If you offer files from your WordPress site, there’s a great way to track the downloads. We’re going to do it using the Download Monitor plugin.
Download Monitor has a few advantages over a generic file download link:
- You can see how many times a file has been downloaded.
- Stats for all downloads, including totals, daily average, and most popular.
- Ability to track downloads of different versions of the same file.
- You can define a download as “members only,” which only allows downloads for users logged into your site.
- Set up paid downloads.
- You can create download categories and tags.
- Style and customize download buttons (available as a paid extension).
If any of those features sound useful to you, follow along as we install the plugin and configure a download.
Installing the Download Monitor Plugin
Log in to your WordPress admin panel.
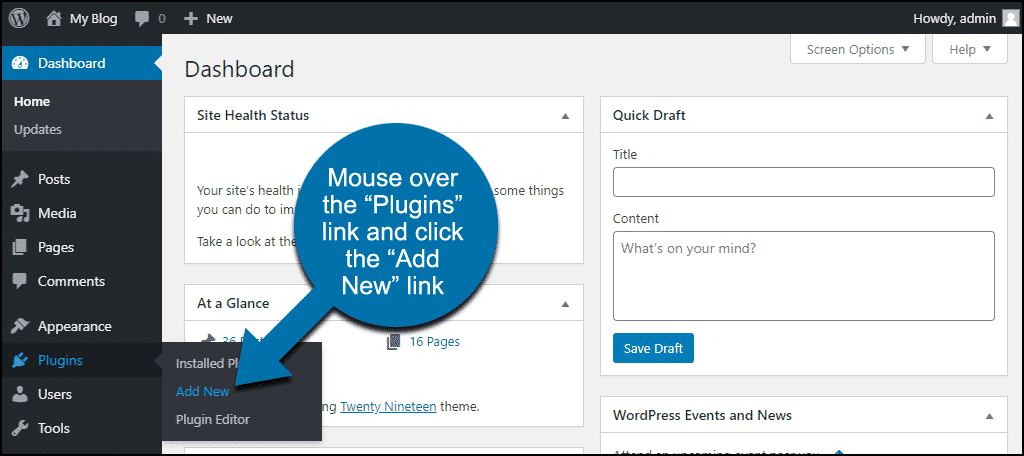
In the left column navigation, mouse over the “Plugins” link and click the “Add New” link.
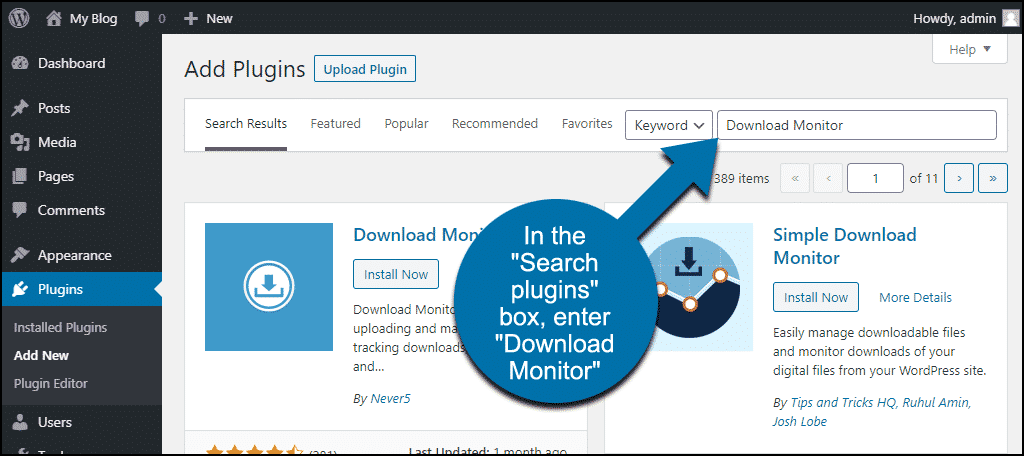
In the “Search plugins…” box, enter, “Download Monitor.”
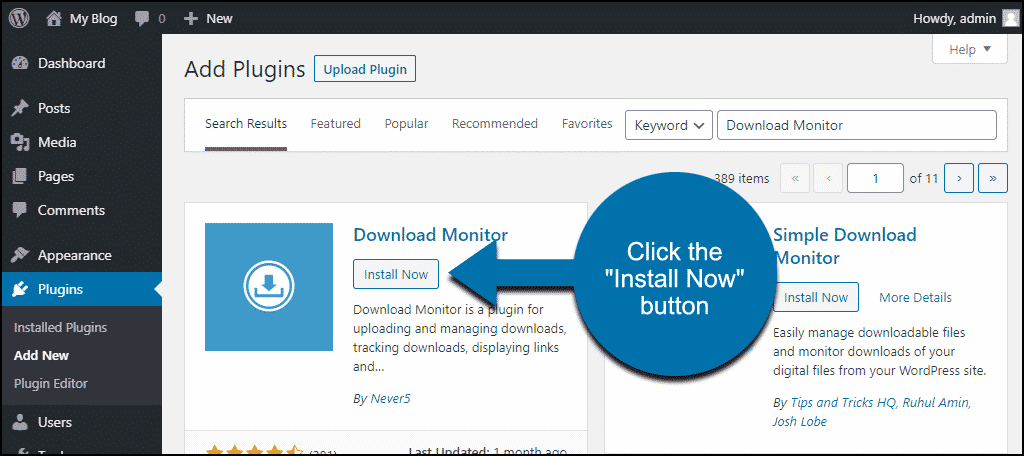
When you find the plugin, click the “Install Now” button.
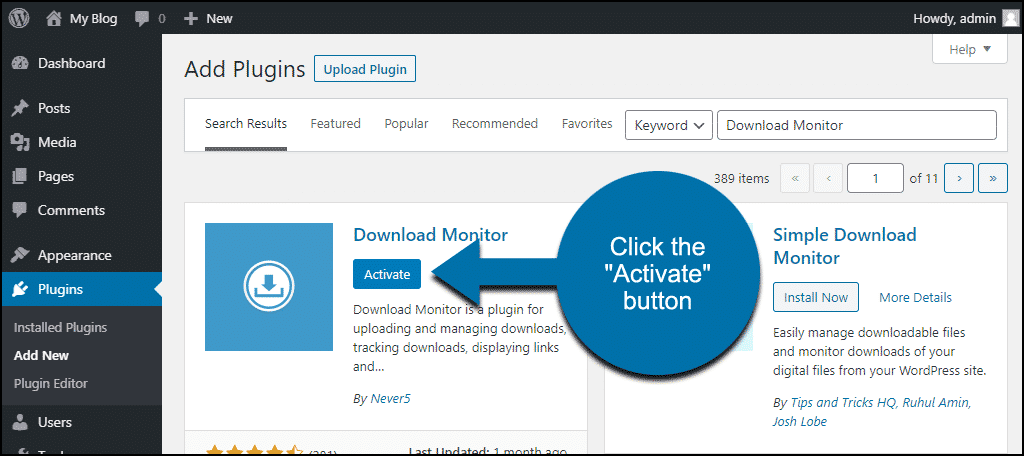
Now the plugin is installed, but it has to be activated before you can use it.
Click the “Activate” button.
The WordPress download monitor is installed; let’s complete the configuration.
Configuring Download Monitor
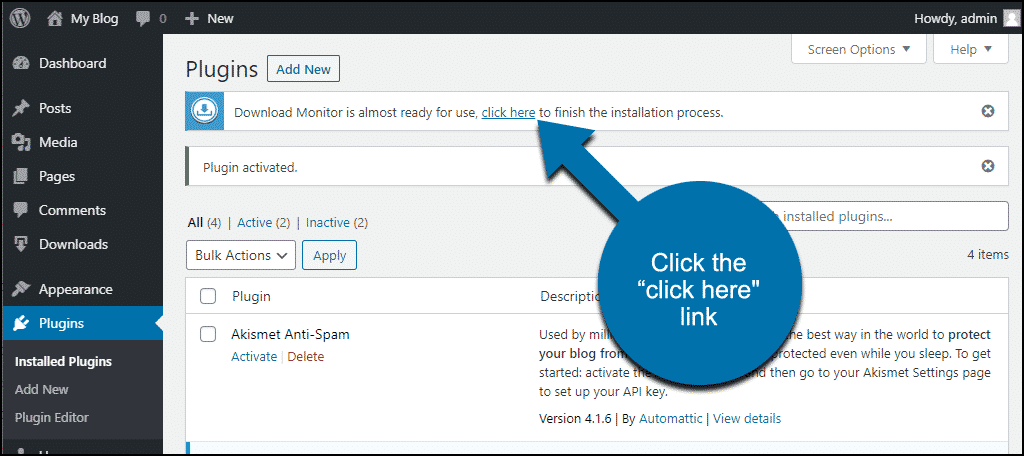
After activating the plugin, you’ll see a “finish the installation” notice at the top of the Plugins page.
Click the “click here” link. And never anchor your own links as “click here,” just a reminder. 😉
The plugin needs certain pages to be created. It will create them for you.
On the “No Access” line, click the “Create Page” button.
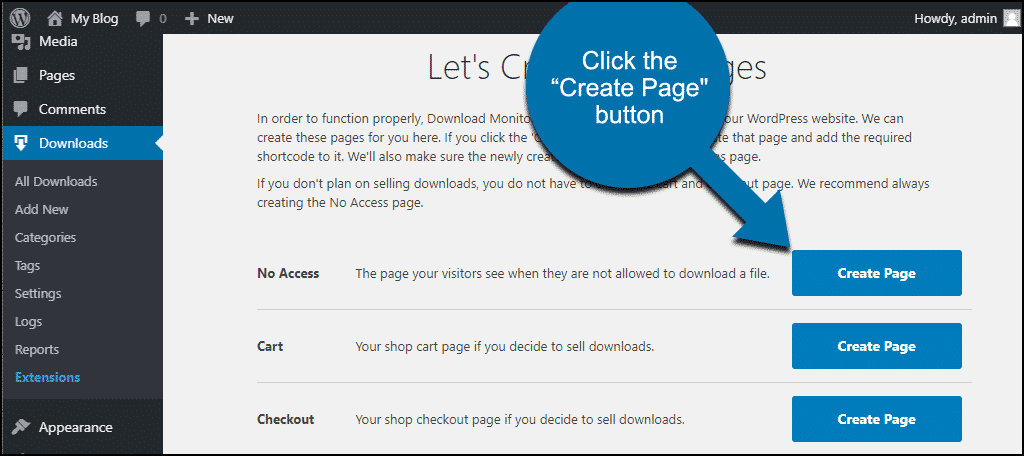
For this tutorial, we’re not going to cover the details of selling downloads. So I’m not going to create the “Cart” or “Checkout” pages. You’ll want to create those pages as well if you intend to sell downloads.
If your WordPress site uses an HTTPS URL (which it should!), the page creation buttons may not work. If that’s the case, you can create a page titled “No Access,” and enter this shortcode in the body: [ht_message mstyle=”info” title=”” show_icon=”” id=”” class=”” style=”” ][dlm_no_access][/ht_message]
Creating a Download
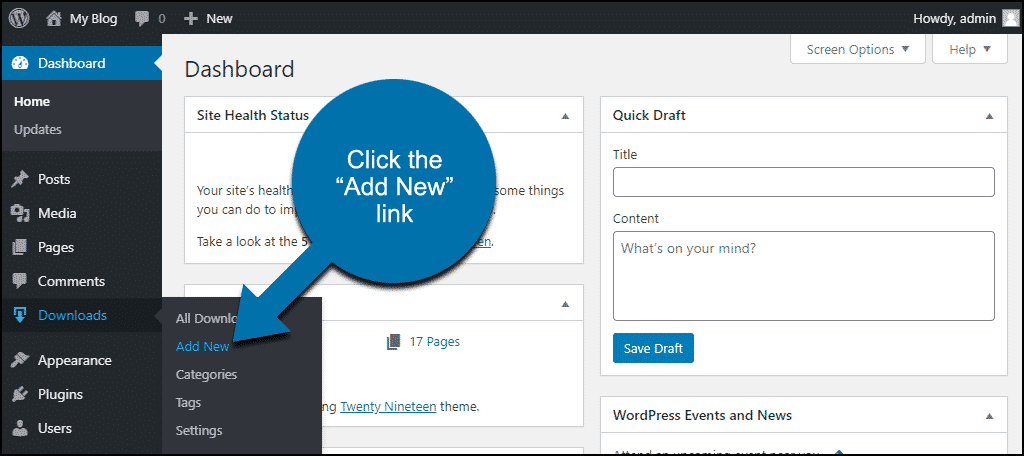
In the left column navigation, mouse over the “Downloads” link and click the “Add New” link.
The plugin will link to downloads in your Media Library or files uploaded via FTP to your site.
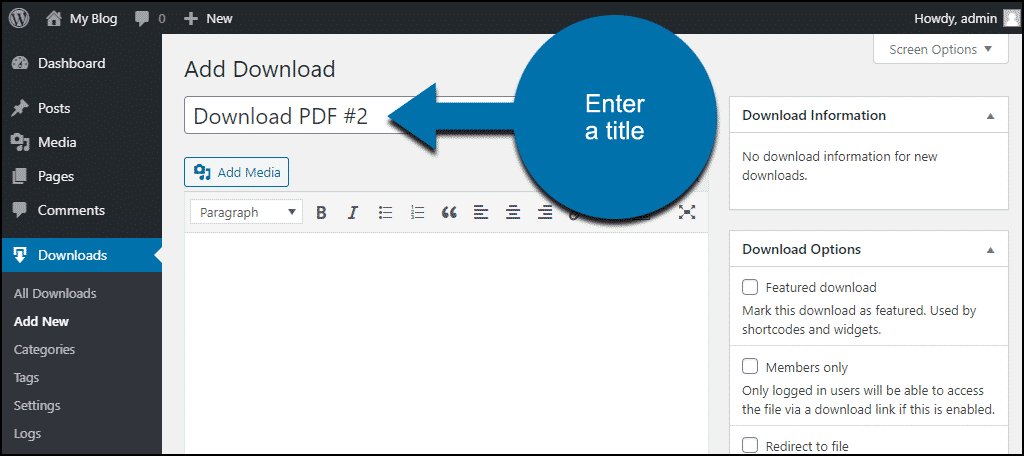
In the Title field, add a download title. This will be the text for the download link, and it’s how you’ll recognize the download in the downloads list.
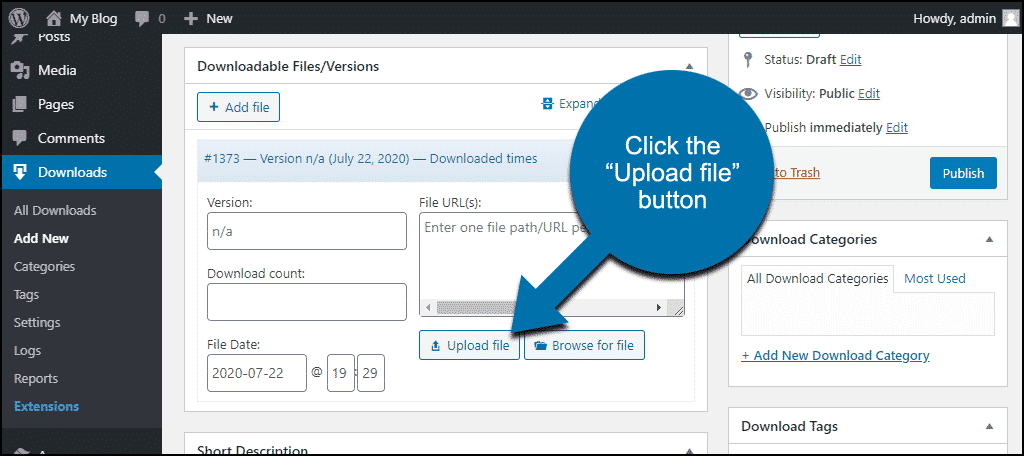
Scroll down to the “Downloadable Files/Versions” section and click the “Add File” button.

You’ll see there are buttons to upload a file or to browse for a file.
- Click the “Upload file” button to upload a file from your computer or WordPress Media Library.
- Click the “Browse for file” button to locate a file you uploaded via FTP to your site.
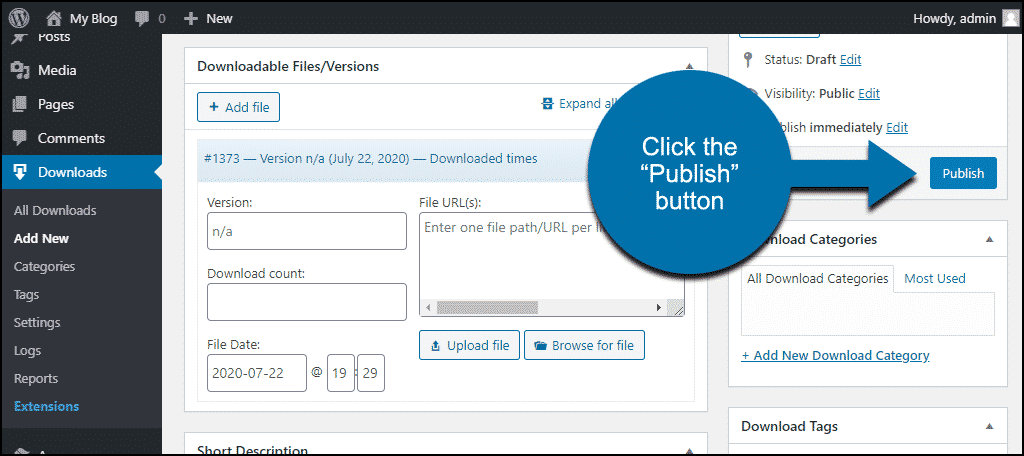
If you’d like, add a description in the “Short Description” section. The description is not displayed with the download link, so adding it isn’t required.
Scroll up and click the “Publish” button.
When the download is published, and the page refreshes, you’ll see a shortcode in the right column. Copy the shortcode.
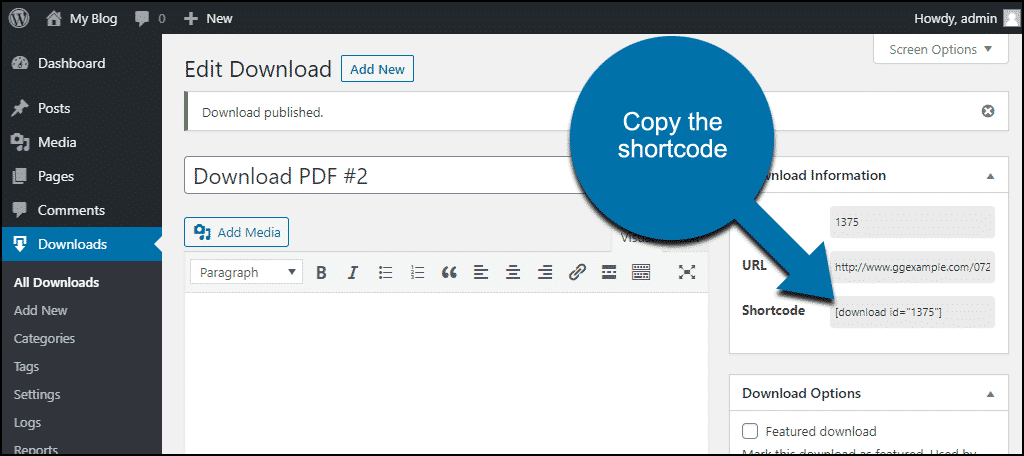
So we’ve successfully added a download, but the link isn’t visible anywhere yet. Let’s take care of that.
How to Show the Download in a Page or Post
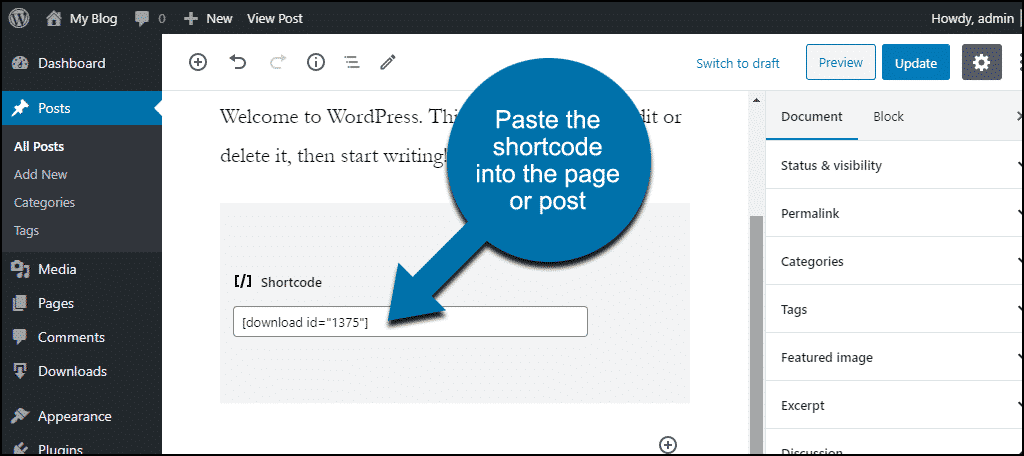
You can paste the shortcode into any page or post.
To do that, we’ll paste the shortcode that we copied into a post.
I’m using the WordPress Gutenberg editor. If you use the “classic” editor, you’ll paste the shortcode into the page or post body the same way.
Now when we update the post, the link appears.
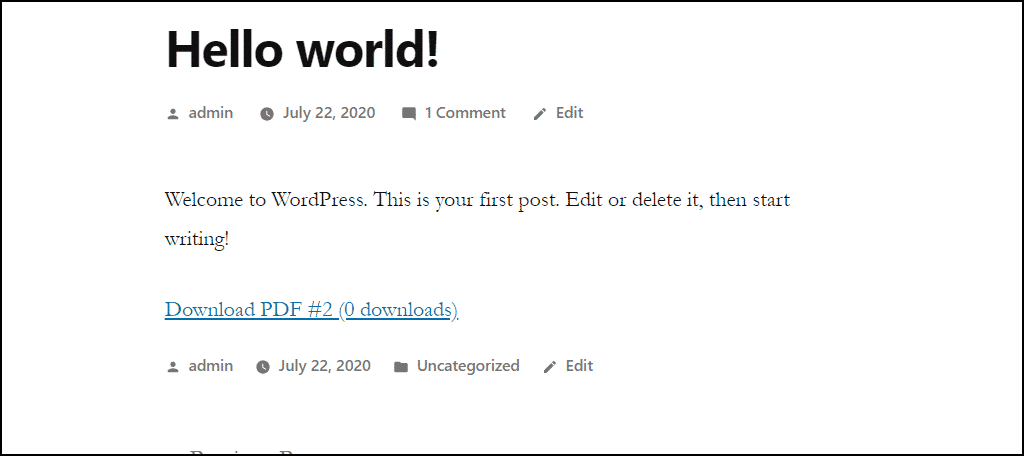
You’ll notice the download count inserted after the download name. If you’d rather not display the count, you can remove it.
In the left column navigation, mouse over the “Downloads” link and click the “Settings” link.
On the “General” tab, find the “Default Template” drop-down.
Select “Title – Shows download title only.”
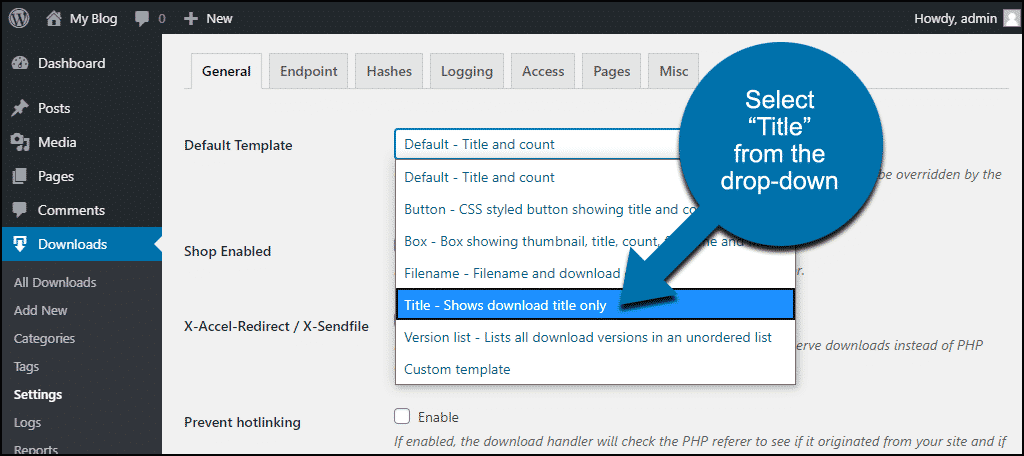
Scroll down and click the “Save Changes” button.
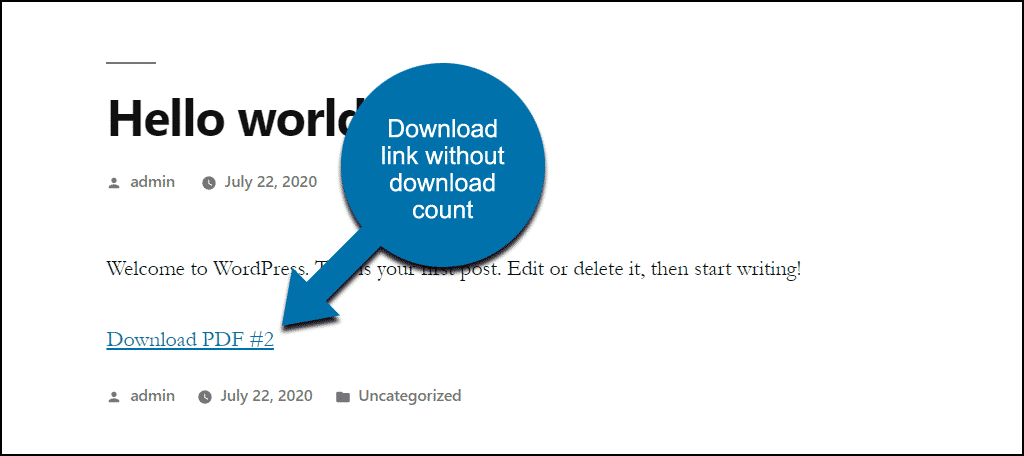
Now the link is displayed without the download count.
The download count is based on the visitor’s IP address. So, as in this example, if I download the file multiple times the count remains “1.”
The plugin logs and reports will reflect multiple downloads from the same IP address.
You can’t exclude an IP address from being counted, but you can blacklist IPs to prevent problem users from accessing your downloads.
How to View Download Statistics
Tracking downloads is what the plugin does best, so let’s take a look at the available stats.
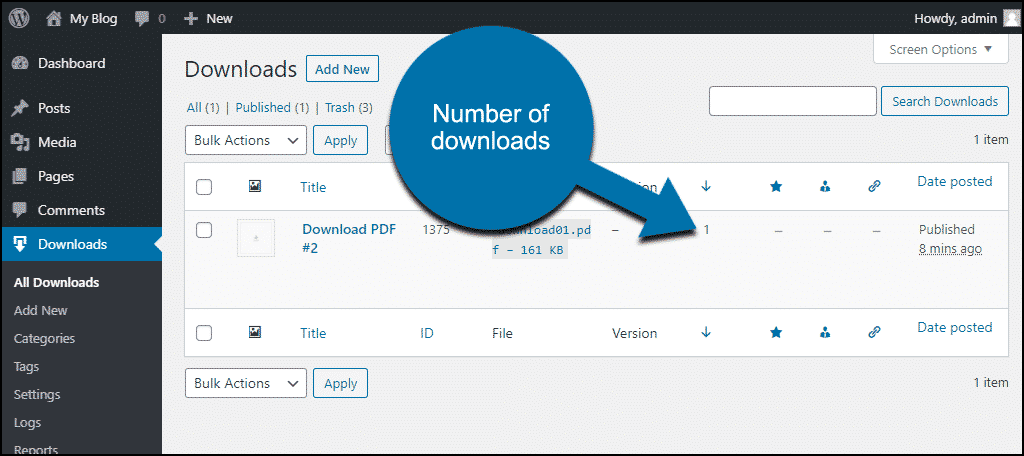
In the left column navigation, mouse over the “Downloads” link and click the “All Downloads” link.
You can see the number of visitor downloads for the file in the downloads list.
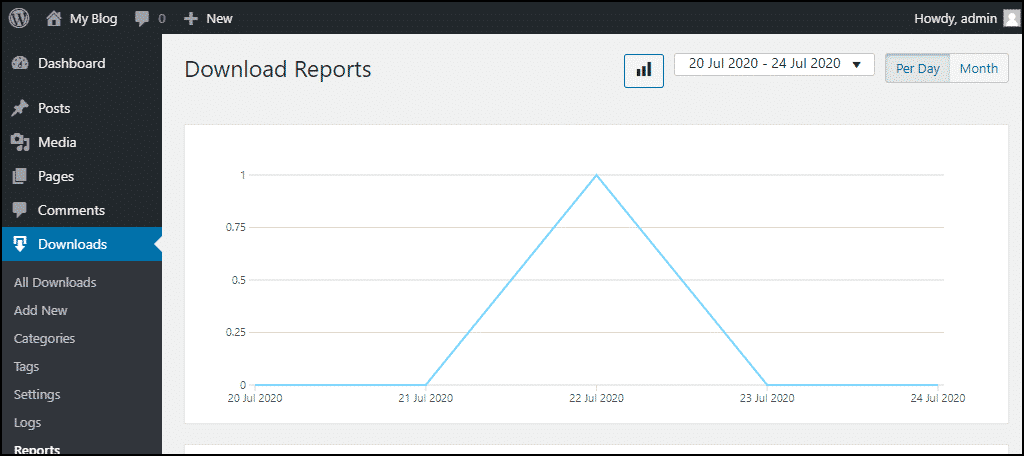
To see the overall download stats, in the left column navigation, mouse over the “Downloads” link and click the “Reports” link.
What Happens if You Uninstall the Download Monitor Plugin
If you uninstall the plugin, pages and posts that used the plugin will be affected.
- Pages created by the plugin will be deleted.
- The plugin shortcodes will stop working, so the shortcodes themselves will be displayed anywhere they were used.
- The plugin creates database tables that are not removed when the plugin is uninstalled. If you want to drop the tables, they have the “dlm_” prefix.
That’s Not All, Folks!
This was a basic tutorial on creating a download and adding it to a post or page. But the plugin has many more features and abilities. If you’d like to investigate further, check out the plugin documentation.
If you sell downloads, whether it’s a web image download, PDF, software, etc., the plugin can manage that. The process is a bit involved to get into here in a basic tutorial. But the framework is in place if you decide to use it.
You can also display a list of all available downloads or lists by category or tag. There are content templates and download boxes – do take a look at everything the plugin offers. When you see what it’s capable of, you’ll understand why this was just a basic tutorial. Covering everything would require a series of articles.
But there’s value in the plugin, even if you only use the basic download tally. Who wants to dig into server logs to see how many times something has been downloaded? I can also imagine situations where the ability to track different versions of a file would come in handy. So, admittedly, we’ve only scratched the surface.
Have you offered downloads on your site before without the ability to track the number of downloads? Can you think of any applications for this plugin that we didn’t cover? Let me know in the comments. I’d love to hear from you.