
Perhaps one of the most popular additions to any news site is a weather widget. This is a tool that displays the weather forecast in a specific area, and there are many ways to add one with the Ventus plugin being one of the best.
Users can easily embed the widget onto their site and configure it to display the weather anywhere in the world. This has several advantages, which is why many kinds of websites display one.
Today, I will demonstrate how to add a weather widget in WordPress using Ventus.
Why Add A Weather Map Widget In WordPress?
Some users may think adding a weather widget is a bit outdated in 2023. Let’s face it, if you want to know the weather, a simple glance at your phone or Google search will pull up the results in seconds.
However, what if you run a business that is weather dependent?
Let’s say you run a jet ski rental service. Well, if it is expected to downpour, displaying that information is pretty important to potential customers, especially if they live in a different town.
Looking up the weather in their own location would be pointless for travelers and vacationers.
This is just one example as sports training, flying lessons, go-karting, and pretty much any other outdoor activity are dependent on the weather. Thus, it is only natural for these businesses to keep track of the weather in their area.
It’s also worth pointing out that many news websites track weather events. Choosing to embed a weather forecast is a nice touch that could add to your site’s credibility. If nothing else, it can help a local news site feel more local.
Luckily, no matter your reason, adding one is easy in WordPress.
Using Ventus to Embed A Weather Widget
Step 1: Install Ventus
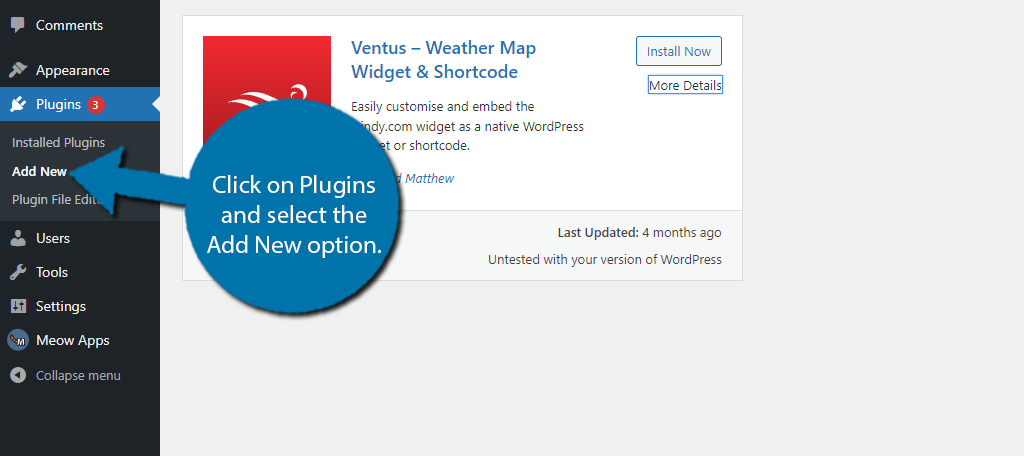
Let’s start by clicking on Plugins and selecting the Add New option on the left-hand admin panel.
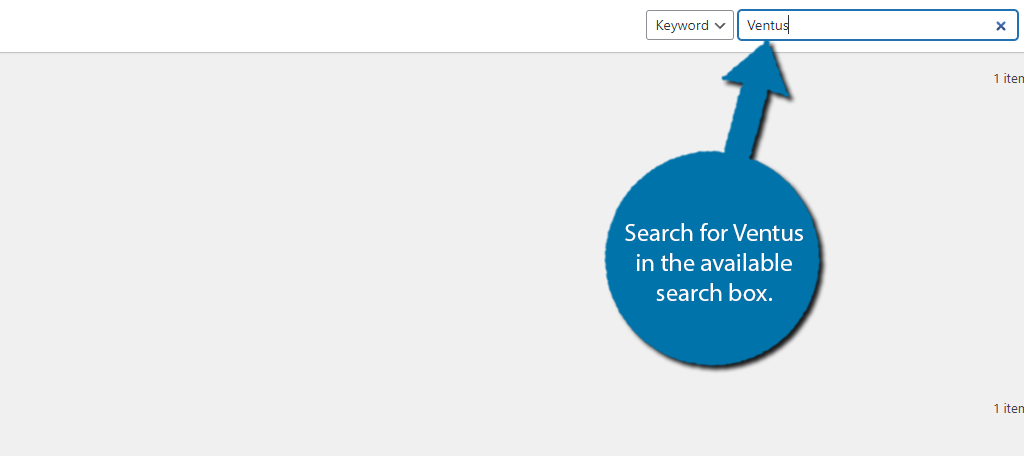
Search for Ventus in the available search box.
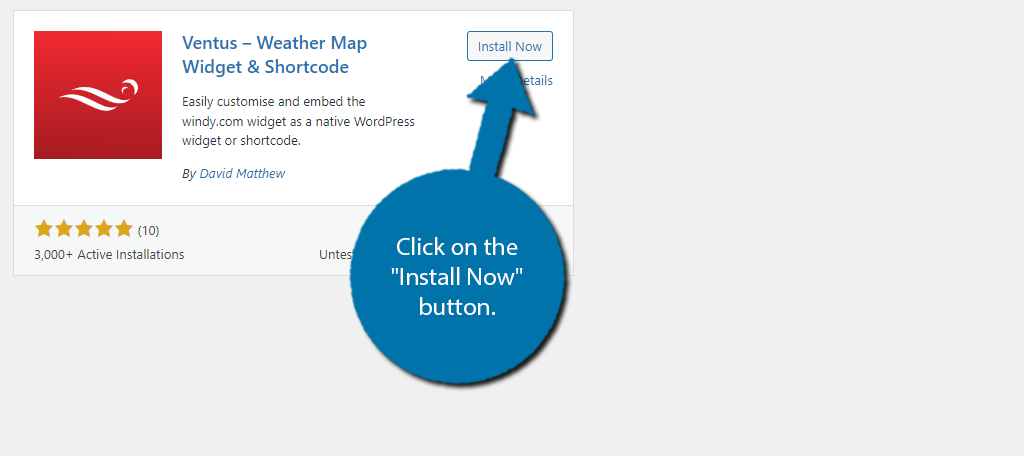
Find the Ventus plugin and click on the “Install Now” button and activate the plugin for use.
Step 2: Add The Ventus Weather Widget
The Ventus plugin is pretty simple to use, and all of the settings are stored within the widget itself. This has the distinct advantage of being able to configure multiple weather widgets for different locations.
For example, let’s say you have two go-karting tracks located in different states. You would want to create a weather widget for each track, which wouldn’t be possible if the settings were stored globally.
In any event, since this is a widget, you’ll have to go to the widget area of WordPress to use it.
Note: It is possible to place this widget in posts and pages if you use the shortcode method, but this tutorial will not be covering that.
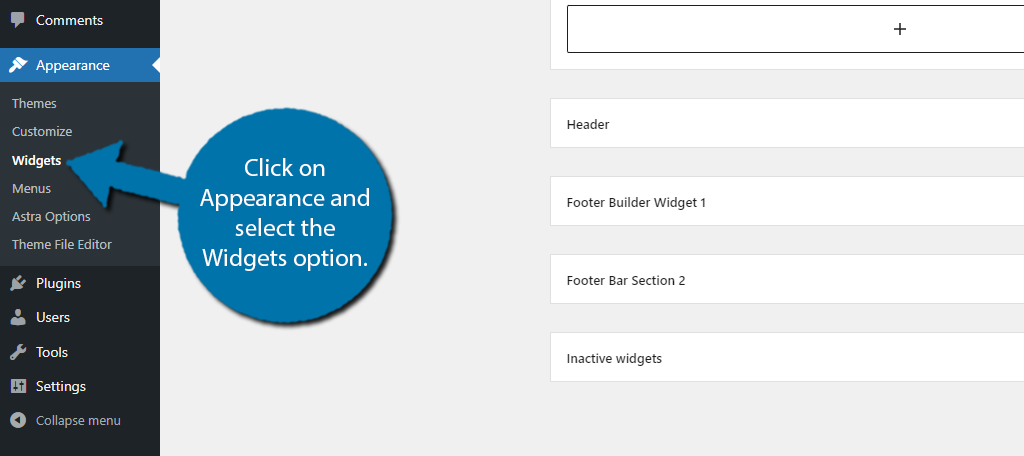
On the left-hand admin panel, click on Appearance and select the Widgets option.
Locate the widget area you would like to add the widget to. Click on the “+” button in that area, and search for the Ventus Weather Map widget.
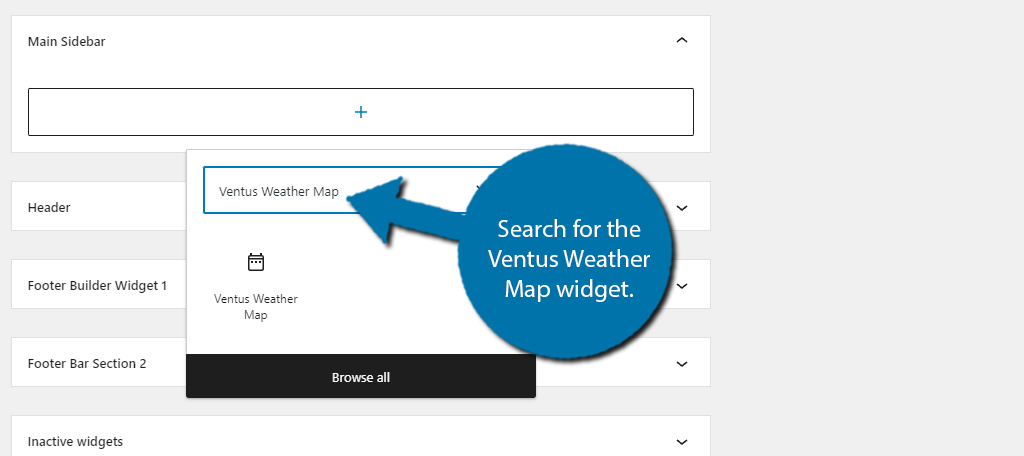
Click on the widget to add it to the widget area. You will see a large list of settings, but don’t be intimidated. It’s actually pretty quick to go through them, so let’s begin.
Step 3: Setting Up Ventus
The first option you will see is a title for the weather widget. You can make it whatever you want, but you probably want to be specific if you are targeting a specific location like a go-kart track.
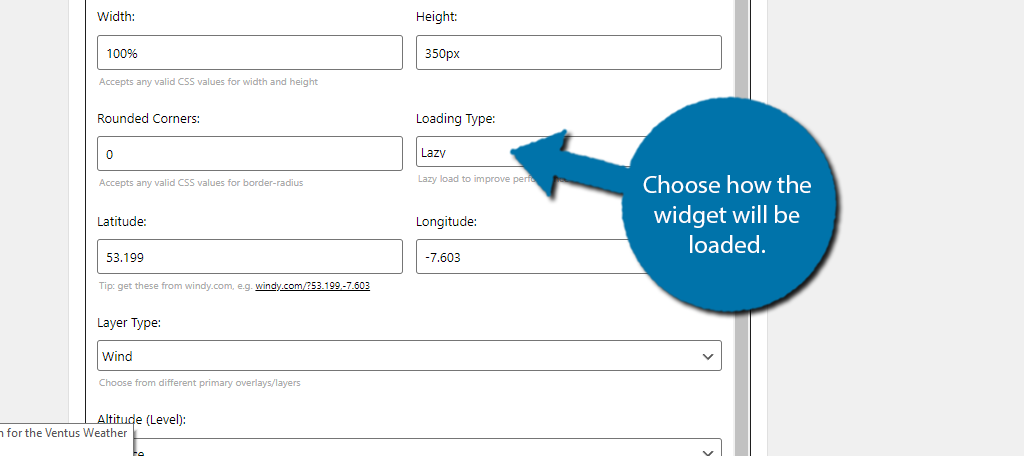
Below this, you can adjust the height and width of the widget, The default values will work for most themes, but you may need to consult your theme’s documentation to find the best dimensions.

Next, you can customize the appearance of the widget by choosing to round the corners. By default, the widget is square, thus it has a value of zero. The higher the value, the more rounded the widget will become.
After this, you can choose how you want the widget to load. By default, it is set to Lazy, which means it will only load once the widget is visible. This is recommended because it will prevent the widget from slowing down your pages.
Step 4: Latitude and Longitude
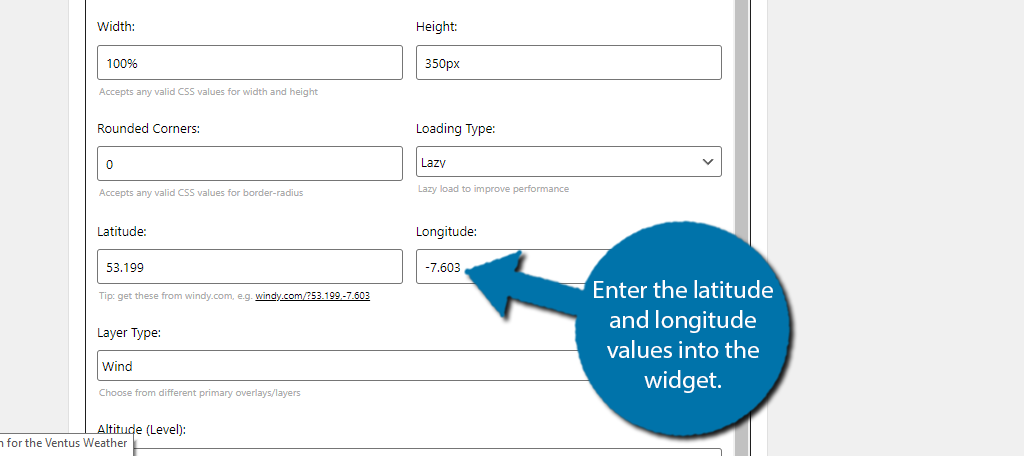
Now, it is time for the most important part of the widget, choosing what weather it should display. This can be a little tricky as you do not choose a city or town like most weather widgets, but instead, need to enter the latitude and longitude.
Odds are you do not know these off the top of your head and that is okay. If you click on the link below these boxes, you can use an interactive map to select the precise location and copy the latitude and longitude coordinates.
From here, you’ll be customizing the way the forecast will be displayed. This starts with choosing the altitude level. By default, it has Surface selected, which will be what most sites are looking for, but feel free to configure it to your liking.
Below this, you can choose things like your zoom level, temperature scale (Fahrenheit or Celsius), pressure isolines, and more. Simply go through each option and configure it as you see fit.
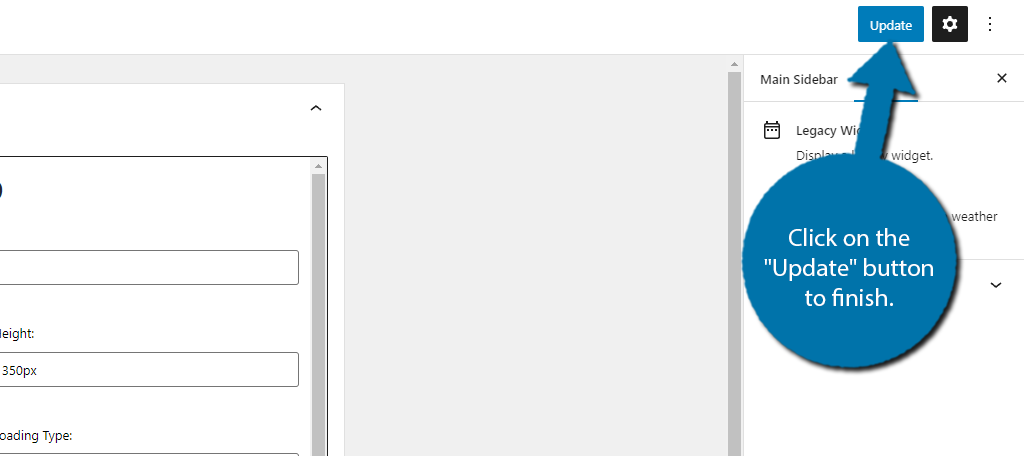
Since you cannot actually see the widget while making these changes, you might want to save the changes and view the results as you go. This will give you a better idea of how the choices you make are impacting the widget’s appearance.
When you are ready, click on the “Update” button to finish.
Congratulations on learning how to add a weather widget in WordPress. Ventus is a quick and easy solution for WordPress. It has a lot of customization options that make it a strong choice.
Note: The focus of this tutorial was on customizing the widget. It is possible to place the weather widget using a shortcode. However, this approach may be more difficult for some users as the shortcode can get quite long.
Does Every Website Need A Weather Widget?
No.
A weather widget is only a good addition if it has a use on the website. For example, if you run an eCommerce site, displaying the weather really serves no purpose. Even worse, it is taking up valuable screen space.
Regardless of if you are adding a weather widget, or a different feature altogether, it is always important to make sure it is necessary. Never add something just because you can. These features can eat up site resources, make the site slow, and negatively impact users.
How to Use the Shortcode
The Ventus plugin comes with an available shortcode that you can use to embed weather radar on your website on any post or page.
The shortcode to use is [ventus]. There is also an old available shortcode that will work called [weather-map], which should continue to work for a while. However, it is recommended you use the updated shortcode.
This shortcode is also customizable, and you can add all of the following to it to create whatever you want.
- Width (any valid CSS property for width)
- Height (any valid CSS property for height)
- Radius (any valid CSS property for radius)
- Latitude and Longitude Attributes
- Zoom Attribute
- Layer Attribute
- Scale Attribute
- Units Attribute
- Pressure, Marker, Forecast Attributes
- Time Attribute
Using this information, you should be able to create a custom shortcode that fits with what you are trying to do.
You can get an example of what the fully-customized shortcode looks like on the plugin’s page on WordPress.org.
Give Ventus a Try for Weather Widgets
As you can see, Ventus is a simple way of adding a weather embed in WordPress. All it takes is a few minutes to set up and you can display detailed forecasting information for any location.
The plugin also offers a good selection of customization options that you can use to better match your website’s design. Overall, it is a great solution for adding a weather forecast in WordPress, and since it is free, you lose nothing by giving it a try.
Why did you add a weather widget in WordPress? Do you think a weather widget is redundant in 2023?