
Any SEO expert will tell you that internal linking is crucial to getting your website to rank highly on Google, but it can be hard to do. However, like most things in WordPress, there is a plugin that can help. In this case, it’s Link Whisper.
This plugin uses an AI to scan the content on your website and then recommend internal links to the writer. Now, as you might expect from an AI, it’s not perfect. But sometimes even a bad recommendation can be helpful during the writing process as you may be able to fit it in later.
Today, I will demonstrate how to improve internal linking with the Link Whisper plugin.
The Importance of Internal Linking
An internal link is a link that leads visitors to another URL on the same site. This can help visitors find other relevant information that can be supporting evidence to the facts you are claiming, or it can be content that deals with a similar topic.
Think of it as an expansion of the article to further engage the reader.
Of course, internal links are not just for the visitor’s benefit, they are proven to boost SEO.
This is because when a search bot crawls through your pages, they explore every link, internal and external. The internal links help the search bots identify which pages are important on your website, thus linked pages are more likely to be indexed.
Of course, this might make you think that you should be linking as many pages as possible. Yet, this isn’t the case. While there is no set number of links you should aim for, keep in mind that too many links can harm the reader experience.
And don’t forget that you need a healthy combination of both internal and external links.
How to Create Internal Links with Link Whisper
Step 1: Install Link Whisper
Link Whisper is a free plugin that uses AI to recommend internal links as you write. The plugin helps identify pages or posts that do not have any internal linking, also known as Orphan content, to help you evenly distribute them.
You can even have it track specific keywords and recommend specific articles every time that keyword is used. For instance, you can have the plugin recommend an article about Yoast SEO every time you use the phrase Yoast SEO.
Note: This tutorial will cover the free version of the plugin. Many features are locked behind the premium version.
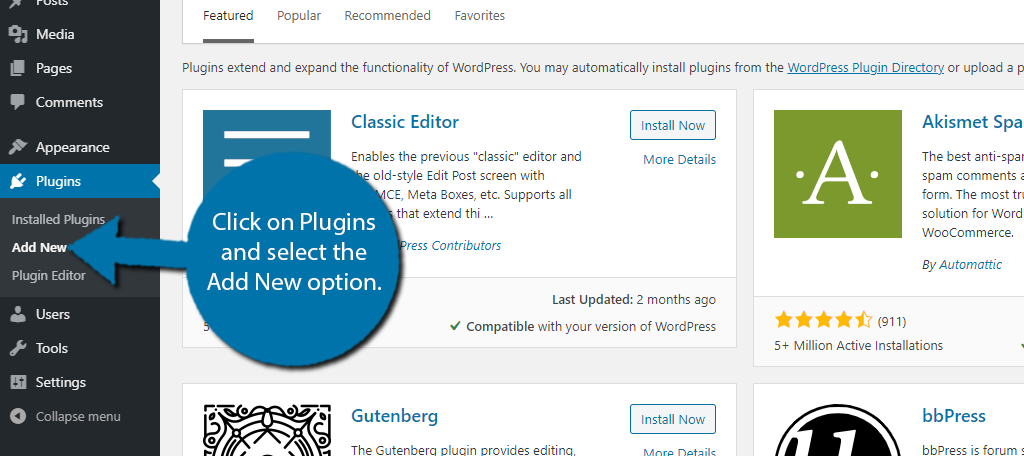
Begin by clicking on Plugins and selecting the Add New option on the left-hand admin panel.
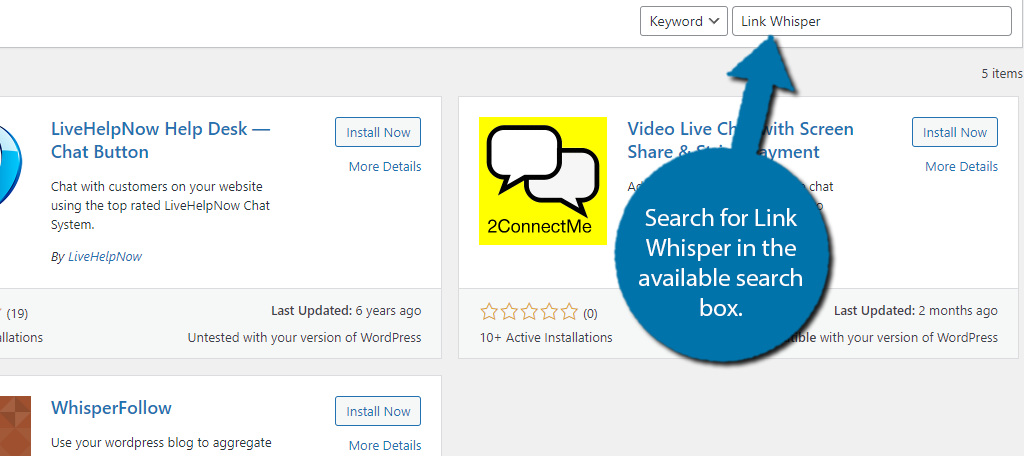
Search for Link Whisper in the available search box. This will pull up additional plugins that you may find helpful.
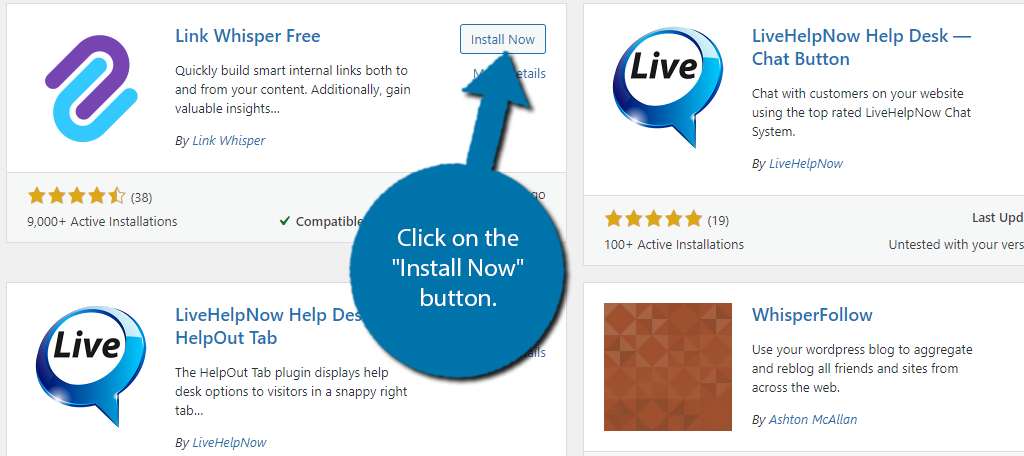
Scroll down until you find the Link Whisper plugin and click on the “Install Now” button and activate the plugin for use.
Step 2: View the Internal Links Report
The first thing the plugin does upon activation is scan your website’s content. It then produces a report that will show the current number of internal (inbound and outbound) and external links on your website.
The first thing you should do is view this report. It’s a great way to see how well or how badly you are doing in regards to internal linking.
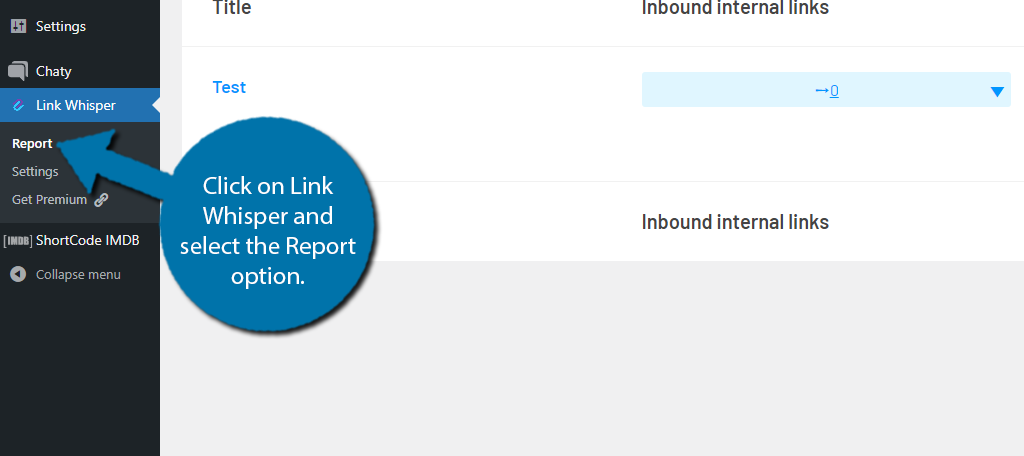
On the left-hand admin panel, click on Link Whisper and select the Report option.
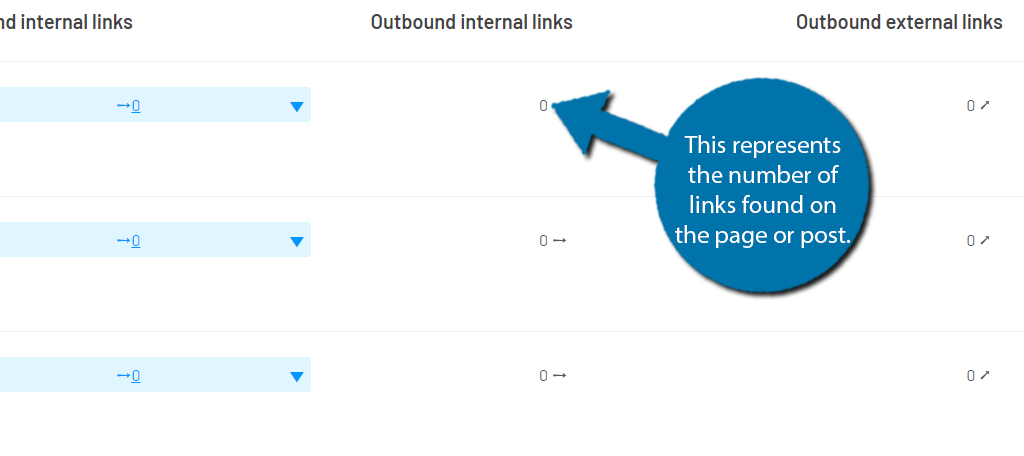
You should see a full list of every post and page on your website. Each of these has three columns: Inbound Internal Links, Outbound Internal Links, and Outbound External links. Each column will have a number that represents the number of those links on that post or page.
Note: In case you were wondering what the difference between inbound and outbound internal links are, an inbound internal link refers to links on other posts or pages that lead to that articles. While outbound refers to the internal links present in the article going to other posts or pages.
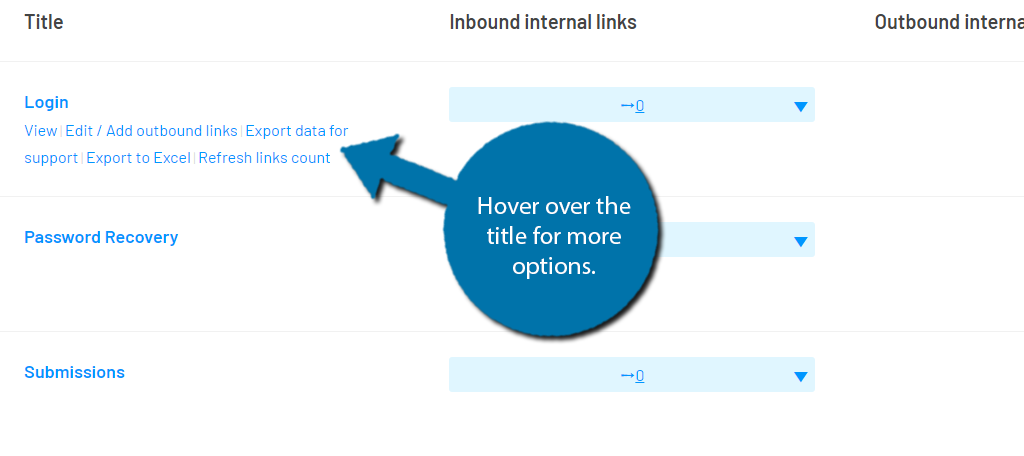
If you hover over the title, you will see a selection of options. This Includes an option to export all of this data to an Excel sheet.
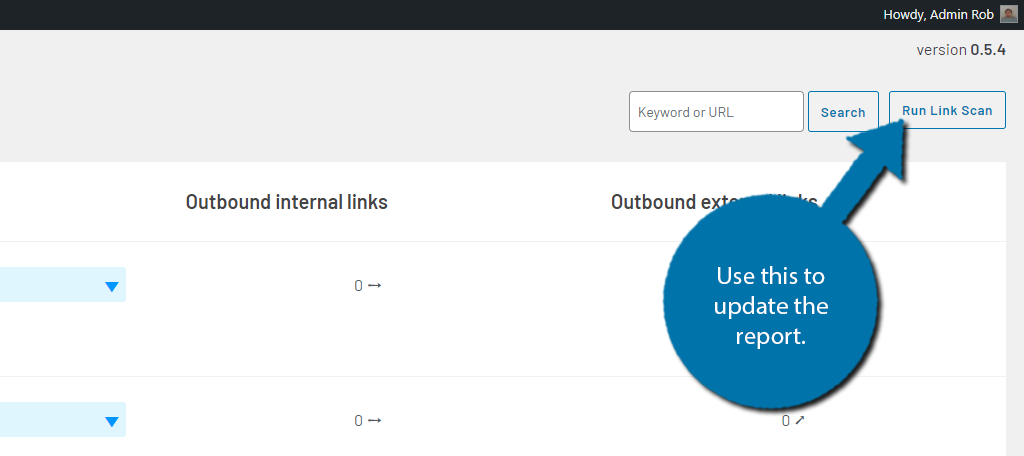
At the top, there is a search option if you are looking for a particular page or post. This is very useful once your website grows as the number of posts and pages will become too long to casually scroll through. Next to it, you will find the “Run Link Scan” button.
This button will scan your entire website and update the report page. Be sure to press this anytime you view the report because you should only view the most accurate information.
Note: The plugin also adds a Link Stats column to your posts and pages sections. This contains the number of links found within each article.
Step 3: Configure Settings
Before you start using the plugin to help create links, you need to configure the settings. These are pretty straightforward but are very important since it dictates the recommendations you will receive.
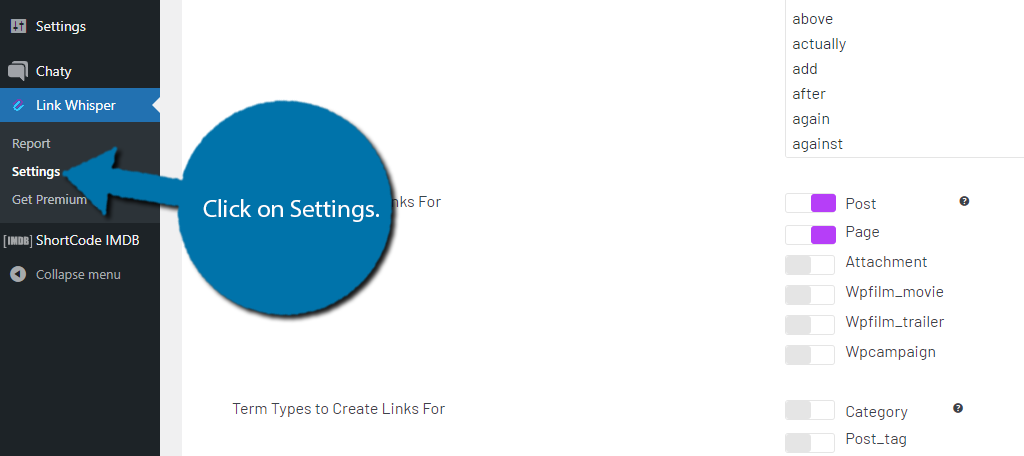
Click on Settings.
These settings are all about tweaking the recommendations that the plugin provides. You can have it exclude numbers or certain common words to enhance the options.
By default, the list of common words is pretty extensive, but feel free to expand it.
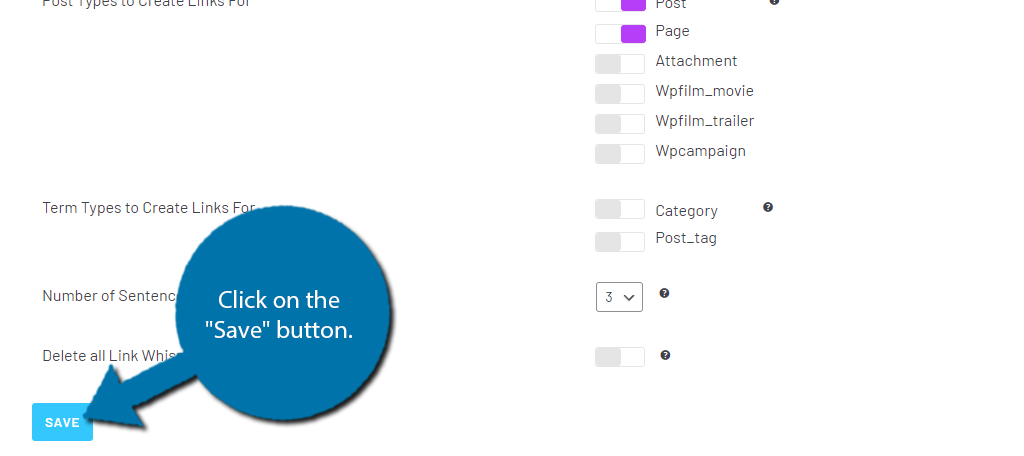
There are other options like what types of content the plugin should recommend. By default, this is posts and pages, but can be expanded as well. You can also set the number of sentences before the plugin starts recommending links.
This is good for writers that don’t want any links in the intro paragraph.
Once you are happy with the settings, click on the “Save” button.
Step 4: Creating Internal Links
With the settings configured, it’s time to actually start creating internal links. But before we get into that, I do need to emphasize a certain point.
If this is a new website without a lot of content (posts or pages), you won’t get many recommendations simply because there are not a lot of available options.
Thus, this plugin works best when you have a lot of content for the plugin to pull from.
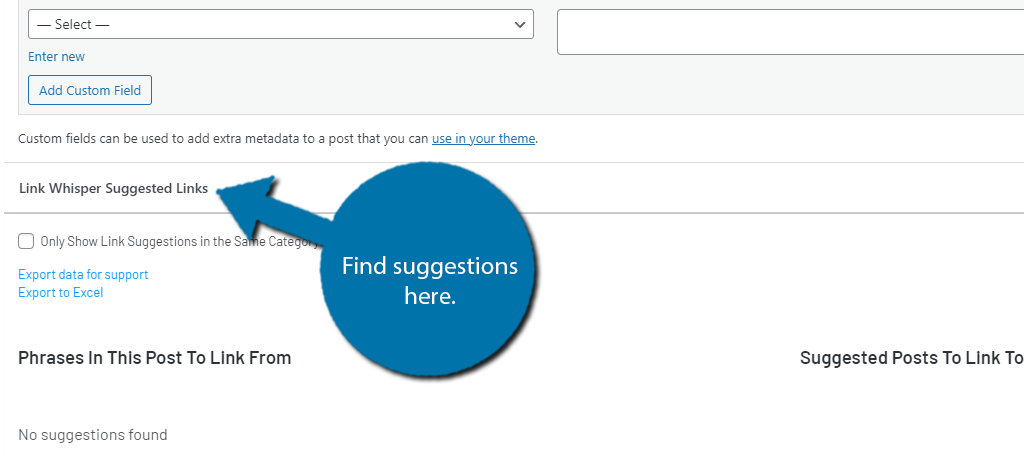
To see the recommendations, go to any existing page or post. Starting a new one will work, but you actually have to create content to see the recommendations. Scroll down below the post to find the Link whisper Suggested Links section.
Here, you will find the suggestions for your content. There are also a few other options.
Congratulations on learning how to use Link Whisper. The plugin is far more useful on larger websites with a lot of content to form internal links. Remember that the Pro version offers a lot more features to take advantage of.
Add Internal Links to WordPress Today
Every successful website utilizes internal links, and yours will not be the exception. It’s an important part of the SEO process, yet it’s not just for search engines. Internal links also help visitors navigate your website and find relevant content to enjoy.
And while this article has focused on internal links, don’t forget to add external ones. This helps show visitors that you are getting information from other sources, which adds credibility to your own content.
It can also open the door to future collaborations in some cases.
How many internal links do you aim for in each post or page? Do you add internal links as you write or add them after you finish writing?
Thank you for the in-depth article, i have just started using the tool and it is pretty good, I have a question?
is it possible to integrate the tool with other platforms ??
I’m not sure. You might have to contact the developers of Link Whisper or check their website.