This article will show you how to set the nameservers for your domain purchased from (or transferred to) GreenGeeks.
Start by logging into your GreenGeeks account.
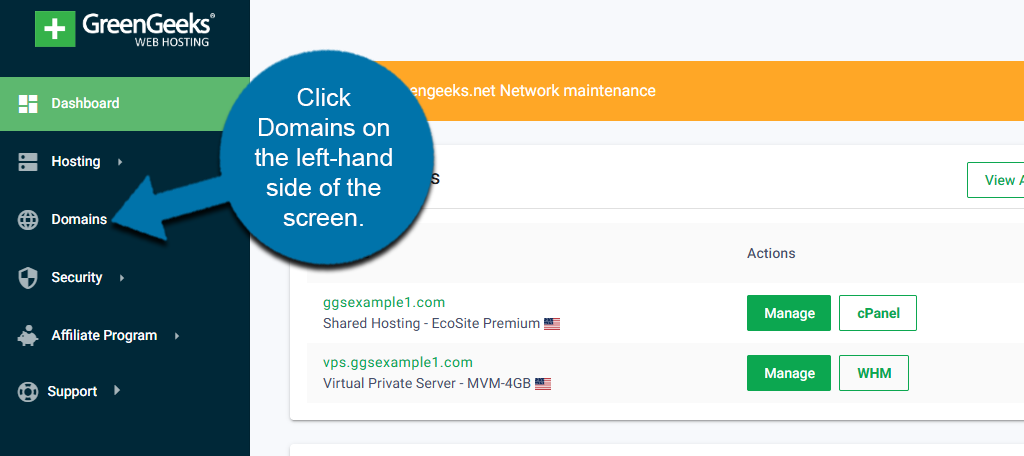
Click Domains on the left-hand side of the screen.
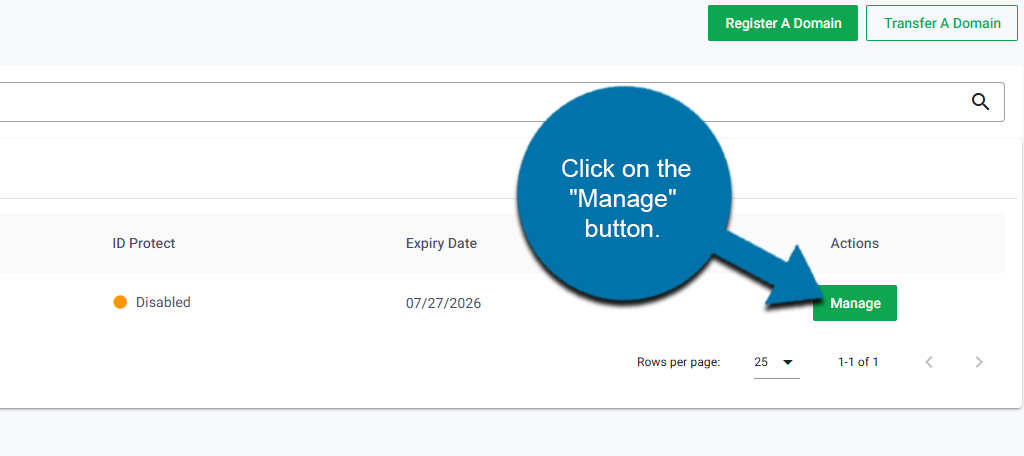
Doing so will pull up a list of every domain you own in GreenGeeks. Click the “Manage” button for the domain you want to make changes to.
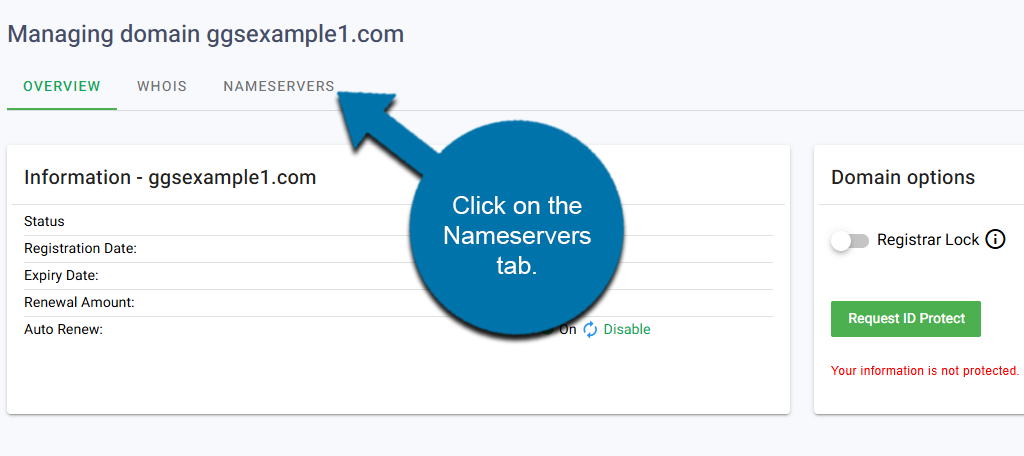
Click on the Nameservers tab.
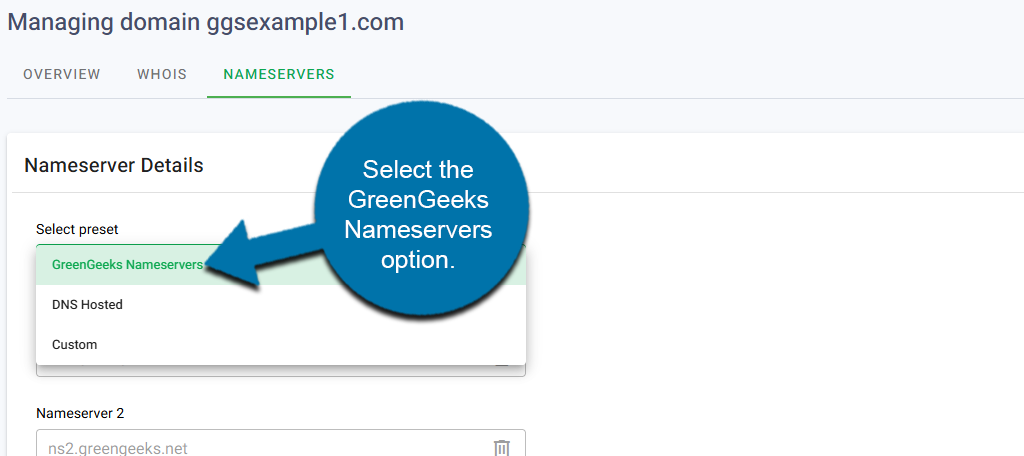
Here you can customize the nameservers that your domain will use. The creation of a nameserver depends on the plan you have, so let’s cover each one.
Ecosite & Reseller Accounts
If you have an Ecosite or Reseller account, you will use these name servers:
- NS1.GREENGEEKS.NET
- NS2.GREENGEEKS.NET
In this case, you can select the GreenGeeks Nameservers option from the drop-down. This will automatically enter the correct information for you.
Click the “Save Changes” button to save the name server settings.

VPS Account
For VPS accounts, first, register your DNS with your VPS IP addresses, then go back to the Nameservers tab in GreenGeeks to set the name servers for your domain.
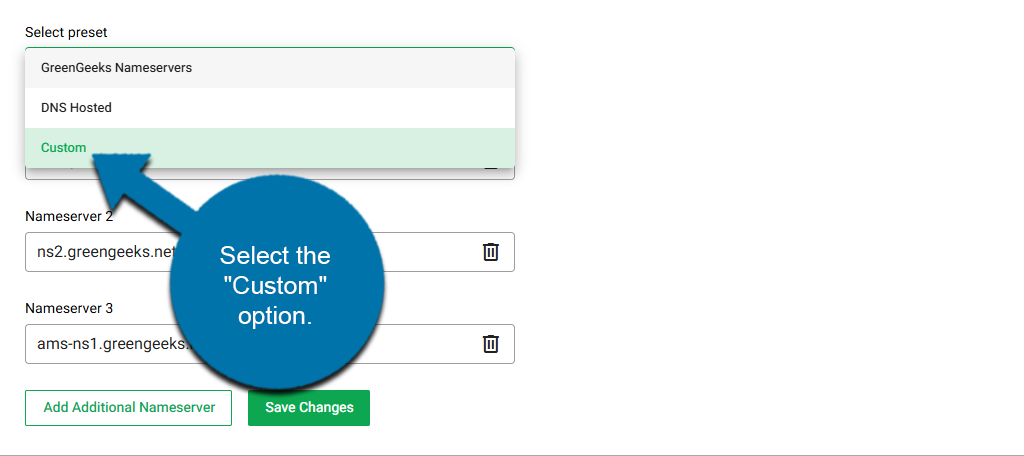
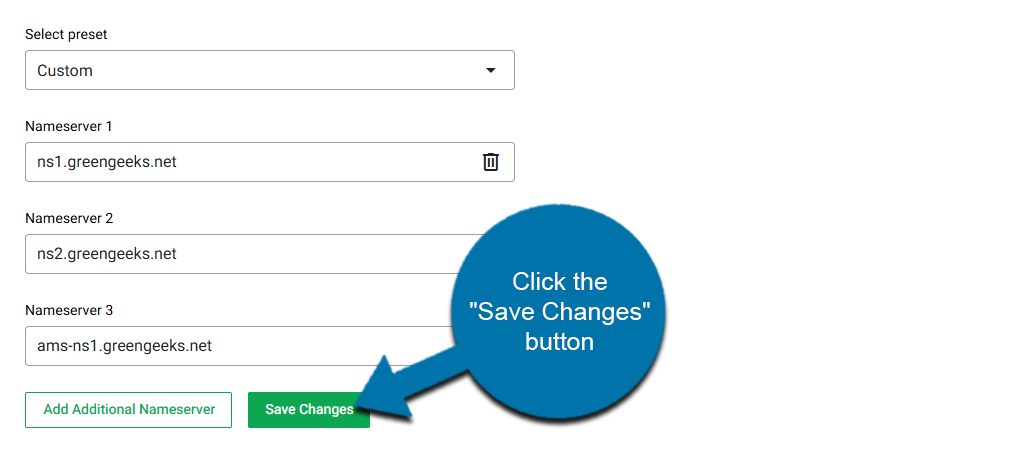
This time, select the “Custom” option from the drop-down and enter the name server information manually. You can use the “Add Additional Nameserver” button to add more as needed.
Click the “Save Changes” button to save the name server settings.
DNS changes take a bit of time to propagate throughout the internet, and that period varies depending on a number of factors. Typically, though, DNS changes shouldn’t take more than a few hours to propagate.