This guide provides a step-by-step overview of the IP Migration process and outlines the actions needed to maintain service continuity for all domains running on your VPS.
Before proceeding, ensure you have administrative access to WHM and your GreenGeeks Dashboard.
[Important] DNS Adjustments
When prompted, you’ll need to update the IP addresses for all domains hosted on your VPS. The steps you need to take will vary depending on your nameserver configuration.
VPS Nameservers
If your domains use the VPS-based nameservers, these changes will propagate automatically when the nameserver IPs are adjusted, and no per-domain DNS updates are required.
To adjust the nameserver registered IPs, you’ll need to login to the Domain Registrar for the nameserver domain, and change the IP for each nameserver to match the newly assigned address.
For domains registered with GreenGeeks, the nameserver IPs will not be automatically updated.
You can update the nameserver IPs from within your GreenGeeks Dashboard; contact GreenGeeks Support if you need assistance with these updates.
3rd Party Nameservers
For any domains using third-party nameservers—such as Cloudflare—you’ll need to manually update their A and TXT records to reflect the new IP.
IP Migration Process
!! WARNING !! If you’re unsure about any part of the process, please contact the GreenGeeks VPS Support Team before proceeding.
To begin the IP Migration process, login to WHM on your VPS as root.
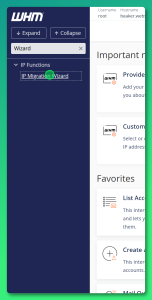
Step 1: Using the Menu or Search, access the “IP Migration Wizard”
Step 2: Enter the new IP Address(es) in the box provided.
If you have multiple IPs, list them in order, smallest to largest.
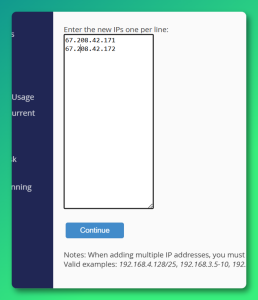
Step 3: Verify all new IP address(es) have been entered correctly, and click “Continue” to proceed to the IP Matrix.
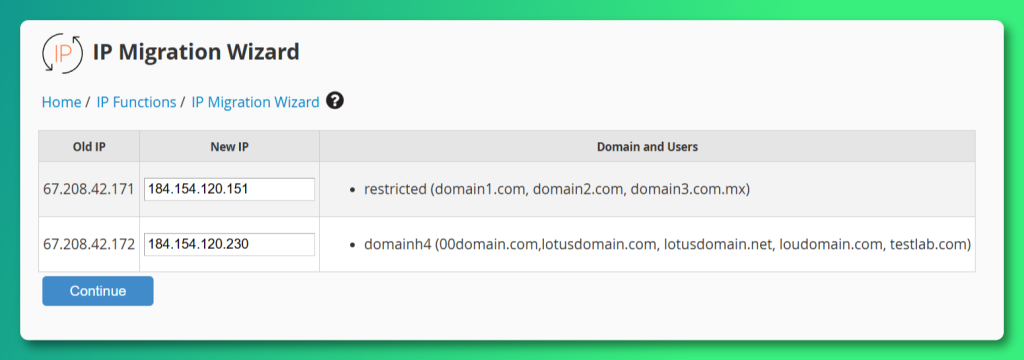
Step 4: Review the new IP Matrix; make a note of any domains that need manual A record updates via 3rd party NS.
Click “Continue“.
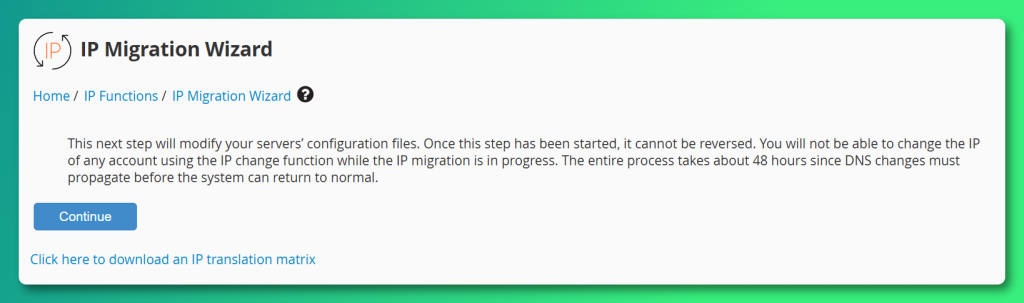
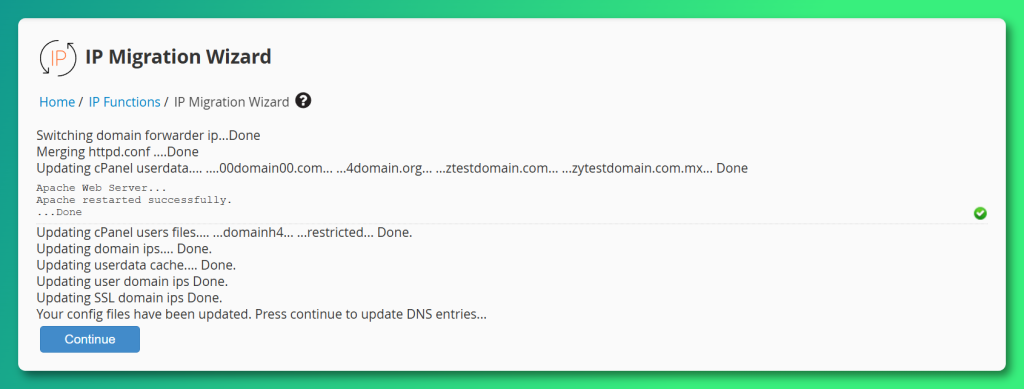
Step 5: Click “Continue” to begin the Config updates.
Step 6: Once the Config updates are complete, click “Continue” to begin the DNS Zone updates.
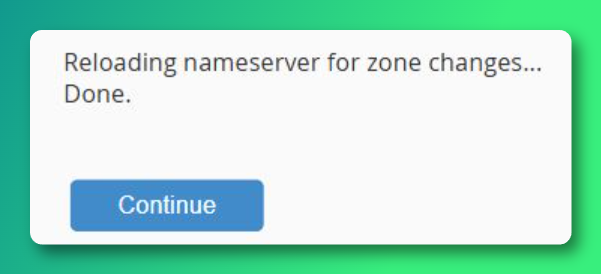
Step 7: Wait for the DNS Zones to be updated; this may take a moment if there a large number of Domains.
Click “Continue”.
Step 8: Update the DNS records with your domain registrar at this time.
Once the DNS records have been updated, including the registered nameserver IPs, and any A records, click the “Clicking Here” button.
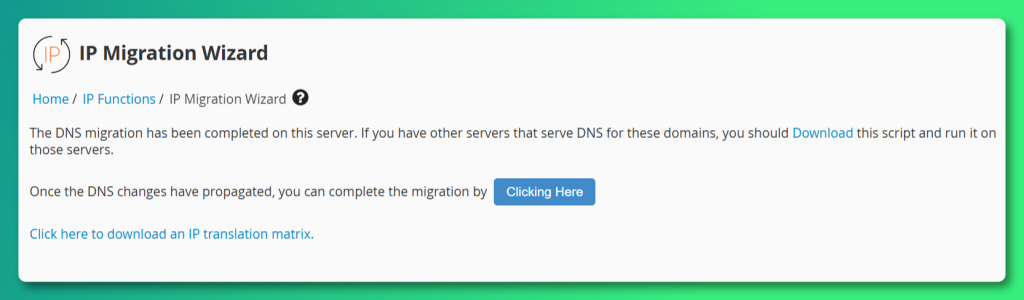
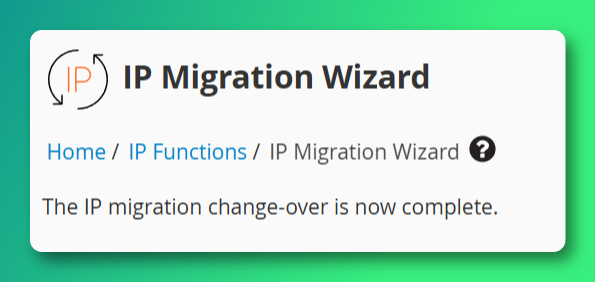
Step 9: Use the “click here” link to finalize the IP Migration Wizard.
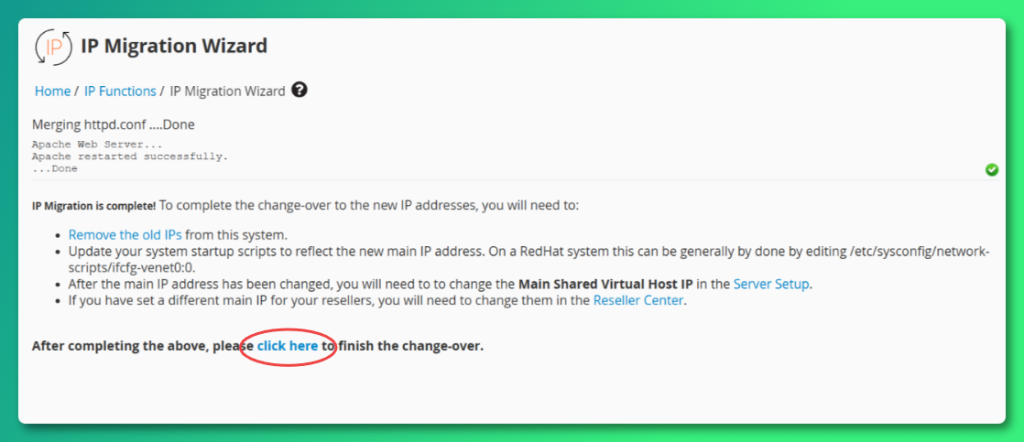
Step 10: The IP Migration Wizard is complete, and only one last change is needed to finalize the process.
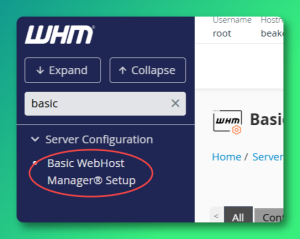
Step 11: In the WHM Menu, select Basic WebHost Manager® Setup
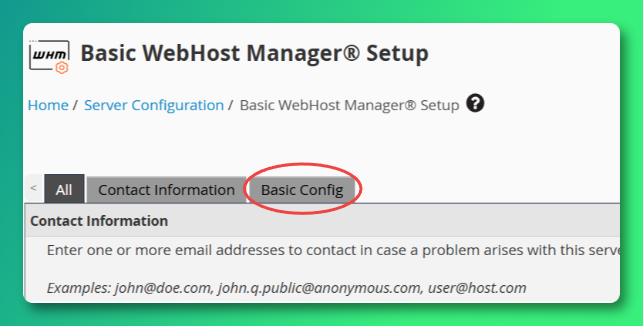
Step 12: Select the “Basic Config” tab.
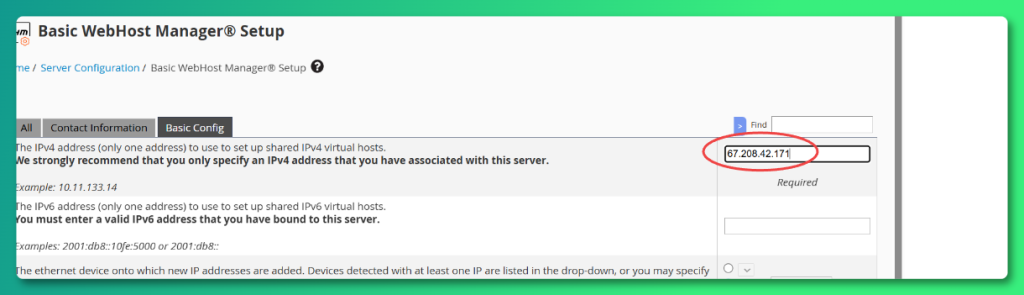
Step 13: Locate the IPv4 address in the Basic Config, and update it to the new Primary IP address.
If you have multiple IPs, the lowest number is the Primary IP.
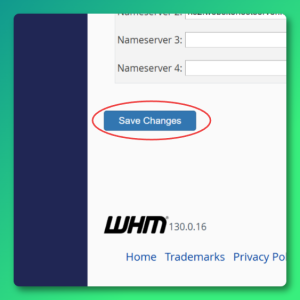
Step 14: Click “Save Changes” at the bottom of the page.
The IP Migration process is now complete!
Once the above process is complete, please Contact the GreenGeeks VPS Support Team to assist you with finalizing the process by adjusting your cPanel licensed IP and removing the old addresses from your VPS.
Troubleshooting
If you run into any issues, have any questions about the IP Migration Process, please contact the VPS Support Team and they’ll be glad to assist you.