
This article covers everything you need to know to manage your Reseller account effectively.
Creating a New cPanel Account
When you first start, you will need to create accounts so customers can access their website. This process is very easy to do through the GreenGeeks Dashboard. Alternatively, you can achieve the same result by using WHM.
Creating An Account On the GreenGeeks Dashboard
Start by logging into your GreenGeeks account. Once there, you will see all of the domains associated with your account. Locate your Reseller account and click on the Manage button next to it.
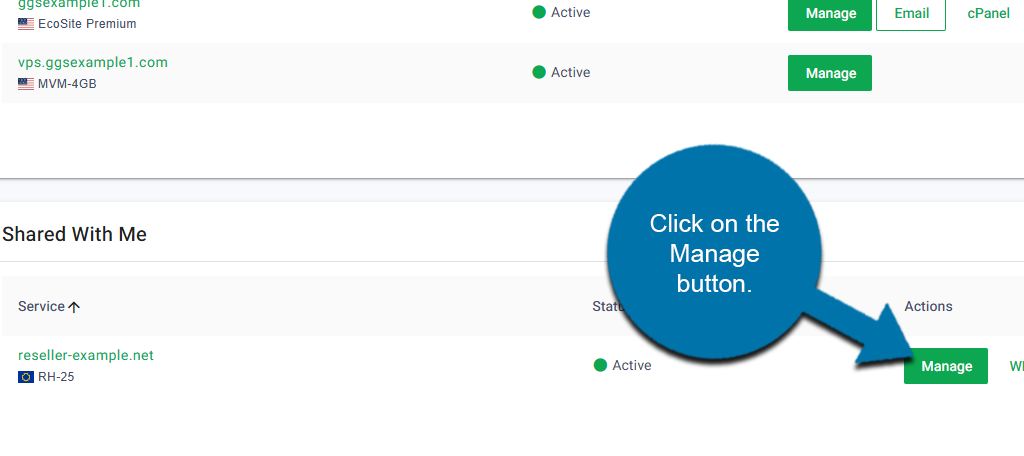
This will bring you to the Reseller dashboard. In the Accounts List section, click on the Add Account button.
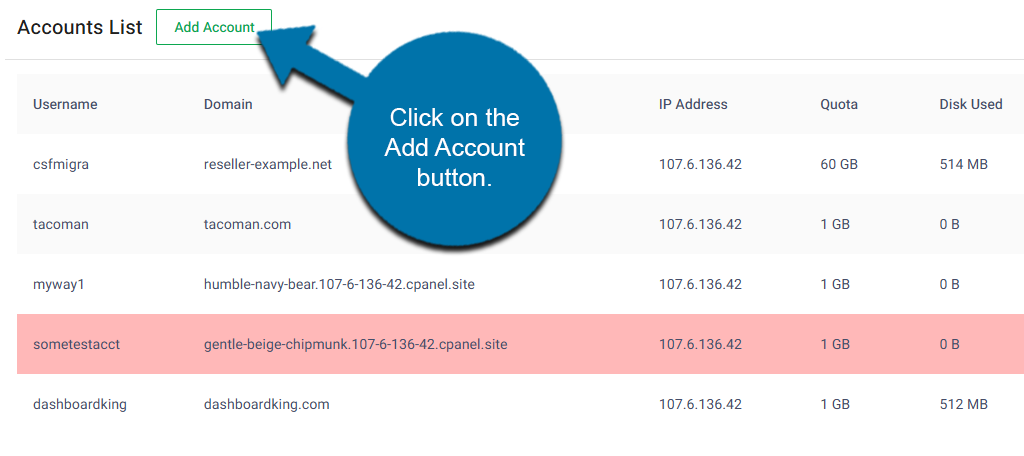
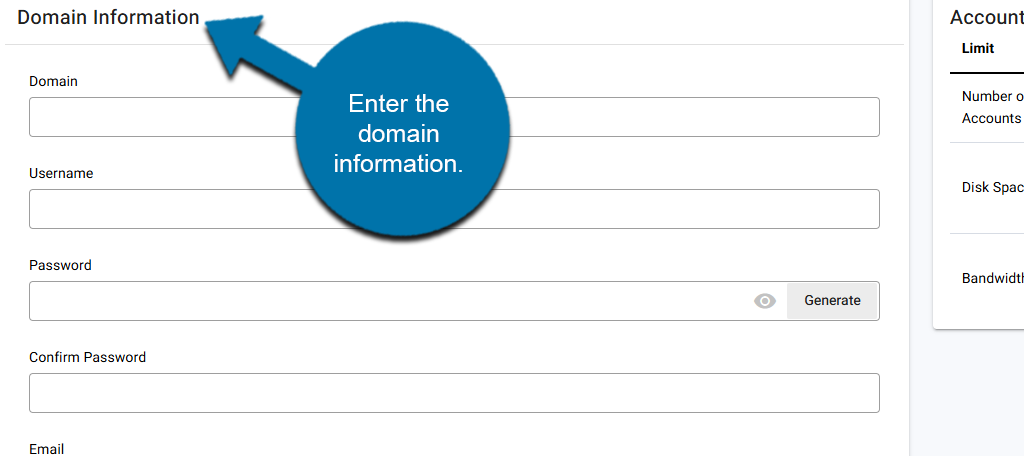
Here, you will need to enter all of the information for the account.
In the Domain Information section, you’ll need to enter the domain, username, email, and create a password for the account. Be sure to pick a strong password.
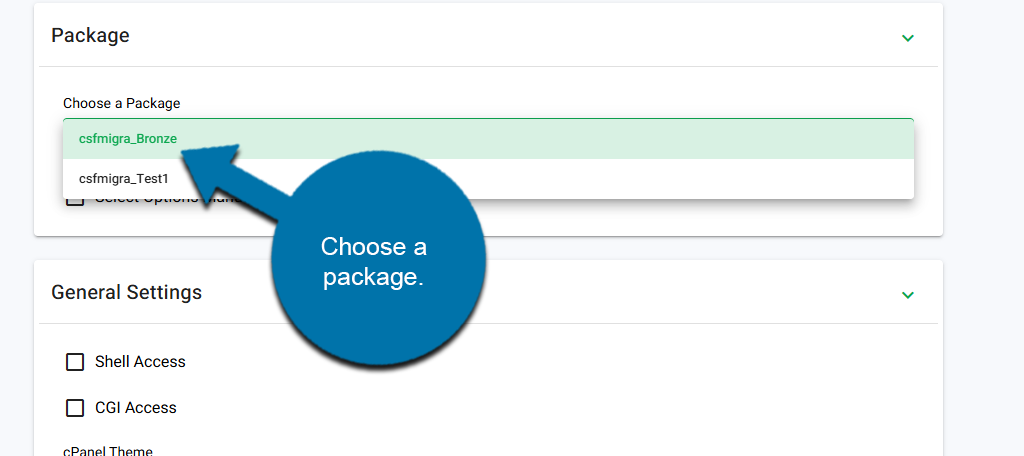
In the Package section, you can assign a hosting package for the account. This will set limitations on the resources that the account has access to.
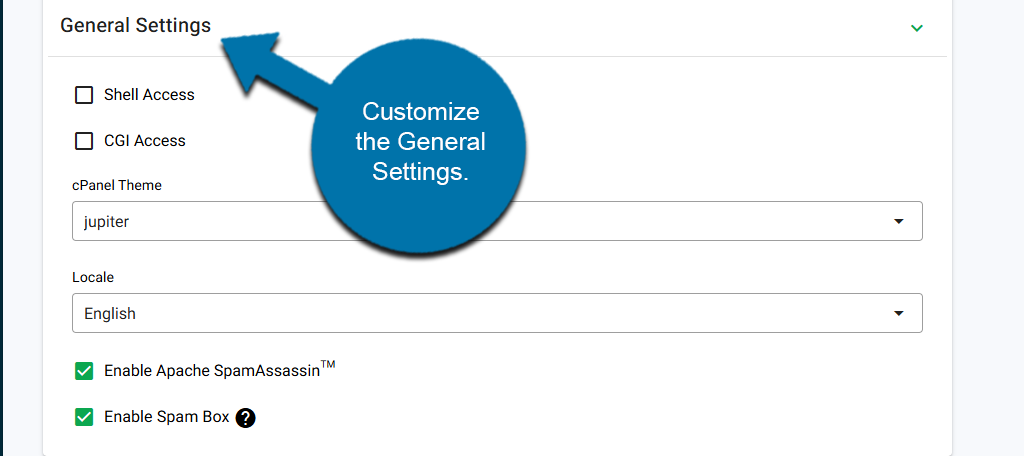
The General Settings section allows you to grant Shell and CGI Access, select a cPanel theme, and choose the language it is in. There are also spam protections enabled here. You can toggle them off, but it is not recommended.
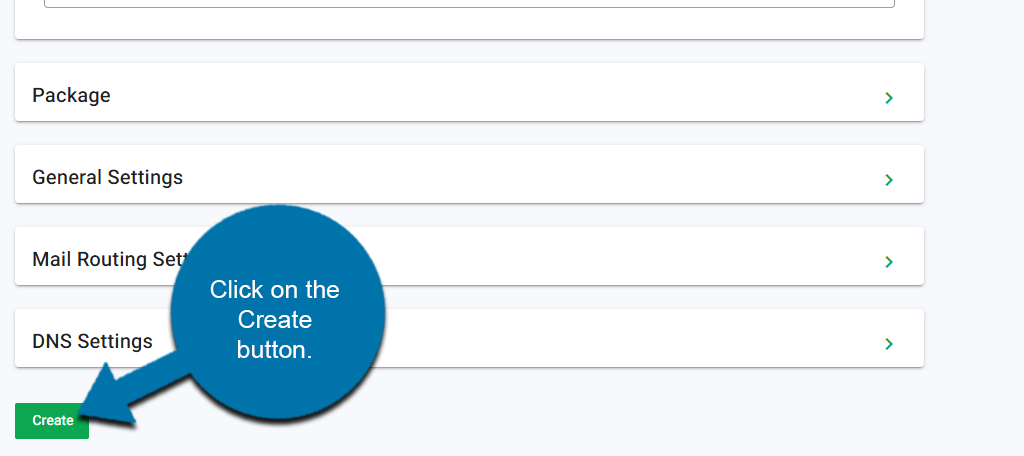
Below this, you will find the Mail Routing Settings and DNS Settings. Customize as you see fit. When you are done, click on the Create button to generate the new account.
As long as the information was entered correctly, the new account will be created. You can find the account by checking out the Account List section on the Reseller dashboard.
Creating An Account With WHM
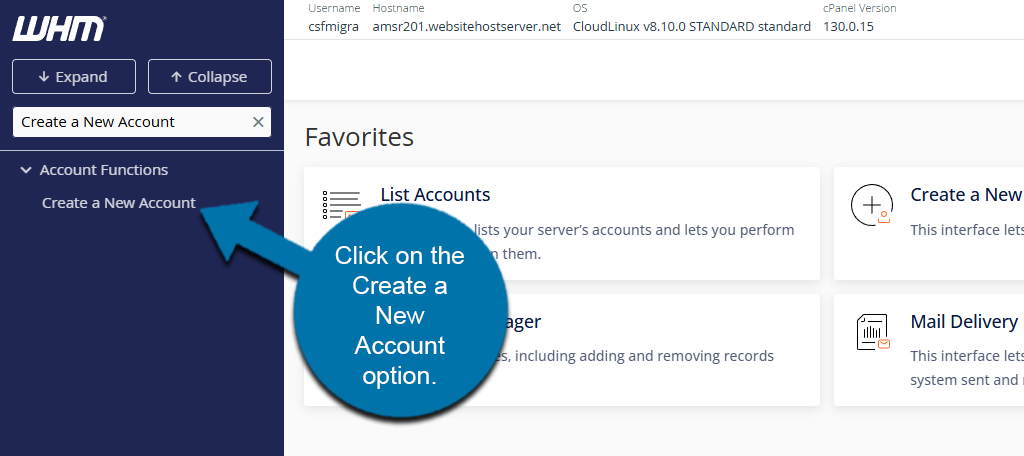
Start by accessing your WHM. Once there, use the search Create a New Account and select he option for it.
At the top of this area, you will see your current account limits. This helps you see how many accounts you can create and the total resource allotment you have available.
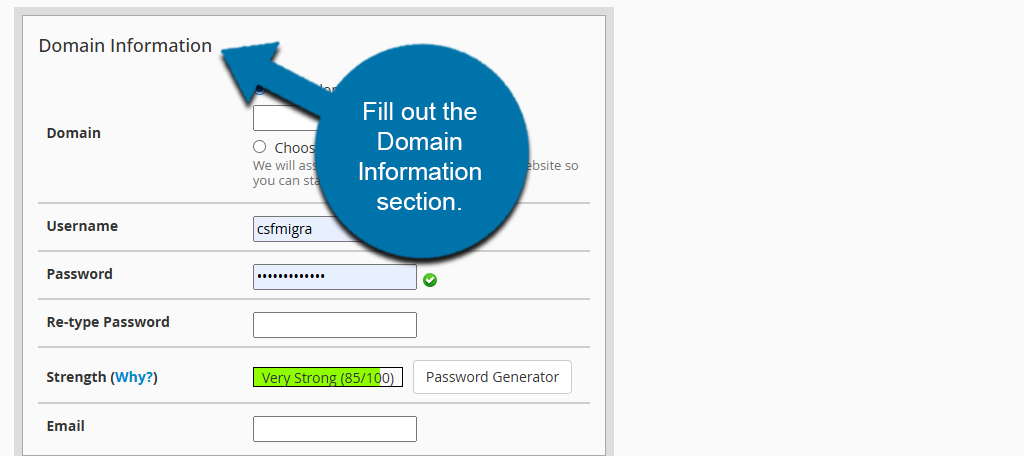
Below this, you will see the Domain information section. Here, you can enter the domain and email address for the account, and create a username and password for it.
Below this is the Package section. Here, you can use the drop-down to select a package to assign to the account. If the package is green, that means you have the resources and can assign it. If it is red, then you cannot choose it because it exceeds resource limitations.
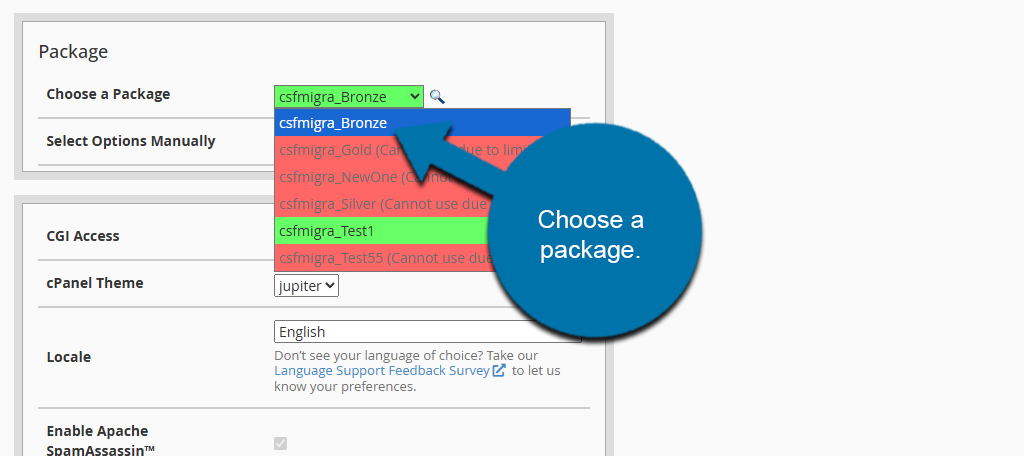
The rest of the options can be adjusted as needed to match your needs. When you are done, click on the Create button.
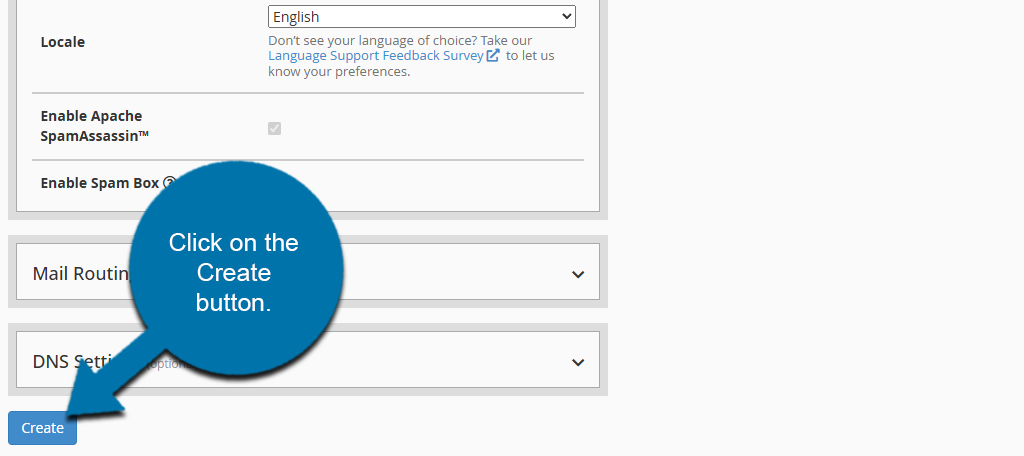
As long as the information is correct, the account will be created. You can view a list of your accounts by visiting the List Accounts section of WHM.
How to Suspend, Unsuspend, or Terminate Customer Accounts
Customers may occasionally be bad actors, which may necessitate taking necessary measures, such as issuing an account suspension or terminating the account. Most commonly, this is necessary when users fail to pay their bills. Let’s cover how to do these actions.
Suspending An Account
To suspend an account, go to the Reseller Dashboard. In the Accounts List section, locate the account that you want to suspend and click on the three vertical dots next to it.
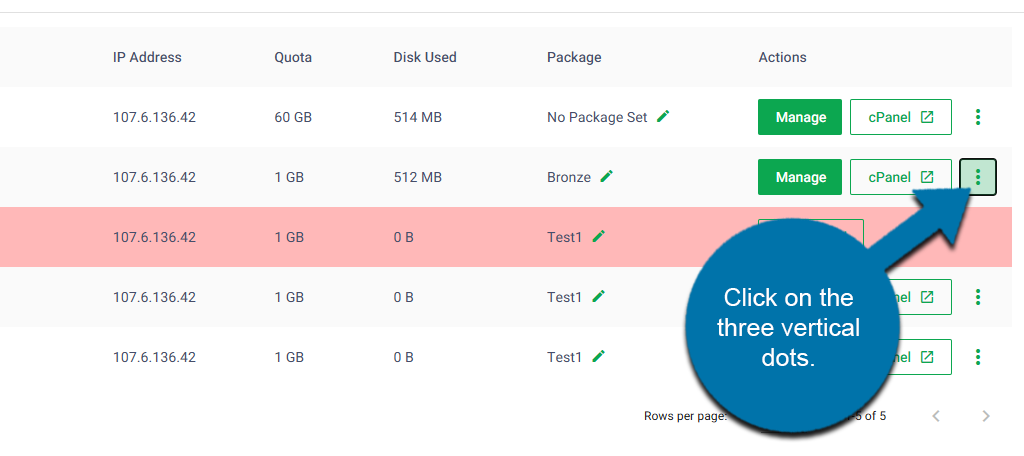
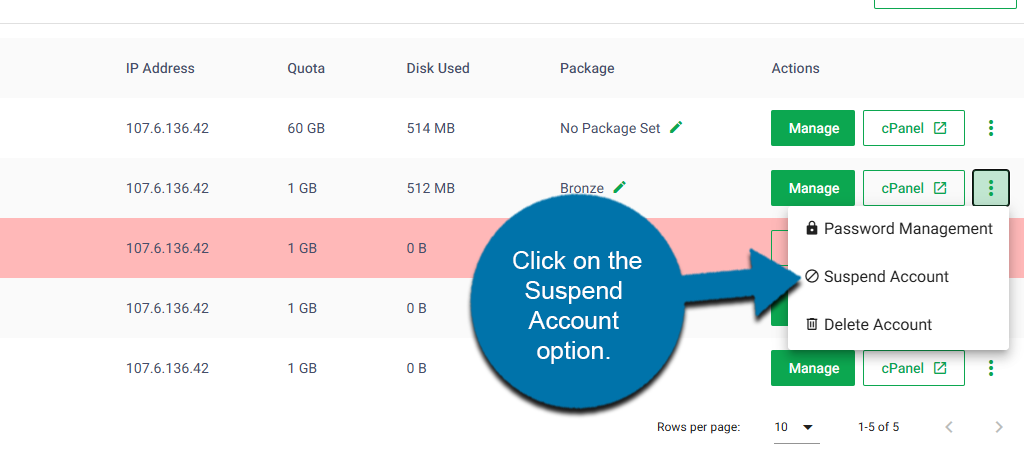
This will reveal three additional options. Click on the Suspend Account option.
Note: If the option is not selectable, it is because you do not have permission to do so. You’ll need to contact the Root Access user to do so or to grant you the permissions.
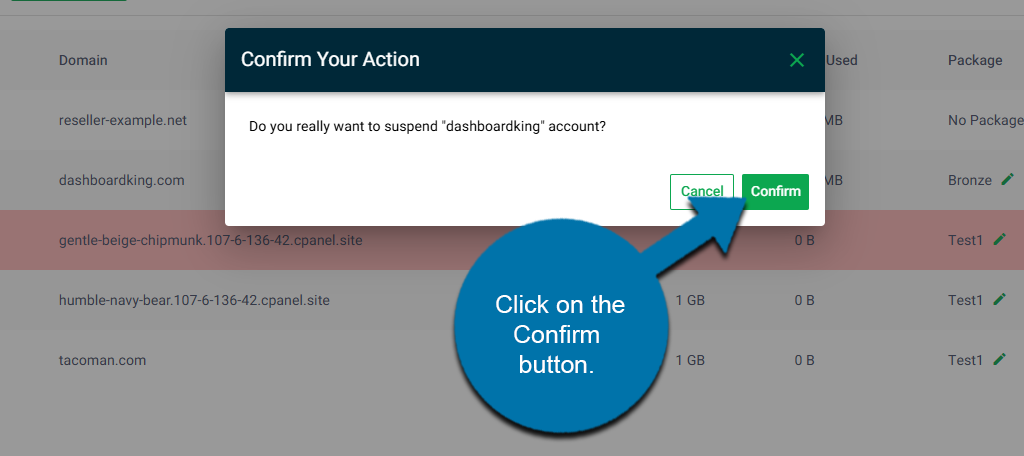
A small window will pop up asking you if you are sure you want to suspend the account. Click on the Confirm button.
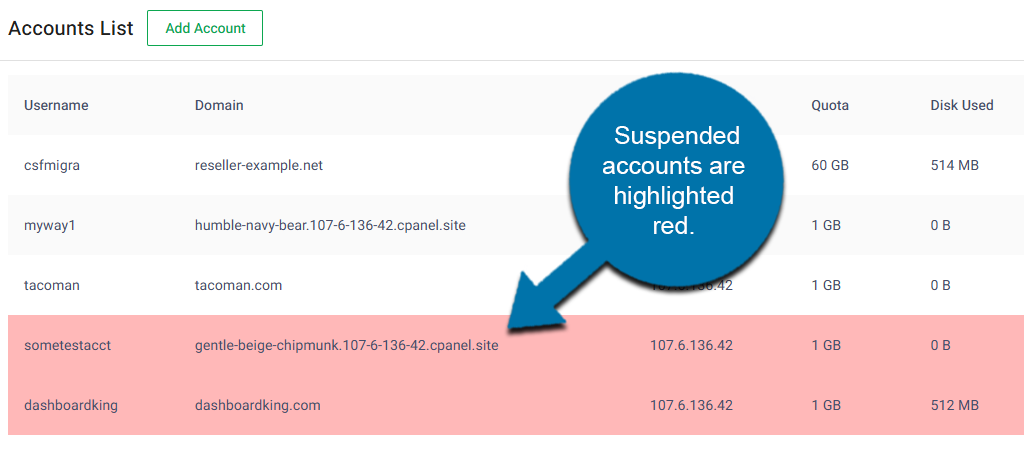
The account is now suspended. You can verify this, as it will now be highlighted red in the dashboard.
Unsuspending An Account
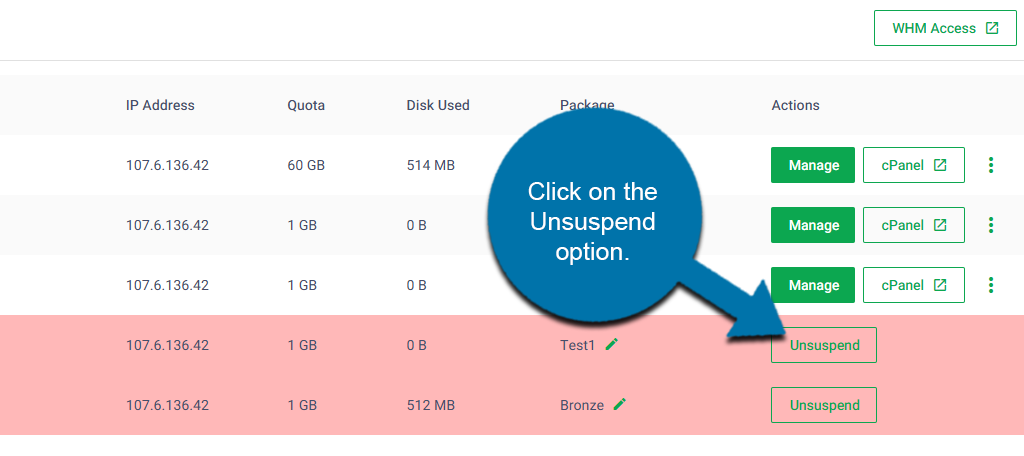
If the problem gets resolved, you’ll want to unsuspend the account so it can go back to regular operations. This is simple to do. Go to the Reseller dashboard. In the Account Lists section, locate the suspended account and click on the Unsuspend option.
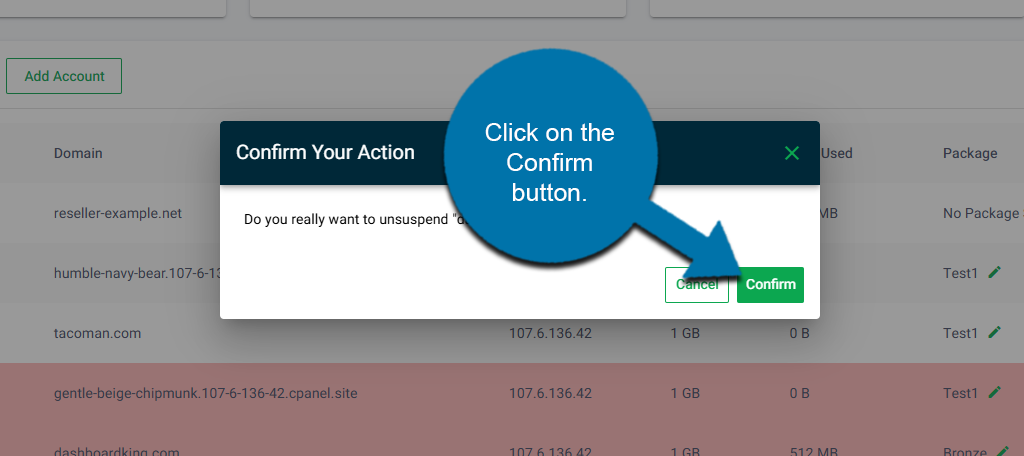
A small window will pop up asking if you are sure you want to unsuspend the account. Click on the Confirm button.
The account will be unsuspended and can resume normal operations.
Terminating An Account
If a customer requests to have their account terminated, or it becomes necessary due to compliance issues, you can do this quickly. There is no way to recover the account once it has been terminated unless you have a full backup of it before termination.
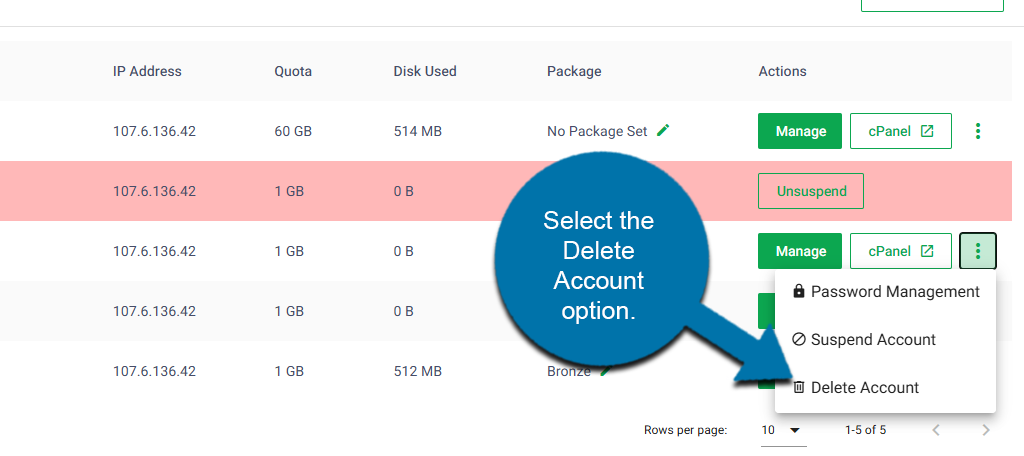
To do this, visit the Reseller Dashboard. In the Accounts List section, locate the account you want to terminate and click on the three vertical dots next to it.
Select the Delete Account option.
Note: If the option is not selectable, it is because you do not have permission to do so. You’ll need to contact the Root Access user to grant you the permissions.
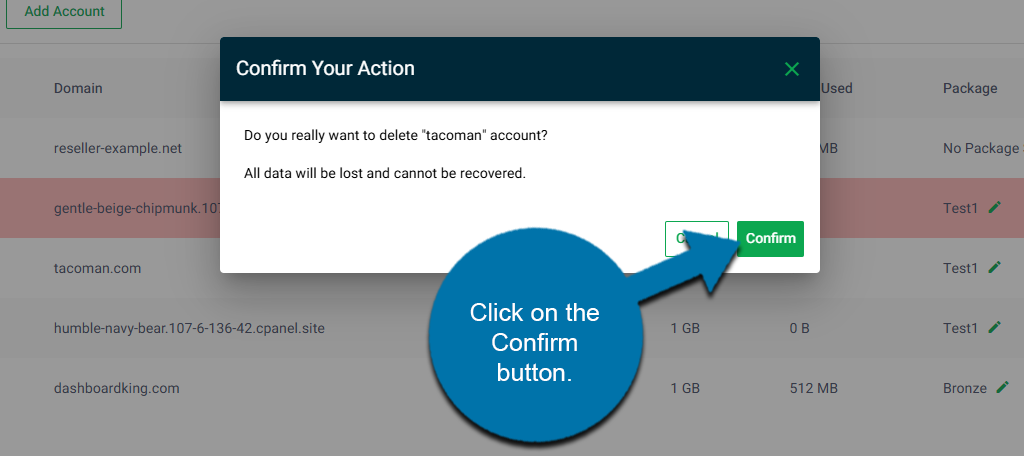
A small window will pop up asking if you really want to delete the account, as this action is permanent and cannot be reversed. Click on the Confirm button.
After a few moments, the account will be deleted.
Remember, this cannot be undone unless you retrieve the account from a backup.
How to Modify Existing cPanel Accounts
You can modify a cPanel account at any time. This allows you to change nearly any piece of information associated with the account. Here are some of the popular options.
Change the Package
Each account is assigned a package that determines the resource allotment. You can change this at any time. This makes it easy for customers to upgrade or downgrade the hosting package they purchase from you.
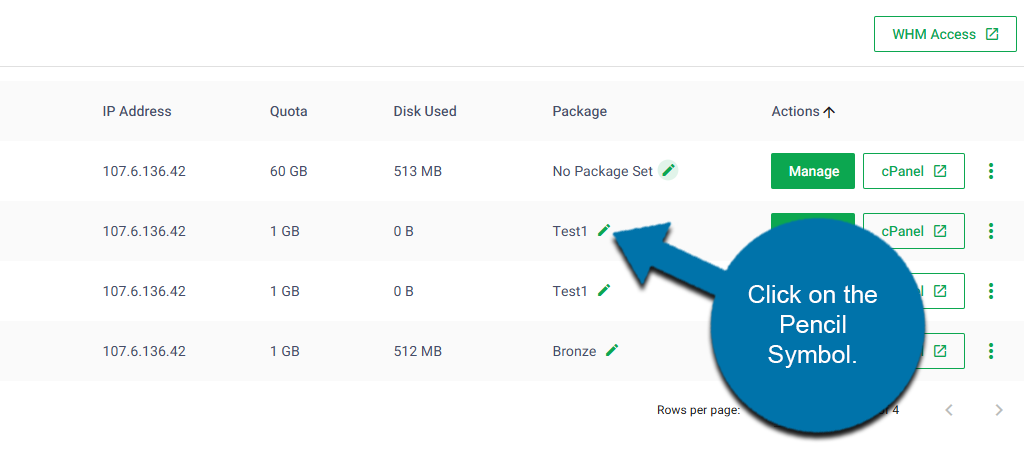
To do this, visit the Reseller Dashboard. In the Accounts List section, click on the Pencil Symbol (Edit) in the Package column.
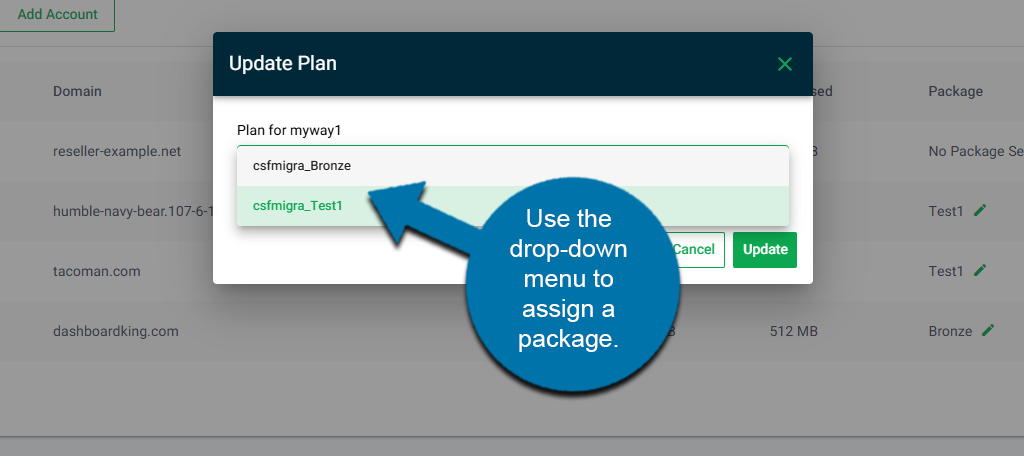
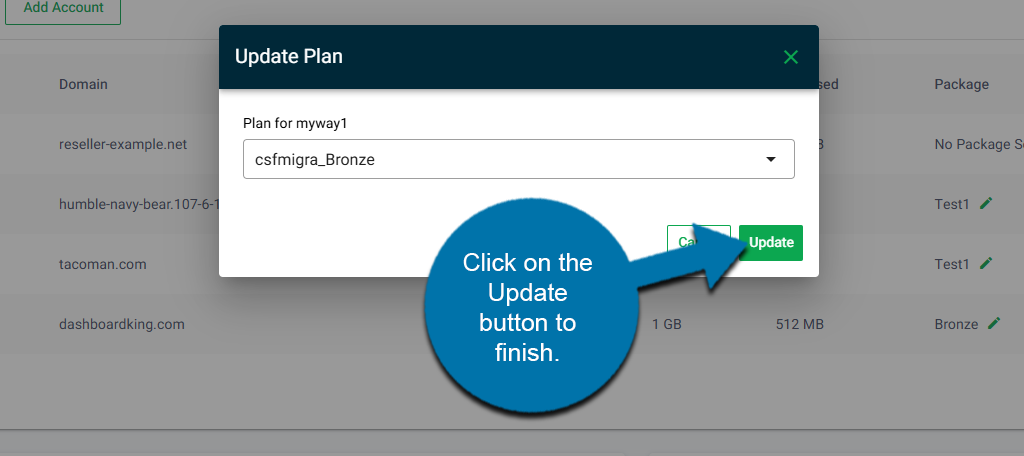
This will open a small window where you can use the drop-down menu to assign a package.
Click on the Update button to finish.
Change the Password
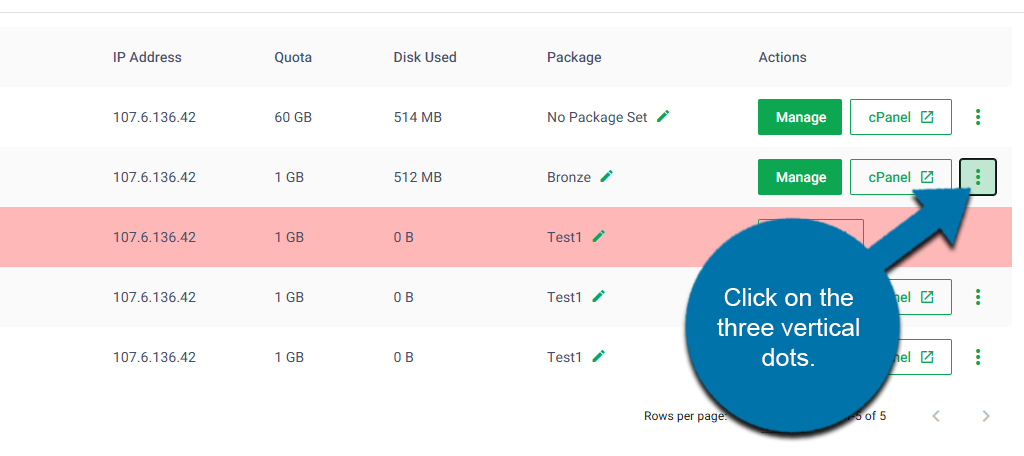
To change the password of a cPanel account, visit the Reseller Dashboard. In the Accounts List section, click on the Three Vertical Dots next to the account you want to change the password for.
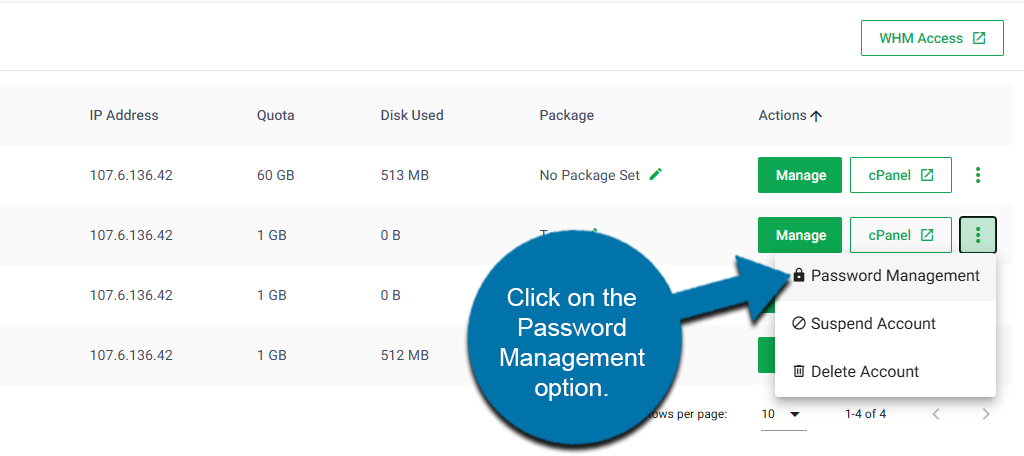
Click on the Password Management option.
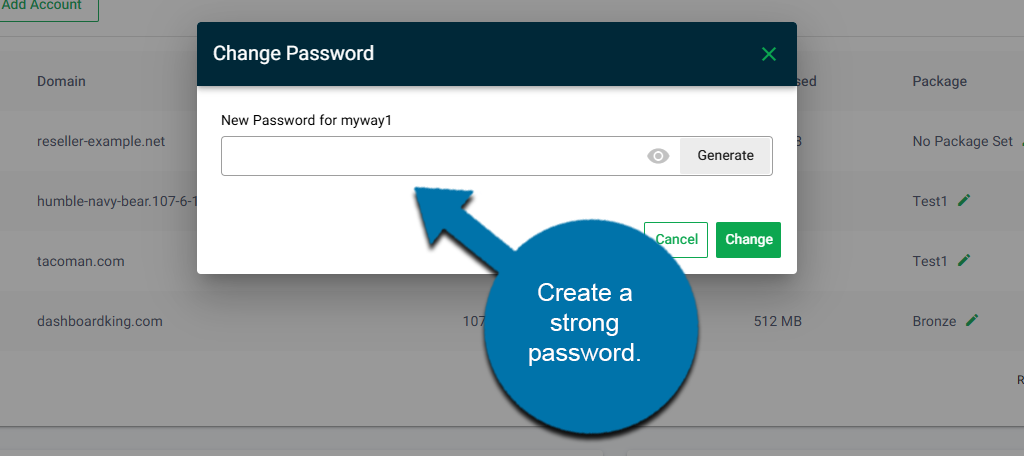
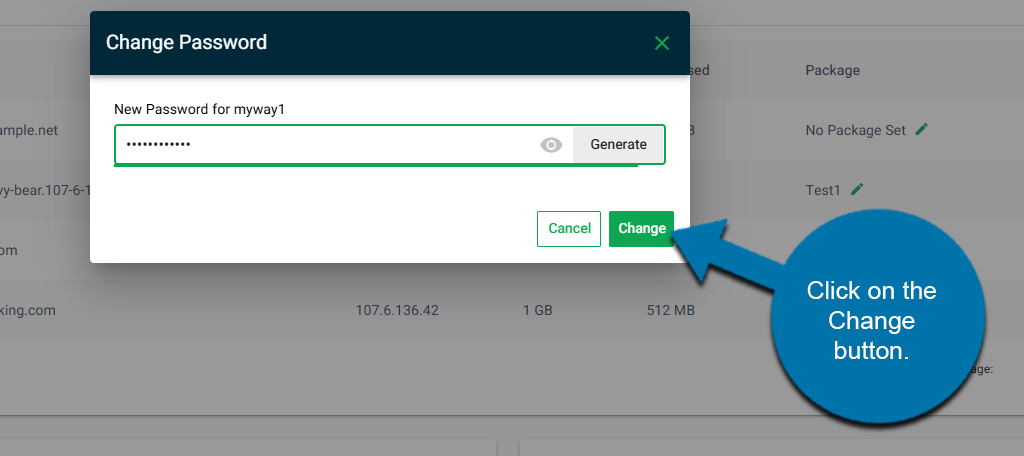
A small window will pop up asking you to enter a new password. You can also click on the Generate button to generate a strong password for the account. Be mindful that you do not need to confirm the password, so be sure to verify that the password was entered correctly and recorded.
Note: To see the password, make sure to click on the eye symbol.
Click on the Change button to finish.
The password has now been updated. Be sure to notify the user of this change.