Backups are an essential tool for web developers, which is why, as a reseller, you will need to know how to create backups for your customers. The good news is that backups also add value to the services that you offer as a web host, which means you can monetize the process.
How to Create A Backup As A Reseller
The process is almost identical to creating a backup on a regular account in cPanel. The only difference is having to select the correct account that you wish to create the backup for.
GreenGeeks allows for backups up to 10GB in size. For sites that exceed this, your options are to create smaller partial backups in cPanel or to utilize a backup plugin that circumvents this limitation.
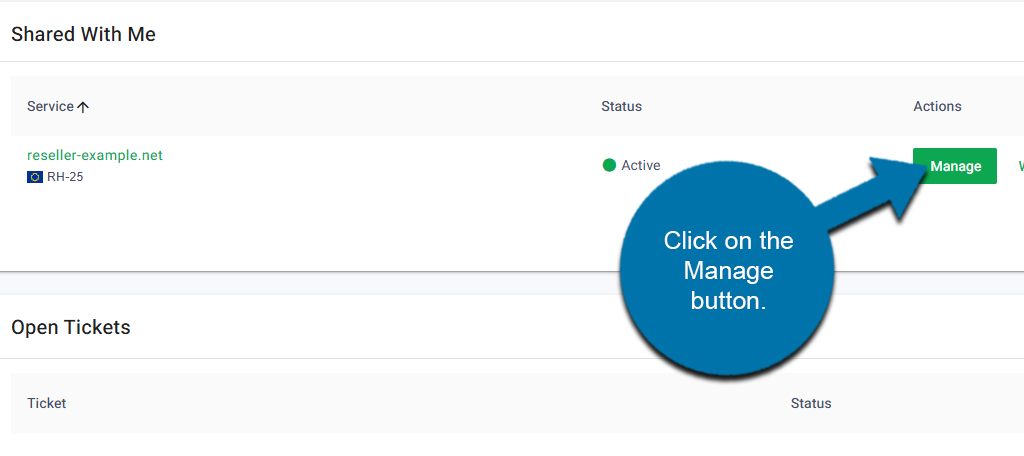
Start by logging into your GreenGeeks account. Click on the Manage button next to your reseller account.
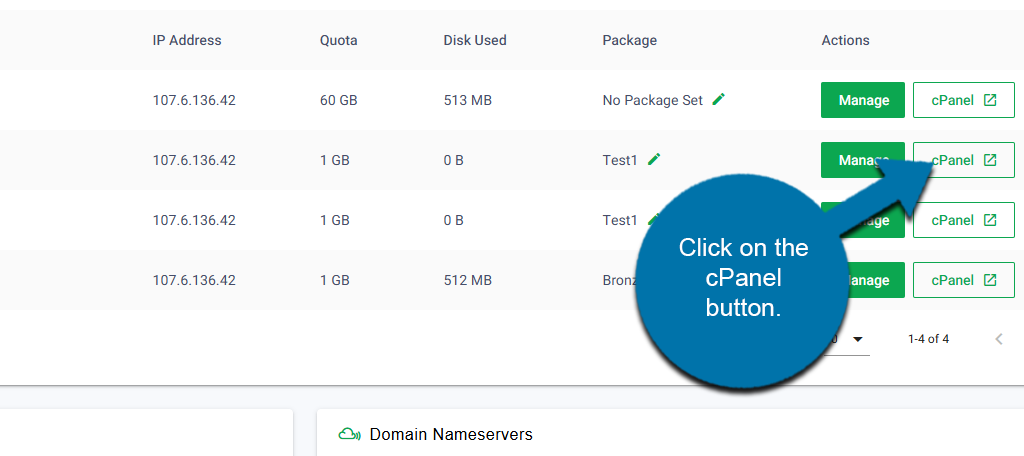
In the Accounts List section, you will see a list of your current customers. Locate the account that you want to make a backup for and click on the cPanel button next to it.
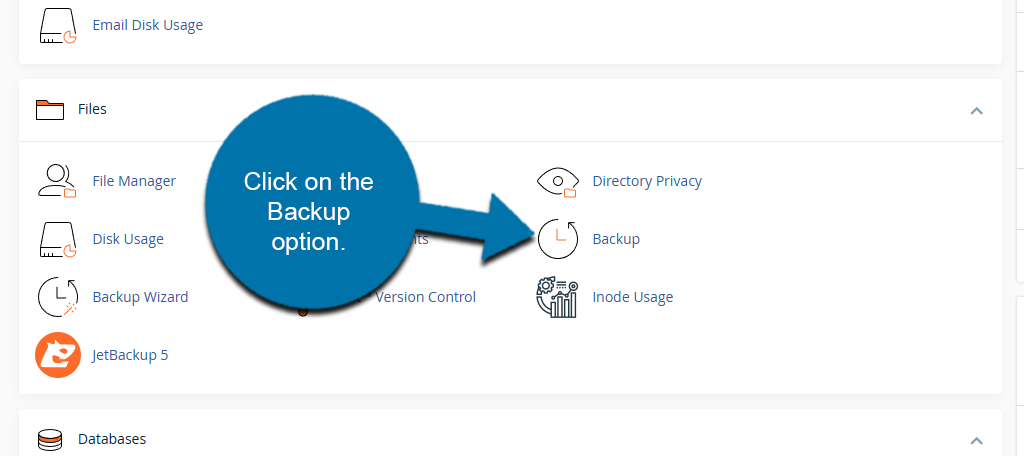
Locate the Files section and click on the Backup option.
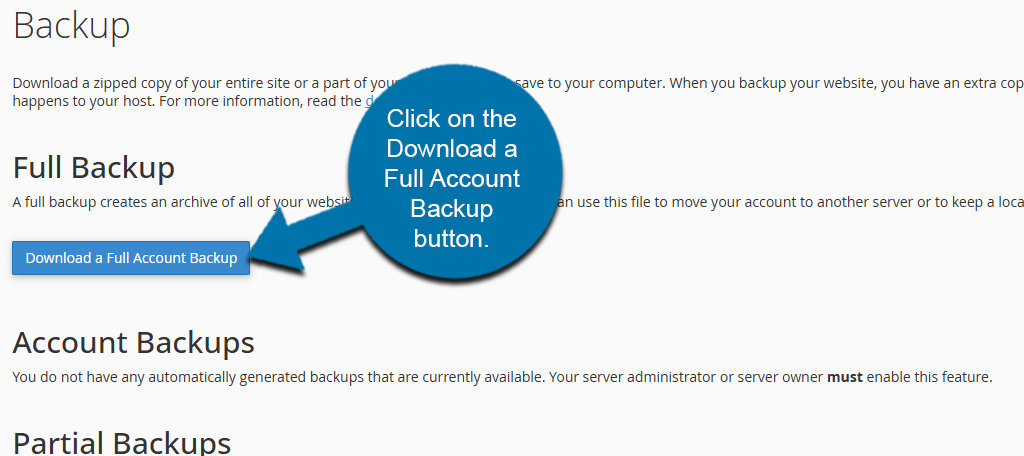
There are several options in this area to create a backup. The first one at the top is to create a full backup, which means to back up all of the customers’ files and configurations for their website. Below this, you will find a series of partial backups that focus on backing up specific parts of a website.
Simply click on the Download a Full Account Backup button to create one.
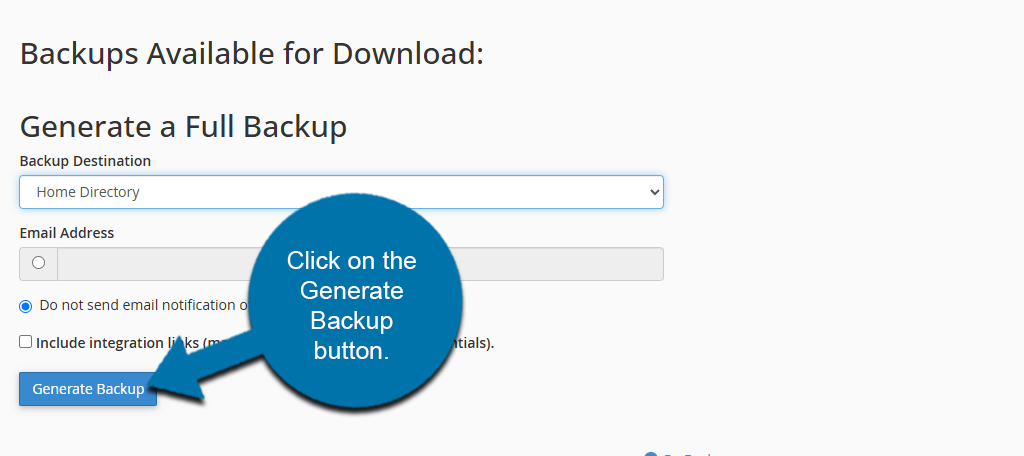
This will direct you to an area where you can select the destination for the backup. By default, it will be sent to the Home Directory. There are also options to send it to an FTP client if you wish. Select if you want to send an email notification that the backup was created and any other necessary information.
Click on the Generate Backup button when finished.
The backup will now be generated. The larger the website, the longer it will take, so be prepared to do something else in the meantime. Once the process is complete, you will receive a notification indicating that the backup is finished.
How to Restore a Backup
If something goes wrong, you may need to use the backup to restore a site. Luckily, this is very simple to do. Start by going to the cPanel.
Locate the Files section and click on the Backup option.
Scroll down and look on the right side. Here you will see a series of restore options. Simply locate the part that you want to restore and click on the Choose File button.
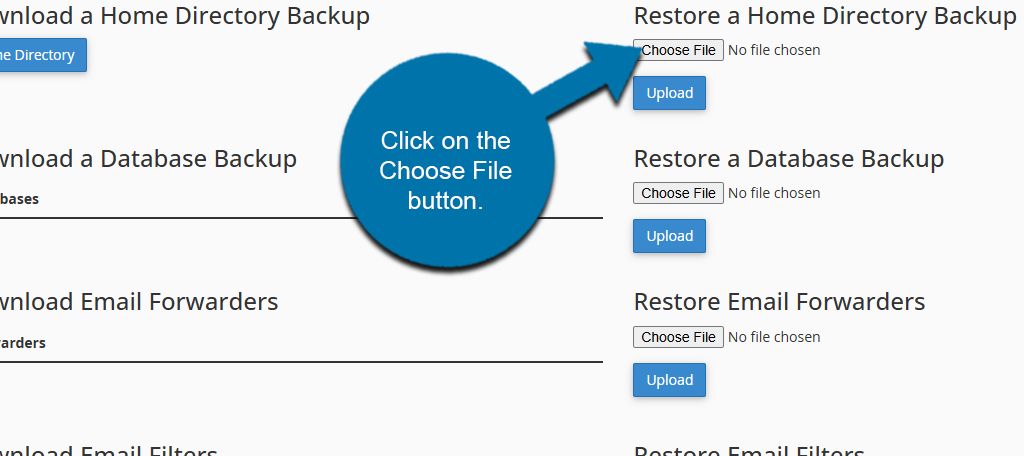
This will allow you to pick a file from your computer and simply choose the correct piece of the backup from your computer. Once that is done, click on the Upload button.
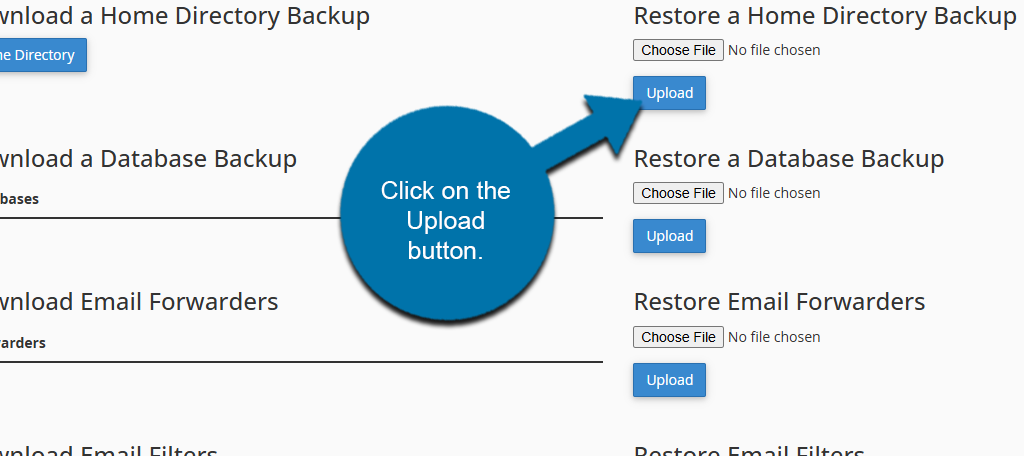
And that’s it, the restoration process will begin by replacing your current files with the files that you uploaded. This process is not reversible, so if you upload the wrong files and do not have a current backup, there is no way to restore them.
Backup FAQ
Backups can be stored anywhere, but you should not store them in the same location as your live website (your web server). Not only does it waste resource space, but you could potentially lose access to your backup if the web server is compromised
Typically, keeping one current backup is a good policy, but some developers like to keep multiple. This way, they can rotate which one gets replaced, thus giving customers more restoration options in the event something goes wrong.
While you can do so, it is important to remember that there are a lot of free backup tools nowadays. As such, many offer a single backup for free, with paid options for multiple.
Many web hosts back up websites daily. However, this can sometimes be part of a web hosting plan; thus, different tiers have different frequencies.