Being able to easily calculate what your customers’ bills are is essential as a reseller. There are several applications that you can integrate with WHM to directly see this kind of information. Any reseller account hosted with GreenGeesk gets access to WHMCS for free upon request.
Once the request is made by submitting a ticket, you will be sent a license key that you can use to set up WHMCS. This tutorial will cover how to install WHMCS and provide an overview of what you can do with it.
How to Install WHMCS
There are two main ways to install WHMCS. This tutorial will cover both.
Method 1: GreenGeeks App Installer
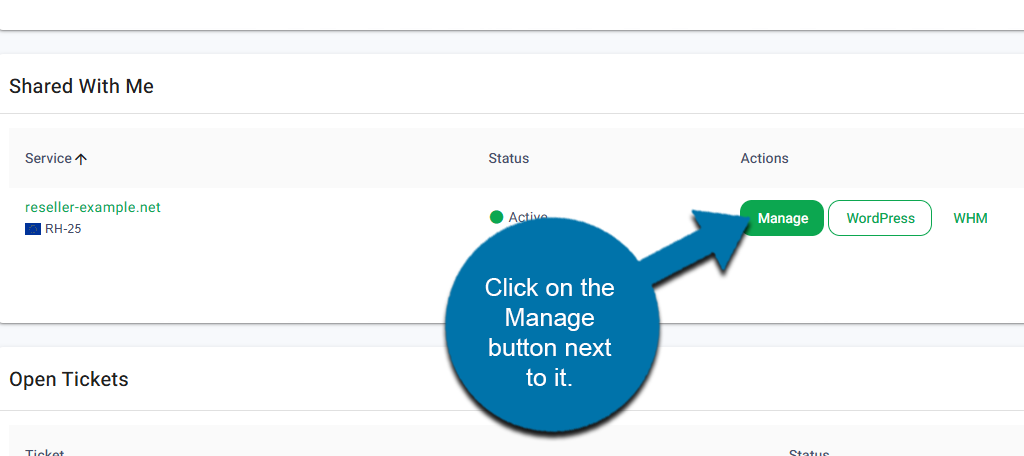
Start by logging into your GreenGeeks account. Locate the Reseller account and click on the Manage button next to it.
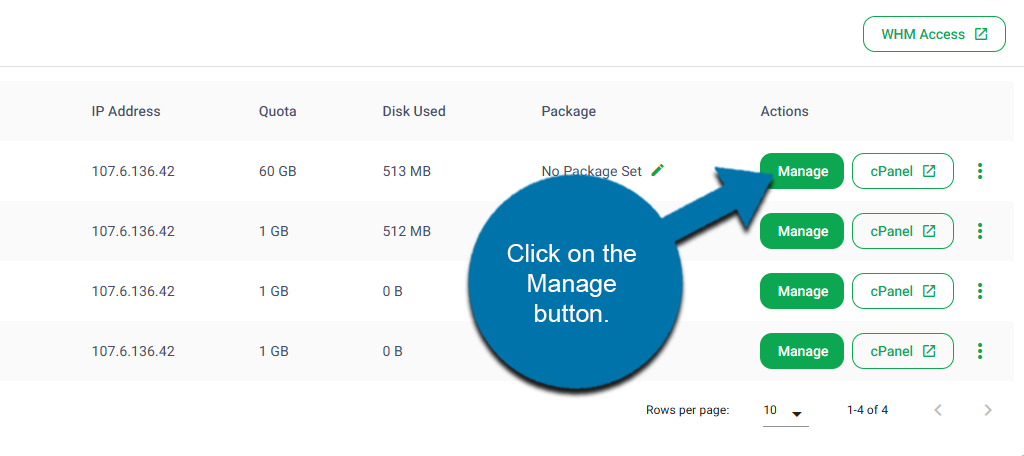
In the Accounts list, click on the Manage button next to the domain you wish to install WHMCS on.
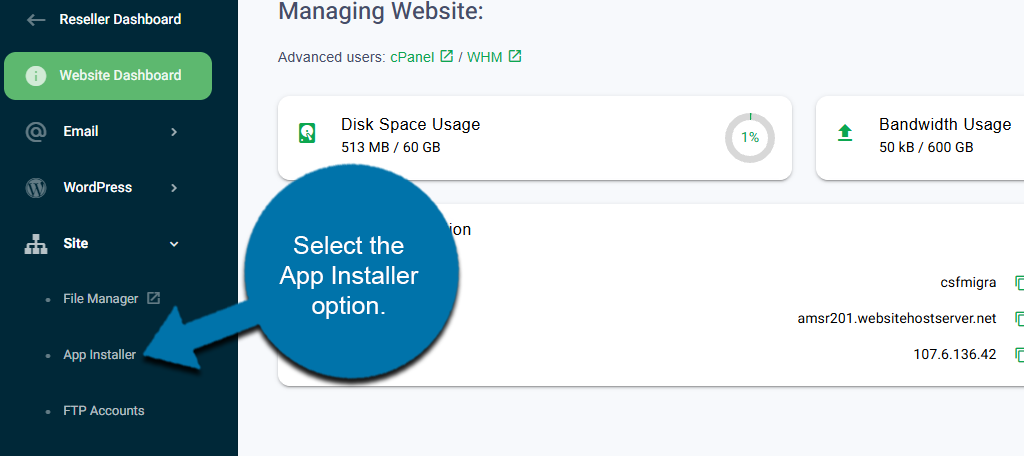
On the left-hand panel, click on Site and select the App Installer option.
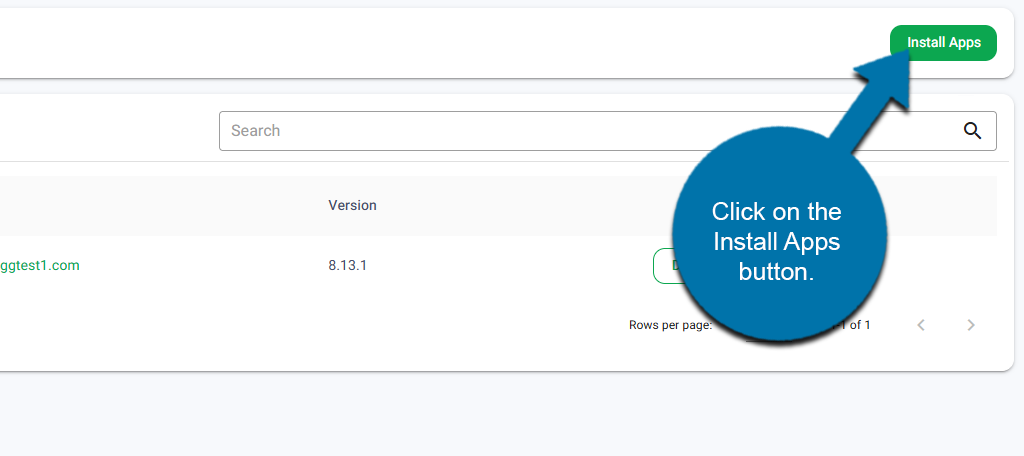
Click on the Install Apps button.
Use the Application drop-down to choose WHMCS.
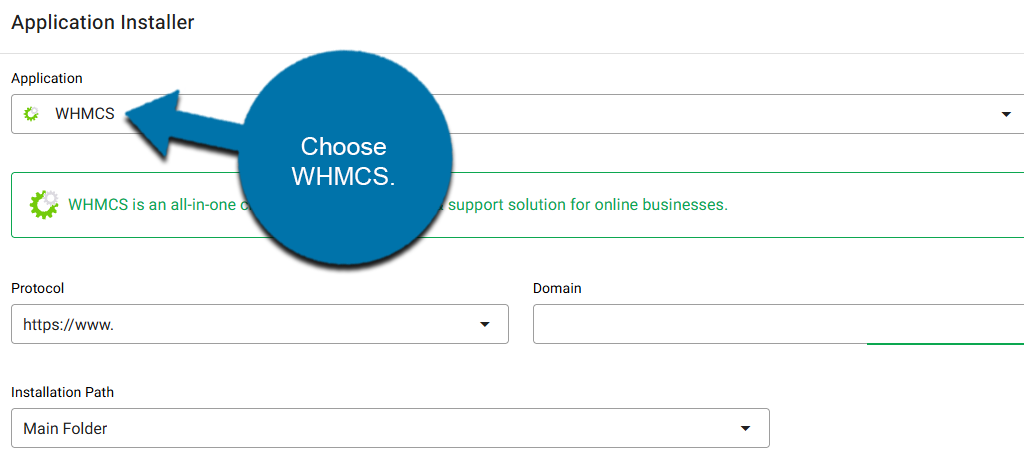
Ensure that the Protocol, Domain, and installation path are correct. Then enter the Admin Username, Admin Password, and Admin Email for the account. Be sure to write this down to access the account after it is installed.
Click on the Install Application button to finish.
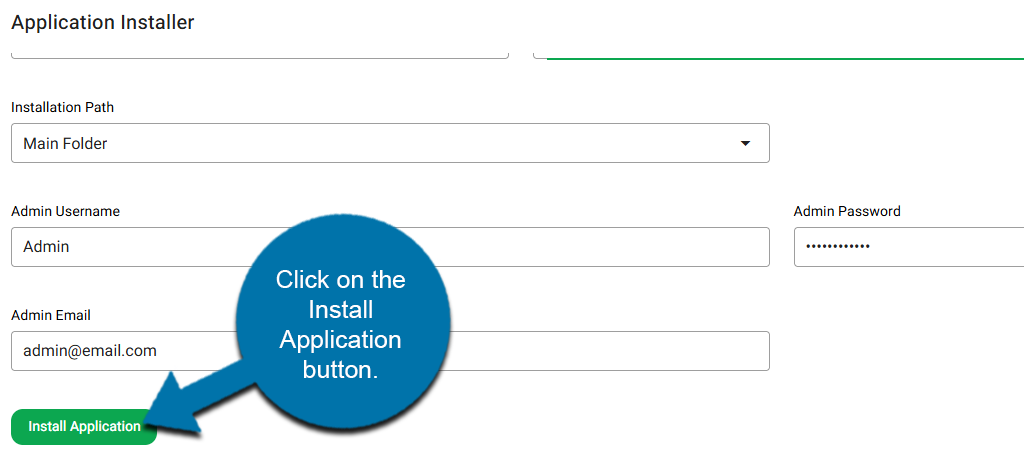
This will begin the installation process. After a few moments, it will be ready for us,e and you can access WHMCS using the admin account information you just entered.
Method 2: Legacy Softaculous Install
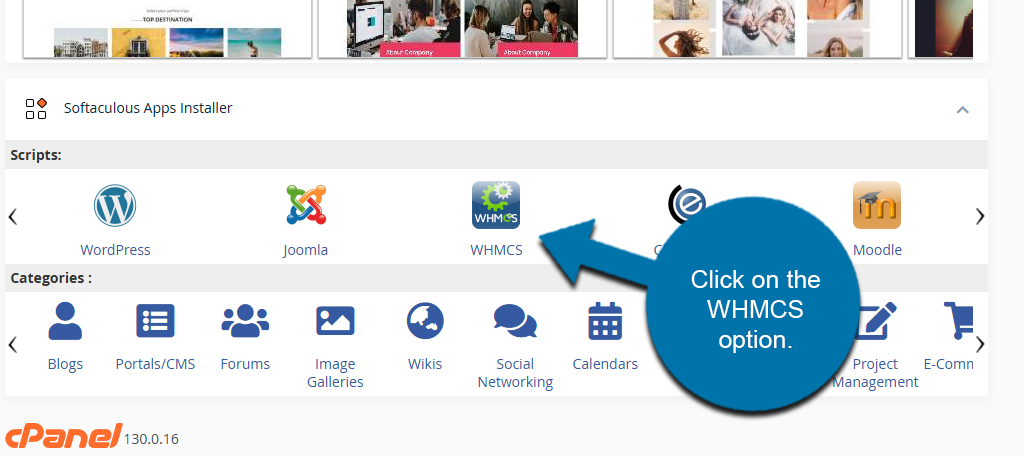
Start by logging into your GreenGeeks account and accessing your cPanel. Once inside the cPanel, scroll down to the bottom. Here, you will see Softaculous Apps Installer. Click on the WHMCS option.
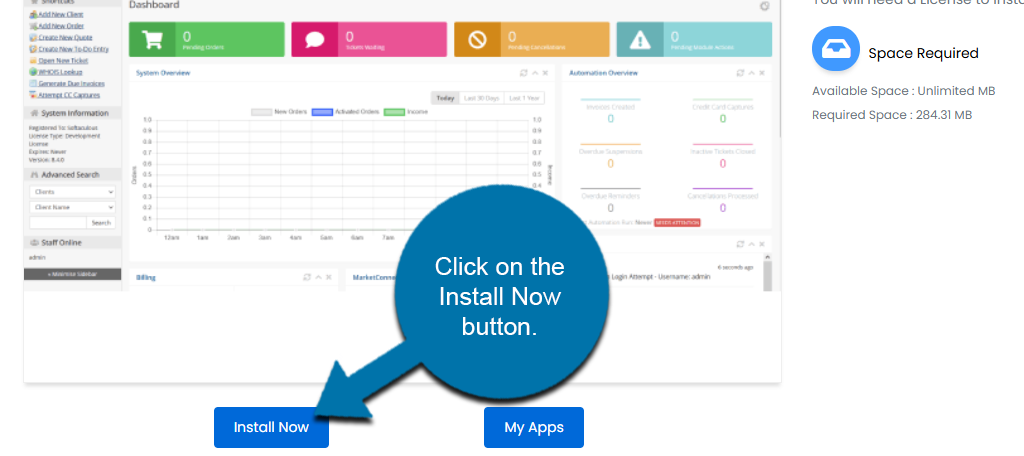
Click on the Install Now button.
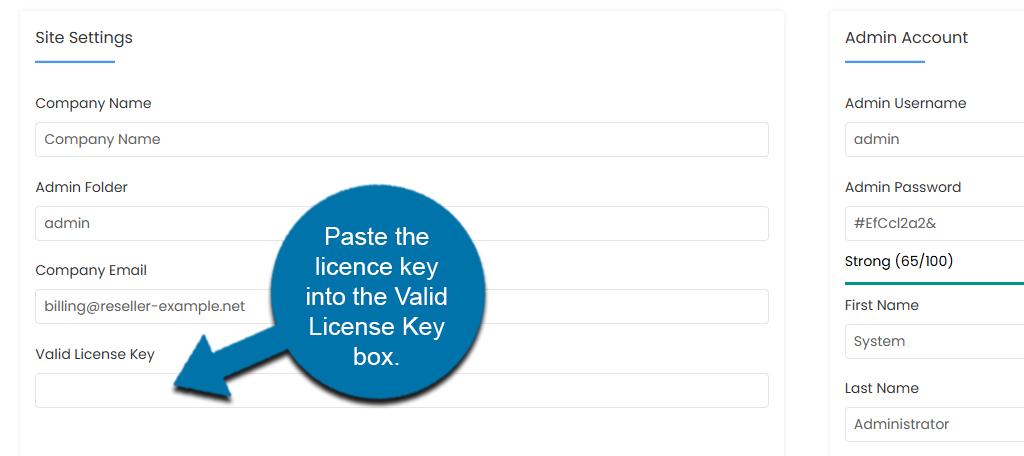
This will reveal installation options that you can configure. At the top, you can enter the installation URL, directory, and CRON job. Below this, you can enter site information. This includes the company name, email, and most importantly, entering a valid license key.
Again, all reseller accounts hosted by GreenGeeks will get this for free upon request. Paste the licence key into the Valid License Key box.
Across from this, you can create an admin account for the software. By default, the username is admin, with a randomly generated password. Feel free to change these fields as you see fit.
Be sure to write down this information to access the account later.
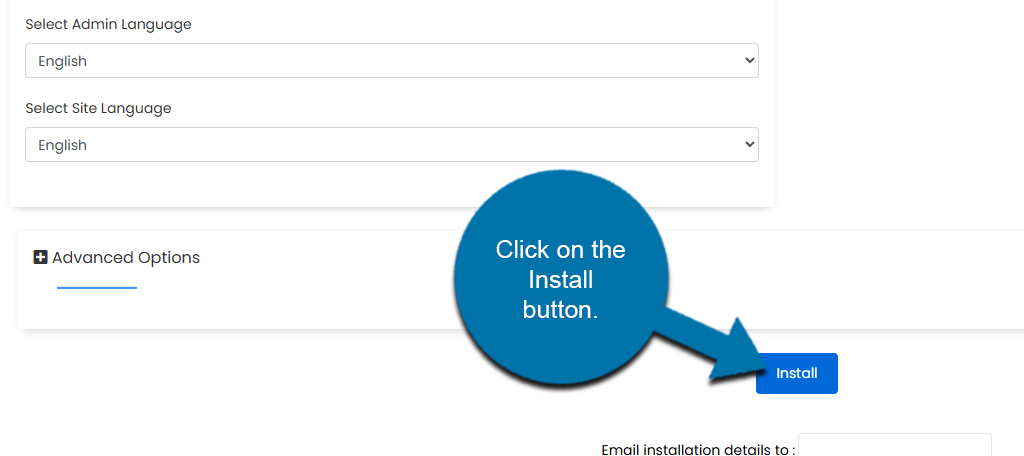
You can also select what language the software will use. Once everything is entered, click on the Install button at the bottom.
This will begin the installation. It may take several minutes to install. Once it is complete, you will see the following message:
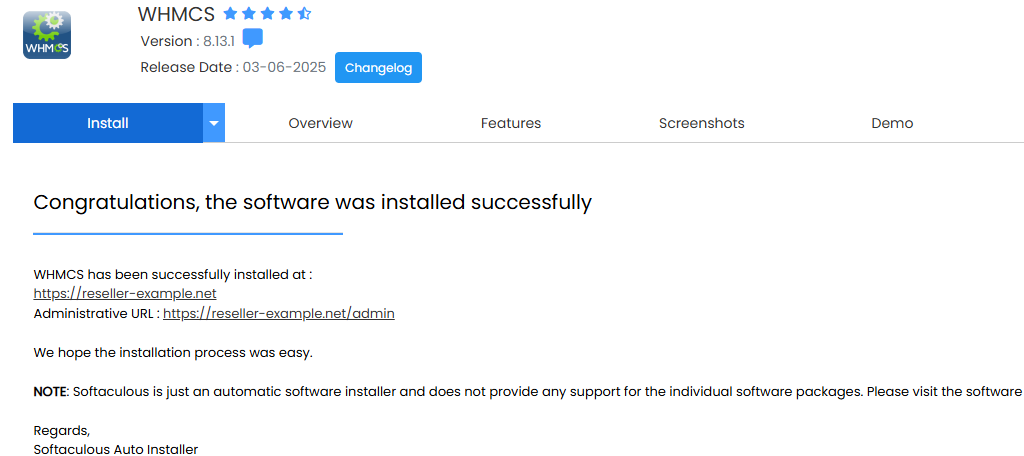
It will provide an administrator URL that you can use to log in, which is always just https://domain.com/admin. With that, WHMCS is now ready to use.
Note: If you get an error, the installation will fail, but it will also provide a reason. This can include not entering a valid license key or not having the correct PHP extension installed. Simply correct the problem and try again.
Getting Started With WHMCS
When you first log into your WHMCS account, you will see an overview area for your account. This shows you a lot of information to help you keep track of customers. This includes:
- Pending Orders
- Tickets Waiting
- Pending Cancelations
- Pending Module Actions
- Billing Statistics
- Overdue Reminders
However, when you first log in, this will all say 0, as you have no customers. While you could immediately start adding clients, you will quickly find that you can’t enter payment details. As such, a good starting point is setting up a Payment Gateway.
WHMCS supports hundreds of payment gateways like PayPal and Stripe. The more options you have, the easier it is for customers to pay their bills. Adding a payment system simply involves installing a module for that service.
For example, let’s cover PayPal.
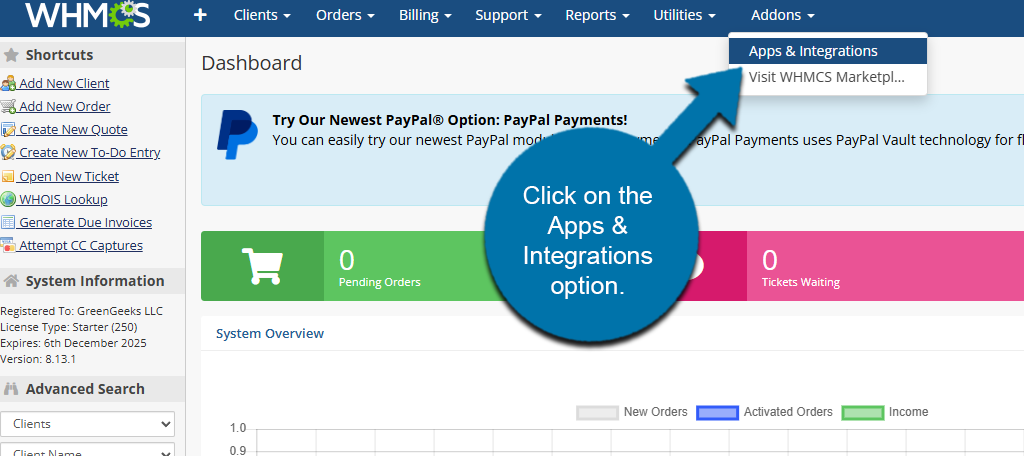
Start by hovering over Addons and selecting the Apps & Integrations option.
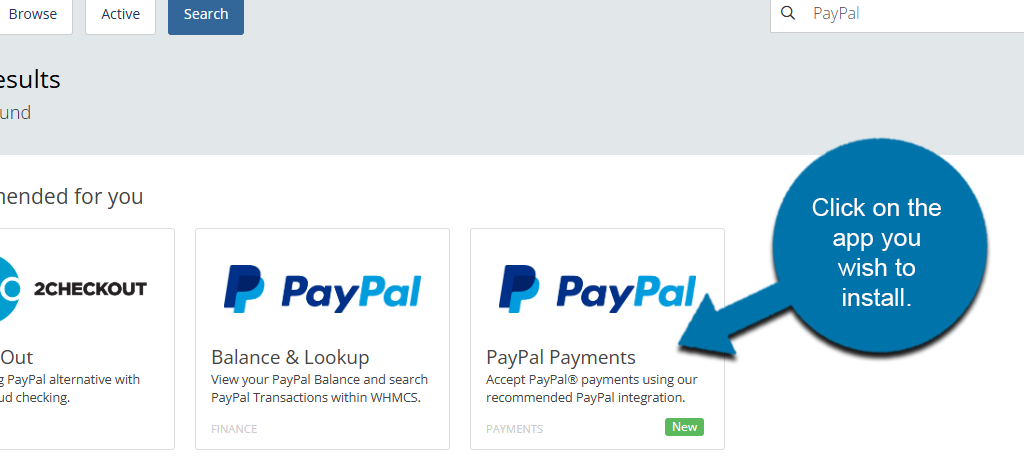
Here, you can search WHMCs for all kinds of apps to add extra features to your install. This goes beyond payment gateways, so be sure to explore it and search for apps that you may find useful. In this case, search for the payment gateway you want to use.
Click on the app you wish to install.
This will open up another window explaining what the app offers. If you want to install it, click on the Activate button.
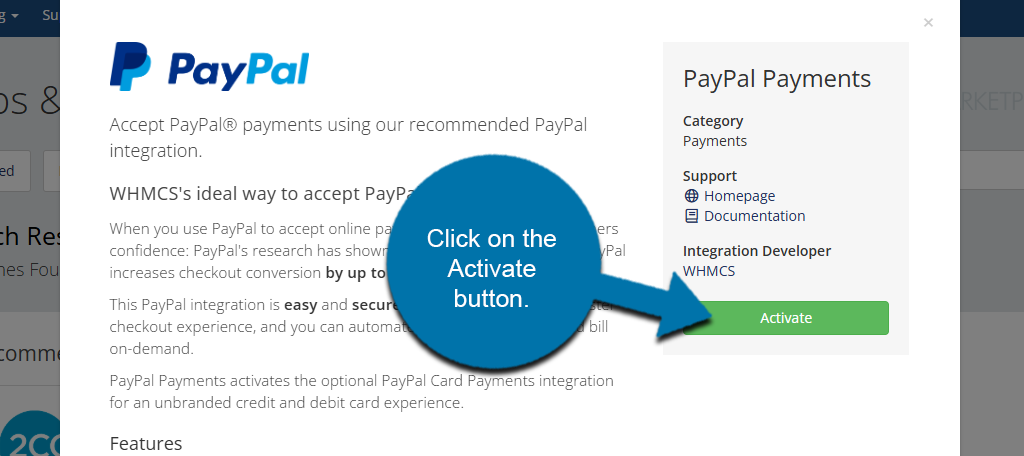
Naturally, each app will have its own unique setup process where you need to enter your account information to fully integrate it with your billing system. For more details, refer to the app documentation.
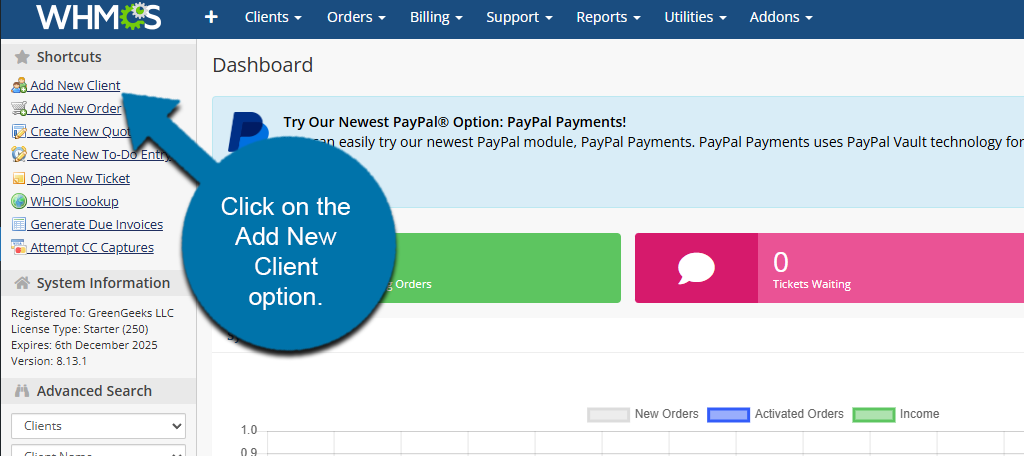
With that taken care of, it is time to start adding clients. To do this, click on the Add New Client option.
Here, you will be able to fill out all of the information for the client. This includes their name, address, payment method, email, and various account settings like enabling late fees.
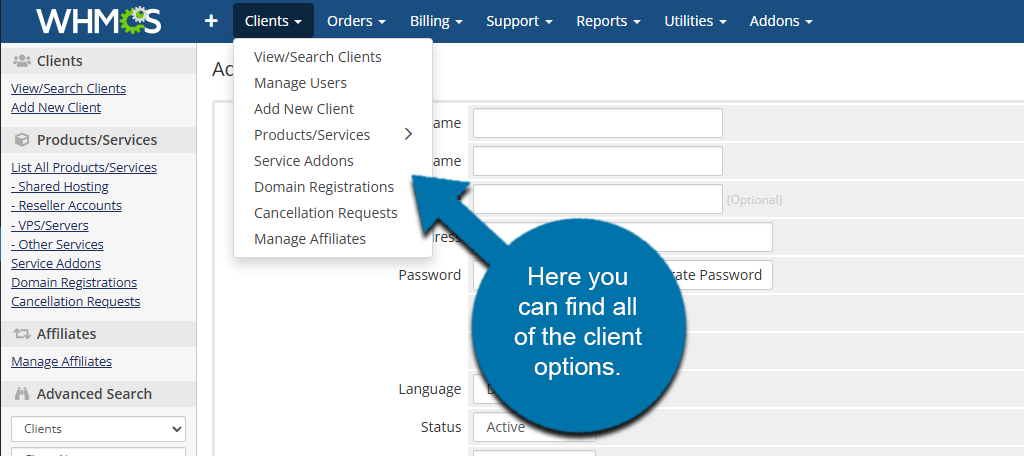
This process is simple, but if you are adding a lot of clients, it can be tedious, as there is no way to enter multiple customers at once. If you hover over the Clients option at the top, you will find various options to help you manage client accounts.
With clients and a payment gateway in place, you can now utilize WHMCS fully by creating orders, monitoring reports for customers, and much more. You can find all of these options by using the choices at the top and filling out the necessary information.
Alternatives for WHMCS
Several other platforms integrate with WHM, like Blesta, ClientExec, BoxBilling, and more. Each platform offers a unique interface and various pricing options to fit your needs.
Alternatively, you can use WHMCS, but install WooCommerce. This will allow you to track and manage payments using the most popular eCommerce platform. Many users may already be familiar with the interface, so this can help make the process easier.