Many customers will run multiple websites from a single hosting account by using add-on domains. As a reseller, you will need to be able to manage these add-on domains. This can be done by accessing the customer’s cPanel account.
This tutorial will demonstrate how to add and manage add-on domains.
What Is An Add-On Domain?
An add-on domain is a separate website that is hosted with the same account. An add-on domain is best utilized when it needs to be separated from the main website. For example, you may want an add-on domain for a different brand or niche that does not align with your main website.
It is also important to remind users that an add-on domain is not the same as a subdomain.
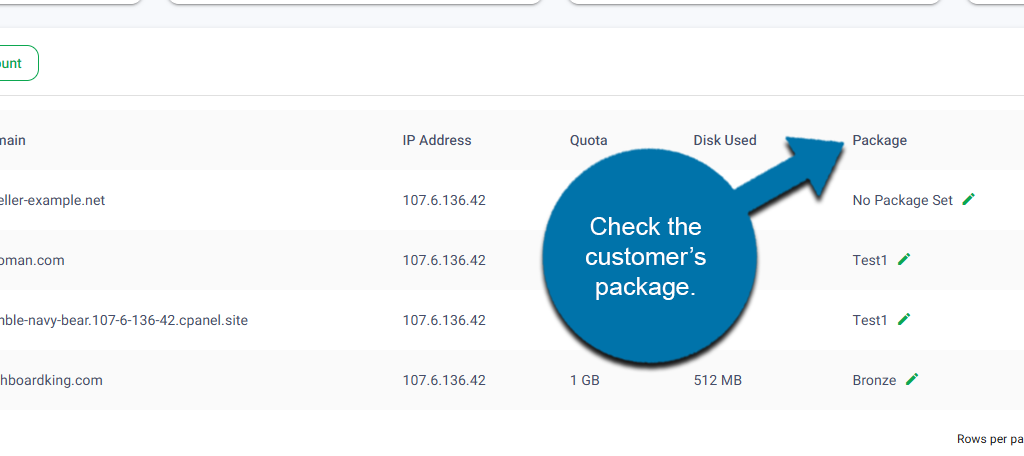
Check the Customer’s Current Package
Before you begin, please verify the customer’s current package. The package includes an option that dictates the number of domains they can have on their account. The number cannot be exceeded; thus, if they don’t have room, you cannot add an add-on domain.
To check this, locate the customer’s account and look at which package they were assigned.
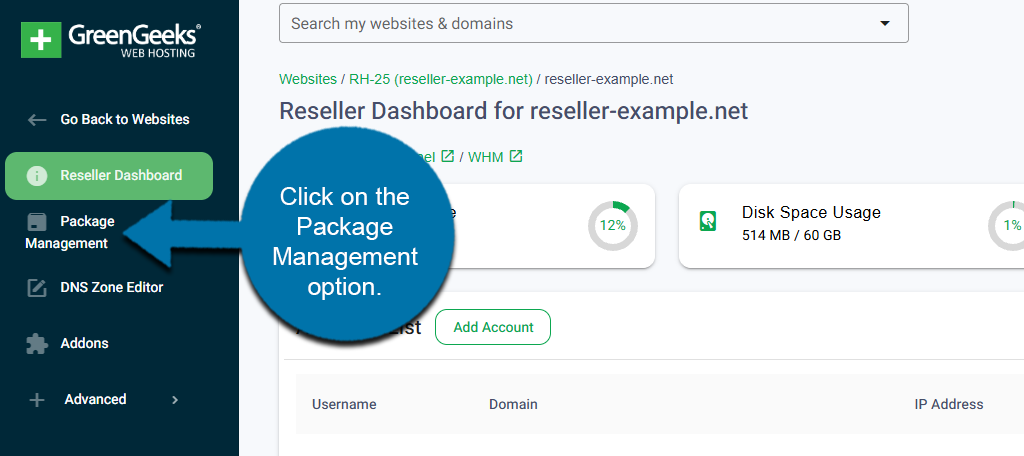
If you need to review what each package includes, you can do that directly from the GreenGeeks Dashboard. Click on the Package Management option on the left-hand panel.
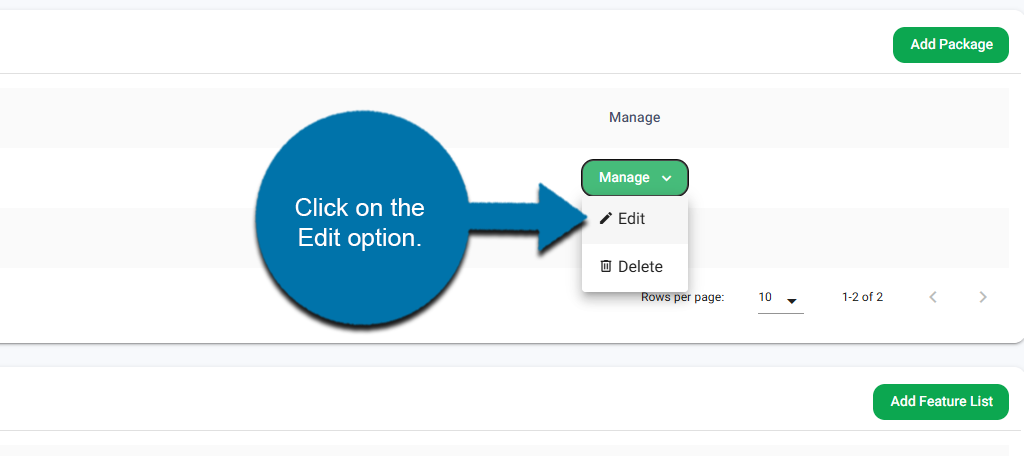
Locate the package that the user is assigned, click on the Manage drop-down, and select the Edit option to view what the package includes.
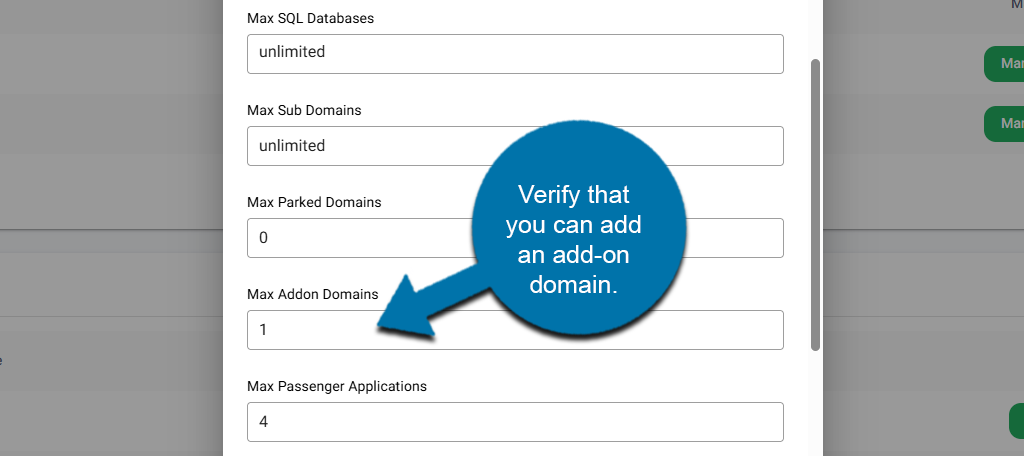
This will open a small window containing all the package information. Scroll down until you find the Max Addon Domains section. Ensure that the value is set to at least 1. Otherwise, you will encounter an error when trying to add an add-on domain.
If the package does not include at least one addon domain, inform the customer that they will need to upgrade their plan to obtain one, or you can manually adjust it if necessary.
Note: All add-on domains share resources with the account. Thus, if a site is already using most of the resources, customers will need to purchase more to support the add-on domain. There are no other limitations on what resources an add-on domain can use.
How to Add An Add-On Domain
Before beginning this process, make sure that the domain name has been registered. You can do this quickly through the GreenGeeks Dashboard for your customers.
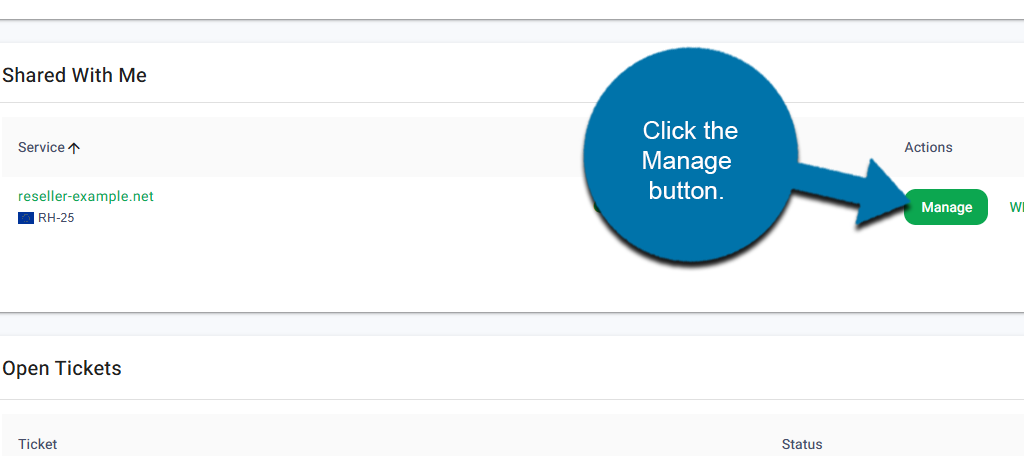
Start by logging into your GreenGeeks Account. Click the Manage button next to your reseller account.
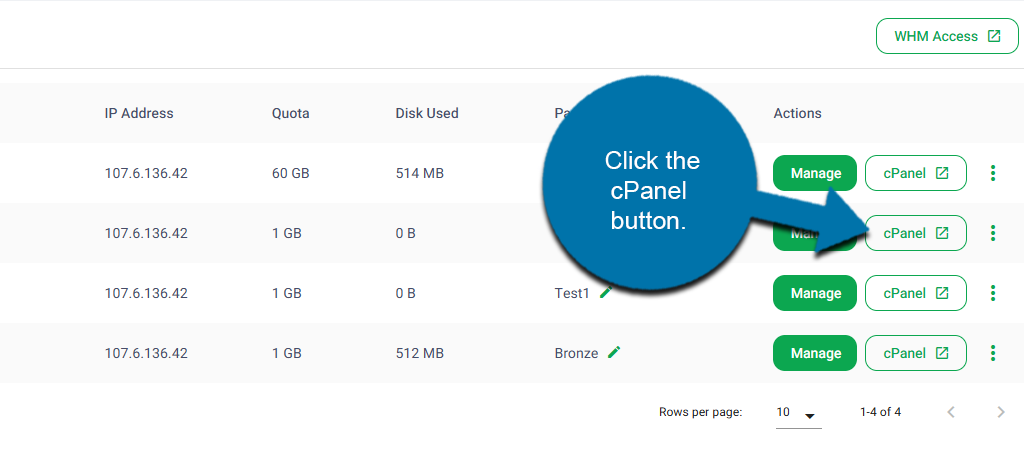
From the Account List section, locate the customer’s account that you want to add an add-on domain to. Click on the cPanel button next to it.
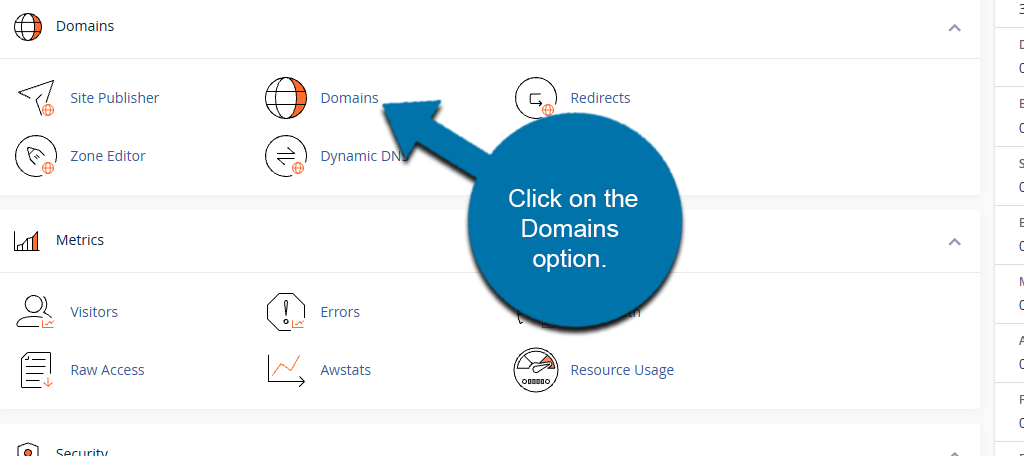
Locate the Domains section in cPanel. Click on the Domains option.
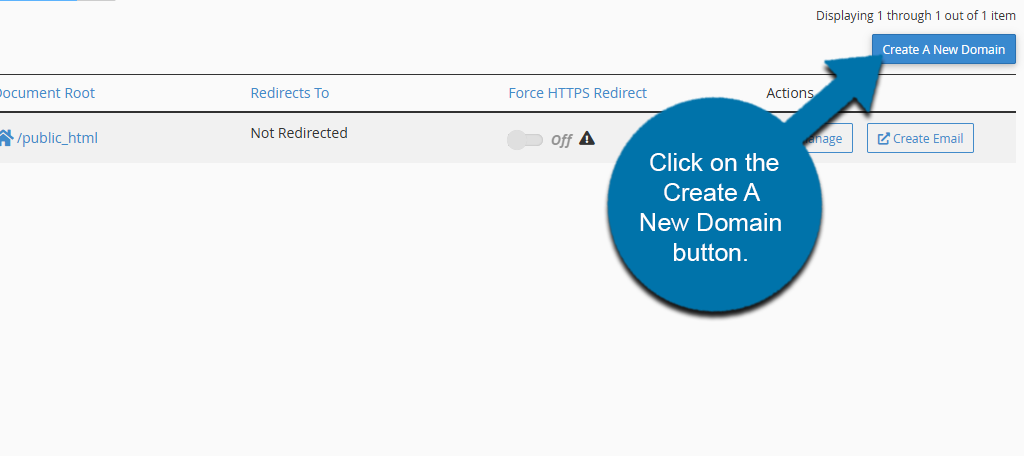
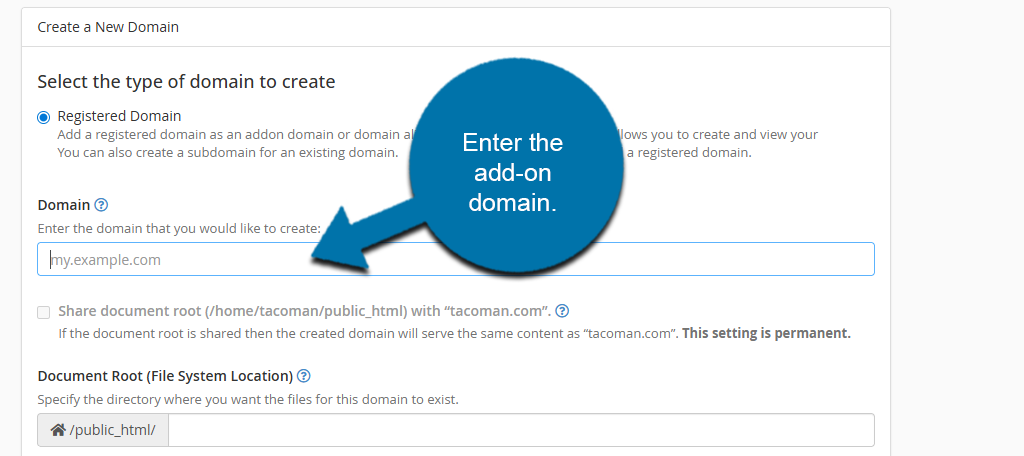
Click on the Create A New Domain button on the top right.
Enter the domain name that you want to add to the customer’s account.
Note: If you see an error message when entering the domain name, then the customer’s account does not currently have a plan that allows them to have multiple add-on domains. They will need to upgrade, or you will need to edit the package settings.
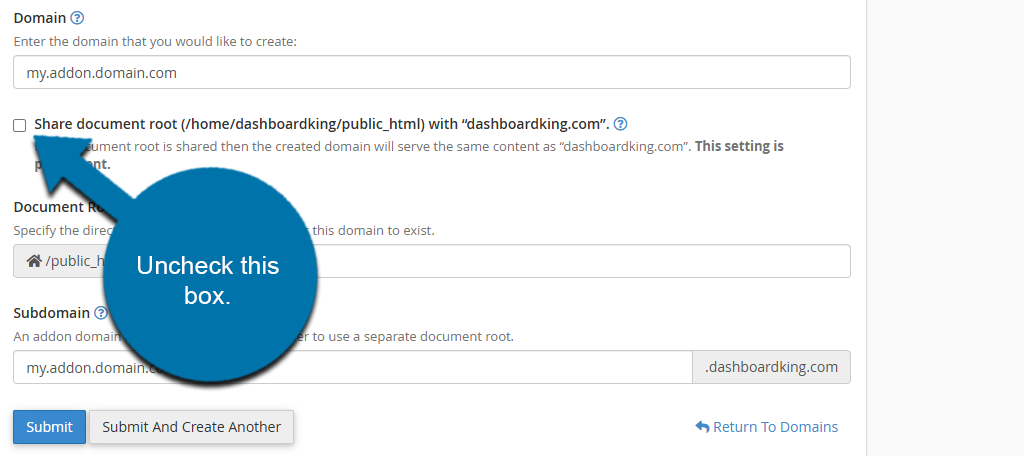
Unselect the Share Document Root option.
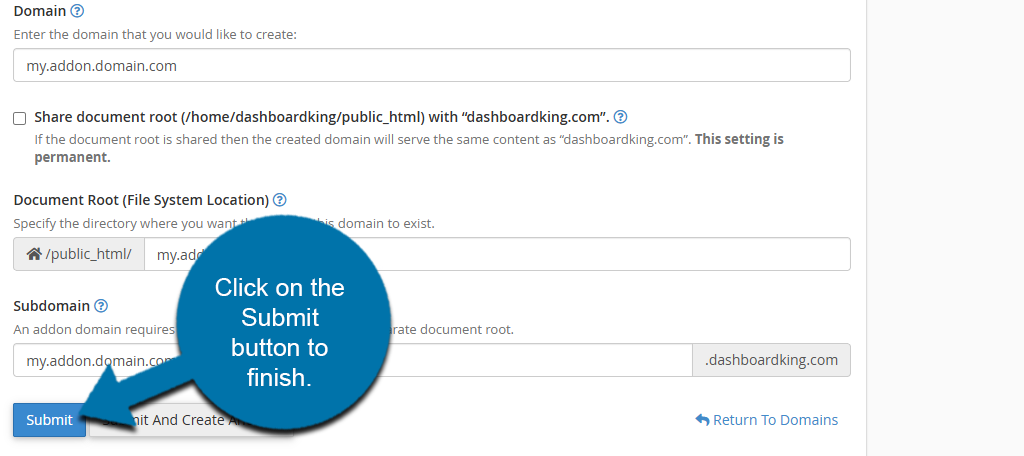
Click on the Submit button to finish.
The process will now begin. This may take several minutes for the domain to get added. Once the domain is added, you are free to upload any files you may need to its directory.
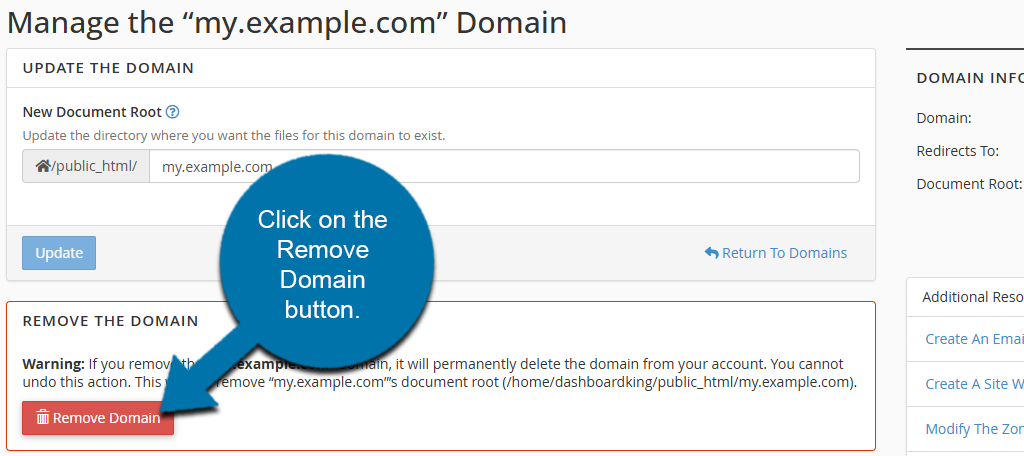
How to Remove Add-On Domains
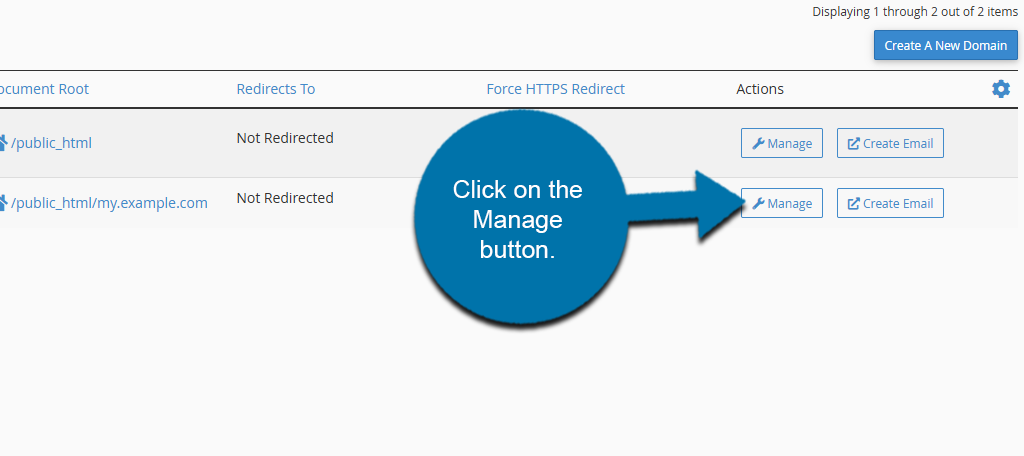
In the Domains section of cPanel, you will see a list of domains associated with your account. Locate the add-on domain you just created and click on the Manage button next to it.
Click on the Remove Domain button to remove the domain. This process will NOT delete the files for the add-on domain. You will need to delete them manually.
You will need to confirm to remove the domain. After that, the domain will be removed after a few moments.