Many users prefer using a File Transfer Protocol (FTP) to help manage their server’s files. Many find FTP clients easier to use, but to use one, you will need to set up an FTP account. You can do this directly from the GreenGeeks Dashboard, and it only takes a few minutes.
Locating the FTP Accounts Area
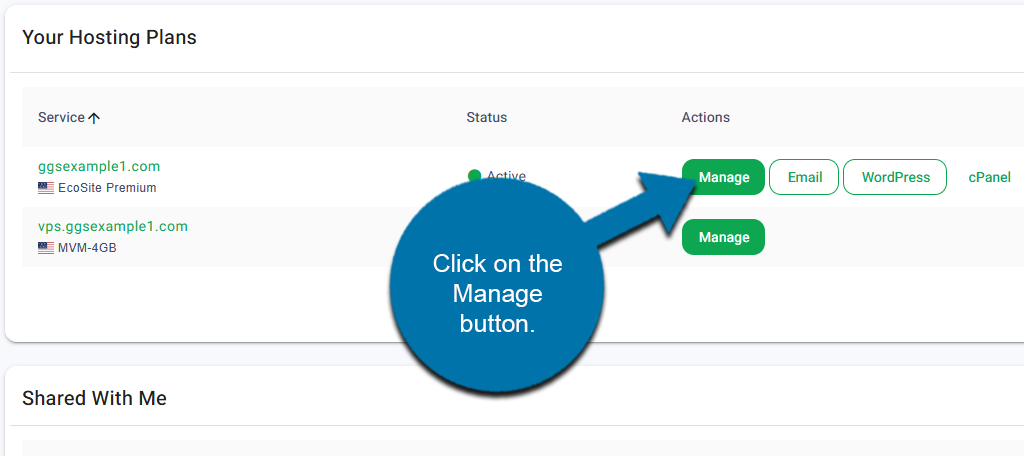
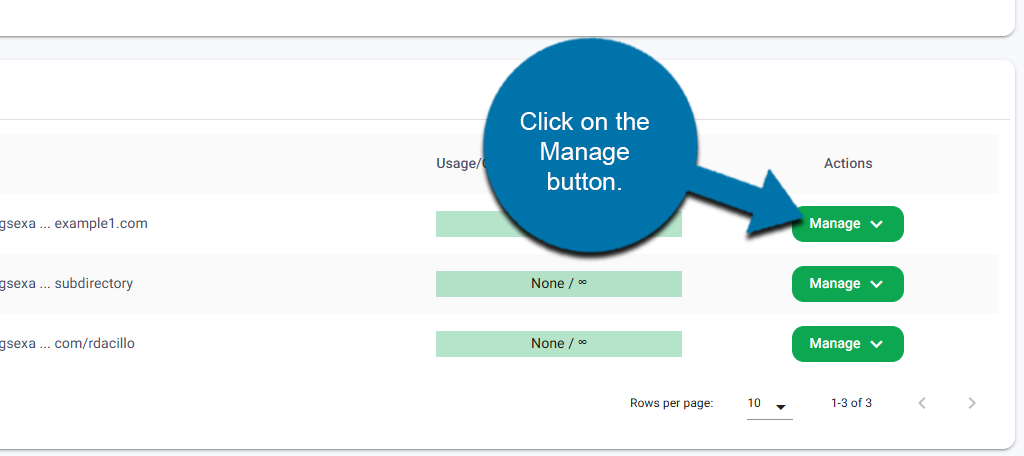
Start by logging into your GreenGeeks account. Locate the domain that you wish to create an FTP account on and click on the Manage button next to it.
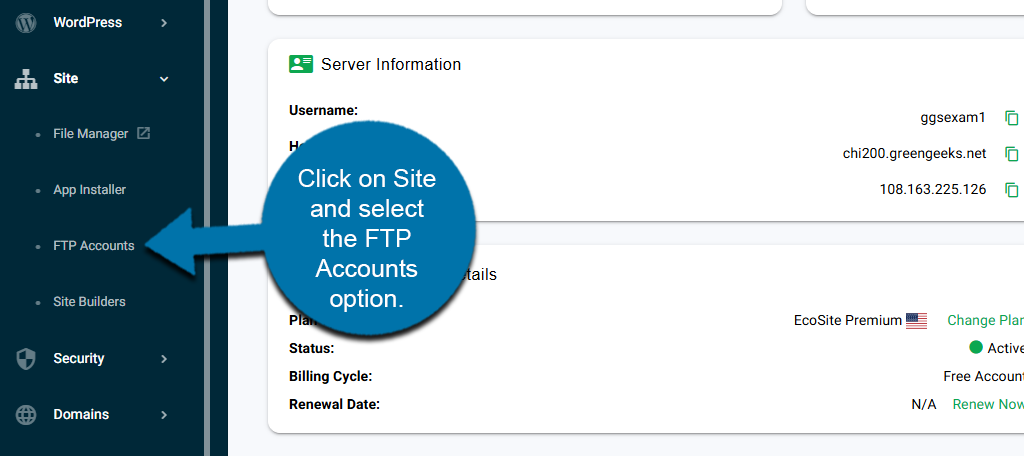
On the left-hand panel, click on Site and select the FTP Accounts option.
Creating An FTP Account
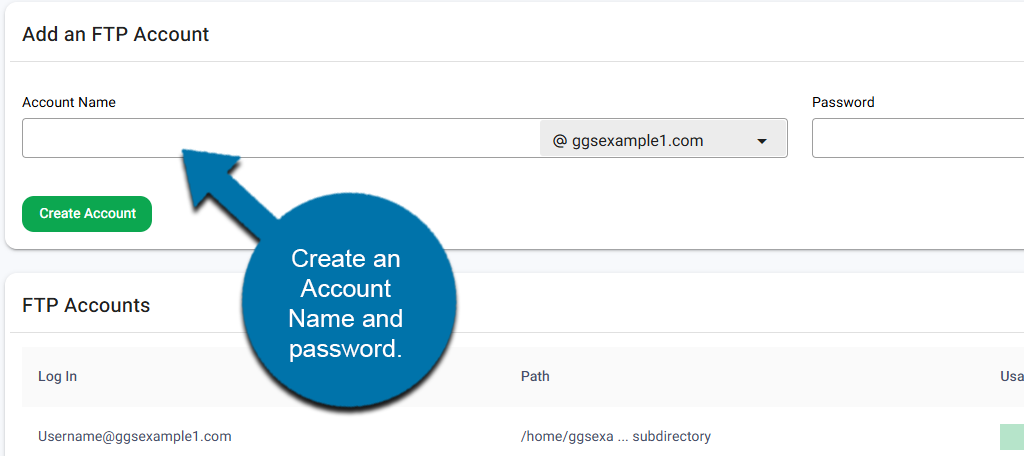
The FTP contains a list of your existing FTP accounts and the ability to create a new one. At the top, enter an Account Name and create a strong password. Include Upper & Lower case letters, numbers, and symbols. Alternatively, you can use the Generate button to make one for you.
Click on the Create Account button to finish.
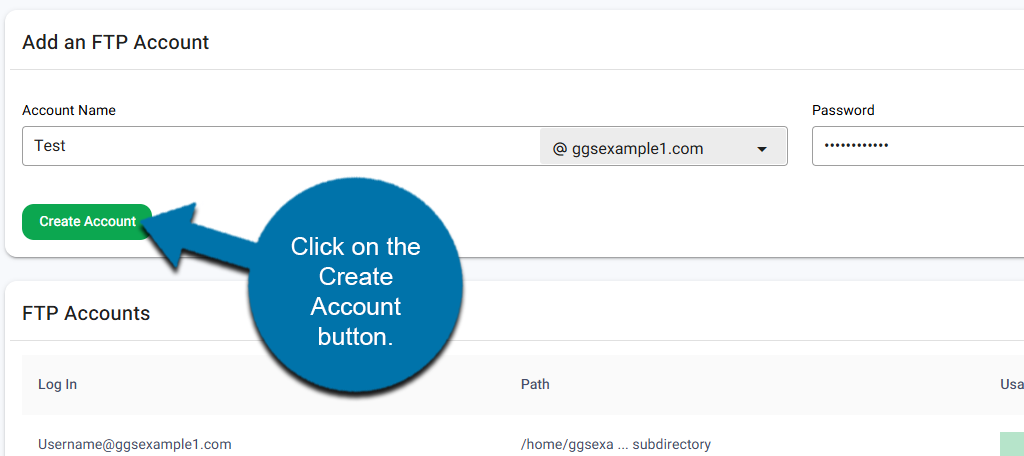
The FTP account will be created and added to your account list. The account will be ready to use after creation, but you can make changes to it at anytime.
To do so, click on the Manage button next to it and select the appropriate action.
The options include changing the home path, quota, password, and deleting it. Any option you choose opens a small window where you can make the necessary changes.