In this article, we’re going to cover how to get started with your GreenGeeks Reseller account and WHM.
The GreenGeeks Reseller Dashboard Overview
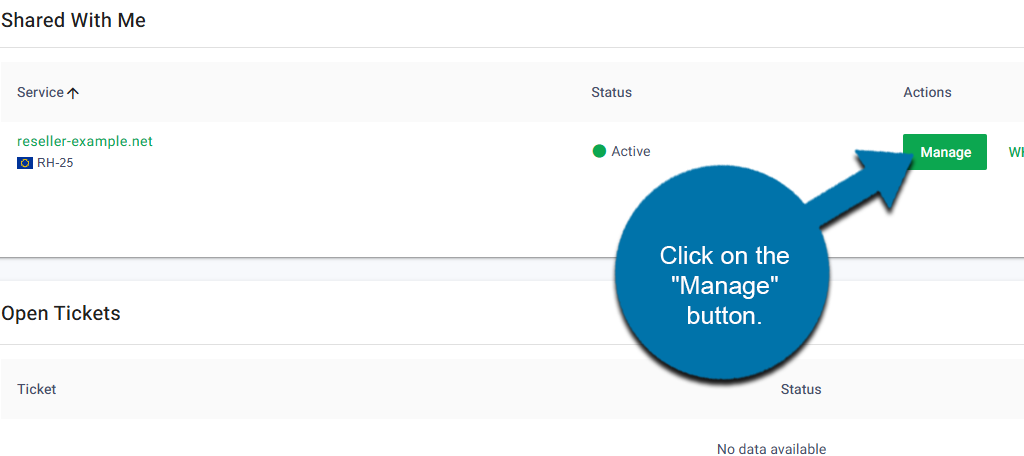
The first thing you should do is log in to your GreenGeeks account. The login information is provided to you when you create a Reseller account with us.
Once logged in, locate your Reseller account and click on the Manage button next to it.
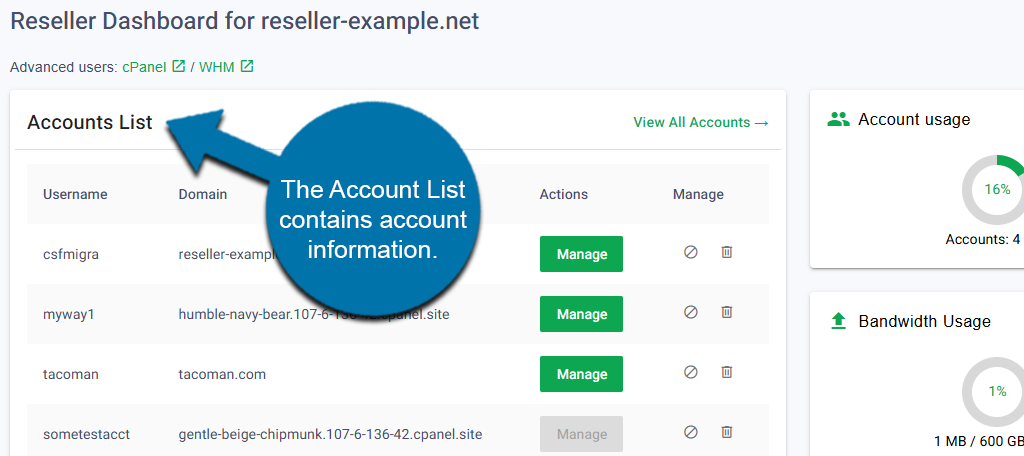
This will take you to the Reseller Dashboard. It contains a variety of useful information that you can quickly access from the Reseller Dashboard.
First, you will see an account list. If you have just started, it will be empty, but once you add customers, you’ll be able to see their account details and manage them quickly.
To the right of this, you will see various server statistics that include Account Usage, Bandwidth Usage, Disk Space Usage, and Inode Usage meters.
This is a good way to quickly view how many resources are still available within your account.

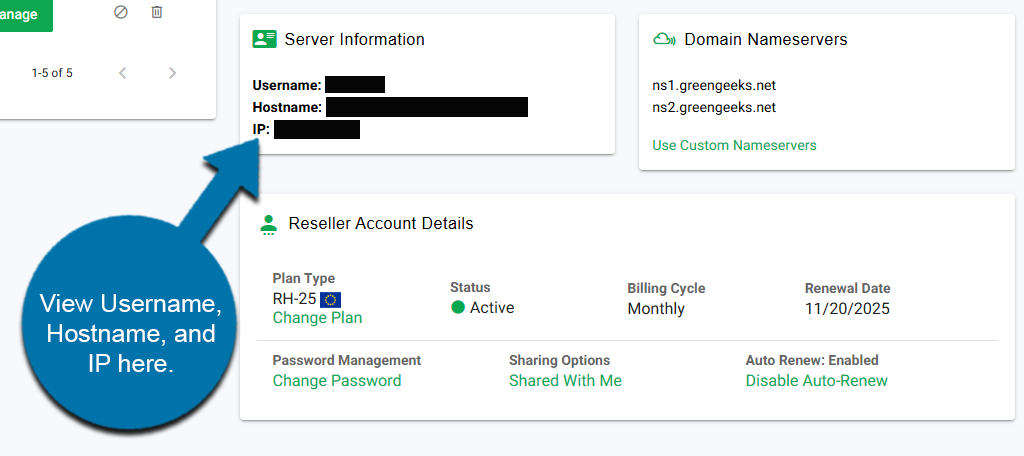
Below these, you will see the Server Information section. This contains vital information such as your Username, Hostname (domain), and IP address.
You can use this information to directly log into your WHM account (see below). Next to this, you can also see your current Nameservers.
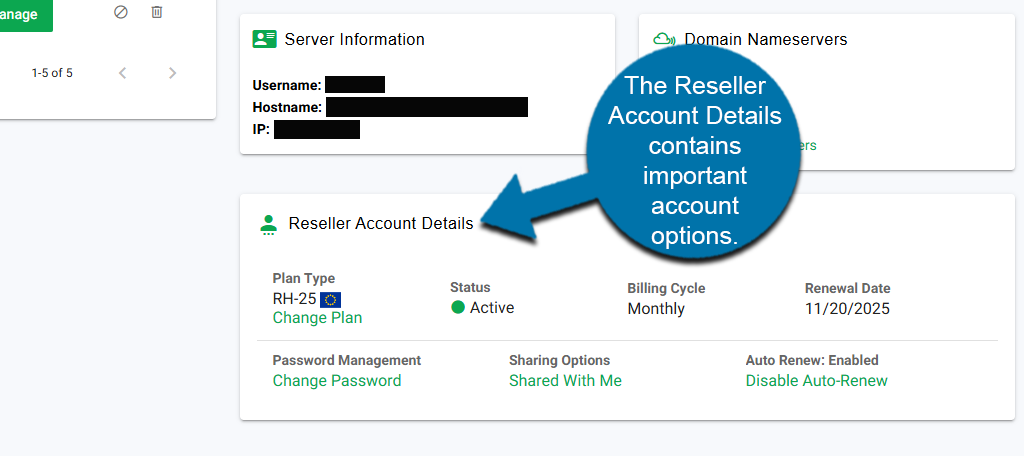
Finally, you’ll see the Reseller Account Details. Here, you can see your plan type, status, billing cycle, and renewal date.
You’ll also find options to change your password, sharing options, and auto-renewal options.
Introduction to WHM for Resellers
The Web Host Manager (WHM) is the control panel for your reseller account. It allows you to manage and customize hosting accounts for your customers. This is done by creating individual accounts for each client, which are typically cPanel accounts.
This provides a scalable way of building your reseller business from a single interface.
How to Access WHM as a Reseller
There are multiple ways to access the WHM as a Reseller.
The first way is to directly access your WHM by using your domain or IP address. This method allows you to quickly access the WHM from your web browser’s address bar.
The other method is to access the WHM from your GreenGeeks account.
How to Access via Domain + IP
You can access the WHM login screen directly via your web browser’s address bar, without needing to log in to your GreenGeeks account. You have two options: you can either use your domain or your IP address.
Enter the following into the address bar for their respective method:
Domain: https://yourdomain.com:2087
Note: The domain name will be included in your account setup email. Alternatively, you can find it by accessing your Reseller Dashboard under Server information.
IP: https://XXX.XXX.XXX.XXX:2087
Note: Your IP address will be included in your account setup email. Alternatively, you can find it by accessing your Reseller Dashboard under Server Information.
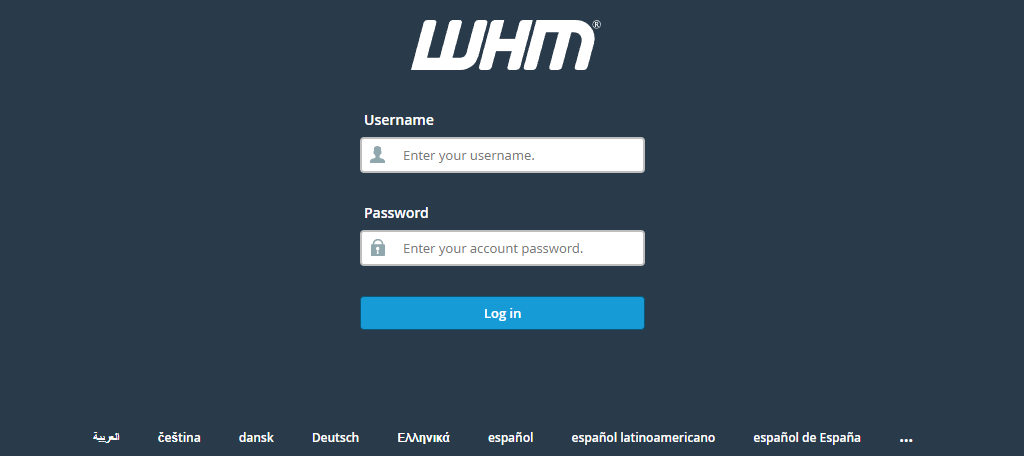
Once you reach the login screen using either method, you’ll need to enter your username and password, which are included in your account setup email.
Navigating the WHM Dashboard
The WHM is the control panel for your Reseller business. You can use it to create customer accounts, grant permissions, and adjust various settings of all domains hosted by it. Let’s take a look at the basic interface in WHM.
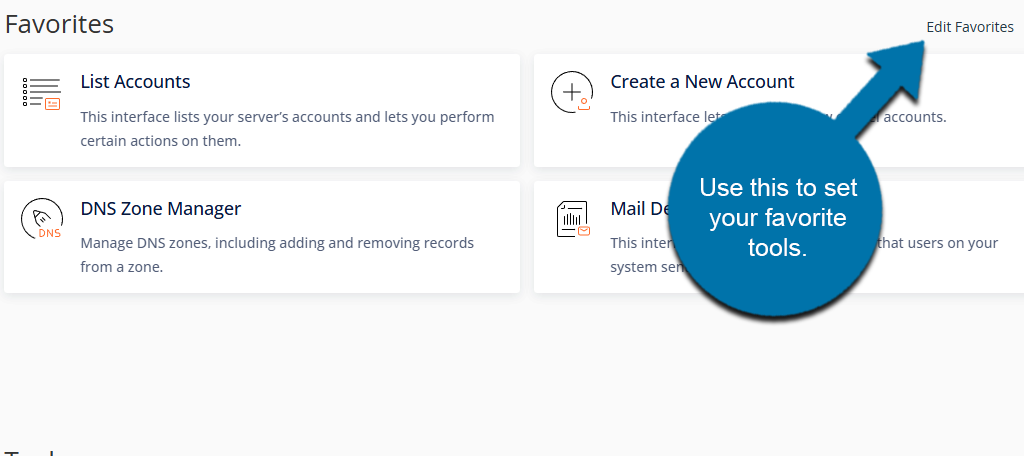
At the top, you will see your favorite tools. By default, these include List Accounts, DNS Zone Manager, Create a New Account, and Mail Delivery Reports.
You can edit these by clicking on the Edit Favorites option.
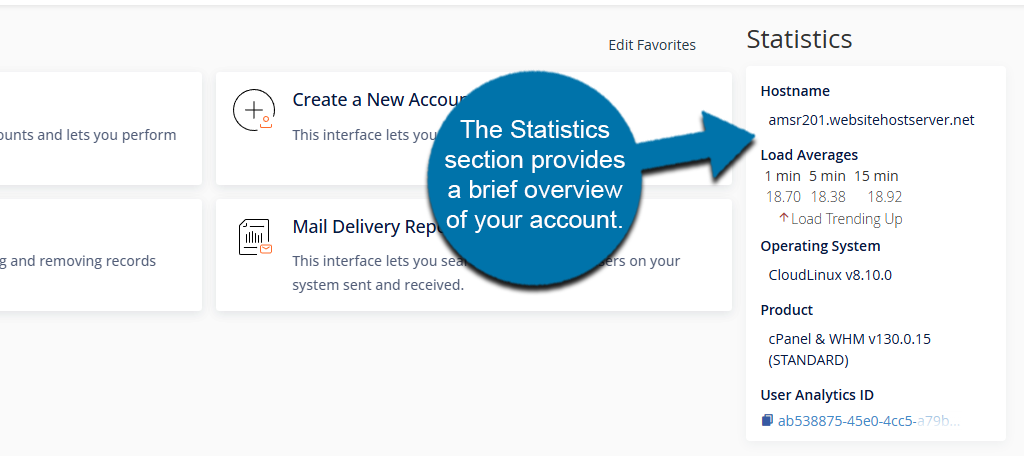
Next to your favorites will be the Statistics section. This includes important information like:
- Hostname
- Load Averages
- Operating System
- Product
- User Analytical ID
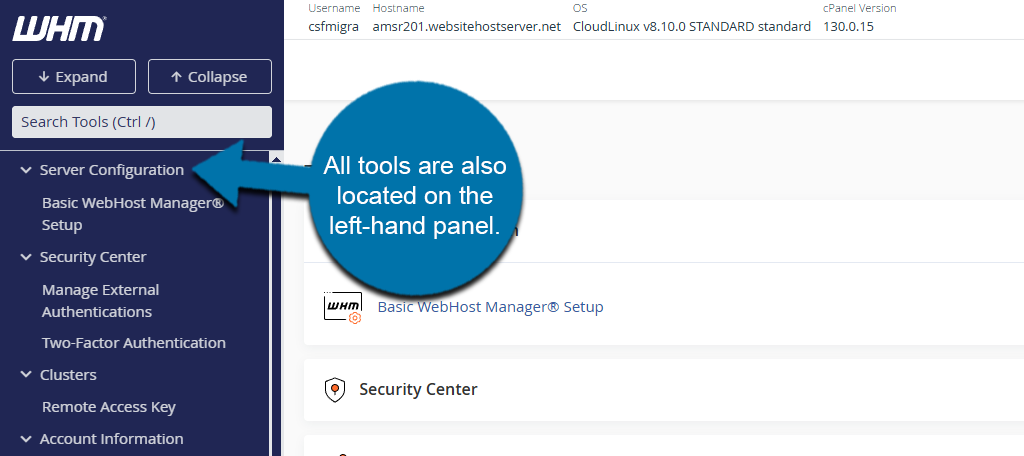
If you scroll down, you will see all of the tools offered within WHM. These tools are separated into different sections. Simply click on the section to expand it and view all of the options within it.
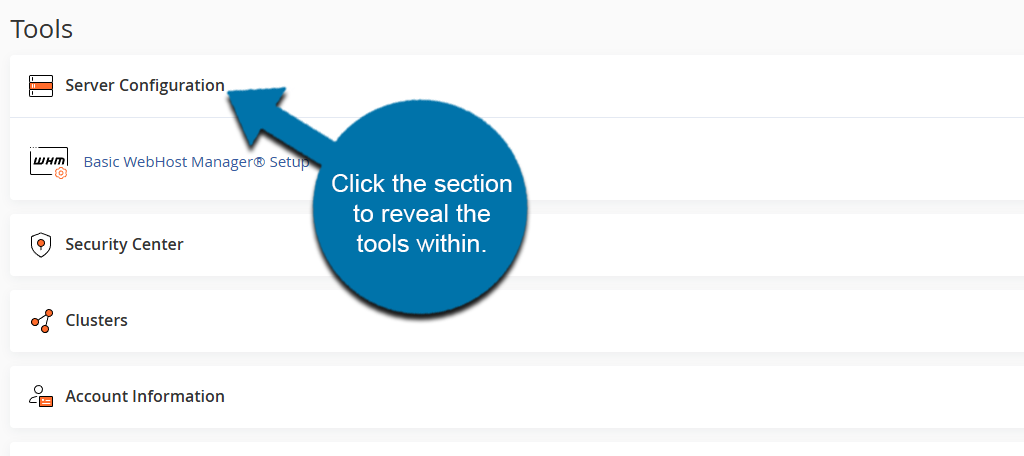
Alternatively, you can also find all of these options on the left-hand panel.
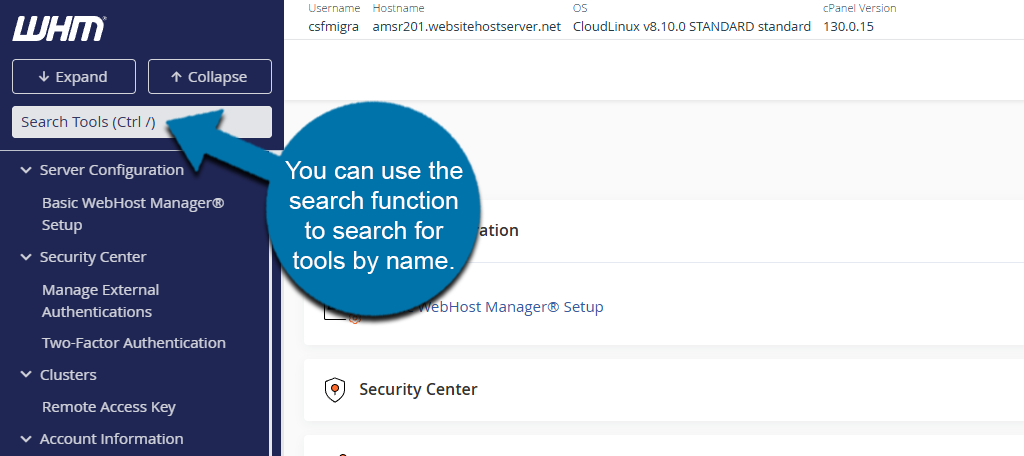
If you are struggling to find a tool, you can use the search bar to directly search for that tool by name.
Configuring Nameservers
The Nameservers for a new account will be the default GreenGeeks DNS. If you would like to use custom Nameservers, you can do so immediately after registering them with GreenGeeks.
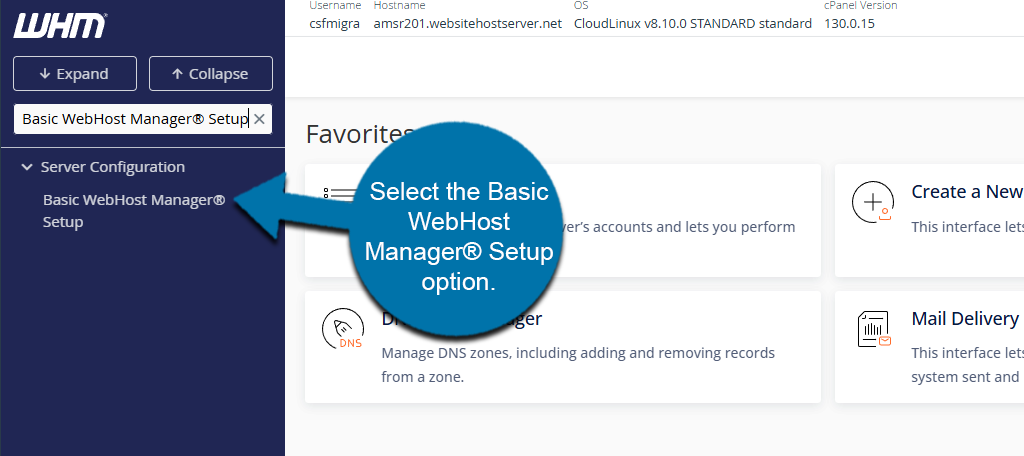
Start by logging in to your WHM account. Search for “Basic WebHost Manager® Setup” in the available search box. Select the Basic WebHost Manager® Setup option.
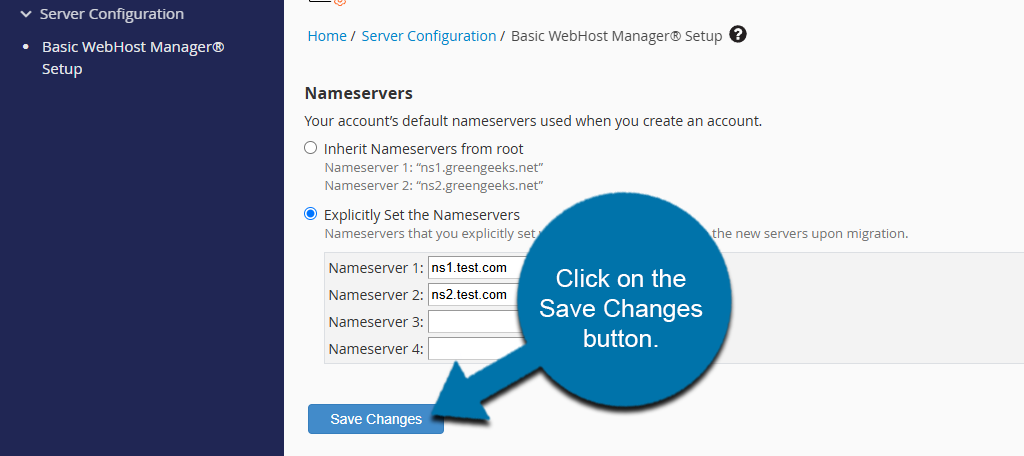
Select the Explicitly Set the Nameservers option. Enter the custom Nameservers into the appropriate boxes below and click on the Save Changes button.
All newly added domains or accounts will now default to the new Nameservers you’ve just set. Accounts created before updating the Nameservers will still be set to the old one.
You can reconfigure these by using the DNS Zone Manager in WHM.
Reseller Account Breakdown
Now that you have a clear understanding of how to log into your WHM account and how to navigate it, let’s discuss what a reseller account can do.
Root-Level Vs. Reseller Accounts
| Feature / Access Level | Reseller Account | Root Account |
|---|---|---|
| Access Level | Limited (sub-admin privileges) | Full administrative access (site admin) |
| WHM Access | Yes, but limited to managing owned/resold accounts | Yes, with full access to all WHM features |
| cPanel Access | Can access customer cPanel accounts | Can access all cPanels and assign ownership |
| Server-wide Settings | No access | Full access |
| Create Other Resellers | Not allowed | Allowed |
| Manage Server Security (CSF) | No | Yes |
| Install Software / Packages | Cannot install software | Full installation privileges |
| Access to All Accounts | Only to own/resold accounts | All accounts on the server |
| SSH Access | Maybe (if enabled by root) | Full SSH access |
| Resource Allocation Control | Can set quotas for clients | Can allocate and override quotas server-wide |
| DNS Zone Management | Limited (for owned domains) | Full DNS control |
| Email / Spam / Firewall Settings | Limited | Full control |
| Server Logs Access | Limited | Full access |
| System Backup & Restore | Only for own accounts | Entire server backups and restores |
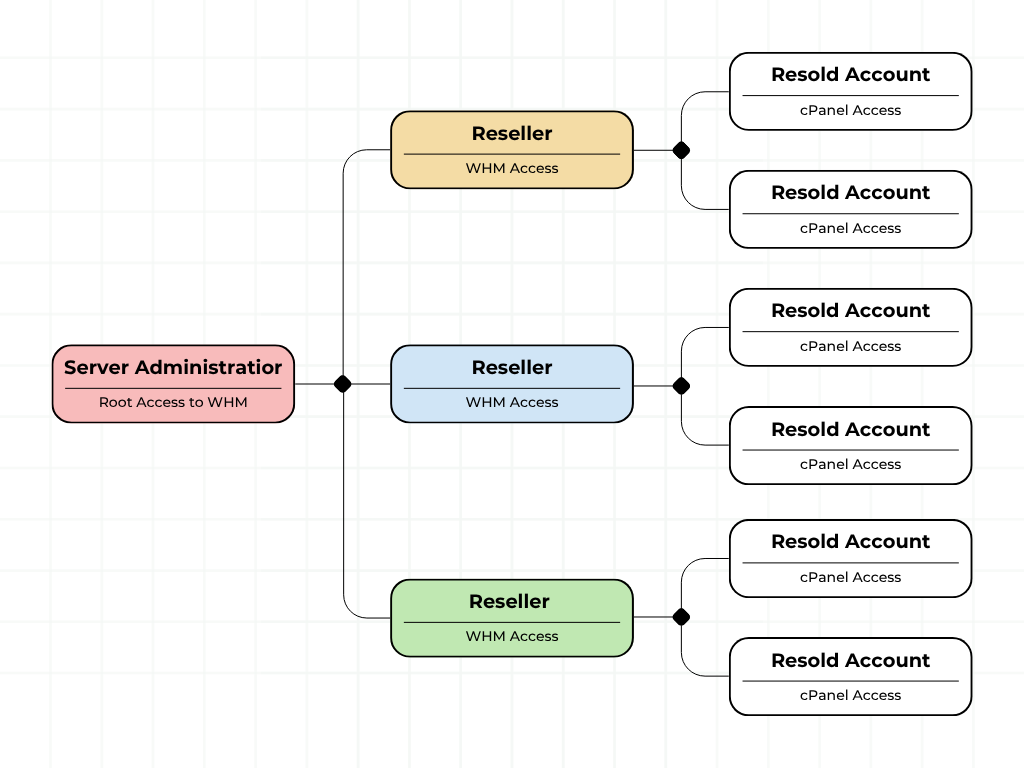
The Root Level user acts as the server administrator for the Reseller account. There can only be one Root Level account per account. It has full access to WHM functions, and can access all accounts lower than it. This account can also tweak the permissions that other accounts have.
The Reseller user is the second-highest tiered account. Resellers work for the Root Level account and have their own Reseller WHM panel that allows them to manage resold accounts under them.
In short, the Root Level user has every privilege, while the Reseller user can only work on the Resold account under it by default. Here is a visual representation of the account hierarchy:
Reseller Account Access and Restrictions
When you create a new reseller account, that reseller will have default privileges assigned to it. These include:
- Basic WebHost Manager Setup: This feature contains some basic configuration settings, like Nameservers.
- Manage External Authentications: This feature allows you to manage your authentication providers and authenticated users.
- List Subdomains: This feature displays a list of the reseller’s subdomains.
- Web Template Editor: This allows you to create placeholder web pages.
- Mail Delivery Reports: This screen allows you to find and review messages sent from and received by your server.
- View Relayers: This screen displays a list of users on your server who have relayed or forwarded mail to remote accounts.
- View Sent Summary: This feature shows the total number of message delivery attempts for each domain.
- Change Log: Displays a list of changes in our software.
- Customization: Use this interface to customize the cPanel interface.
- SSL Storage Manager: Displays SSL keys, certificates, and CSRs that you control.
- Developer Documentation: Brings you to official documentation for WHM & cPanel.
- Manage API Tokens: This feature allows you to create, list, update, and revoke API tokens.
Additional privileges can be granted to Reseller users from the Root Level User (System Admin).
Need Help? We Have You Covered
If you are having trouble accessing your account or need further assistance, do not hesitate to reach out to GreenGeeks support. Our agents are standing by, ready to assist you.