
WARNING: Exercise caution when accessing your account via the command line.
Incorrect or incorrectly used commands can permanently change or delete permissions and files. If you do not have command-line experience or are uncertain about a command, we suggest exploring alternatives to using the command line.
Before connecting, make sure you have:
- Generated an SSH key pair
- Added your public key in GreenGeeks >> Hosting Plans >> Manage the service >> Dev Tools >> SSH Manager
- Your SSH username and server hostname/IP
Step 1: Generate an SSH Key Pair
You can generate SSH keys using either:
- GreenGeeks SSH Manager (recommended)
- Your local computer (Windows Command Prompt, macOS Terminal, or Linux Terminal)
Option 1: Generate SSH Keys Using GreenGeeks SSH Manager
You may follow our support article on How to Create SSH Keys for Shell Access.
Important: Never share your private key. Only the public key should be added to your server.
Option 2: Generate SSH Keys Using Your Computer
If you prefer to generate your SSH key pair locally, you may do so using your computer’s built-in SSH tools or a compatible SSH client.
For step-by-step instructions, please refer to our support article: Generate SSH Keys Using Your Computer.
Important: Never share your private key. Only the public key should be added to your server.
Step 2: Download and Install Tabby
Download Tabby from the official website.
Install Tabby for your operating system:
- Windows
- macOS
Step 3: Open Tabby and Create an SSH Profile
- Open Tabby.
- Click: Settings >> Profiles and connections
- Click: New profile
- Select: SSH Connection
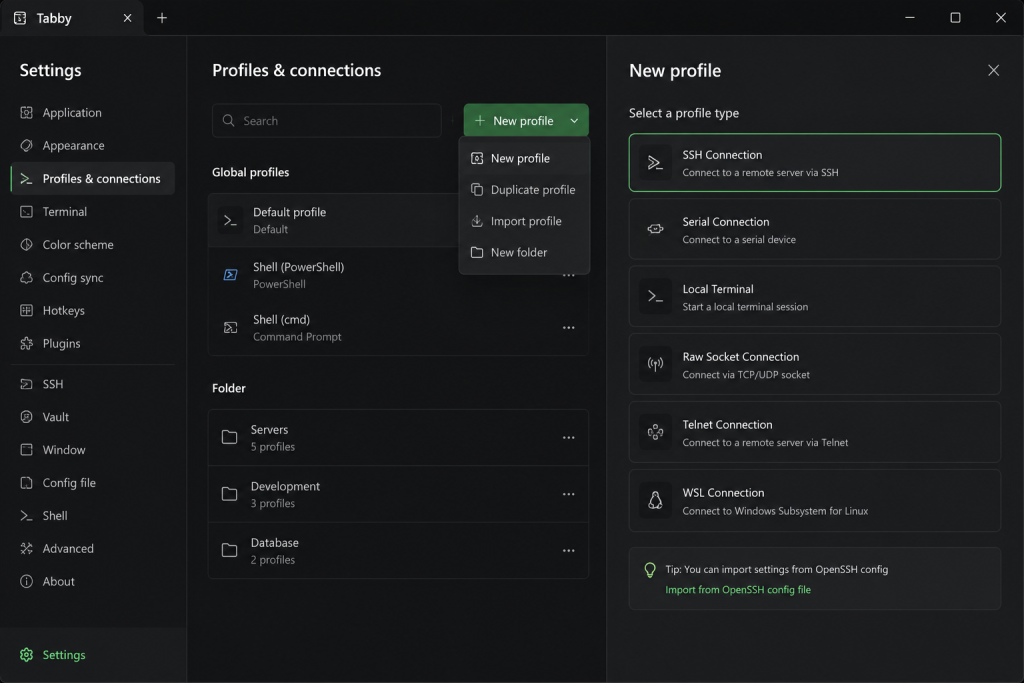
Step 4: Configure SSH Connection Settings
Log in to GreenGeeks, go to Hosting Plans and manage your hosting service.
The Manage section on your GreenGeeks Hosting service will provide you the Server Information that consists of your Server Hostname and Server IP address.
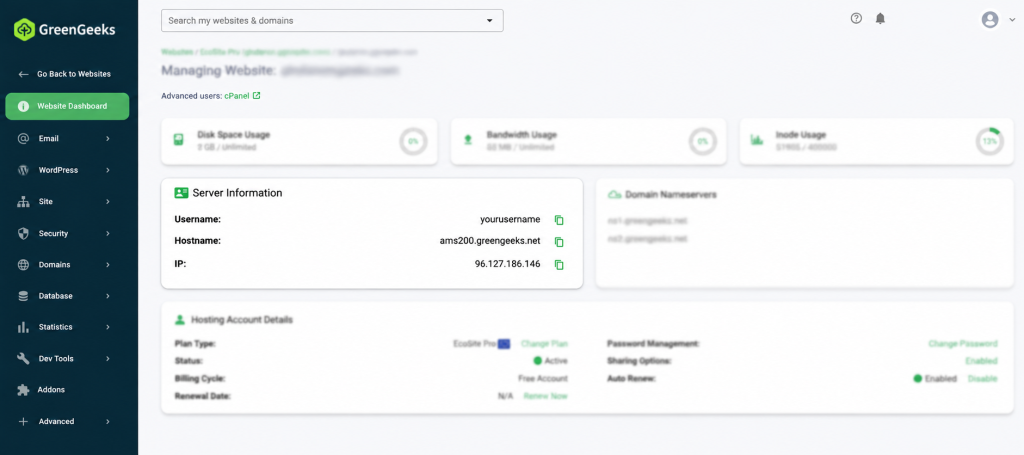
Enter the following information:
Host
Enter your GreenGeeks server hostname or IP address.
Example: server.example.com
Port
Use: 22
Username
Enter your GreenGeeks cPanel username.
Example: yourusername
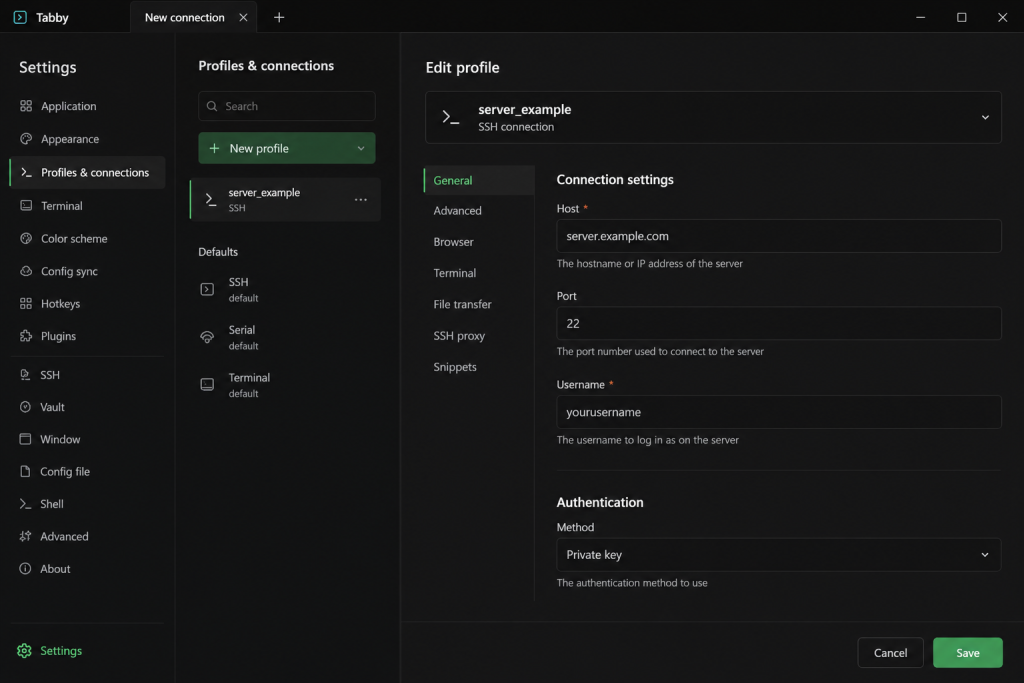
Step 5: Select Your SSH Private Key
Under the SSH authentication settings:
- Locate the Private Key option.
- Select your private key file.
For keys generated using Command Prompt or Terminal:
Windows:
C:\Users\YourUsername.ssh\id_ed25519
macOS/Linux:
/Users/YourUsername/.ssh/id_ed25519
For keys generated through GreenGeeks SSH Manager:
Select the downloaded private key file.
Important: Do not select: id_ed25519.pub or the public key.
The .pub file is your public key and should only be added in SSH Manager.
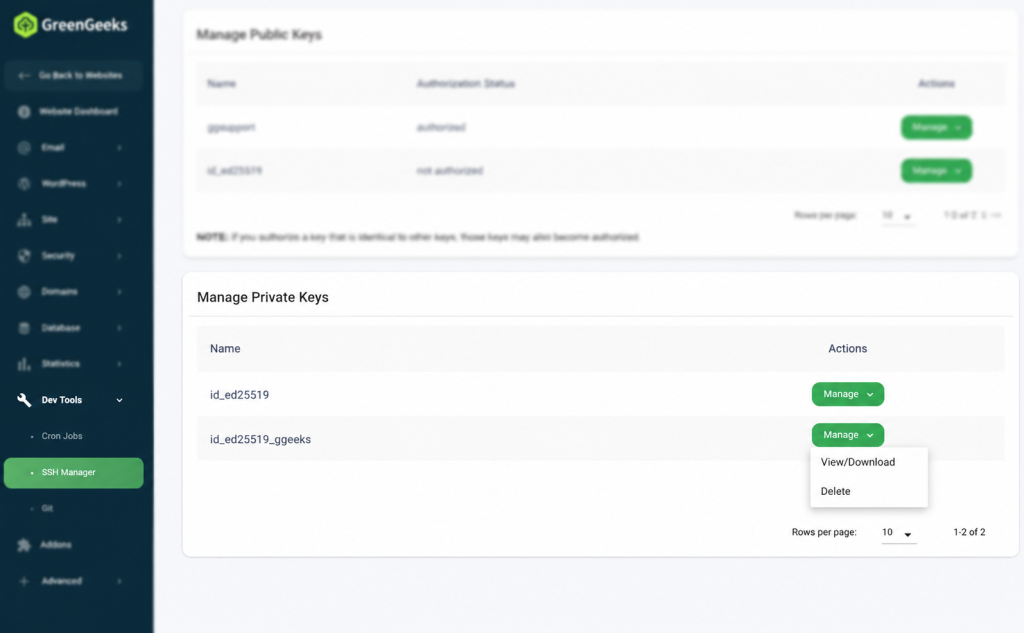
Step 6: Connect to Your Server
- Save your SSH profile.
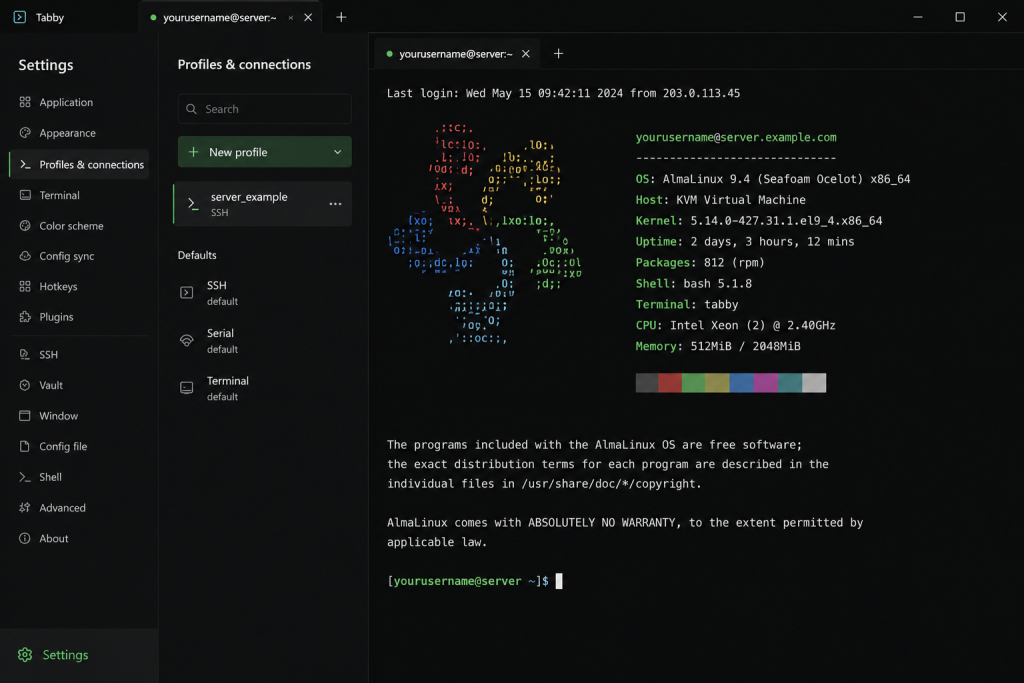
- Click the profile you created to start the connection.
- If your SSH key is configured correctly, Tabby will connect without requesting your account password.
Example successful connection:
yourusername@server:~$
Troubleshooting
If you receive: Permission denied (publickey)
Verify that:
- The correct username is being used.
- The public key was added correctly in SSH Manager.
- The private key exists on your computer.
- The correct hostname/server address is being used.
If you need further assistance connecting to your server, please open a support ticket in GreenGeeks. Our Support Team will be happy to help troubleshoot any SSH connection issues.