
SSH key authentication provides a secure method of connecting to your GreenGeeks hosting account using an SSH client. Instead of authenticating with a password, SSH uses a pair of cryptographic keys: a private key, which remains on your computer, and a public key, which is added to your hosting account.
This article will guide you through generating an SSH key pair on your local computer. Once generated, you can upload the public key to your GreenGeeks hosting account and use the corresponding private key to authenticate securely when connecting via SSH.
Important: GreenGeeks servers do not support SSH password authentication. You must use public key authentication to establish an SSH connection.
Warning: Exercise caution when accessing your account through the command line. Incorrect or improperly used commands can permanently modify or delete files, directories, permissions, or other account data. If you are unfamiliar with the command line or are unsure about a command, we recommend exploring alternative methods or contacting our support team before proceeding.
Step 1: Generate SSH key using your computer
Windows
1. Open Command Prompt.
2. Run the following command:
ssh-keygen -t ed25519
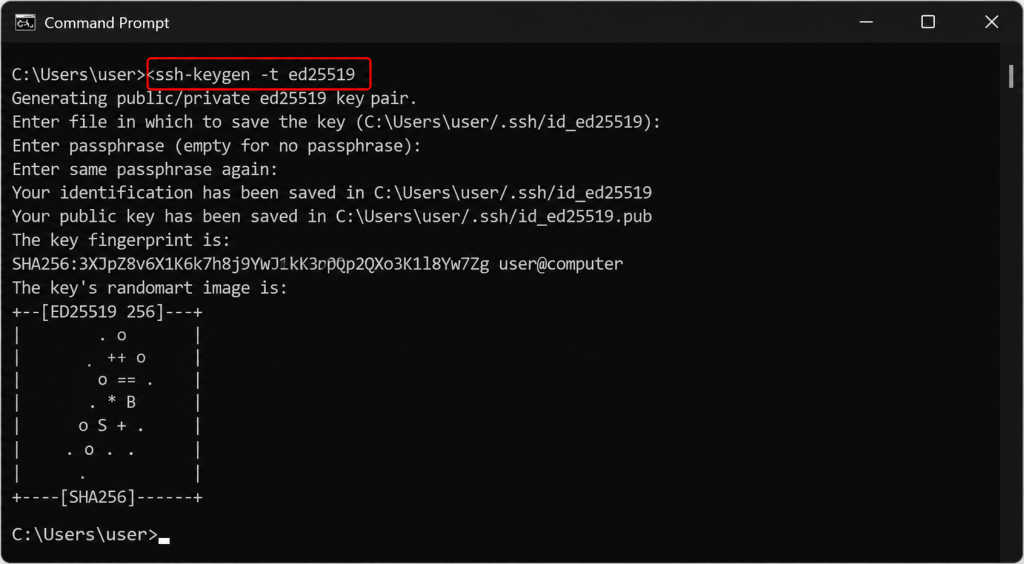
3. When prompted:
- Enter file in which to save the key:
- Press Enter to use the default location.
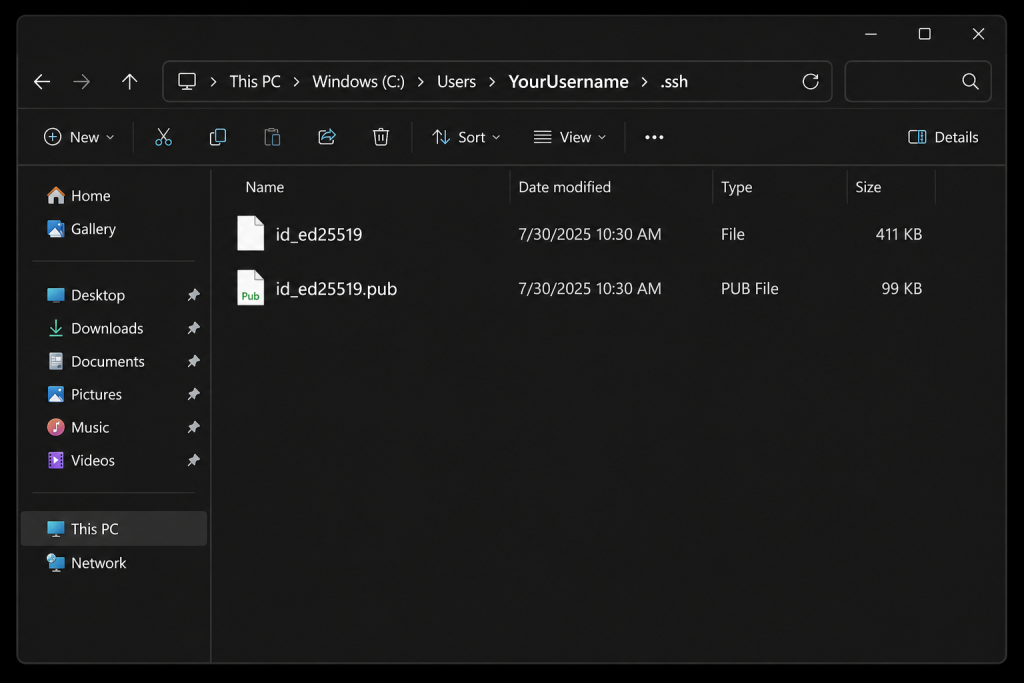
The SSH keys will be saved in:
C:\Users\YourUsername\.ssh\
You will see two files:
id_ed25519
id_ed25519.pub
Mac
1. Open Terminal.
You can open Terminal by:
- Pressing Command + Space
- Searching for Terminal
- Pressing Enter
2. Run the following command:
ssh-keygen -t ed25519
3. When prompted:
- Enter file in which to save the key:
- Press Enter to use the default location.
The SSH keys will be saved in:
/Users/YourUsername/.ssh/
Important: Never share your private key (id_ed25519). Only the public key (id_ed25519.pub) should be added to your server.
Step 2: Copy Your Public Key
Your public key is stored as:
id_ed25519.pub
Windows
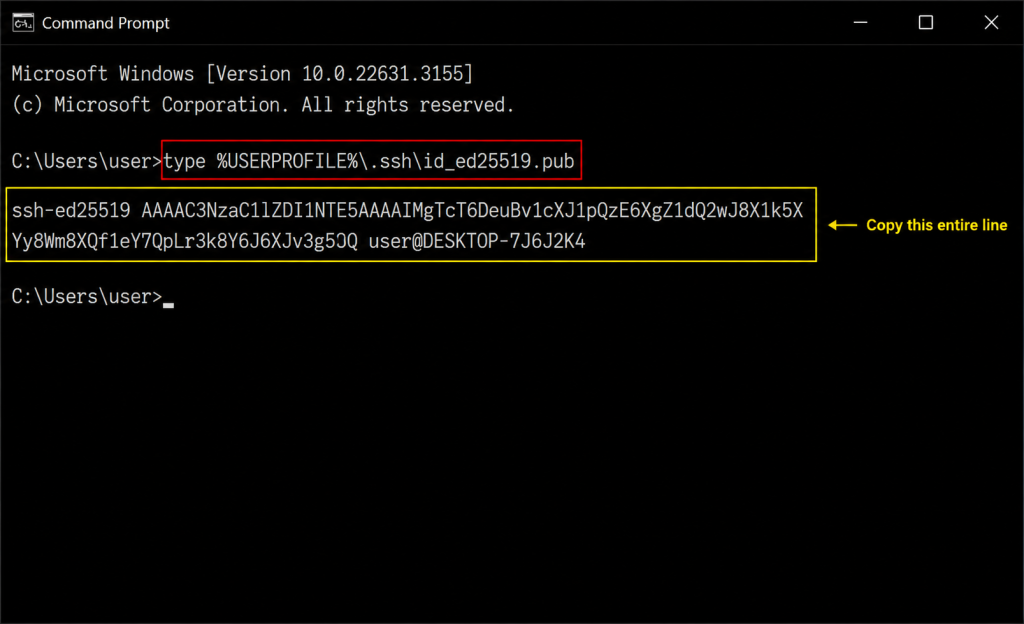
- Open Command Prompt and run:
type %USERPROFILE%.ssh\id_ed25519.pub - Copy the entire line.
Example:
ssh-ed25519 AAAAC3NzaC1lZDI1NTE5AAAA…
Mac
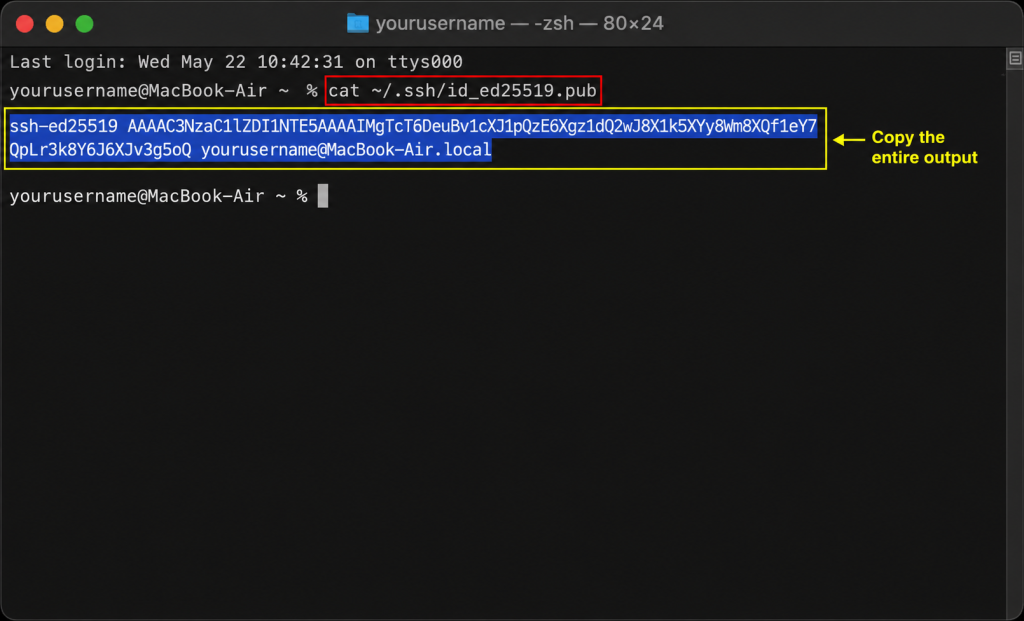
- Open Terminal and run:
cat ~/.ssh/id_ed25519.pub - Copy the entire output.
Example:
ssh-ed25519 AAAAC3NzaC1lZDI1NTE5AAAA…
Step 3: Add Your SSH Key in GreenGeeks
- Log in to your GreenGeeks account.
- Navigate to: Hosting Plans >> Manage the service >> Dev Tools: SSH Manager
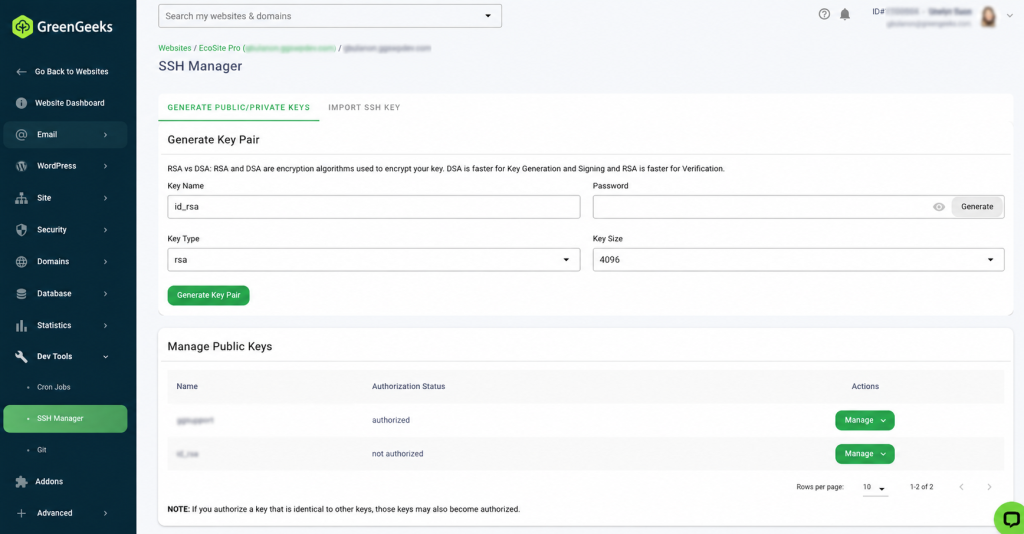
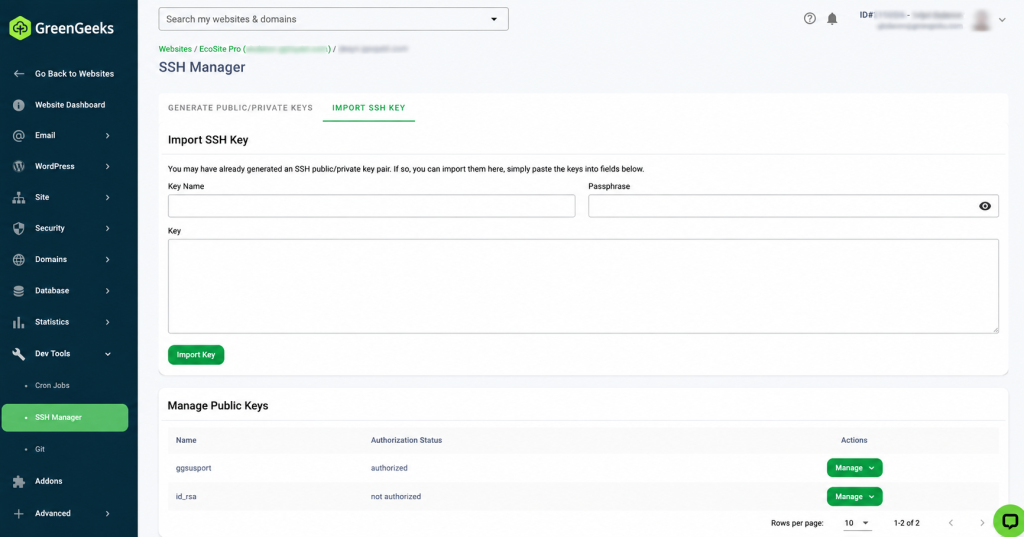
4. If you generated your SSH key locally, import your public SSH key by pasting the contents of id_ed25519.pub into the SSH key field.
If you generated the key using GreenGeeks SSH Manager, use the generated key pair provided by the dashboard.
5. Paste the contents of: id_ed25519.pub into the SSH key field.
Connect using an SSH Client
Once you have generated and authorized your SSH key, choose the SSH client you would like to use:
- Connect Using PuTTY (Windows): Follow our guide to Create/Import SSH Keys for PuTTY.
- Connect Using Tabby (Windows, macOS, and Linux): Use the Tabby terminal client to connect by configuring it with your server details and private SSH key. You may follow our guide here to connect using Tabby terminal.
- Connect Using Command Prompt (Windows) or Mac (Terminal): Follow our guide to connect to SSH using Command Prompt or Mac Terminal.
If you experience any issues while following this guide, please submit a support ticket through your GreenGeeks Dashboard or contact our Support Team via live chat or phone. Our team will be happy to assist you.