Does this sound familiar: You’ve set up your first email address on your new domain, and you’re looking around for a web-based email tool, but all you can find are clunky generic programs that just feel…old.
There must be something else out there, right?
There is, and you probably already use it. Gmail. That’s right; you can read and reply to mail that comes into addresses on your domain name through the Gmail interface.
In this tutorial, we will show you how to use Gmail as your email program for GreenGeeks-hosted domains, or anywhere else your POP email accounts are hosted.
There are ten steps, but they’re easy to complete.
Configuring Gmail for a Domain Hosted Anywhere
These instructions use a regular Gmail account as an example. For G Suite Gmail accounts, some of the labelings may differ, but the general workflow is the same.
Step 1
Log in to Gmail and click the gear icon.
![]()
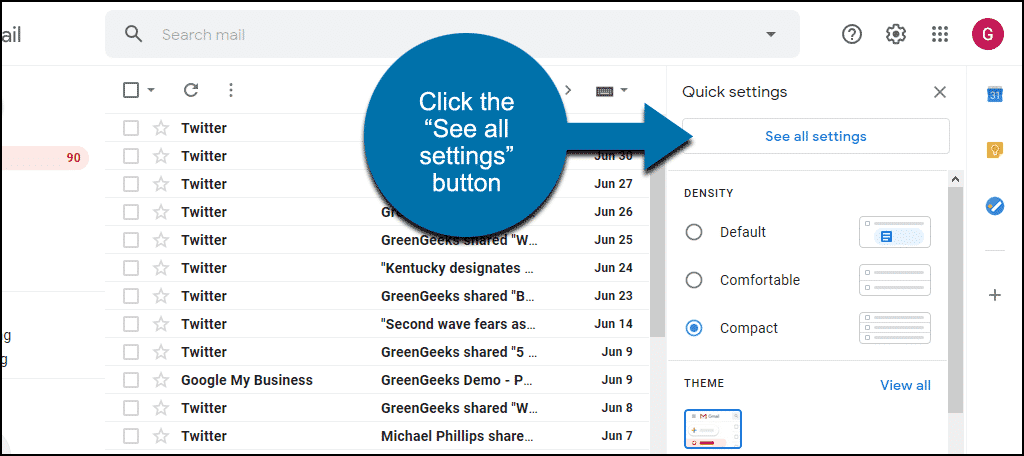
Step 2
Click the “See all settings” button.
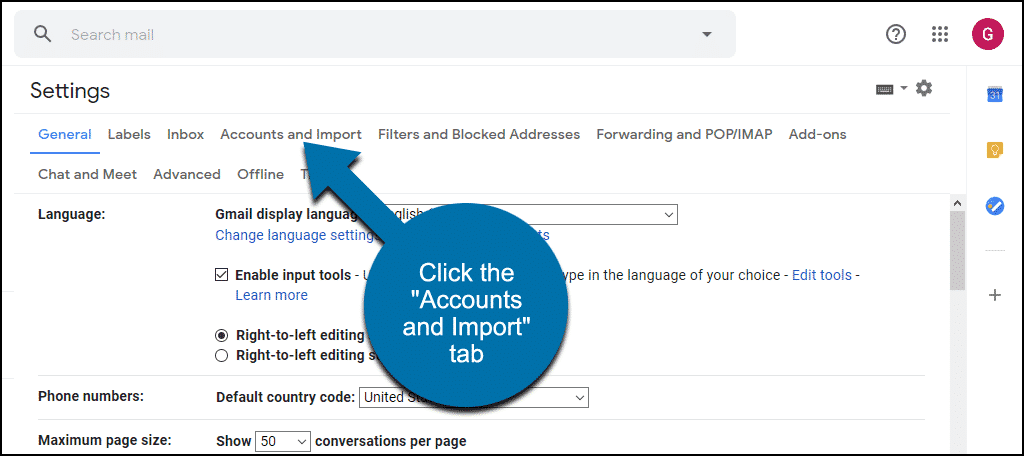
Step 3
Click the “Accounts and Import” tab.
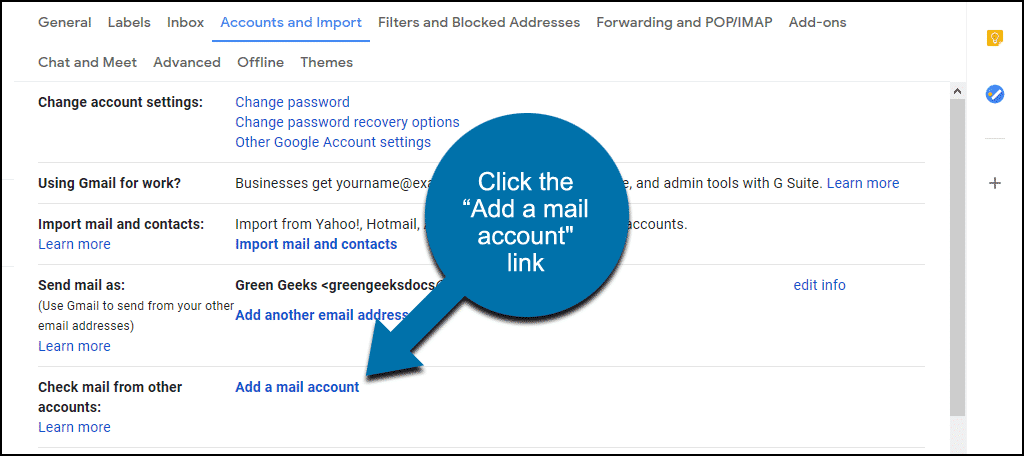
Step 4
Next to “Check mail from other accounts,” click “Add a mail account.”
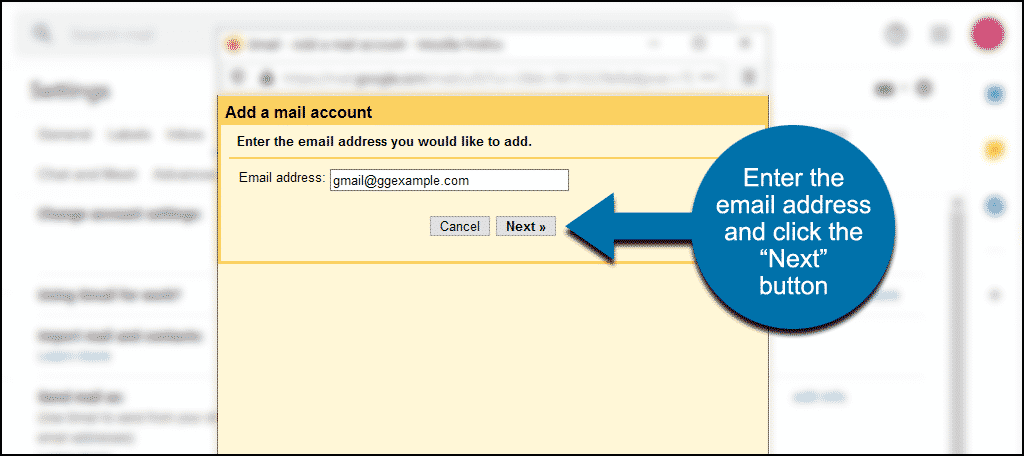
Step 5
An orange popup window will open. Enter the email address that you want to check using Gmail. Click the “Next” button.
Step 6
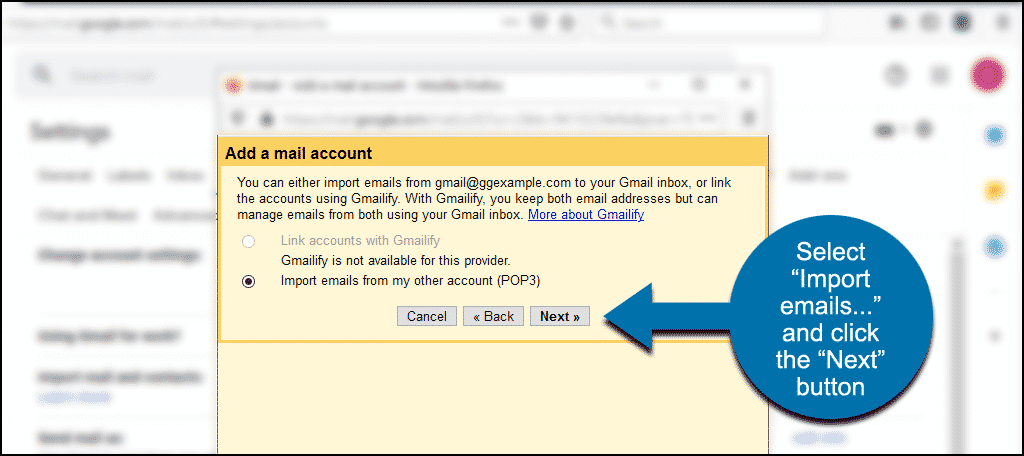
Select “Import emails from my other account (POP3)” and click the “Next” button.
(The “Gmailify” option is for linking accounts from major webmail providers like Yahoo, AOL, Outlook, and Hotmail.)
Step 7
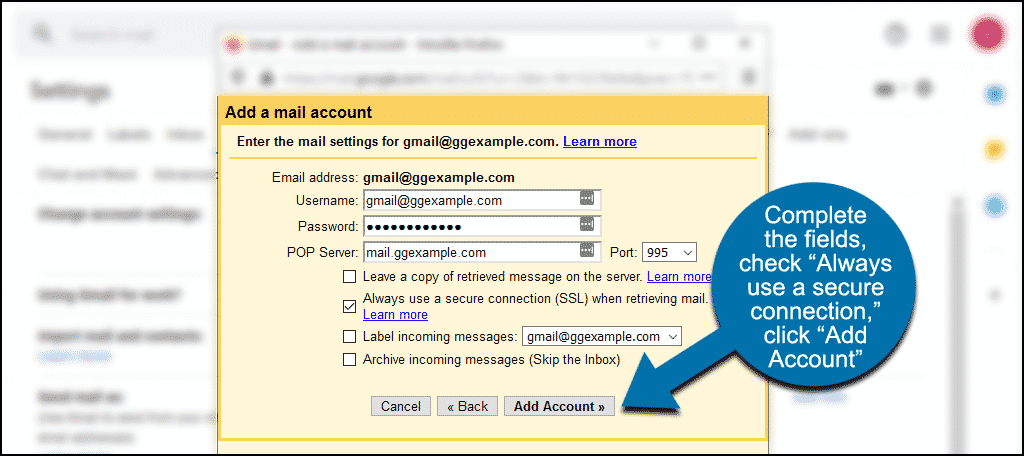
Next, you’ll be on the “Add a mail account” page where you enter your current incoming email server settings.
In this example, I’m using an email address hosted at GreenGeeks, so I’ll use the GreenGeeks-specific configuration. If the email address is hosted elsewhere, the ports and server settings may be different.
If you’re unsure of the settings, check out the article, Where to Find Mail Server Login Information for GreenGeeks-hosted Domains.
- Username is typically your complete email address, not just the part before @.
- Password is the POP account password that you used when you set up the email address.
- POP Server will be pre-populated with mail.ggexample.com (where ggxample.com is the domain name for the email address you entered earlier).
- Port is 995.
- Check the box for Always use a secure connection (SSL) when retrieving mail.
Everything else can be left in its default state.
If you do not intend to use Gmail exclusively, check the box for “Leave a copy of retrieved message on the server” that will allow you to pull your mail down from another source in addition to Gmail.
Note that if you use that option and your GreenGeeks-hosted email boxes become full, incoming mail will bounce. To prevent that from happening, do not check “Leave a copy of retrieved message on the server.”
Click the “Add Account” button.
Step 8
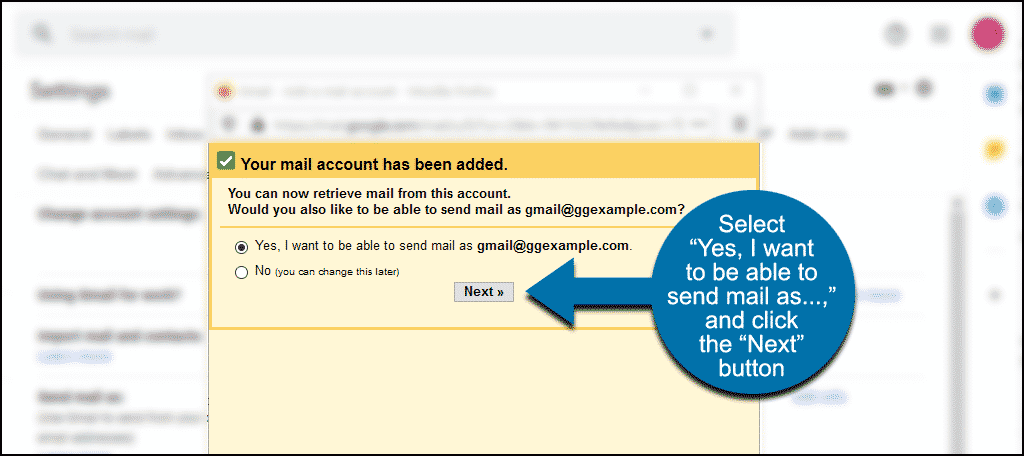
The next window will verify that your account has been added.
You will also be given the option of being able to send mail “as” the new address. If you intend to use Gmail as your only email client, or if you ever want to respond to the incoming mail for your newly set up account, select “Yes, I want to be able to send mail as…” and click the “Next” button.
Step 9
In the next window, enter the name you want to appear as the “sender” or “from” name of the outgoing email.
In most cases, you want to leave “Treat as an alias” checked (see this Google explanation of the setting).
Click the “Next Step” button.

Step 10
Enter your current outgoing (SMTP) email server settings and click the “Add Account” button.

If you’re unsure of the settings, check out the article, Where to Find Mail Server Login Information for GreenGeeks-hosted Domains.
If you are adding a GreenGeeks-hosted email but do not have SSL on the account, you’ll enter the server name in the SMTP Server field, rather than the domain name.
Step 11
Before Gmail lets you send mail from the new address, they want to verify that you can receive mail there, so they send a verification code.
You can click a link in the verification email, or cut and paste the confirmation code in the “Confirm verification and add your email address” box as shown below, and click the “Verify” button.

The popup window will disappear, and you’re ready to go.
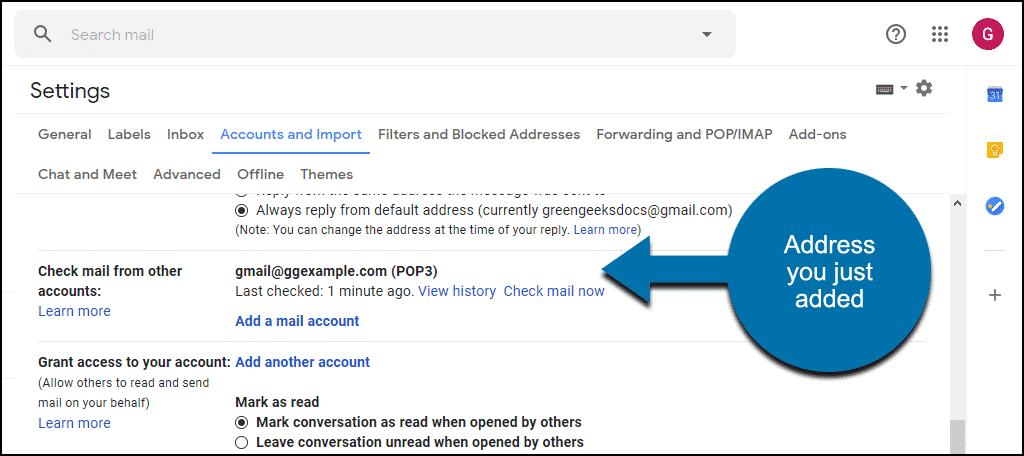
You’ll now see the address you added in the “Accounts and imports” settings.
Both the regular Gmail account and the G Suite Gmail account will let you add up to five outside email accounts using this method.
I am still looking for answer on Greeekgeeks, Cloudflare, and Gmail issues.
Tech support sent me an email looking elsewhere for help.
Hi!
I’m currently trying to set up my gmail to take my domain mail. I keep getting “Server denied POP3 access for the given username and password” and I’m not sure why. I have triple checked username, password, and server to make sure they are right and I’m still getting the same message.
Attention GreenGeeks this article is out of date. Not exactly how gmail does it anymore. You’d probably save customer service time by updating this.
Your fellow geek Whitney
Thanks for the heads-up, Whitney. We’re actually updating this article later today.
Hi, is this article now up to date? I can’t see a publish date, but I can see it was due to be updated.
Thanks,
Jack
Hi any chance this article has been updated yet? am still unable to get it to work..
The article was updated at the beginning of July.