Sooner or later, most of us will have the need to export WordPress data. Maybe for a site migration or to get user information for a marketing campaign. Whatever the reason, if you need to export any kind of data from your WordPress site to use elsewhere, this tutorial will show you how to do it.
WordPress has a built-in export function (Tools > Export) that will export posts, pages, comments, custom fields, terms, navigation menus, and custom posts. It works great, but it exports an XML file. Is there any way to make WordPress export a CSV file rather than the default WordPress XML export?
As a matter of fact, there is. But to do it, you’ll need a WordPress export plugin. We’re going to use WP All Export. It extends beyond the abilities of the native WordPress export system, so let’s get ready to export.
WP All Export
Log in to your WordPress admin panel.
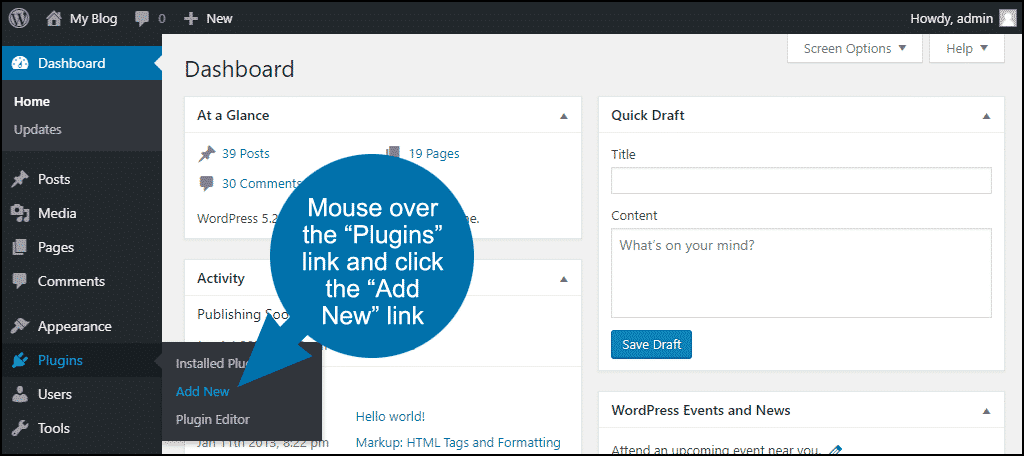
In the left column navigation mouse over the “Plugins” link and click the “Add New” link.
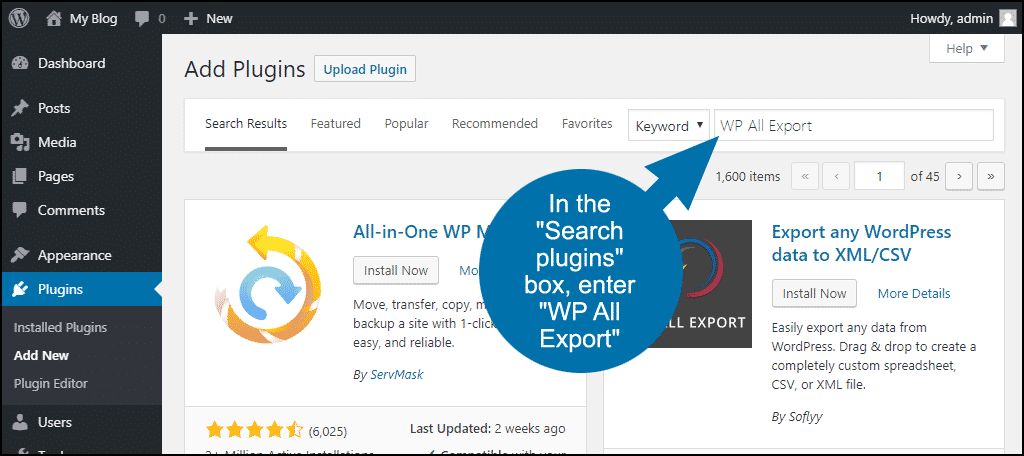
In the “Search plugins…” box, enter “WP All Export.”
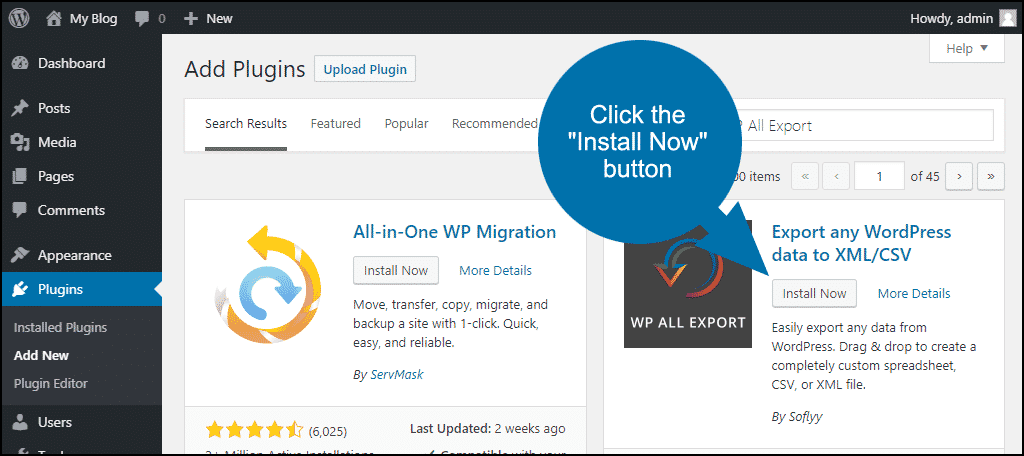
Once you have located the plugin, click the “Install Now” button.
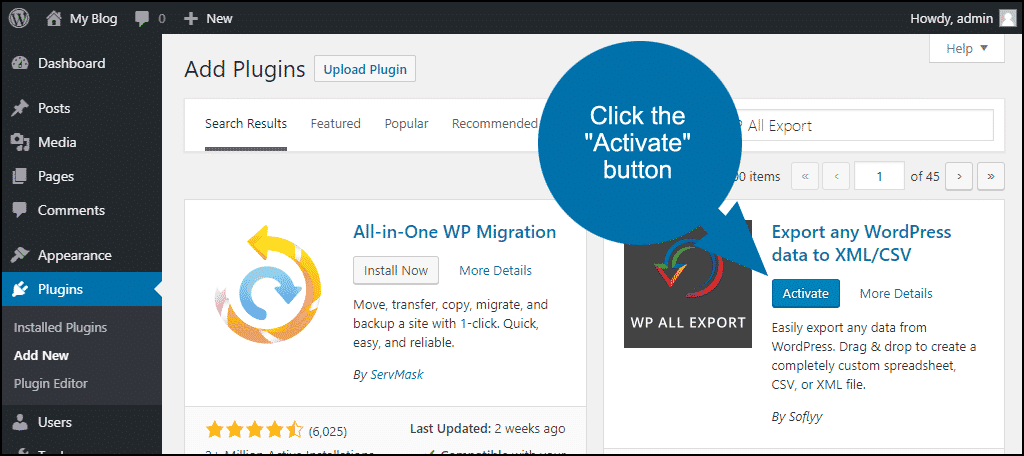
When the plugin has been installed, click the “Activate” button.
Using WP All Export
We’re focusing on how to export WordPress data as a CSV file, but the WP All Export plugin can do a lot more than that. Perhaps most notably, it can schedule automatic exports, export user data, and even export customers and orders from WooCommerce.
All things that the built-in WordPress exporter can’t do.
To get that functionality from WP All Export, you’ll have to opt for the paid version of the plugin, but I thought it was worth mentioning here.
Let’s see how we can export WordPress data in the CSV format.
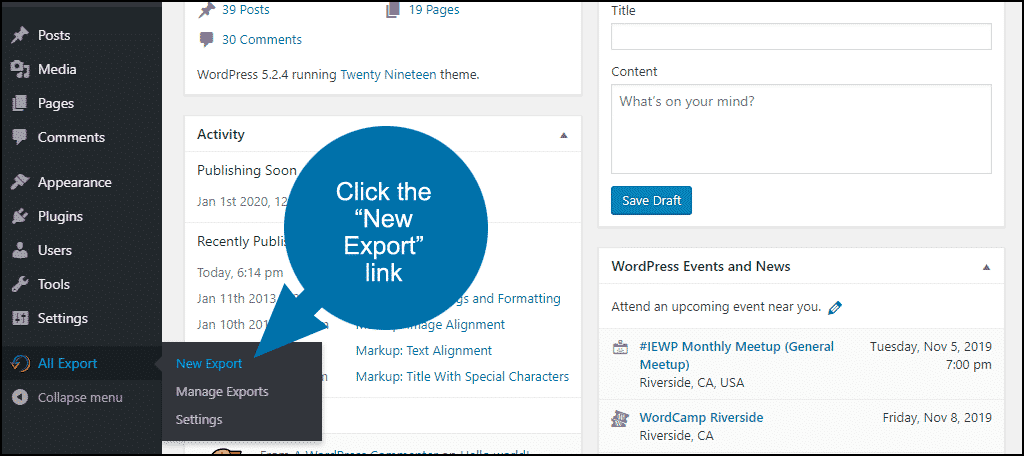
In the left column navigation, mouse over the “All Export” link and click the “New Export” link.
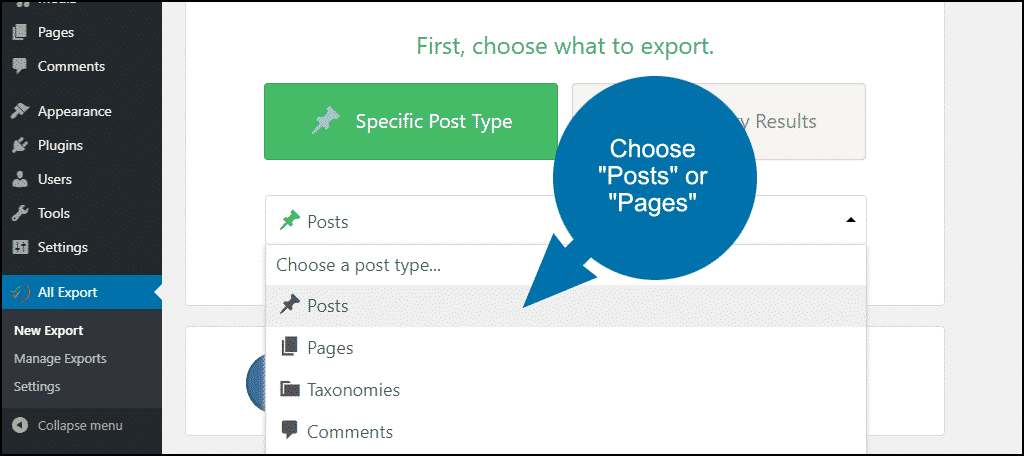
If you’re comfortable writing your own queries, you can use the “WP_Query Results” button. To keep it a bit more simple in this tutorial, I’m going to use the “Specific Post Type” option.
Click the “Choose a post type…” drop-down and choose “Posts” or “Pages.” Those are the only options that will work in the free version of the plugin.
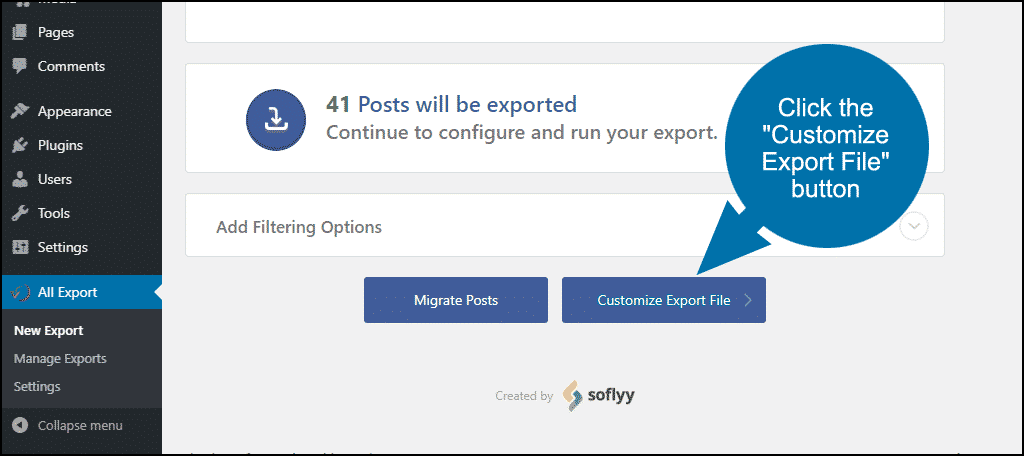
You’ll see a dialog letting you know how many posts will be exported.
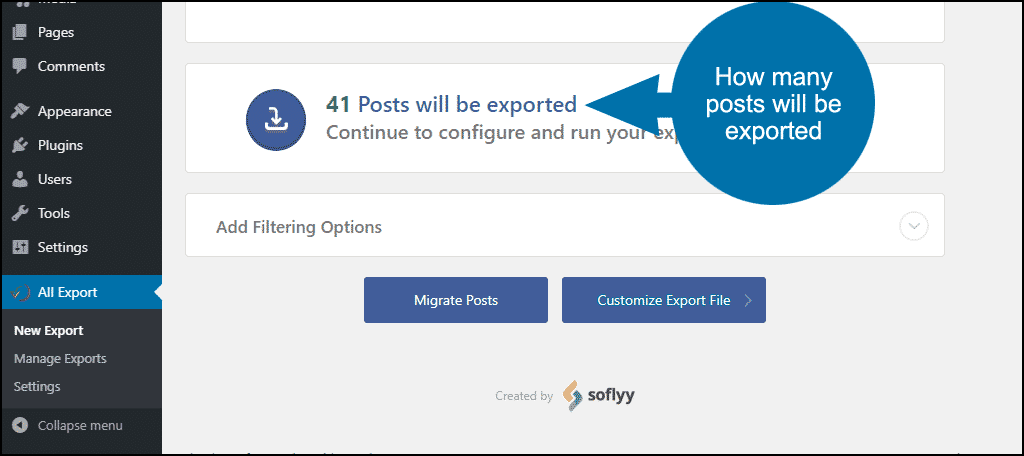
Below that, there’s an “Add Filtering Options” drop-down, which may appear tempting. But, it is also not available in the free version of the plugin.
“Customize Export File” is available though, so we’ll take a look at what we can do. But first, let’s do a standard export without any customization.
Standard Export
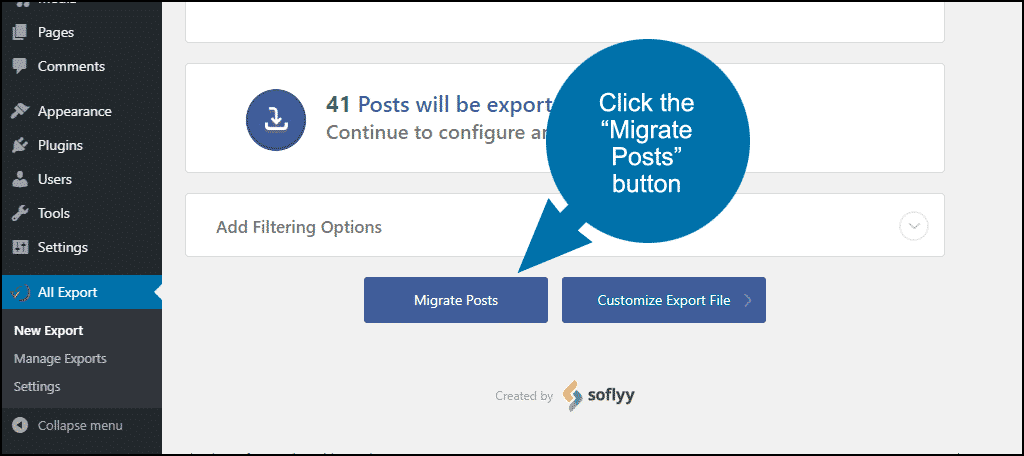
Click the “Migrate Posts” button.
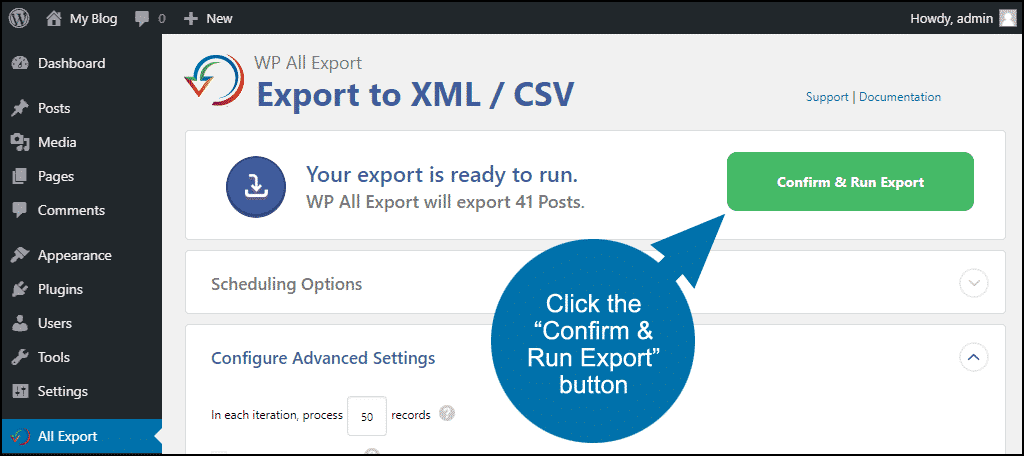
On the confirmation page, “Scheduling Options” are not available to us in the free version. You won’t normally need to change anything in the “Configure Advanced Settings” section (if your export times out, reduce the “In each iteration…” number or use the “Split large exports into multiple files” option).
So, we’ll click the “Confirm & Run Export” button to finish up.

The results page gives you the option to download the CSV file or a “Bundle.” You don’t need to download the bundle unless you’re using the companion “WP All Import” plugin.
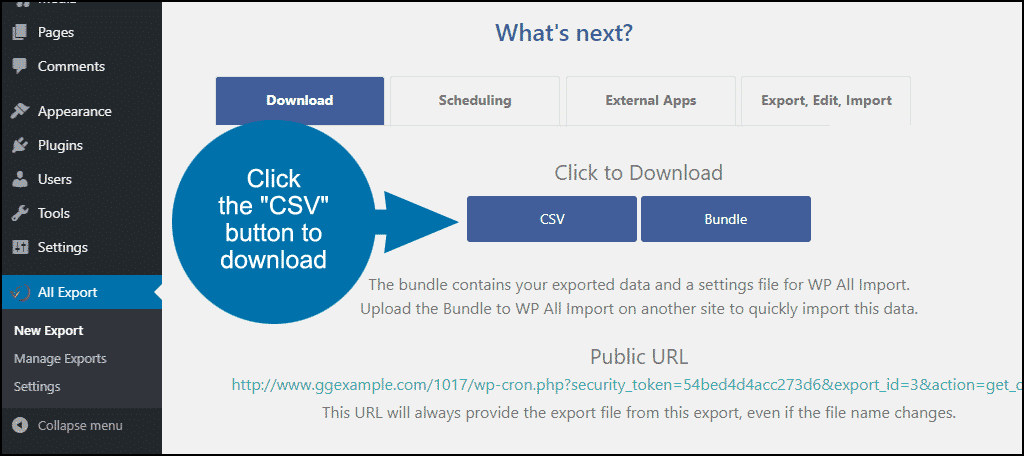
There’s also a public URL generated so the export can be downloaded by anyone with the web address. That could be handy if you want to provide the export data to someone, but you don’t necessarily want to give them admin access to the site (or send the data via email).
Customizing the Export
Like we did in the standard export example, click the “Choose a post type…” drop-down and choose “Posts” or “Pages.”
Now on the dialog page, you’ll know how many posts will be exported. We’ll choose “Customize Export File.”
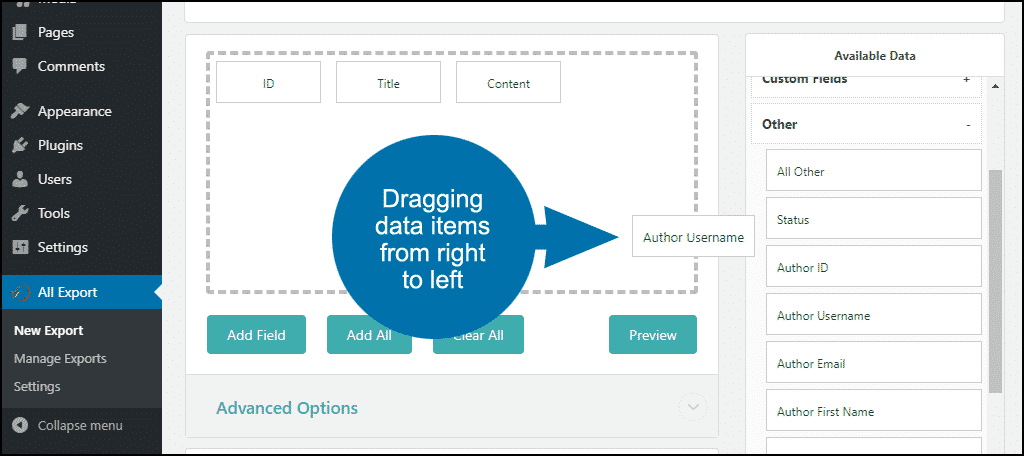
You can see that you now have the ability to choose what data is included in the export.
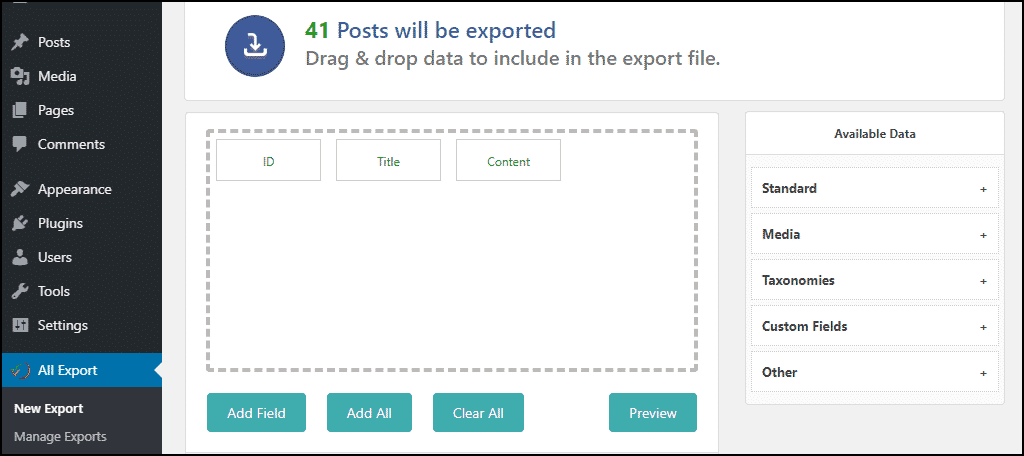
The box on the left represents the export file. So if we don’t change anything, the box is telling us the file will contain the post ID, Title, and Content (in that order).
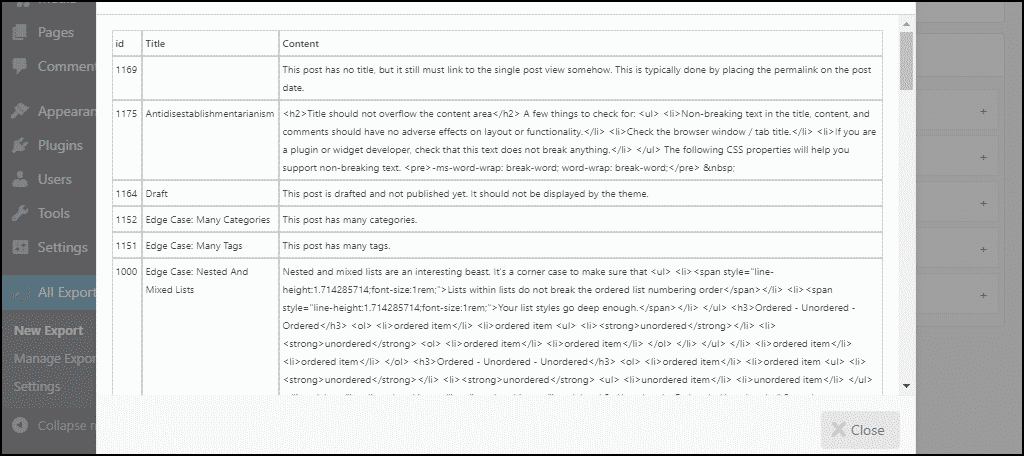
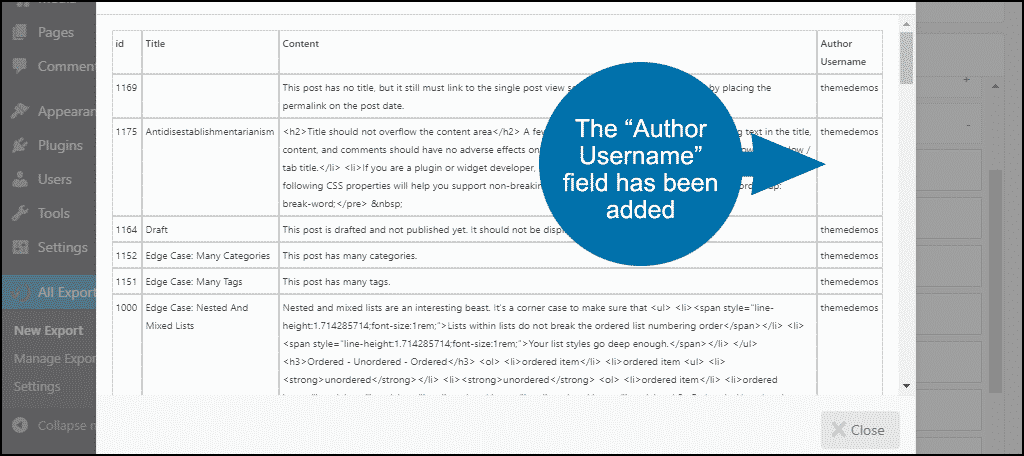
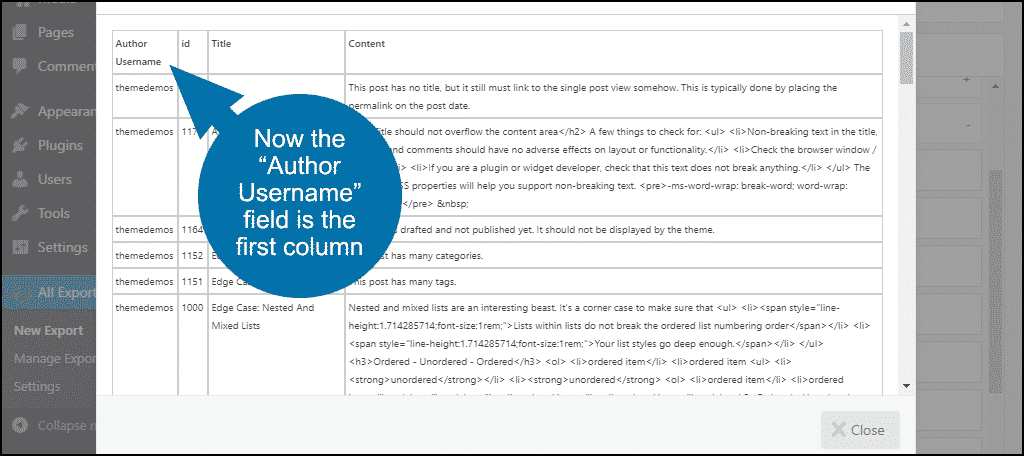
Clicking the “Preview” button shows you what the export will look like.
To add data to the export, drag it into the box from the list on the right.
I’ll drag the Author Username over.
Then if we look at the preview, you can see the username is there.
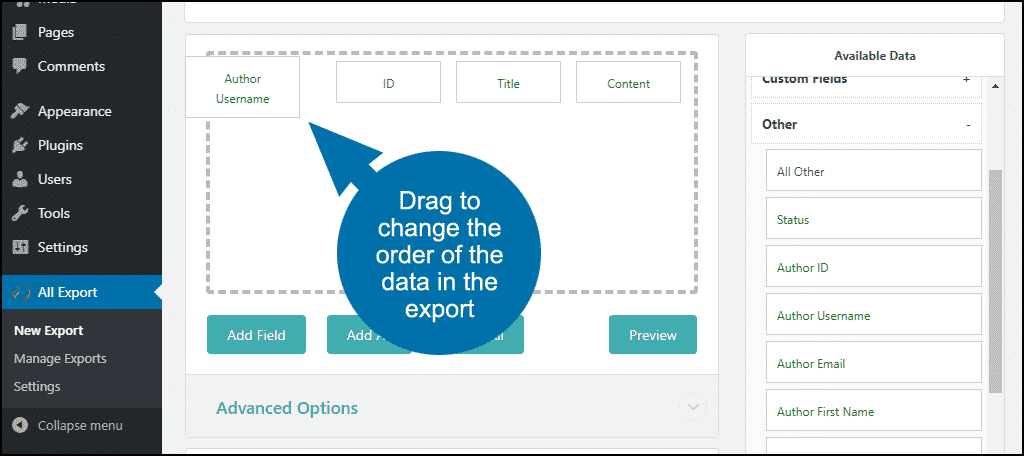
You can also change the order of the data in the export by dragging the items and rearranging them.
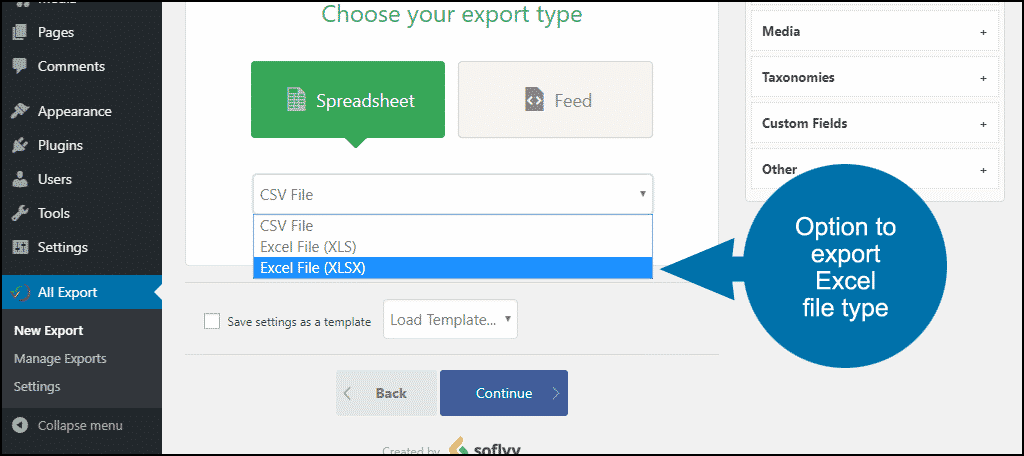
The “Advanced Options” drop-down lets you change the CSV separator, and the “Export Type” drop-down lets you export to an Excel file if you prefer that to CSV.
Click the “Continue” button.
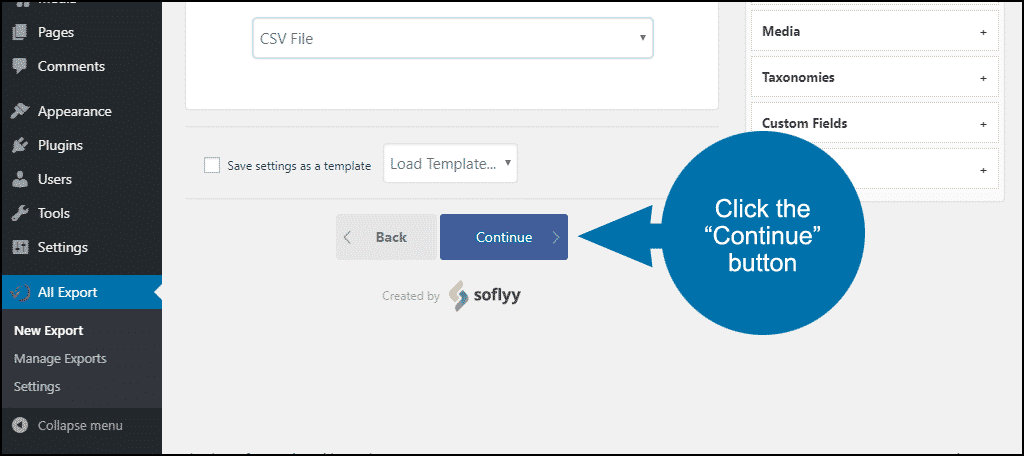
Then click the “Confirm & Run Export” button to finish up.
Taking WP All Export Further
You can use the same methods we just went through to export page data as well.
I mentioned earlier that there’s a paid version of this plugin. Since so many of the plugins we cover here have paid tiers, let’s take a minute to talk about plugin developers.
I know we all like free stuff, but supporting plugin developers allows them to continue offering the tools that make the WordPress environment as rich with possibilities as it is. So if you like a tool—or more importantly, if you benefit from the use of a tool—consider supporting the developers by buying a license from them.
Have you ever had the need to export data from your WordPress site? Did you use the native WordPress export or another tool? Let me know in the comments.