Categories are one of the most effective ways to organize your content in WordPress. It creates a post hierarchy that makes finding certain topics easier for yourself as well as visitors.
And thanks to the flexibility of WordPress, you can bulk move posts from one category to another with very little effort.
This is convenient if you want to fine-tune how your content is set up on the website.
In this tutorial, I’m going to show you how to create new categories and how you can move content into them. It’s quite effortless and very simple to understand.
Using the Category Section
The Category section in WordPress is where your metadata and descriptions will be used. It’s similar to creating posts, but you don’t want these to be very long. A brief two or three-sentence description should be all that you need.
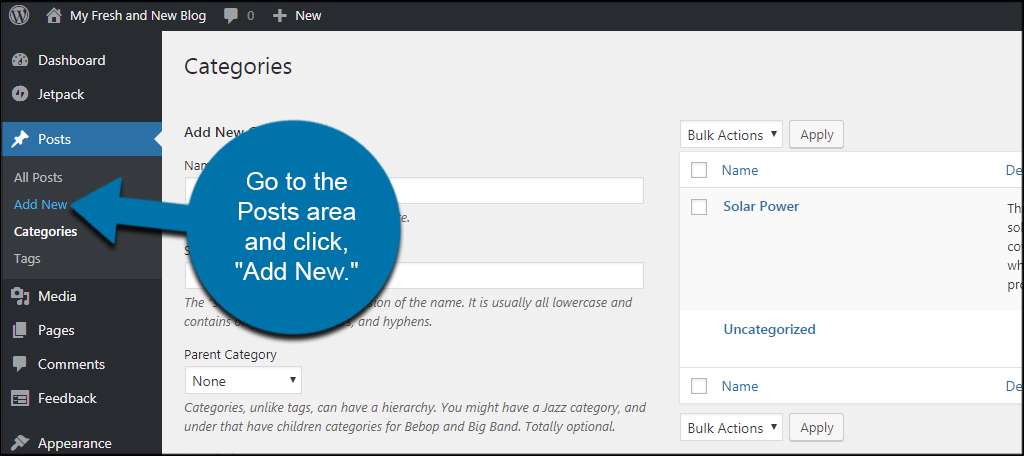
From the WordPress dashboard, go to Posts and select, “Categories.”
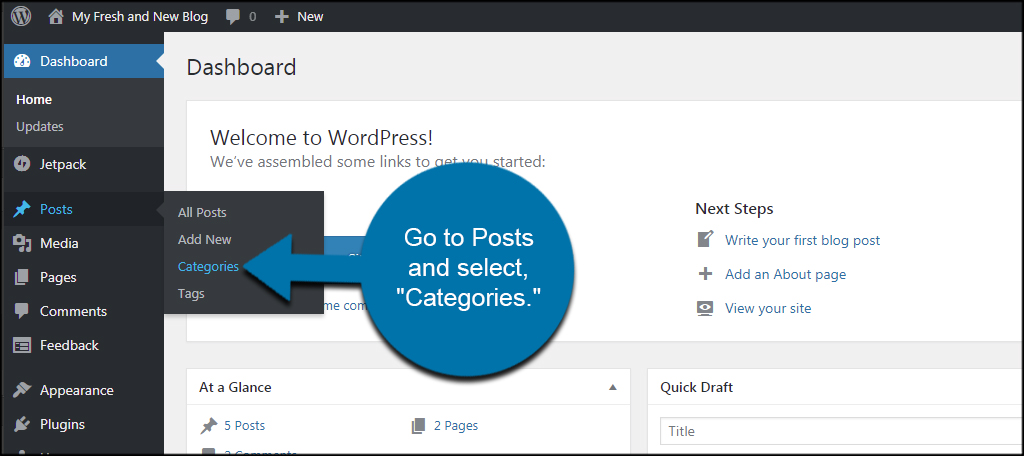
This section will show all of the available categories in WordPress. The “Uncategorized” category is default for every installation of WordPress.
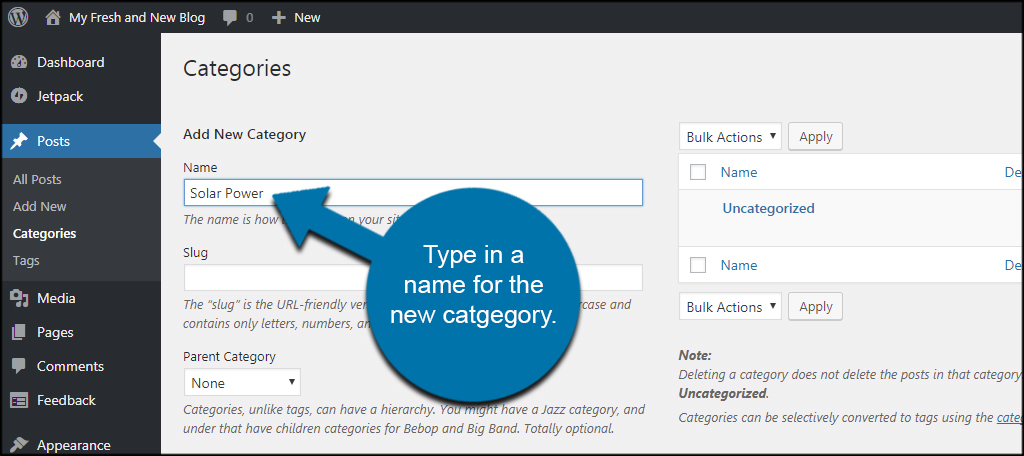
Type in a name for the new category. For this example, I’m simply going to name it “Solar Power.”
Naming categories is very useful if you want to create lists using shortcodes to display specific types of content on a page.
You can customize the slug if you wish. However, I find it easier to just let WordPress do this automatically. The slug is a URL-friendly version of the category. For example, the category Solar Power will look like “solar-power” in the URL of any posts.
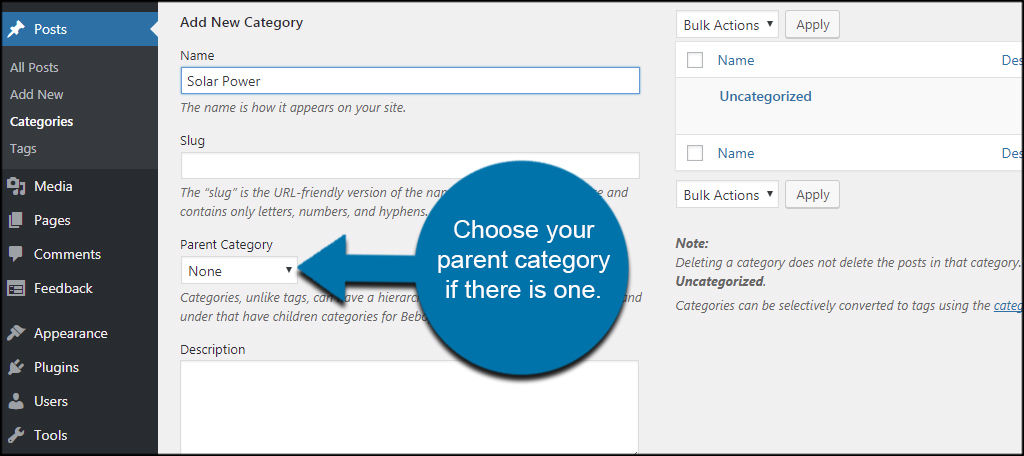
If you’re building a hierarchy, you’ll want to choose a parent category. So if I decided to add the category of “Panels” to Solar Power, I would make Solar Power the parent. That way, visitors and I both know Panels is related to solar power content.
Choose your parent category if there is one. If not, then simply leave it as “None.”
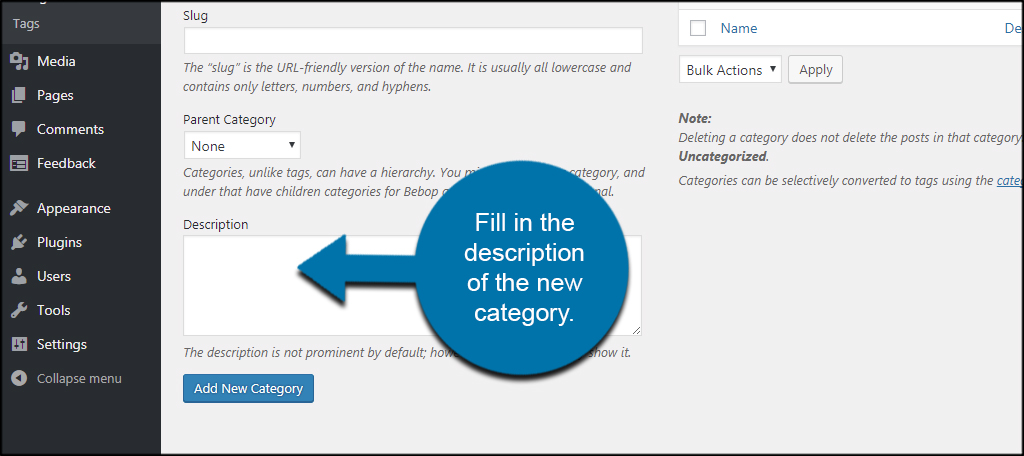
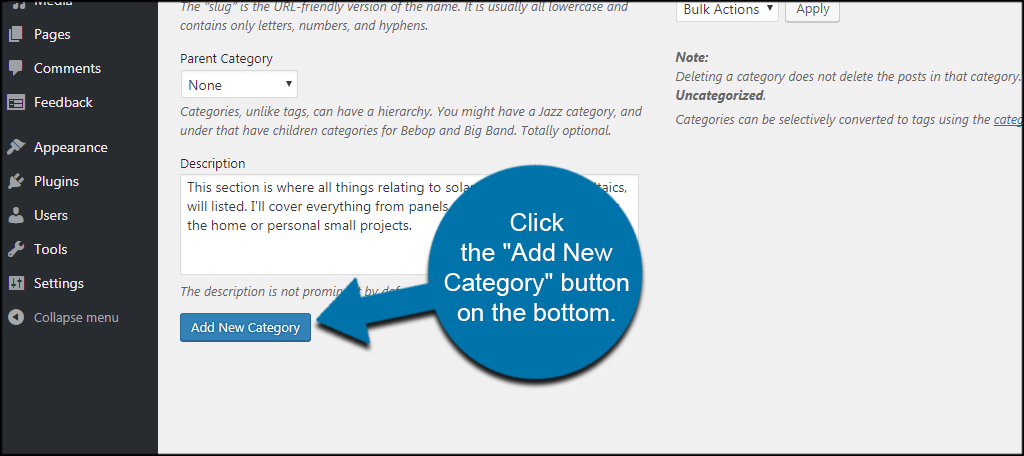
Next, fill in the description of the new category. You can do this later or not at all if you choose. However, it’s very useful if you do this now as some aspects of WordPress will show visitors this content.
Plus, it helps keep the content organized if you have other authors writing for your site.
Click the “Add New Category” button on the bottom. You will then have a place where you can post your new content.
Using Posts to Create Categories
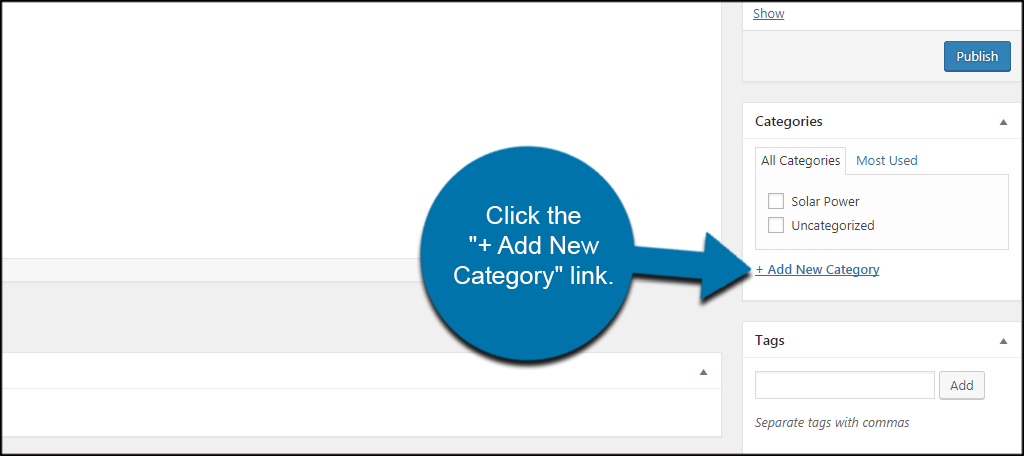
You can also create categories from with the post itself. This is useful if you forgot you wanted to add content to a specific topic or if you’re purposely creating one to fit the post.
Go to the Posts area and click, “Add New.” I’m going to show you where this is located.
On the right side of the screen, you’ll see a window listing your categories. Click the “+ Add New Category” link.
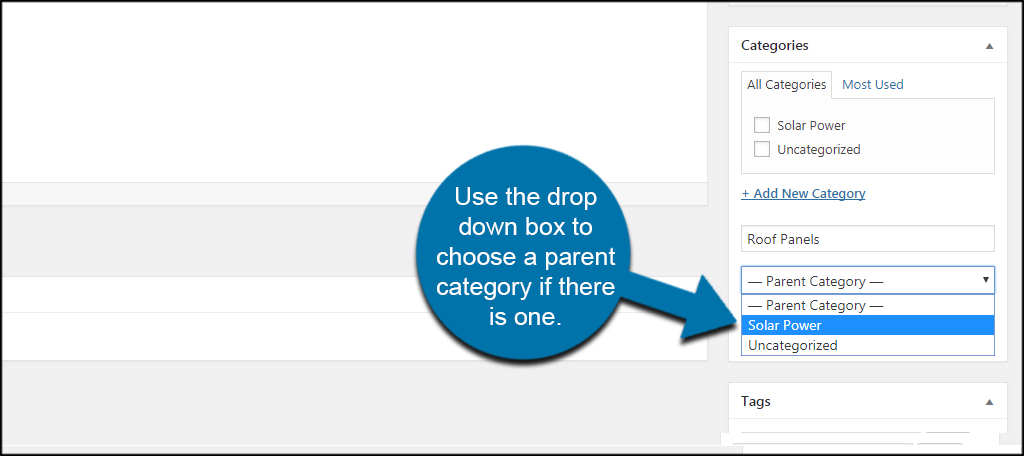
A new field will appear under this link. Enter the name of the new category in the text field. For this tutorial, I’m going to add the “Roof Panels” category.
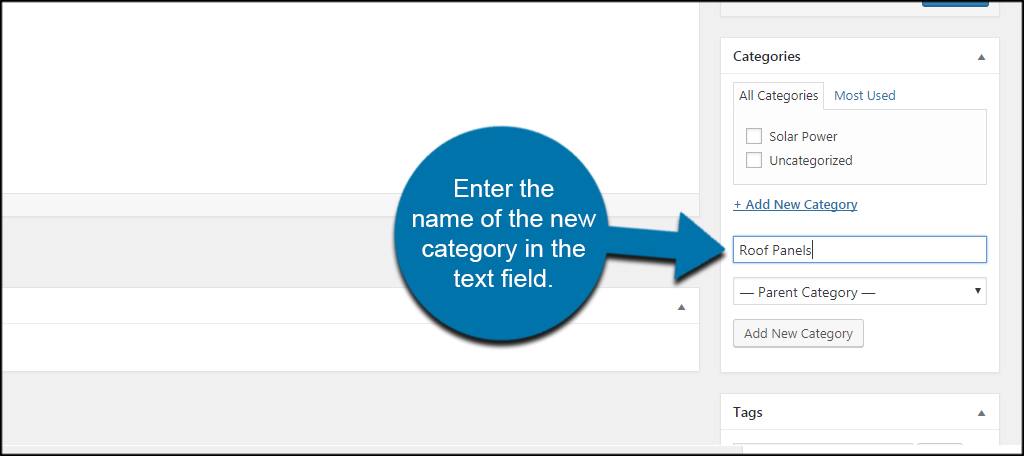
Use the drop down box to choose a parent category if there is one. Because I am creating a subitem for the Solar Power category, I’m going to choose it as the parent.
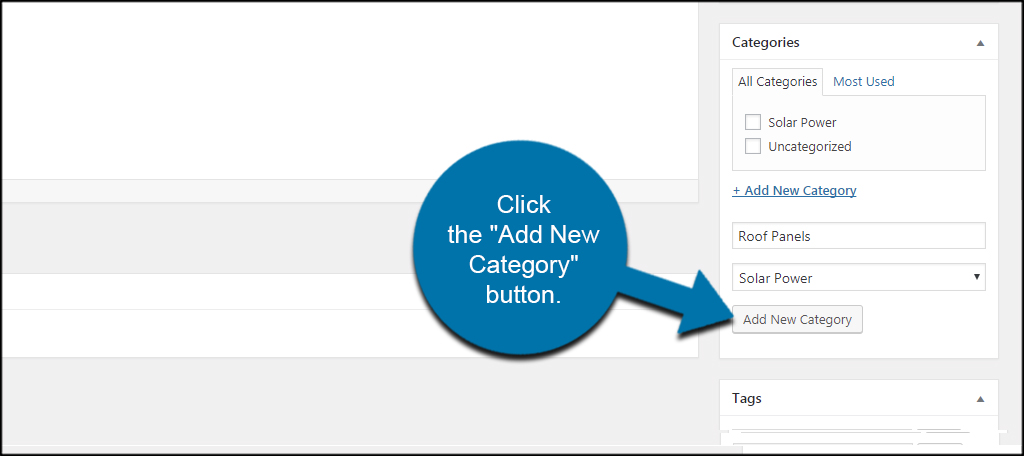
Click the “Add New Category” button. This will add the current post as well as the new category to your website.
You won’t be able to modify the slug or the category description from the Post screen. However, you can easily go into the Category section and edit it later.
Moving a Post to New Categories
What if you want to move an old post to your new category? That’s relatively simple. Open one of your existing posts currently saved in WordPress.
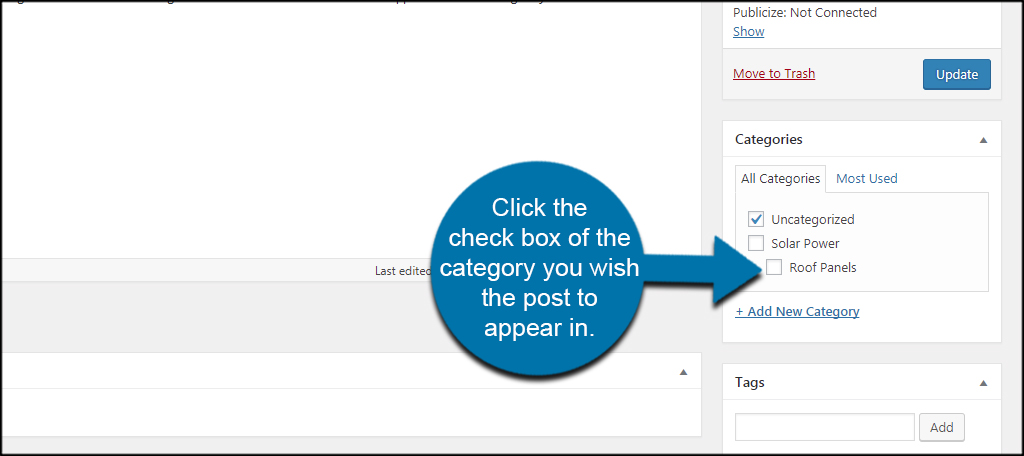
In the Category window, click the check box of the category you wish the post to appear in. For this example, I am moving an article into the “Roof Panels” subcategory.
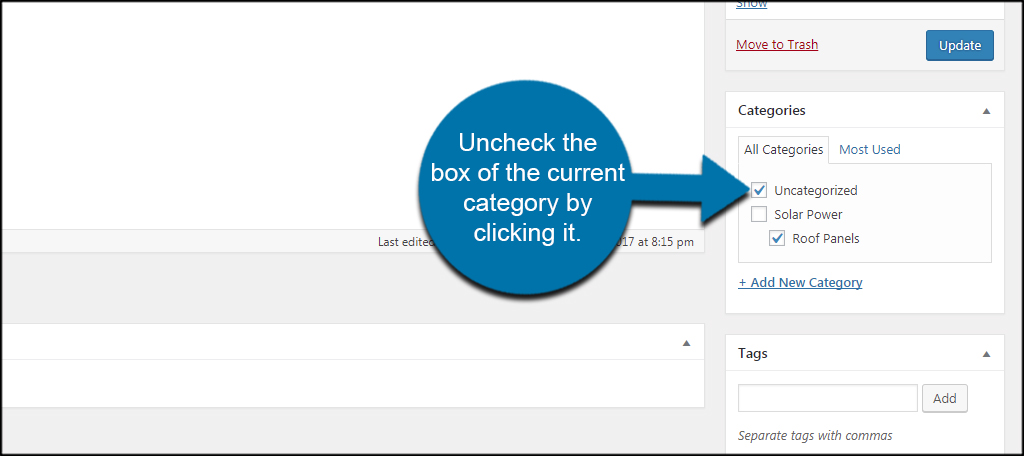
What if you don’t want the post to appear in its original location? Uncheck the box of the current category by clicking it.
When you save, update or publish, the changes will instantly become live.
Bulk Moving Posts to a New Category
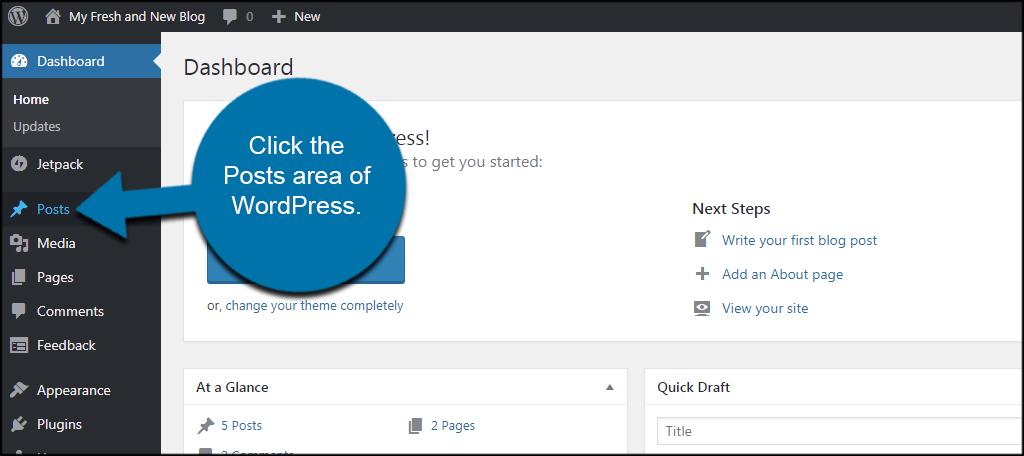
What if you have a lot of articles you want to move from one category to another? Click the Posts area of WordPress. This will take you to a list of all the content you have saved in the system.
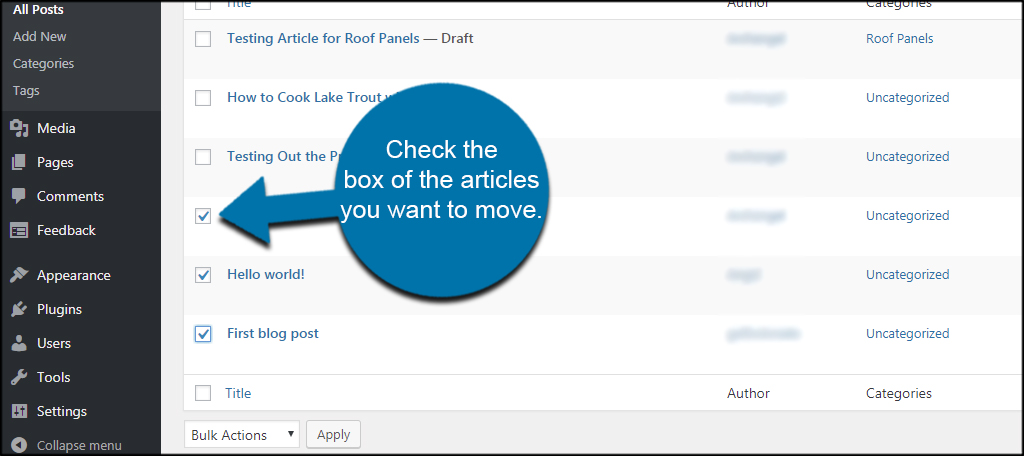
Check the box of the articles you want to move. This will select them so you can perform a bulk action.
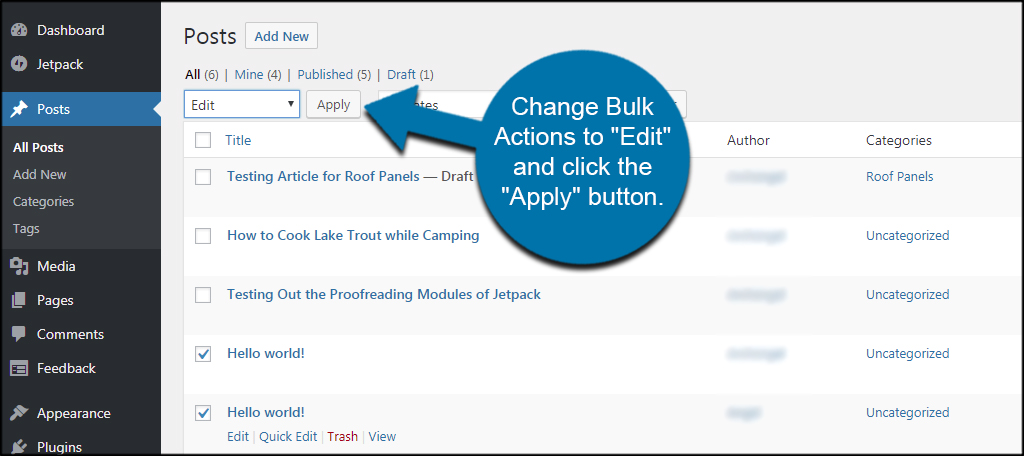
Change Bulk Actions to “Edit” and click the “Apply” button.
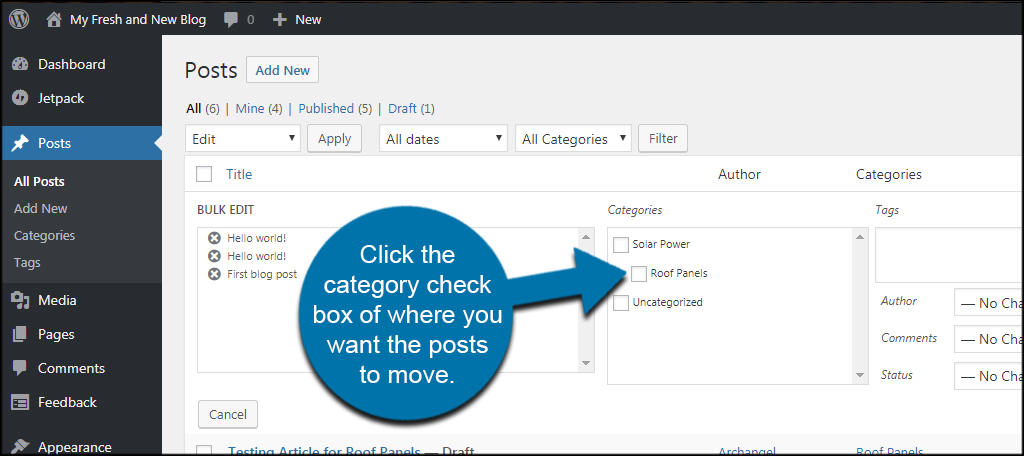
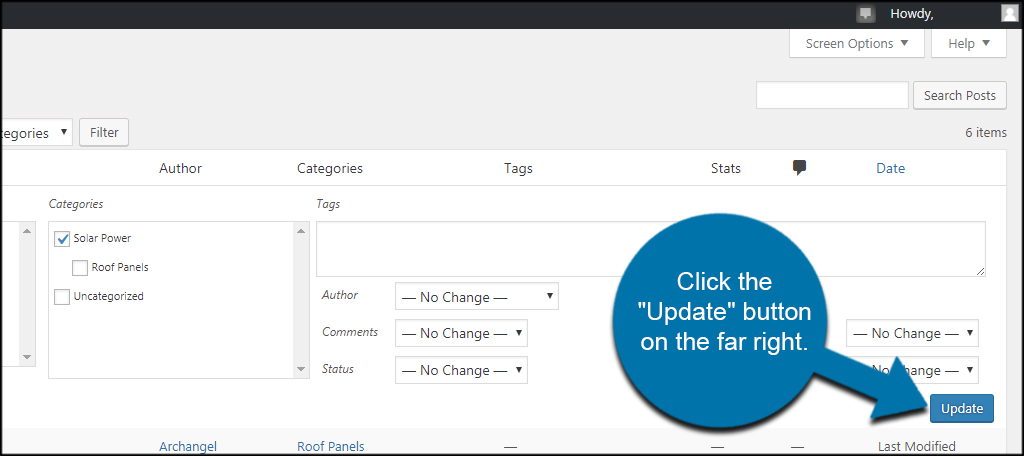
A new screen will open giving you access to the bulk editable elements for the articles. For example, you can change authors, comments, publish status and more. Click the category check box of where you want the posts to move.
Click the “Update” button on the far right. After a few moments, your changes will then become live. Don’t stress if it takes a few seconds. The more posts you’re moving, the longer the process will take.
Keep It Organized
Keeping your content organized makes your site look more professional and easier to operate. You want visitors to have the most fluid and superior user experience possible. Keeping your posts in a logical hierarchy only works to improve this, which may lead to a better experience and a higher likelihood visitors will come back.
What kind of elements do you use in your site to make it easier to use? Have you tried using categories as additions in your navigation menu yet?