Are you looking for an easy way to block users in WordPress? The most common way to block a user in WordPress is to delete their user account. However, there is a catch when you delete an account, you must reassign the content that was underneath that name to a new user. This can be quite tedious if you are in the process of bulk user account deletion.
Instead, of deleting the user, blocking the user entirely is a better solution. There are quite a few ways to block specific users in WordPress and it all depends on how you want to go about it. Today, I will demonstrate how to easily block users in WordPress with the User Blocker plugin.
Why Block Users in WordPress
While many websites struggle to build their user base, you will find that once you succeed, some users do not behave nicely. This may include rude comments that target authors or other users or accounts that just produce spam. In either case, these are not users that you want to have on your website. Thus, the need to block their accounts becomes an issue.
Other Ways to block Users in WordPress
Before beginning with the main method I will be showcasing below, there are other options to block users in WordPress. One of the easiest ways is to change their login information. For example, imagine someone trying to sign in to the website with their email and password and they keep getting an error message about an incorrect password or email. The user is essentially blocked. Another way to block users in WordPress is to block their IP address. This will ensure that they cannot access your website.
How to Easily Block Users in WordPress
Today, I will demonstrate how to easily block users in WordPress with the User Blocker plugin. This plugin allows you to block and unblock users on your website. Not only can you block users permanently, but you can block them for specific amounts of time. These temporary bans can be very useful for visitors who break the rules by mistake. Just make sure the reasoning for blocking a user is justified.
Installing User Blocker
Let’s begin with clicking on Plugins and selecting the Add New option on the left-hand admin panel.

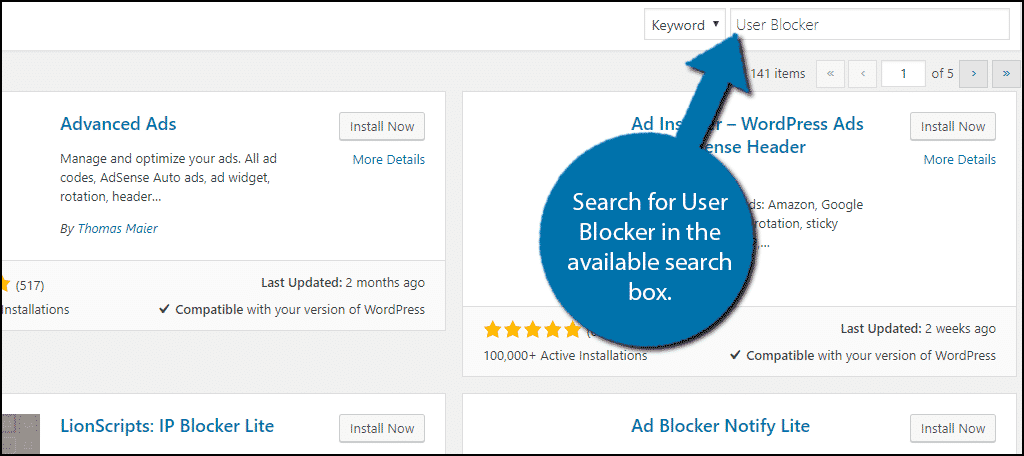
Search for User Blocker in the available search box. This will pull up additional plugins that you may find helpful.
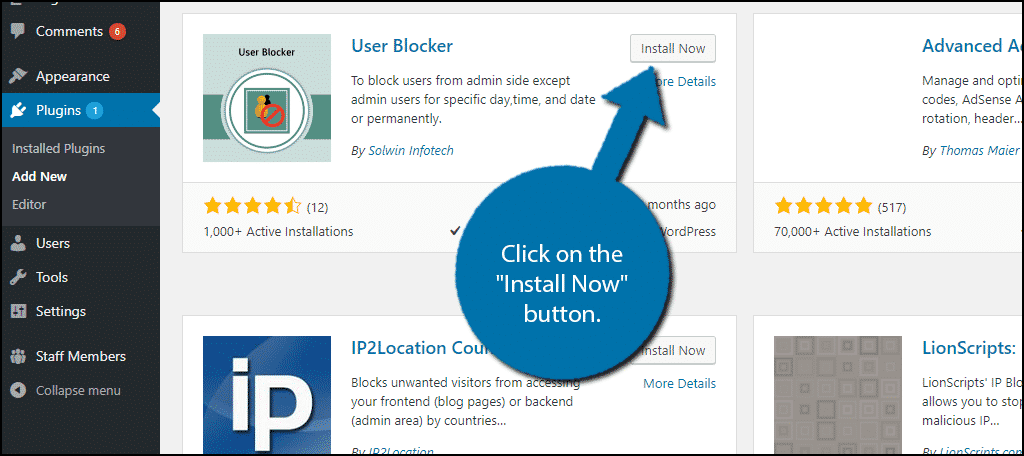
Scroll down until you find the User Blocker plugin and click on the “Install Now” button and activate the plugin for use.
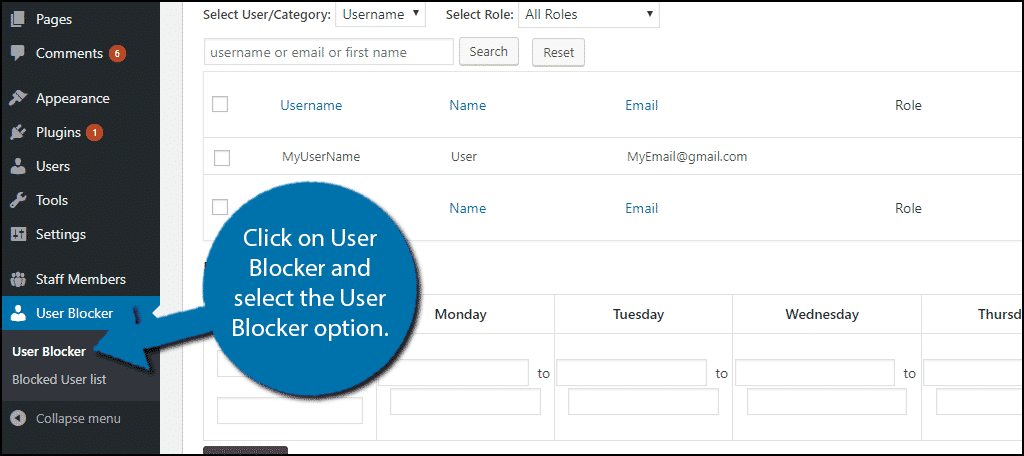
On the left-hand admin panel click on User Blocker and select the User Blocker option. This will pull up the main settings page.
Using the User Blocker Plugin
There are three main ways to block users with this plugin: block users by time, block users by date, and block users permanently. You can use any combination of these to block users on your website. Keep in mind that blocking users can have some negative repercussions. For example, if you block a user, they probably will not come back if they are unblocked. If you block another user’s friend, they may decide to leave as well.
Before any blocking takes place, I recommend making clear guidelines. Tell users exactly what will happen when they do something wrong. For example, a very popular method is the three strike rule. The first offense will have a short temporary ban. The second will have a longer temporary ban. The third and final offense will result in a permanent ban. However, if the offense is very bad you may decide to opt for a permanent ban.
Blocking Users By Time
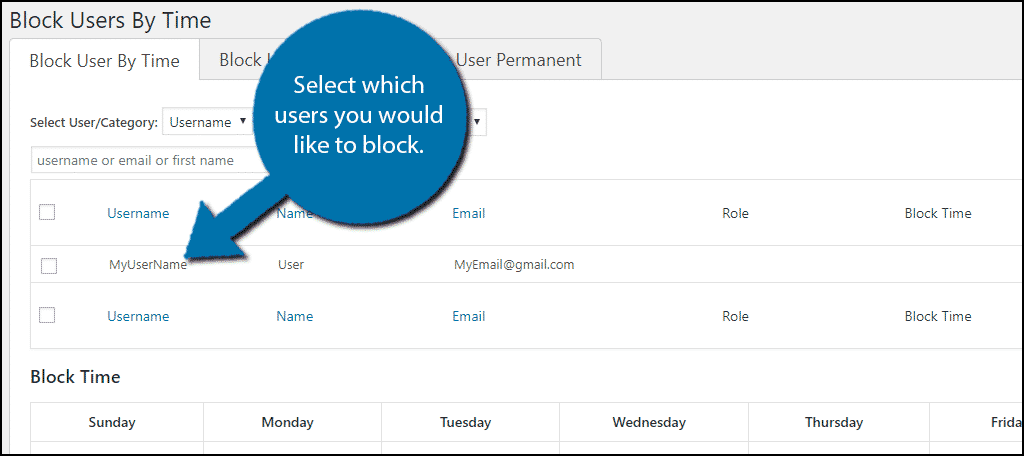
The first tab is the Blocking Users By Time section. This area is for temporary bans that you want to last a week. If you’re looking for longer temporary bans, skip to the next section.
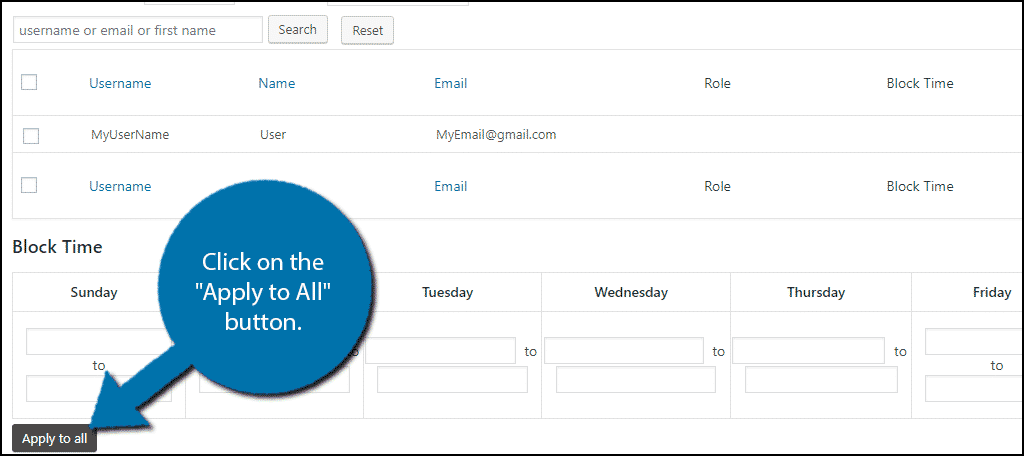
Here you will see a list of all of your users. Select any user that you would like to block for a time.
Once you have selected the users you want to block, it’s time to select the length of the block. Fill out the times that you would like the user to be blocked. Click on the “Apply to All” button when you are done. This will block all users that you previously selected.
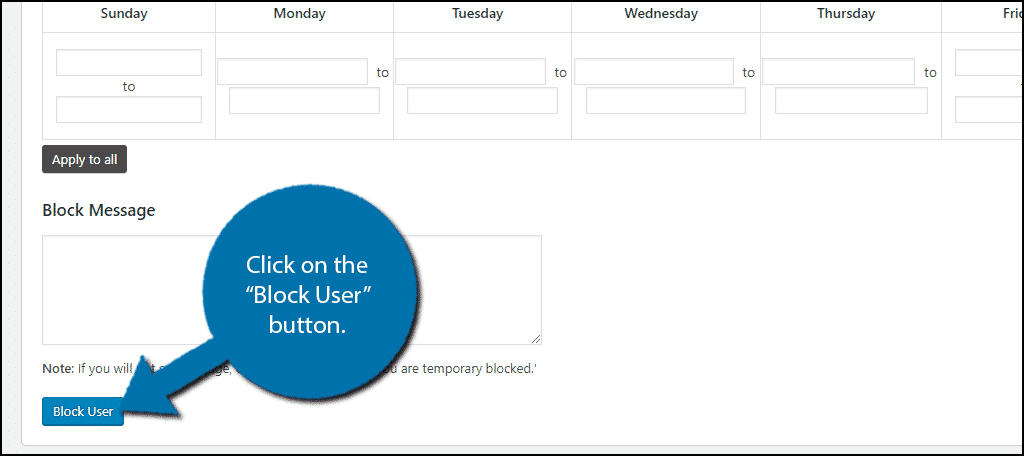
The last thing you can do is create a message to why the user is banned. It is good to create a few generic reasons why someone has been banned. You can get very specific if you wish. For example, if someone used foul language, you can cite exactly what they said as evidence as to why they are blocked, but ultimately, you can block anyone for any reason.
Once you are done, click on the “Block User” button.
Congratulations, you have successfully blocked a user or users on your website. The remaining methods are similar to this one but allow for more time options.
Block User By Date and Permanently
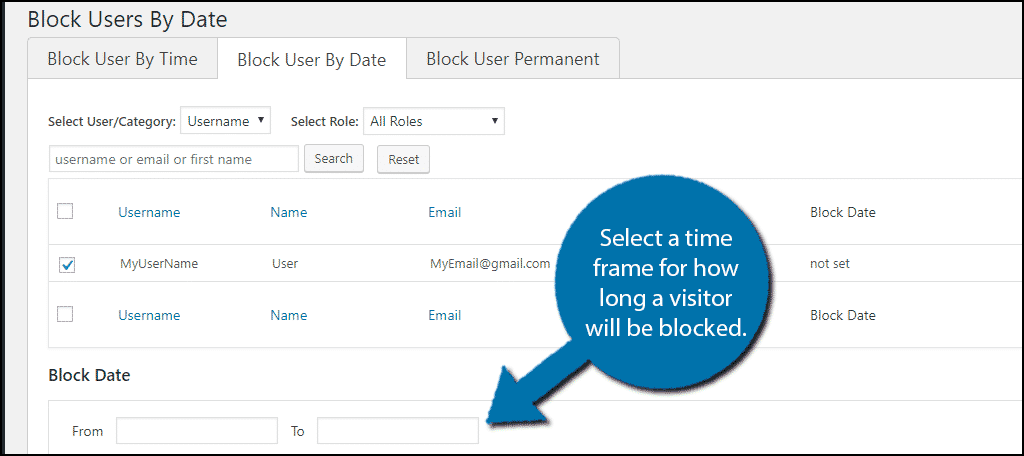
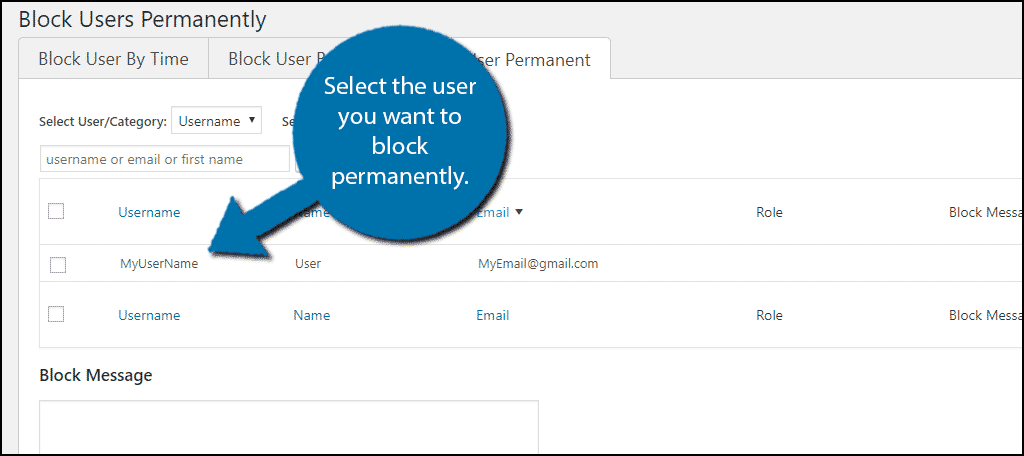
The next two methods are very similar. Select the appropriate tab of the method you want to use. Start by selecting the user you want to block.
For the Block User By Date approach, the main difference from the previous method is the length. You can select a starting date for when the ban will begin and then select an end date.
For the Block User Permanent method, simply select the user and click on the “Block User” button. There are no times to select because it is permanent.
Unblocking Users
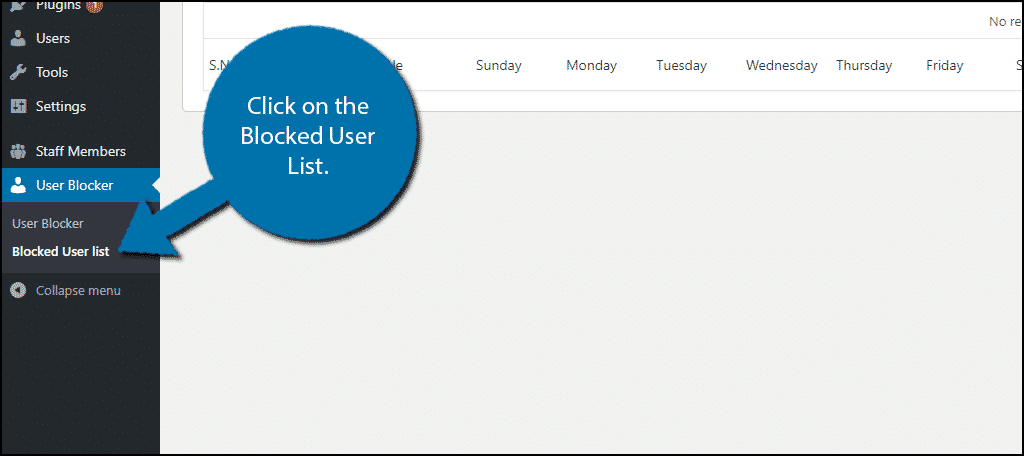
Once you start establishing a blocked user list, there is always the potential for mistakes or unfair blockings. You may need to unblock someone’s account. To do so click on the Blocked User List.
Find which category they are under. Each tab corresponds to which method you used. Select the user and click on the Reset option underneath their name.
This will reset their block timer to 0 and unblock them. Repeat this for as many users as you want.
Keep Your Website Friendly
One of the best parts of a website is always the comment section, but sometimes it’s not so fun. Many people will talk much differently on the Internet than in real life. This can translate into a lot of bad words being said and it’s up to that website’s staff to handle it. Blocking these problem users will make your website a safer place to discuss topics for everyone.
Why do you need to block users? Has blocking users helped your website?
These only work if you have a business plan to install plugins.