Did you know you can decide what pages a widget is displayed on by making it conditional? Widgets allow you to add useful features on the sidebar, but sometimes they are not necessary or just outright redundant. And WordPress conditional content can open quite a few possibilities.
For example, if you are at checkout and have a “Go to Checkout” widget, there is no point in it being displayed at that time. This will help you save space and speed up your website by reducing the amount of content loaded on a page.
Today, I will demonstrate how to use the Widget Logic plugin to create conditional sidebar widgets in WordPress.
What Does Conditional Content Mean?
Conditional content is a type of content that only appears when a specific condition is met. This is extremely useful when you want content displayed on one page, but not another.
If you were doing this by code, it can get a bit complicated if you are not familiar with the concept already. Luckily, the Widget Logic plugin makes it simple. Every widget in WordPress will not have an extra setting that allows you to set the condition for it to appear.
Instead, the plugin will let you use the Conditional Tags for WordPress in the sidebar widgets.
The plugin has a simple code that you can copy and paste into the condition section. All you will need to input is the actual page. It’s very simple and will only take a few minutes.
Installing Widget Logic
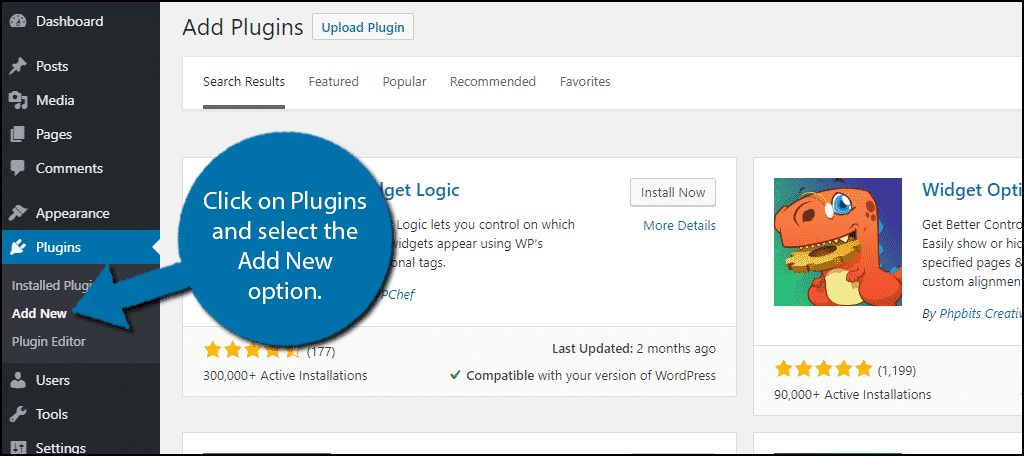
Let’s start by clicking on Plugins and selecting the Add New option on the left-hand admin panel.
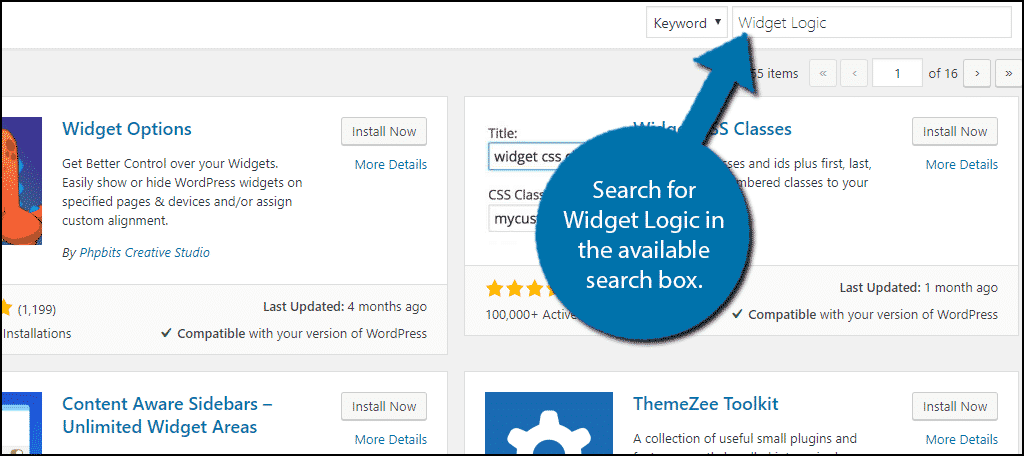
Search for Widget Logic in the available search box. This will pull up additional plugins that you may find helpful.
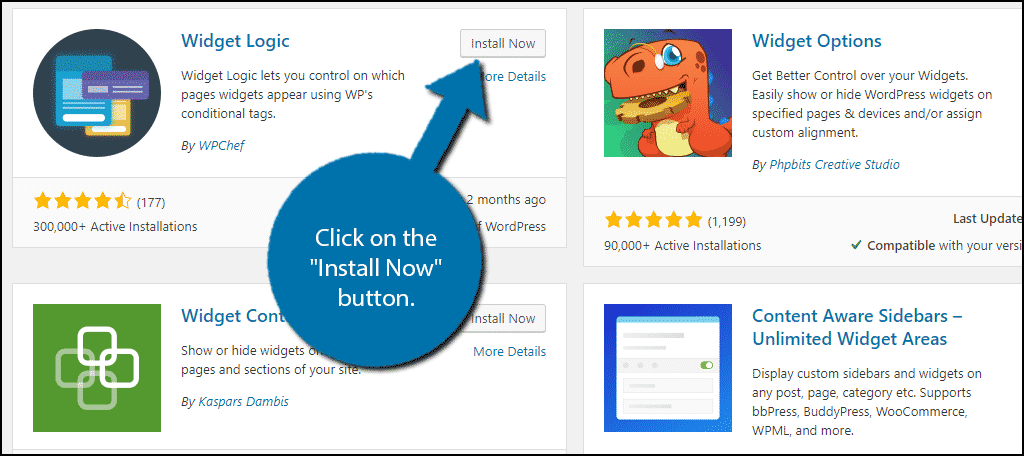
Scroll down until you find the Widget Logic plugin and click on the “Install Now” button and activate the plugin for use.
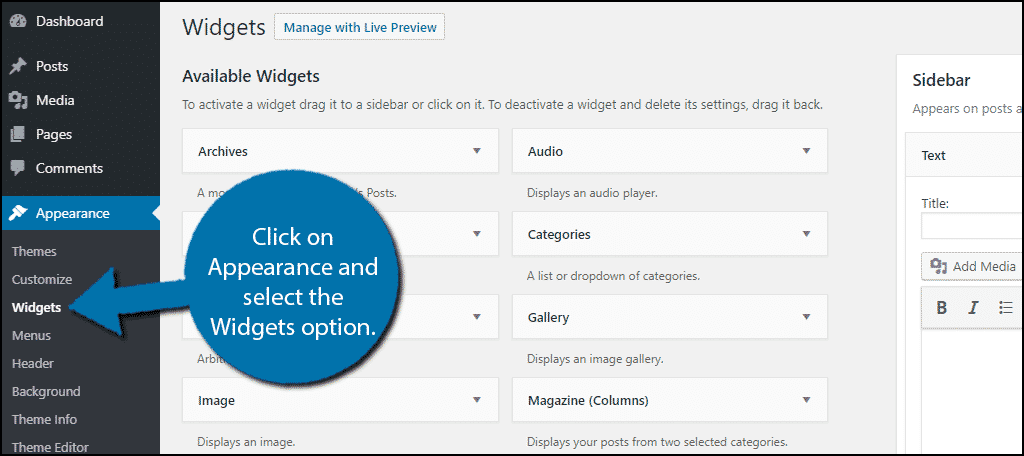
On the left-hand admin panel, click on Appearance and select the Widgets option. This will pull up the widgets section of WordPress.
Using Widget Logic
At the bottom of every widget, you will now find a Widget logic section.
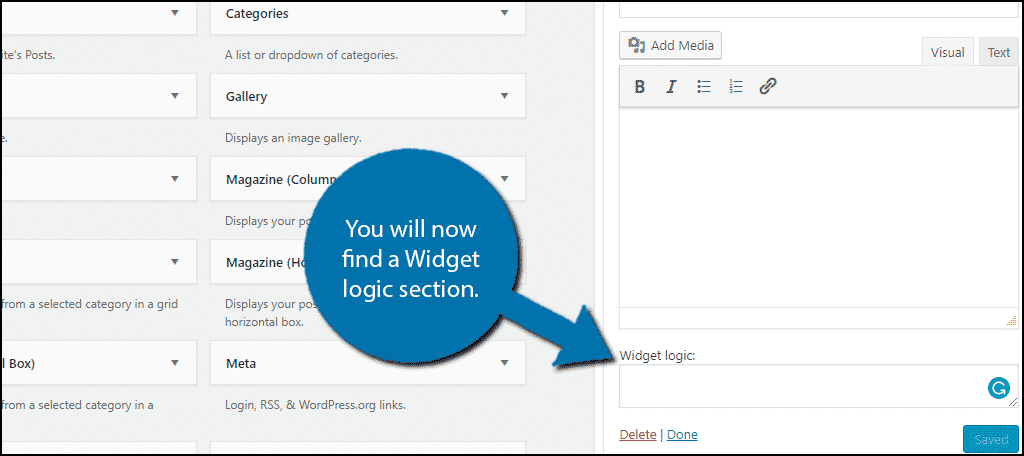
Here, you can copy and paste code segments to set WordPress conditional content. The plugin makes full use of WordPress’s conditional tags, so if you have prior knowledge of them, it should be even easier.
However, prior knowledge is not necessary. There is a full list of these code segments on the WordPress.org codex, but here is a shortlist of the ones we will utilize in this tutorial:
- !is_page(‘Example’) — This will display the widget on every page except the one listed in the parentheses.
- !is_user_logged_in() — This will display the widget when the user is not logged in.
- is_home() — This will display the widget exclusively on the home page.
There are plenty of additional conditions you can set, but these are the ones we will cover.
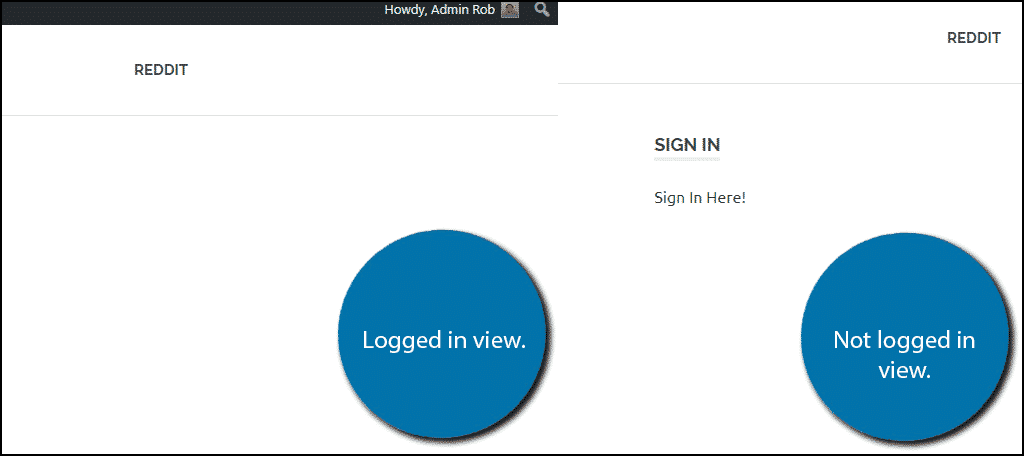
Let’s start off with an easy one. It is extremely common to have a login/sign-in widget, but once the visitors have done this, the widget is essentially useless. Thus, it is the perfect widget to have a condition for.
In this case, you would want to use:
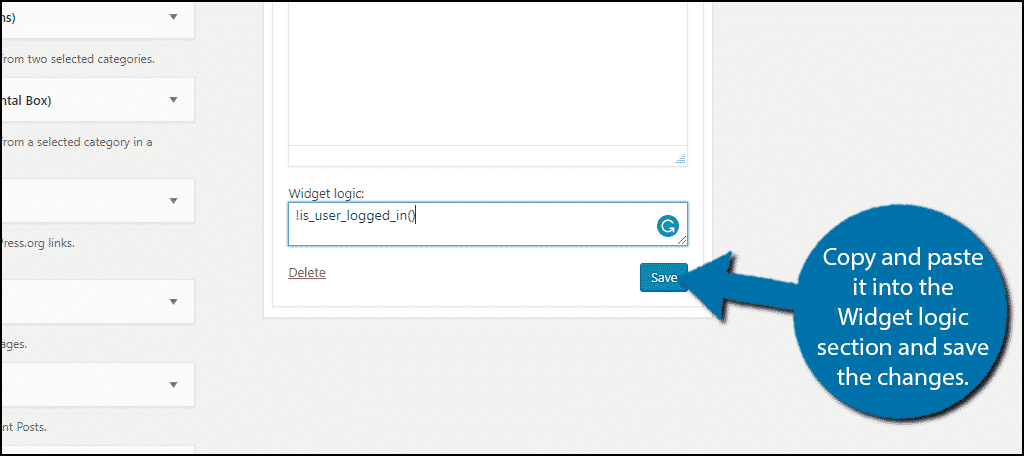
[ht_message mstyle=”info” title=”” show_icon=”” id=”” class=”” style=”” ]!is_user_logged_in()[/ht_message]
Simply copy and paste it into the Widget logic section and save the changes.
You can test it by logging in and out.
Using Logic
Of course, you can do the exact opposite. The “!” in front of the code means “Not” and if you do not use the “!” the codes meaning will change. Thus, is_user_logged_in(), will now display the widget when someone is logged in.
This would be perfect for a log/sign out widget.
This type of change can be made to every line of coding, which essentially doubles the options you have.
Of course, you can create even more options when you combine commands together. For example, perhaps you want a widget to appear on your home page, but only if the visitor is not logged in.
You can do this by connecting the code with “&&” which means “AND.” Thus, the code would be: [ht_message mstyle=”info” title=”” show_icon=”” id=”” class=”” style=”” ]is_home() && !is_user_logged_in()[/ht_message]
Finally, you have yet another command that you can utilize to increase your options. You can use “||” which means “OR” to create even more combinations.
For example, let’s say you wanted to display the widget when the visitor is logged in or when they are not on the home page. The code would be: [ht_message mstyle=”info” title=”” show_icon=”” id=”” class=”” style=”” ]is_user_logged_in() || !is_home()[/ht_message]
Essentially, all you have to do is copy the code, decide the condition and add the appropriate modiffiers (!, &&, or ||).
Customize Your Widgets
Using WordPress conditional content and deciding when a widget is visible or not is an extremely useful feature to have. This can allow you to tailor your visitor’s experience. In fact, you can do a lot with your widgets in WordPress including changing the style and creating a custom one.
How easy do you find the plugin to use? What conditions did you set up for your widgets?
Great but is the conditional even more powerful? So far all it does is to show or hide depending on logged or not or on what page I want it displayed.
BUT, what if I want it displayed hower, clicking on it will then depend on specific things like e.g is the user paying member of the website or a free user.
so, to be clear, everyone can see the widget but only paying members can actually click on it and get acces to the wherever it takes them but free users will not be redirected, maybe even get a pop-up telling them they need to ugrade first.
Is that possible?
In WordPress, anything is possible. I know I’ve seen some plugins with the capacity to block and popup messages when certain elements are clicked. Or, you could get more customization by coding the element directly.