Do you want to create a random post button in WordPress? Many websites will create a random post button when they have a lot of content to offer. This will allow visitors to view a random post on the website. Keep in mind that if your website is newer, you might not have enough content to make this work.
Creating this button is accomplished by adding code to your functions.php file. This code will redirect you to a random post. You then need to link a button to www.ggexample.com/random, and the code you added will do everything else (replace “ggexample.com” with your domain). The process is straightforward for any skill level and should only take a few minutes. Today, I will demonstrate how to create a random post button in WordPress.
Why Should I Use a Random Post Button?
As websites get older, content is pushed from the front page and fades into obscurity. There are not many guards against this happening except a custom archive page or another page that shows every post. If the random post button is successful, you may see more views going to older content. Don’t worry about newer content, because it will always have the advantage of being new.
Keep in mind that if your older content is really out of date, it might not be a good thing for it to exist. For example, if you wrote phone tutorials, a guide on the very first iPhone would be most likely useless today. It might not be a bad idea to remove really out of date content from your website.
How to Create a Random Post Button in WordPress
Today, I will demonstrate how to create a random post button in WordPress. You will not need any additional plugins, but you will need access to your website’s cPanel. The login information is provided to you by your web hosting provider when you create an account. You do not need to be a coding expert to follow this tutorial, but before you begin, I would recommend making a backup of your website. This will ensure that if something does go wrong, you can revert to the version of your site that was working before the change was made.
Adding Redirect Code
Let’s start by logging into the cPanel and clicking on the File Manager option. The File Manager will allow you to access all of the files related to your website.
![]()
You need to locate your themes functions.php file. Click on the public_html directory, then click on the wp-content folder. Inside this folder, you will find all of the content related to your website. Click on the themes folder and enter the folder of the theme you are currently using. Finally, right-click on the functions.php file and select the Edit option.
![]()
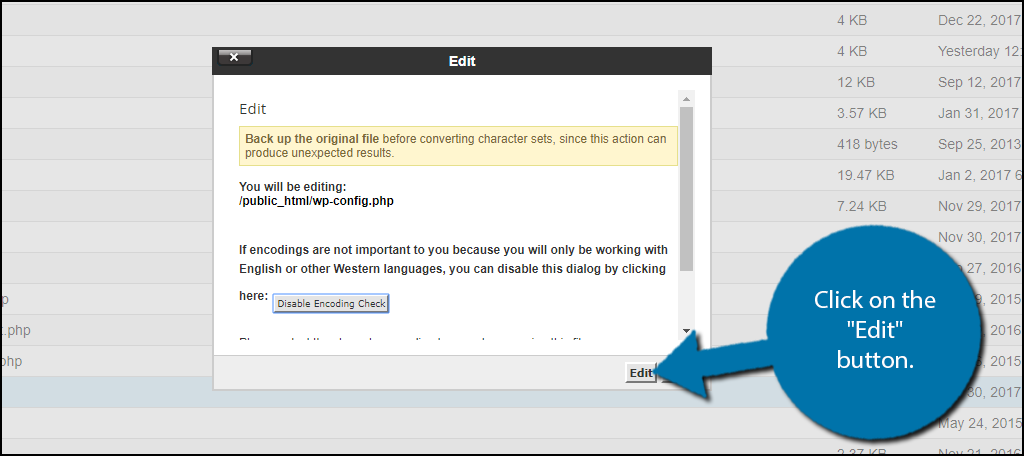
A pop-up window will show up. This box will warn you to create a backup of your files before editing anything. This will ensure that you can revert your website back to when it was working if something goes wrong. Click on the “Edit” button. A new tab will open containing all of the code from the file.
Copy and paste the following code into your functions.php file: [ht_message mstyle=”info” title=”” show_icon=”” id=”” class=”” style=”” ]add_action(‘init’,’random_add_rewrite’);
function random_add_rewrite() {
global $wp;
$wp->add_query_var(‘random’);
add_rewrite_rule(‘random/?$’, ‘index.php?random=1’, ‘top’);
}
add_action(‘template_redirect’,’random_template’);
function random_template() {
if (get_query_var(‘random’) == 1) {
$posts = get_posts(‘post_type=post&orderby=rand&numberposts=1’);
foreach($posts as $post) {
$link = get_permalink($post);
}
wp_redirect($link,307);
exit;
}
}[/ht_message]
This code will perform a 307 redirect to get a random post to appeared when it is called upon. A 307 redirect is chosen because it is a temporary redirect.
Once you have inserted the code into the functions.php file, click on the “Save Changes” button to finish.
![]()
Now it is time to create a button that uses the code you just added.
A Small Bug
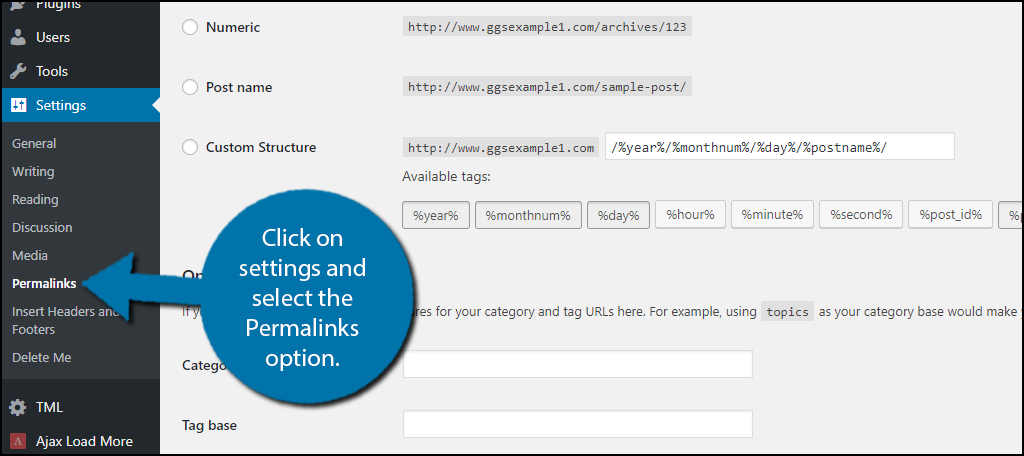
This code will not work yet. If you tried to set up a button calling ggexample.com/random, you would receive a 404 error. To fix this, click on settings and select the Permalinks option.
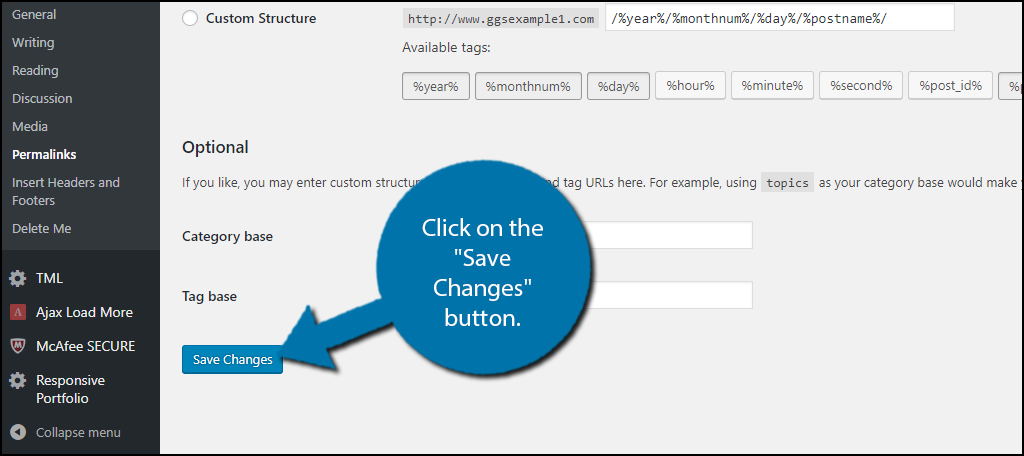
Click on the “Save Changes” button. You do not need to change anything, but clicking this button will work like a refresh and the code will not create a 404 error.
How to Create a Random Post Button
Before you begin, think about where you would like to place this button. My suggestion is on the sidebar because it will appear everywhere on your website. You will also only have to place the button once, instead of multiple times. Wherever you choose to place it does not matter, but a good location can make it very popular.
After deciding on the location you will also need to decide on what the button looks like. You can find many button templates online to use or create your own custom button. If you create a button make sure it is properly sized and save as a JPEG or PNG file. You can then turn the image into a button, which I will now demonstrate.
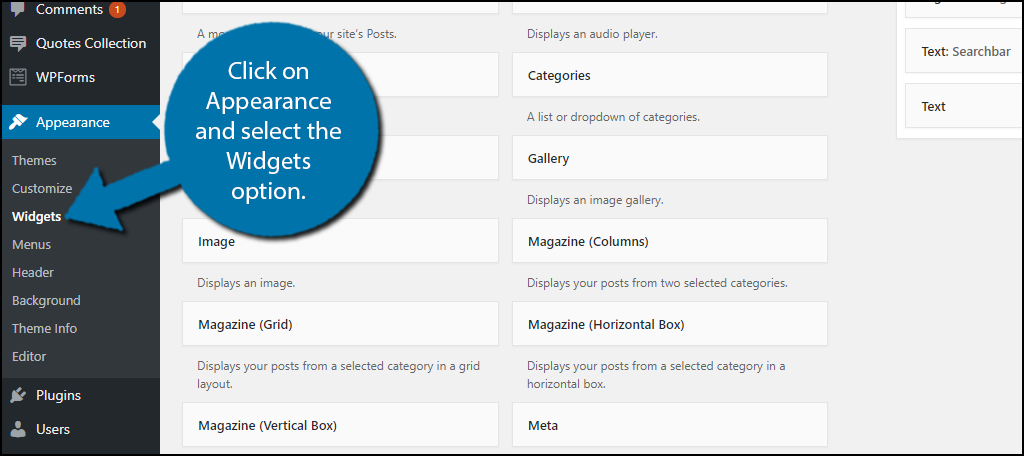
Open a post, page, or the widgets section of WordPress. You can place the button anywhere there is a text editor. I will be demonstrating adding it to the sidebar, but it is the same process for adding it to a post or page. On the left-hand admin panel, click on Appearance and select the Widgets option.
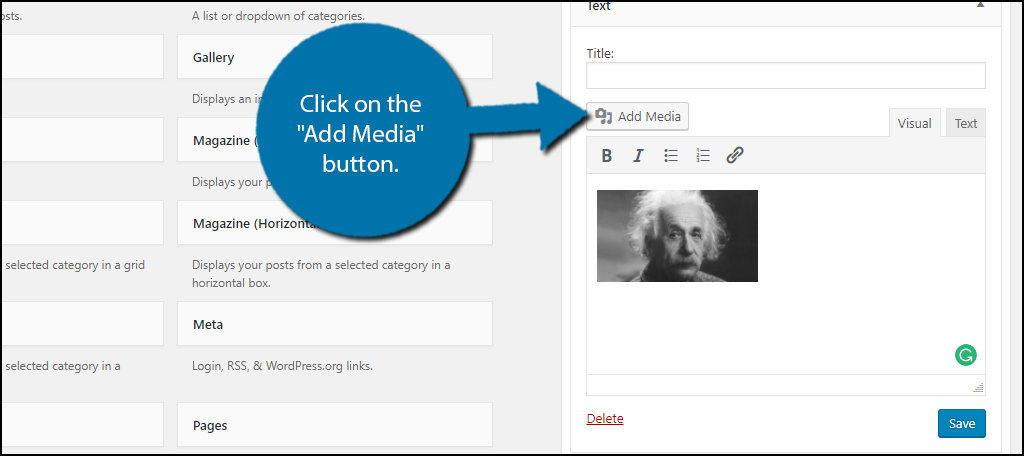
You will need to locate a text widget and drag it into your sidebar widget area. Once the text widget is in place click on the “Add Media” button.
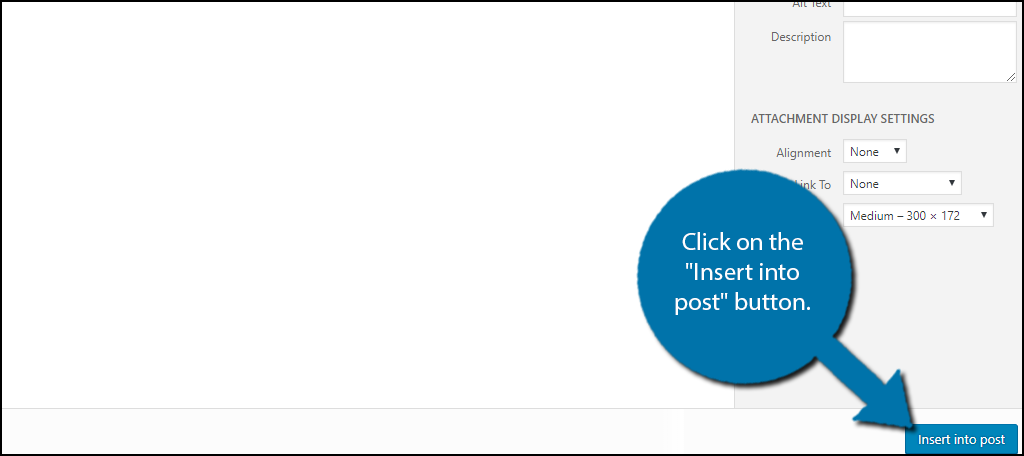
Select the image you would like to use as the button. Make sure the image is not linked to another location. The “Link To” text box should show none. Click on the “Insert into post” button.
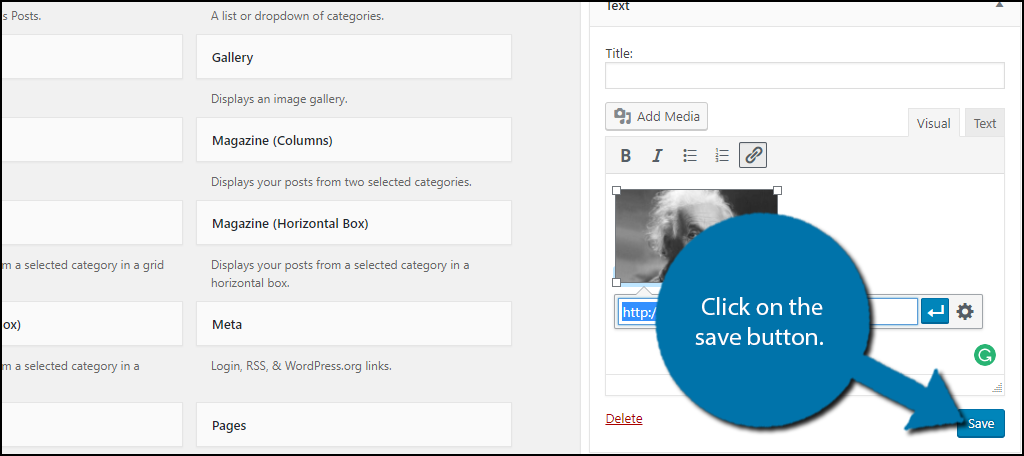
Click on the image you just added and then click on the insert button. Insert the following text, but with your website: [ht_message mstyle=”info” title=”” show_icon=”” id=”” class=”” style=”” ]ggexample.com/random[/ht_message]
This will make the image a button. Every time the image is clicked on, a new random post will appear. Make sure the button has text, unlike mine. If you want to use a picture or photo, use photo editing software like Photoshop to add text to the image. Once the link is set up, click on the save button.
Congratulations, you have successfully added a random post button to WordPress. Remember to size the button accordingly. Using a 1000 pixel image will not look right. Alternatively, you could simply add text and create a link the same way if you do not want a button.
Keep Older Content Relevant
A random post button is meant to help older content. This becomes increasingly difficult as websites age, and ultimately you will see older content fail. This is a result of how search engines prioritize newer content on ranked websites. It is not the fairest system and becoming highly ranked has increased in difficulty over the years. Do not get discouraged if you see your older content slow down, it is only natural.
Why did you want to add a random post button to your website? Do you think the random post button will help your struggling older content?
Cool!
Is there a way to restrict the random post displayed to a certain category?
Cheers,
Julien
Does this work with Elementor?