
Tracking visitor stats is often crucial to the WordPress development experience. The information can show you how visitors are engaging with your content and what articles work the best.
Because of this value, many will install a visitor stats dashboard in WordPress. It provides the details you need without having to switch to your Google Analytics account.
All the information you’ll need is right there on the admin screen. It’s all about streamlining the process of maintaining your site.
In this tutorial, I’m going to show you how to set up a visitor stats dashboard in WordPress.
Before we get started though, you’ll need to have a Google Analytics account for your website.
Method 1: Using MonsterInsights for Visitor Stats Dashboard
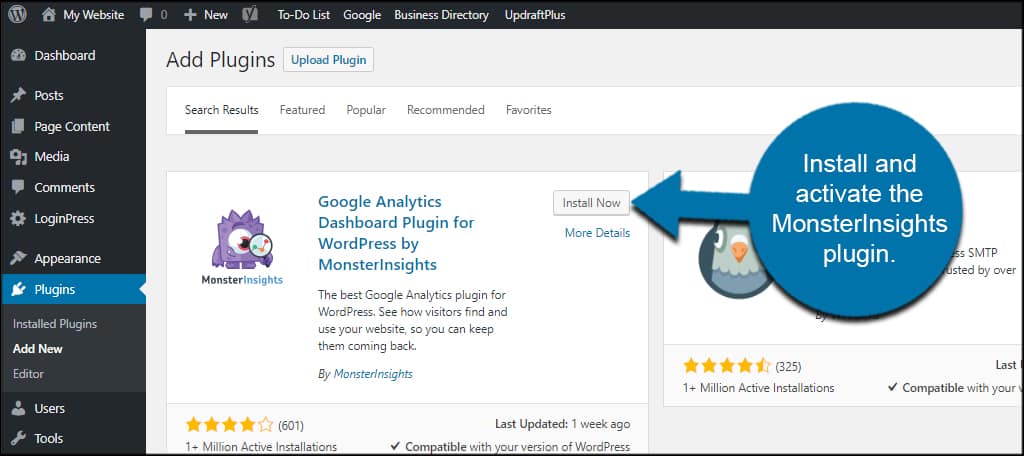
Step 1: Install MonsterInsights
Today, I’ll show you a bit of what MonsterInsights can do. Although I’ll use the “lite” version of the plugin, you can get far more features with a premium account.
This tool has over two million active installs and is among some of the more popular tools. It’s a feature-rich addition if you want WordPress admin dashboard visitor stats available.
Install and activate the MonsterInsights plugin for the Google Analytics Dashboard.
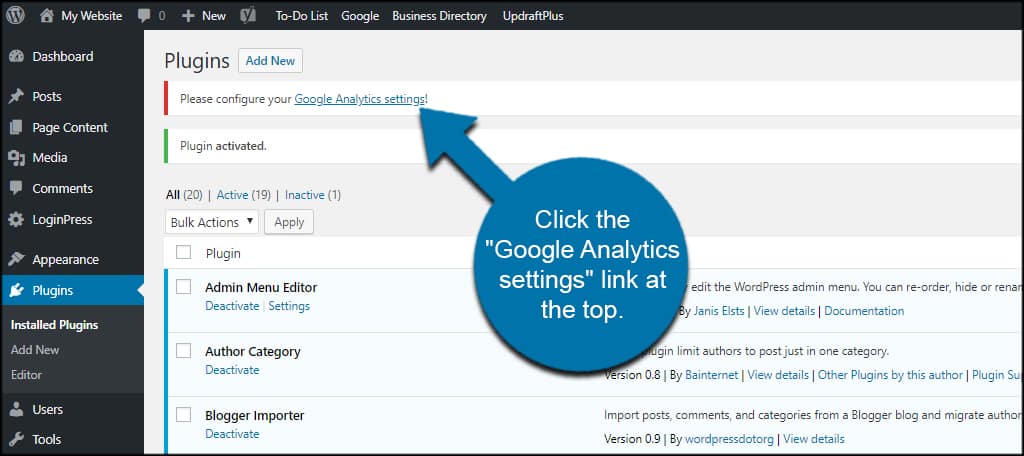
Upon activation, you’ll get a warning at the top of your screen. This is MonsterInsights telling you that information is required before it is usable on the website.
Without these settings, you won’t be able to monitor WordPress traffic from the plugin.
Click the “Google Analytics settings” link at the top.
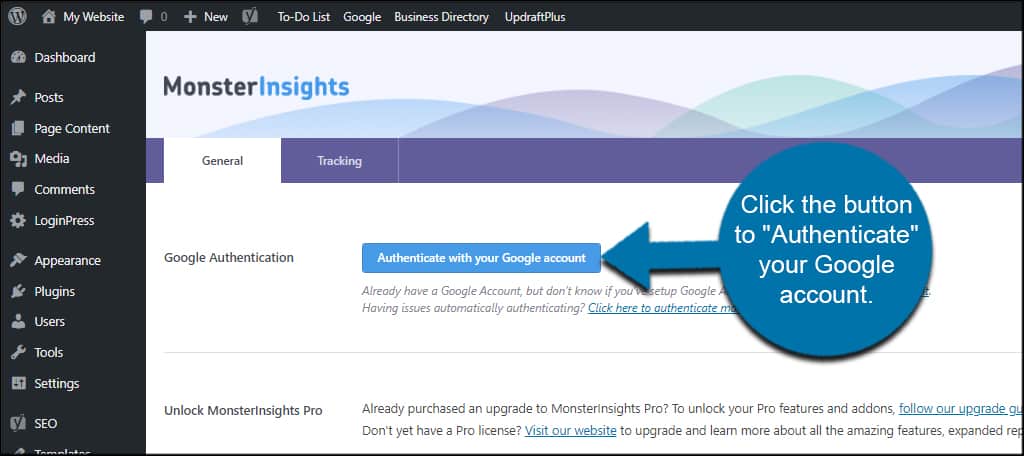
Click the button to “Authenticate” your Google account. This is the connection between your website and Google Analytics.
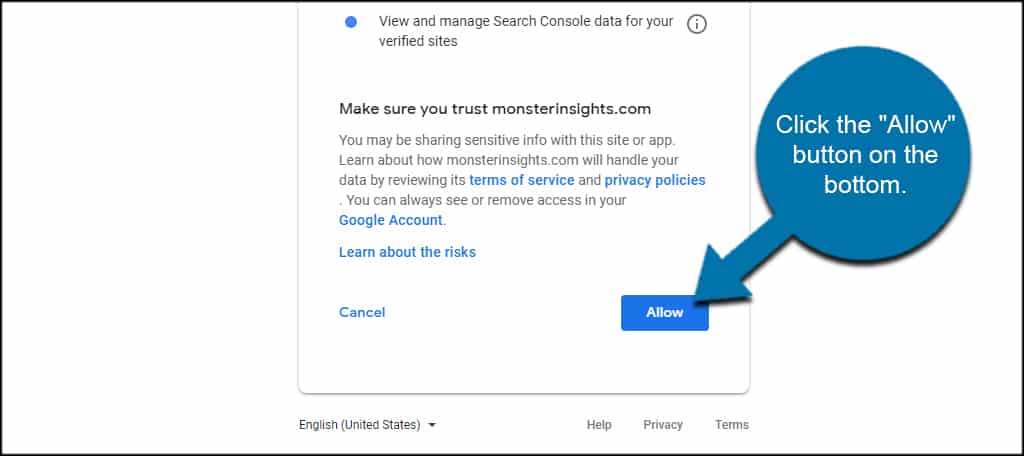
At this point, the plugin will redirect you to Google’s login screen where you choose the account you are linking. After signing in, you’ll see a message that “monsterinsights.com wants to access your Google Account.”
Click the “Allow” button on the bottom.
Pick the profile you want to associate with the WordPress stats dashboard. If you have multiple sites, use the drop-down to find the one you want.
Click the “Complete Connection” button.

It’ll take a few seconds for the authentication process to finish. Once it does, you’ll be taken back to your MonsterInsights settings screen on your website.
Step 2: Configure the Settings
This plugin is full of customization options that you can configure. Here’s a small overview of what you can find. Again, the premium version offers way more options.
General Settings
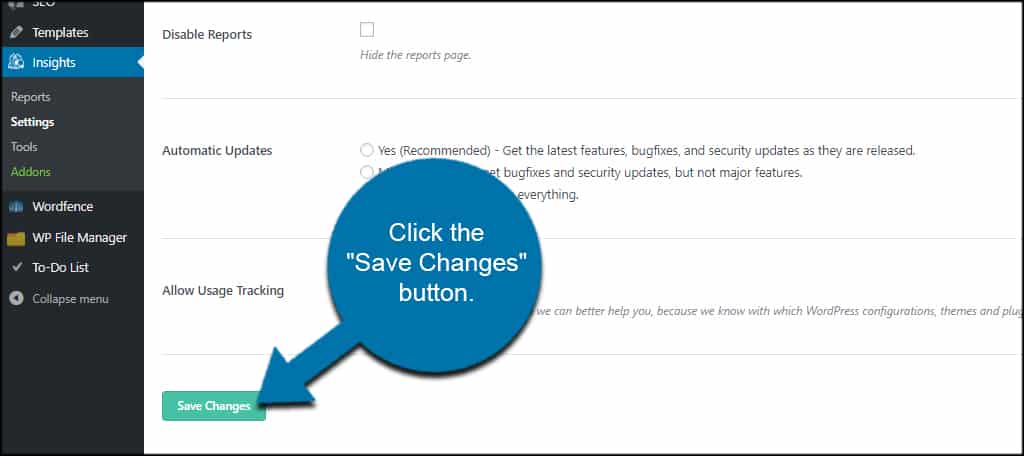
The “General” options tab for the visitor tracking plugin has a few settings available. You can choose to disable the reports, perform automatic updates or allow usage tracking.
Click the “Save Changes” button.
Tracking Settings
Click the “Tracking” tab at the top.
On this screen, you have access to a long list of features. You can change how MonsterInsights processes information regarding engagement, demographics, ads, eCommerce, performance, and much more.
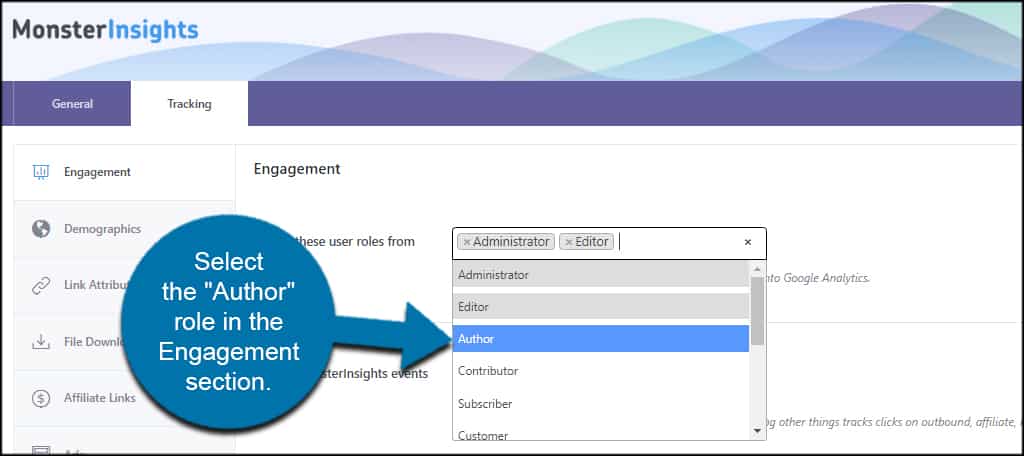
One of the benefits of MonsterInsights is that it supports custom user roles for tracking. This means you can ignore visits from specific users on your site. For example, what if you don’t want to track “Authors?”
You would select the “Author” role in the Engagement section.
Unfortunately, most of the features for MonsterInsights are locked behind the “Pro” version of MonsterInsights. But if you decide to subscribe to the service, this section is where you would fine-tune your reporting.
Each section will have its own “Save Changes” button available, so don’t forget to click it if you make adjustments. For this tutorial, I’m just going to keep everything as default for now.
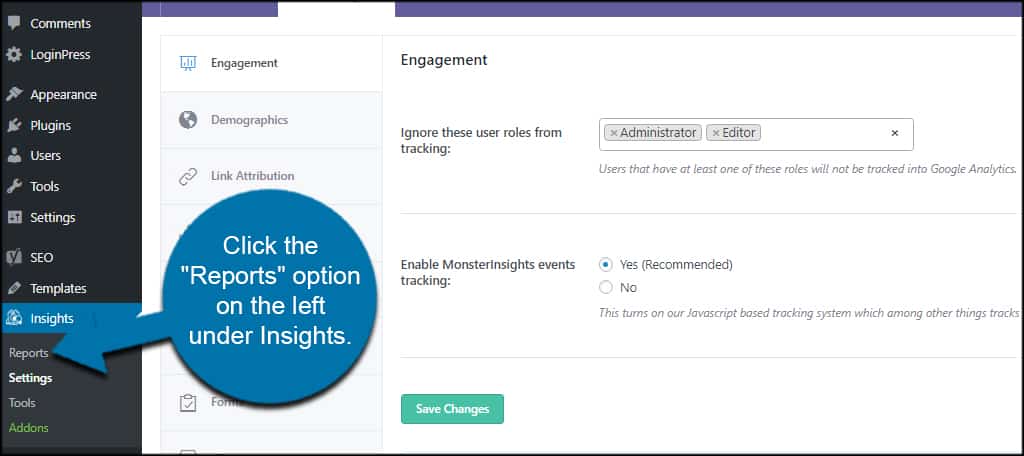
Step 3: MonsterInsights Reports
Click the “Reports” option on the left under Insights.
In the Lite version of MonsterInsights, all you have access to is the “Overview” report. If you want to see AdSense data, eCommerce, Search Console stats, and other data, you need the Pro version.
Now, let’s go over how to check views on a WordPress website with MonsterInsights.
Overview Report: Sessions
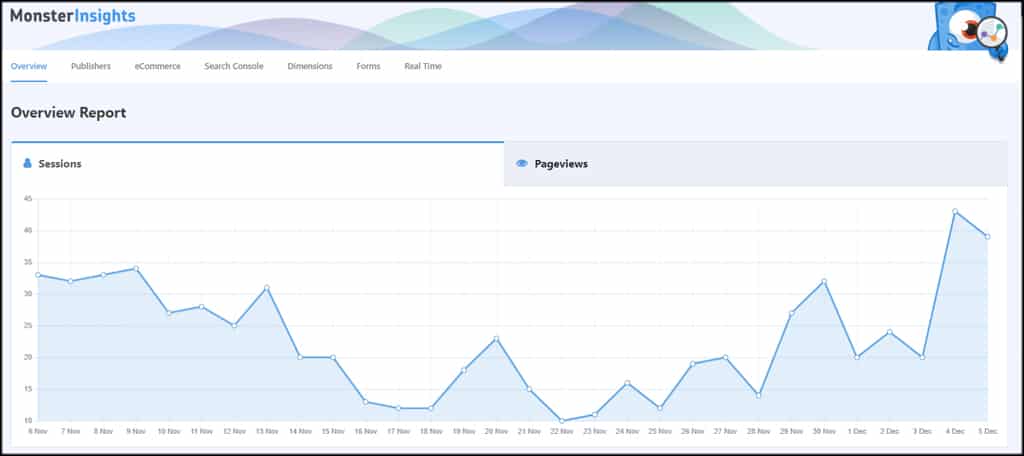
The first tab is the Sessions graph. This shows the number of visitors to a website over the span of a month. It’s similar to what you would see in Google Analytics.
Hovering your mouse over any of the data points will show you the number of unique visitors for that day as well as the positive or negative growth in percentage points.
Overview Report: Pageviews
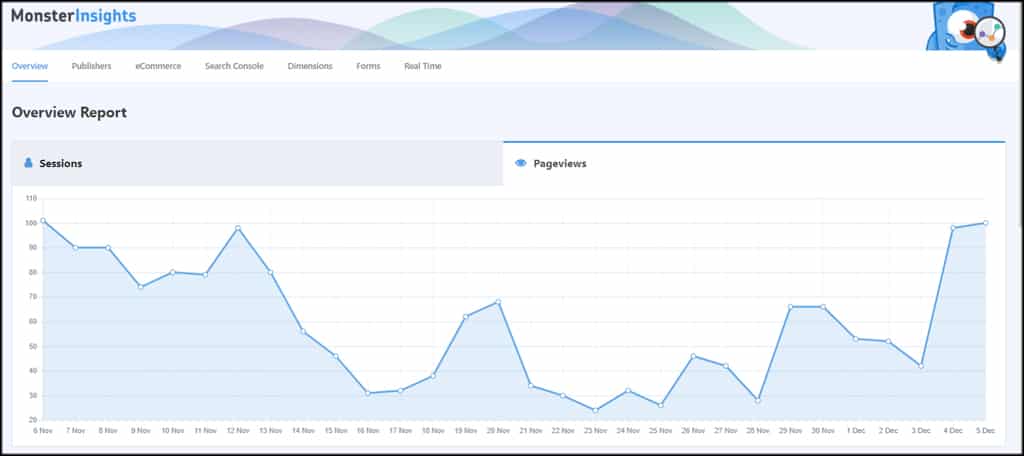
The Pageview report shows the number of times a visitor has accessed pages on your website. The graph is usually similar to Sessions.
However, spikes in this report often signify people exploring the website instead of reading just one article.
More Report Details
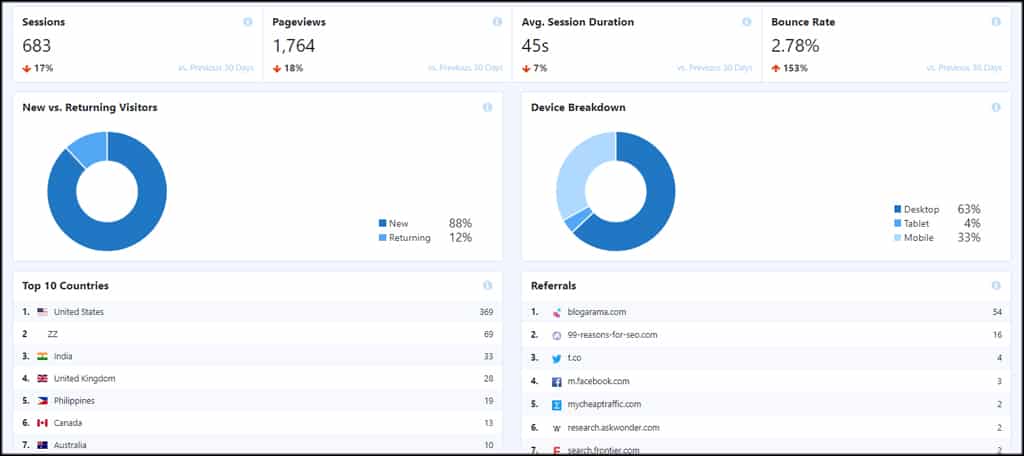
If you scroll down, you’ll see more data regarding visitors. These reports will show the previous 30 days and how it compares to the 30 days before.
Essentially, it’s a monthly comparison figure.
You’ll also see new vs. returning visitors as well as the types of devices used to access your pages.
Underneath those boxes, you’ll find the top countries and referrals. Now, the referral segment will show you how certain social campaigns are working for driving traffic to the site.
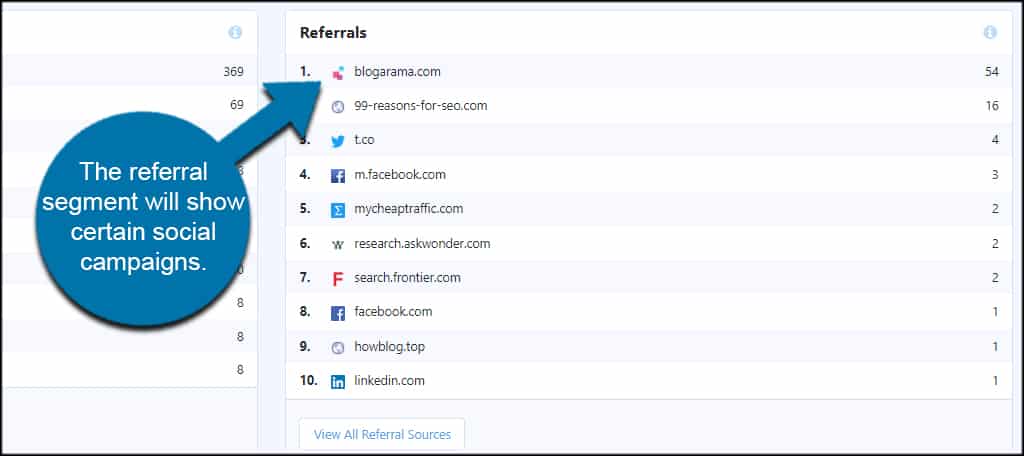
As you can see in my example site, Blogarama.com generates the majority of referrals. This tells me that simply sharing the site with this particular blog submission site works better than the Twitter and Facebook campaigns combined.
Keep in mind that referrals are different than search results. This is simply a list of externally hosted sites that send traffic to you.
The last thing in this visitor stats dashboard of WordPress is the Top Posts/Pages. By default, MonsterInsights shows you the 10 most productive pieces of content over the last 30 days.
You can choose to show 10, 25, or 50 of the top articles.
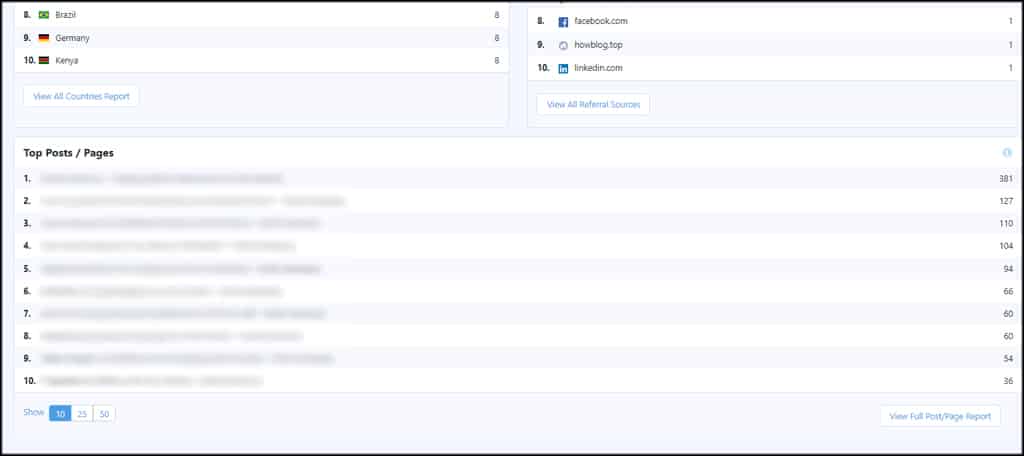
This kind of information is extremely helpful when determining what style of content is the most effective on your site. For instance, you can tell whether “How to” articles are better or if reviews are the way to go.
Perhaps the biggest downside to this particular report is the lack of dates. I would love to know if an older article is performing better than a newer one. It would help in making adjustments to the content.
Method 2: Using JetPack for Visitor Stats Dashboard
Step 1: Install Jetpack
Jetpack is a module-based plugin. Each module adds specific functionality to your website and there is one for just about anything. Due to its sheer versatility, it is one of the most popular plugins with over 5 million active installs.
In this case, we will be using the Jetpack Stats module. This allows you to see a variety of stats on your WordPress dashboard. This includes site visits, most viewed pages, and you can even see the search terms visitors used to find your site.
Go to the plugin area and install the Jetpack plugin.

Step 2: Setup Wizard
In many cases, you will need to install a module, but in this case, stats is one of the default options. If this is the first time you are installing Jetpack, you will need to go through the setup wizard which will allow you to choose a plan.
For the purposes of this tutorial, the free plan is more than enough. Since the wizard provides all of the information you need, I’ll leave this step to you.
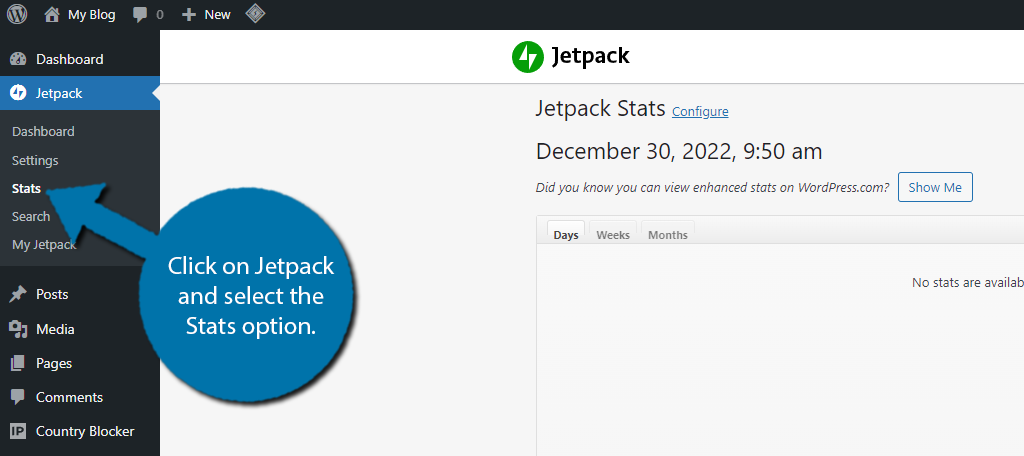
Step 3: View Stats
Once you have gone through the setup, click on Jetpack and select the Stats option.
Here, you can see the total visitor count, number of referrers, top posts & pages, video plays, search terms, subscribers, and more.

Unfortunately, I don’t have a lot of data to show in the above image. However, Jetpack will record quite a bit of data over time.
Plus, you’ll be able to access even more stats by accessing the WordPress.com layout, which you should have enabled when registering for free with Jetpack.
It’s a great option to view stats in WordPress, as most websites will have Jetpack installed for other features.
Method 3: Using Google Site Kit for Visitor Stats Dashboard
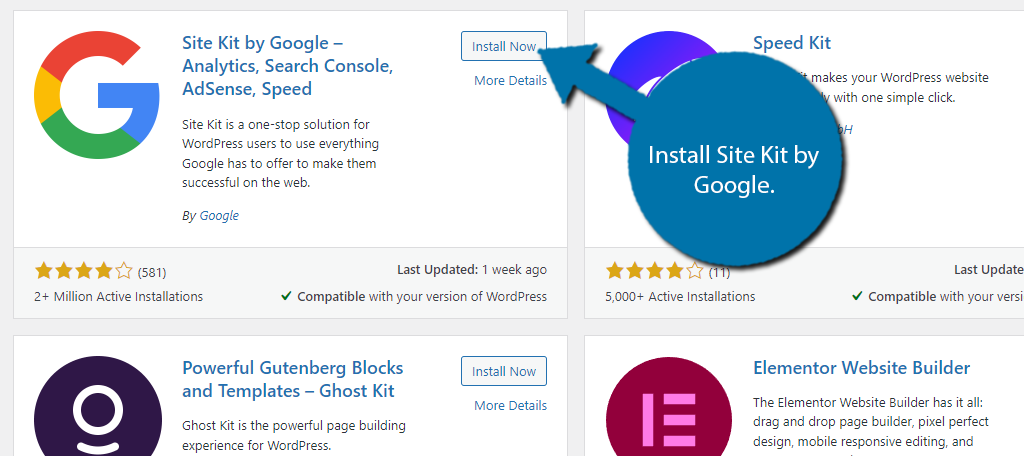
Step 1: Install Site Kit by Google
Site Kit by Google is an official plugin from Google that allows you to see website visit stats directly from your WordPress dashboard. Even though it is still relatively new, it has over 2 million active installs.
Begin by going to the plugin section and installing the Site Kit By Google plugin.
Step 2: Setup Site Kit
You need to set up Site Kit, which entails connecting it with Google Analytics. Luckily, the setup wizard will do most of the work for you. Just follow the on-screen prompts and complete the setup wizard.
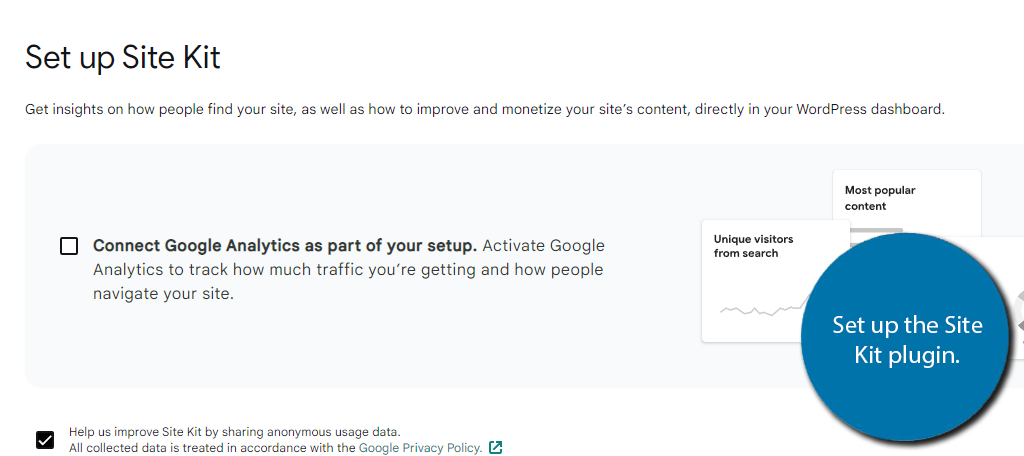
Note: It is possible to set up the plugin without connecting to Google Analytics, but that is not recommended as you will not have access to a lot of visitors’ information.
Step 3: View Stats
Once the plugin is set up, you can freely view the visitor count and other stats directly from your WordPress dashboard. The information you see should be nearly identical to what you can view in Google Analytics, assuming you are connected with it.
Of course, Site Kit is not just for viewing stats. It is a hub for all things Google, so be sure to check out its other features to take full advantage of the plugin.
Optional – Enable Other Google Tools
Site Kit allows you to connect to other Google tools such as Search Console, AdSense, PageSpeed Insights, Optimize, and Tag Manager.
Although you’ll have access to far more data by going to these services directly, Site Kit is still somewhat useful if you want a quick glance at those functions.
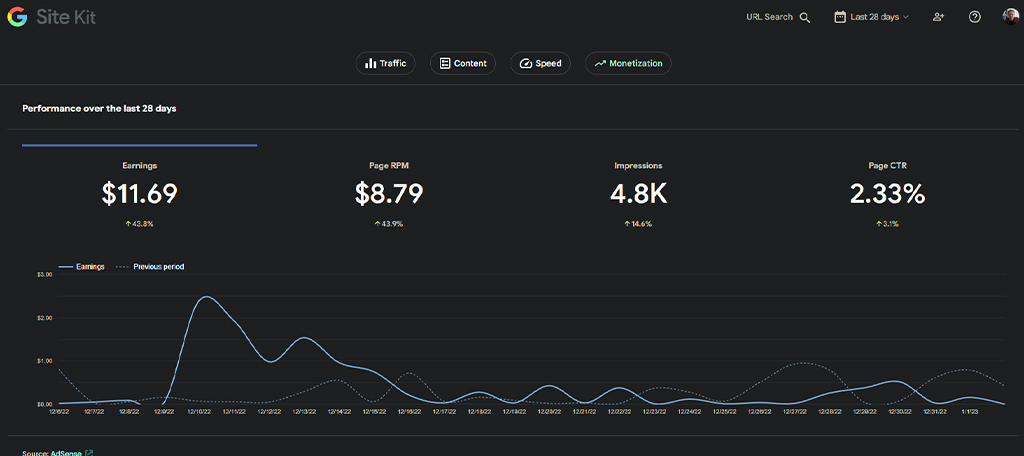
Probably one of the features of Site Kit I use most is Search Console. I like being able to see how people are accessing my content at a glance.
Although Site Kit will only show the top 10 articles for your site, it does link back to Search Console’s main page for detailed analysis.
Add Visitor Stats to WordPress Today
Being able to see visitor stats from the dashboard in WordPress streamlines development. Instead of changing tabs or signing in and out of Google Analytics directly, vital information is visible from your site.
It’s this data that will contribute to building strong content marketing strategies and figuring out what social campaigns are the most effective.
Never underestimate the value of data.
What kind of analytic plugins do you use in WordPress? Do you prefer free or limited plugins as opposed to premium tools?