Including a Facebook like box on the website is a vital component if you value social media integration. It gives visitors an easy way to follow your account while keeping them in the loop when posting new material to the popular search engine. It can also be a great way to boost the fans of the profile instead of relying purely on attracting Facebook users.
When someone “likes” your Facebook profile from the website, they are adding it to their own feed. This means that anything you post directly on Facebook will be seen by the person when he or she is on the social media site. As a result, you are gaining a way to engage an audience even further than just merely writing content.
Today, we’re going to show you how to put the Facebook like box into WordPress. There are a few methods this can be done. Whether you want simple plugins or advanced coding, here is how you add Facebook to your website.
This is only one of many ways that can be used to integrate social media into a WordPress website.
Method 1: Using the Facebook Widget
Plugins and widgets are two of the things that make WordPress such a popular platform. In this instance, we’re going to use the Facebook plugin because it has versatility as a sidebar widget and provides a shortcode to use elsewhere in the site.
To install Facebook for your website:
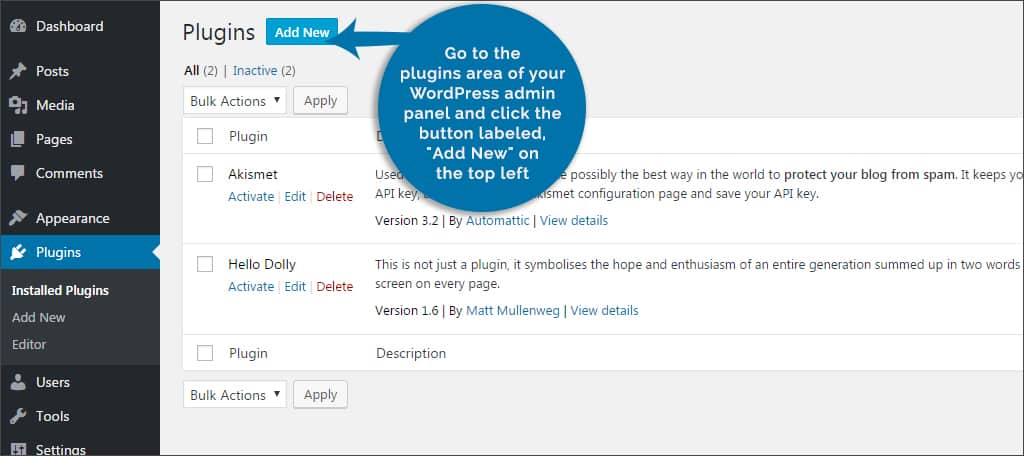
Step 1: Go to the plugins area of your WordPress admin panel and click the button labeled, “Add New” on the top left.
Step 2: Search for the plugin “Facebook” in the field provided on the right.
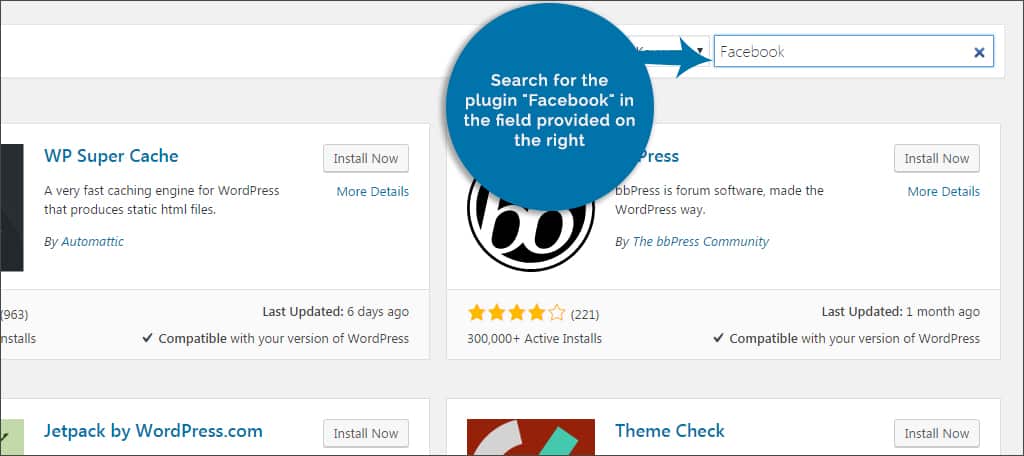
NOTE: This will bring up a large number of Facebook plugins. You want the one that is by Weblizar. It is a highly rated plugin with more than 50,000 active installs.
Step 3: Install and activate the plugin.
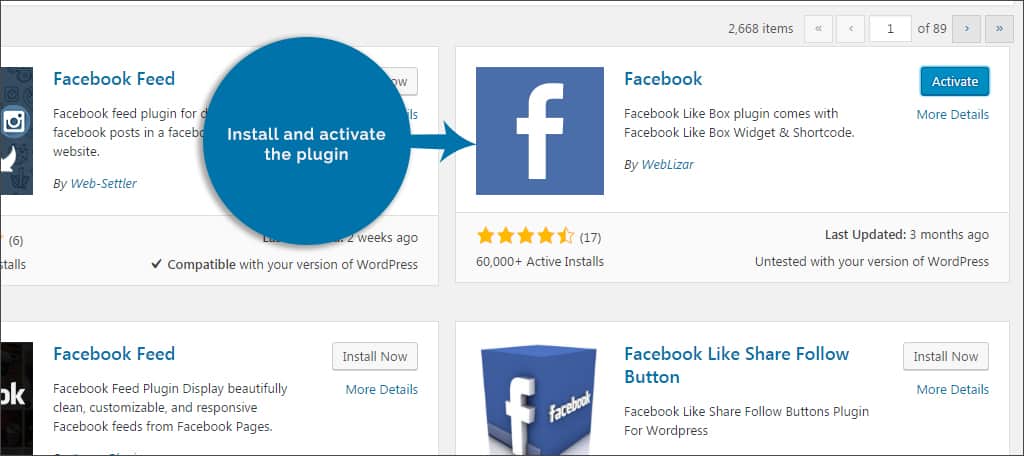
NOTE: Activating this plugin will add a new tool to the left admin panel of WordPress called, “Facebook By Weblizar.”
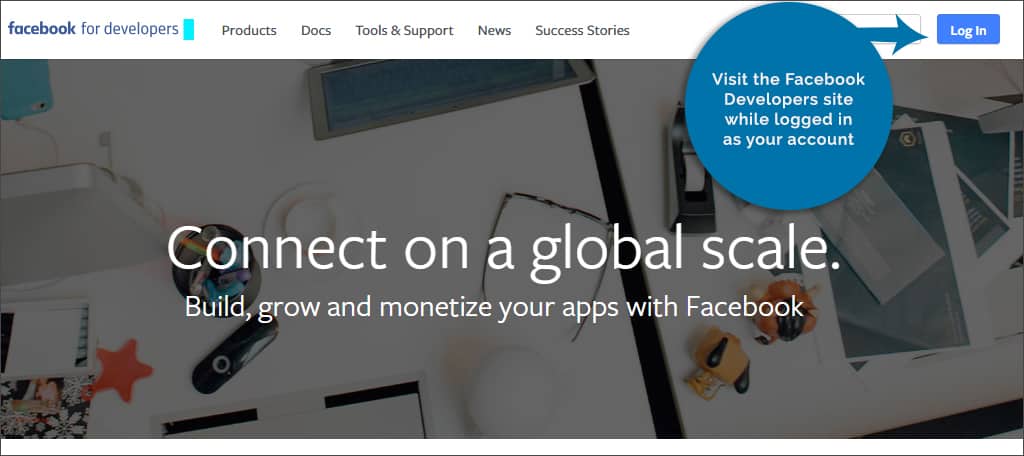
Step 4: Now that you have the plugin installed, you need an API code from Facebook. This enables tracking and other features you can use from the Facebook Developers dashboard. Visit the Facebook Developers site while logged in as your account.
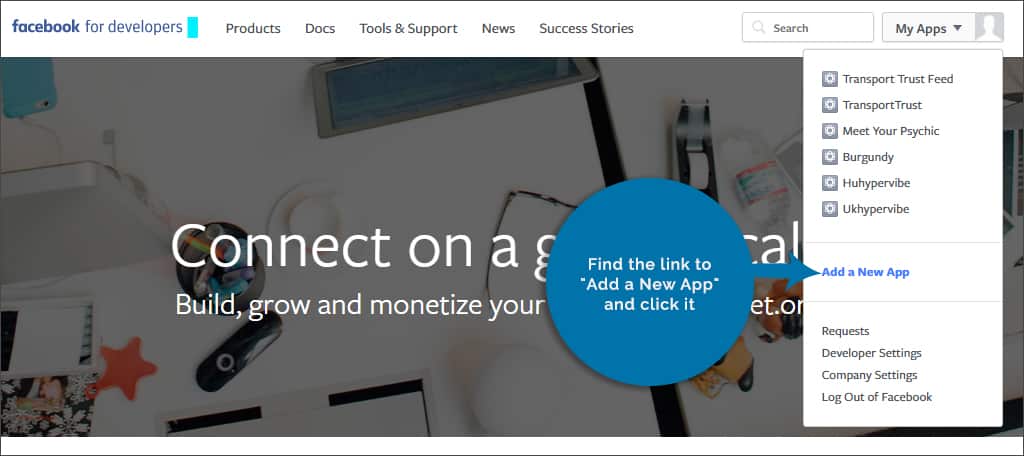
Step 5: On the right side of the site, you’ll see a drop down box next to your profile image labeled, “My Apps.” This is a list of everything you’ve connected to Facebook. Hover your mouse over this box.
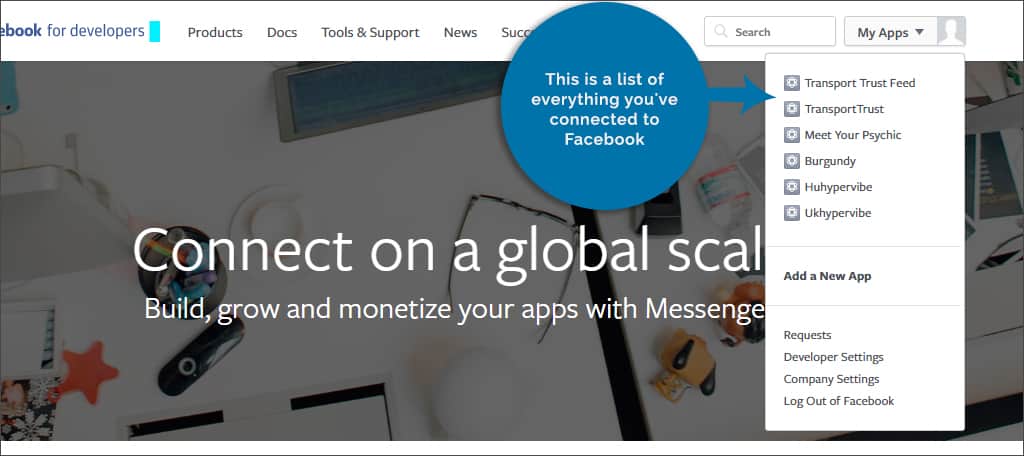
Step 6: Find the link to “Add a New App” and click it. This link will be under any apps you have created. Otherwise, it may be at the top of the list.
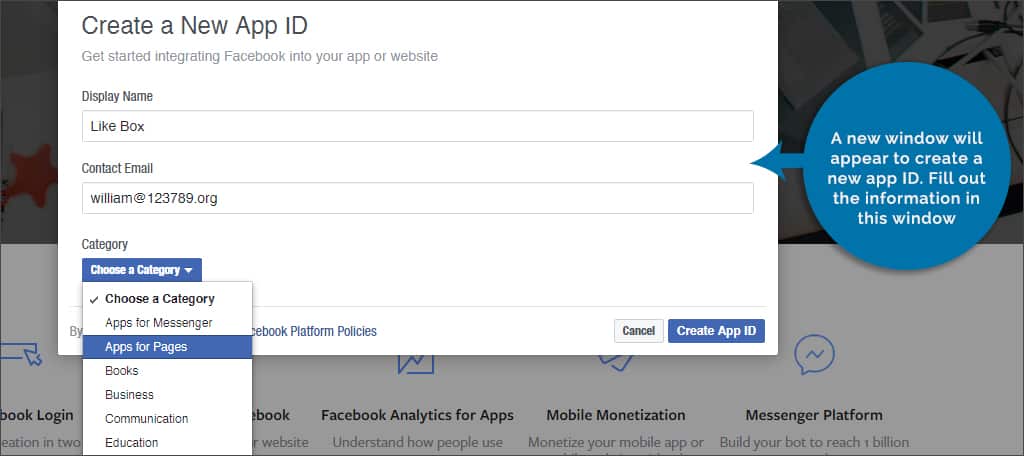
Step 7: A new window will appear to create a new app ID. Fill out the information in this window:
Display Name: This is what you want to call the app. For now, let’s just put “Like Box.”
Contact Email: Use an address that is associated with the app and Facebook.
Category: For this plugin, select “Apps for Pages”
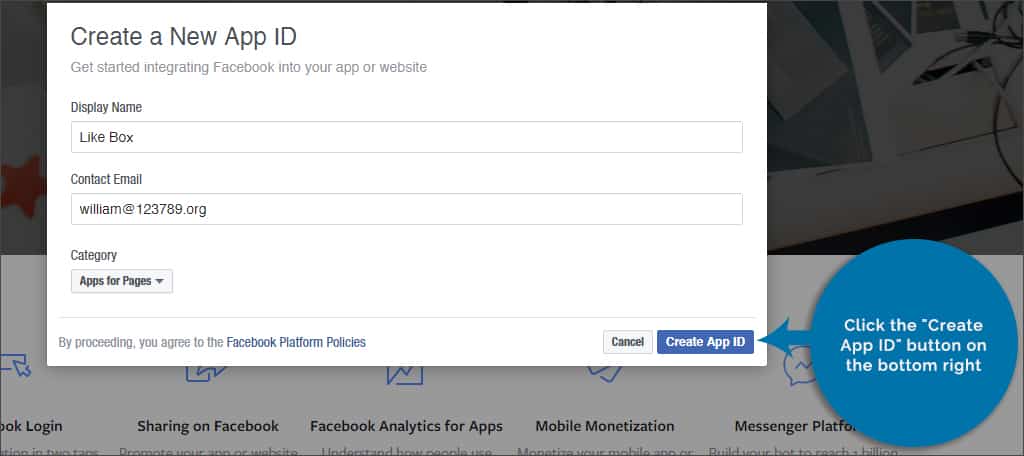
Step 8: Click the “Create App ID” button on the bottom right.
Step 9: Facebook will prompt a security check. This is a CAPTCHA code that needs to be entered. Once you put in the code, click “Submit.”
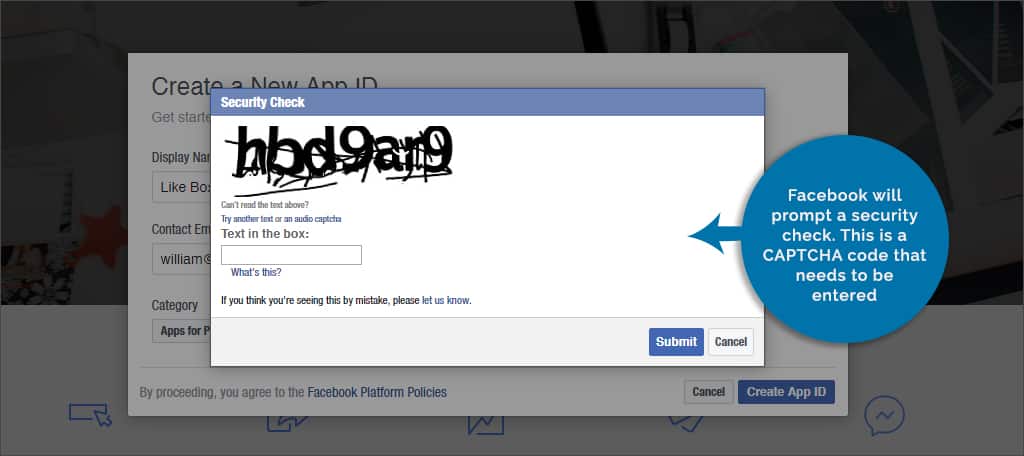
Step 10: Once the CAPTCHA is accepted, Facebook will take a moment and create the app. This can take more than a few seconds, so be patient.
Step 11: The next screen will be a dashboard for the new app. Along the top, you will see an “APP ID” number. Copy this number.

Step 12: Go back to your WordPress admin panel and go to the appearance area.
Step 13: Click into “Widgets.”
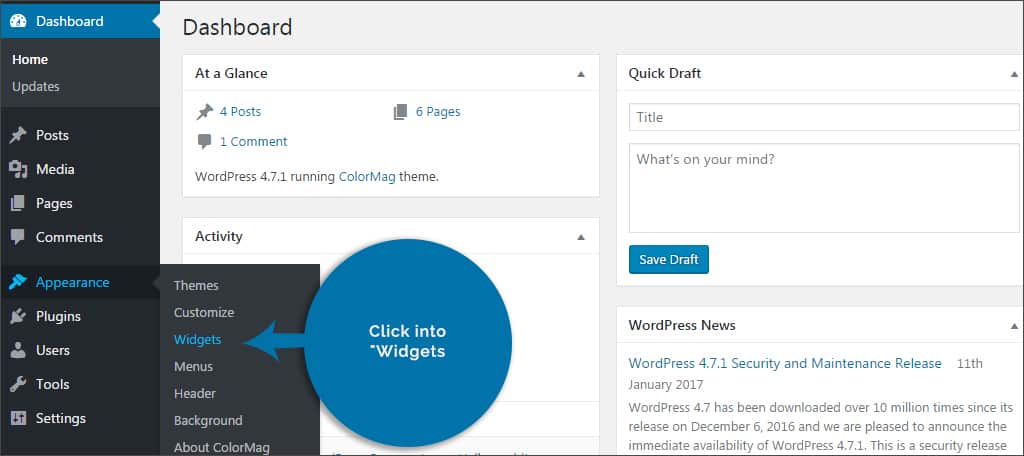
Step 14: Find the “Facebook By Weblizar” widget and drag it over to the sidebar.
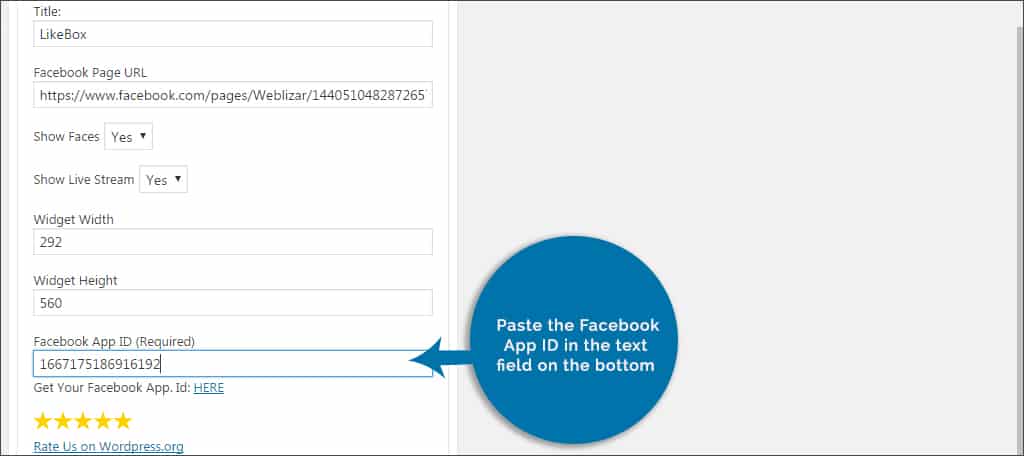
Step 15: Expand the widget by clicking on its name.

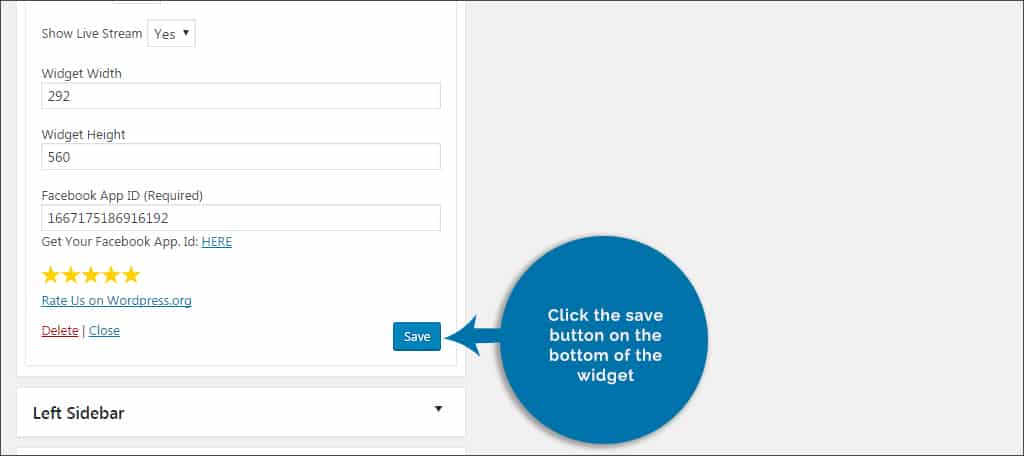
Step 16: Paste the Facebook App ID in the text field on the bottom.
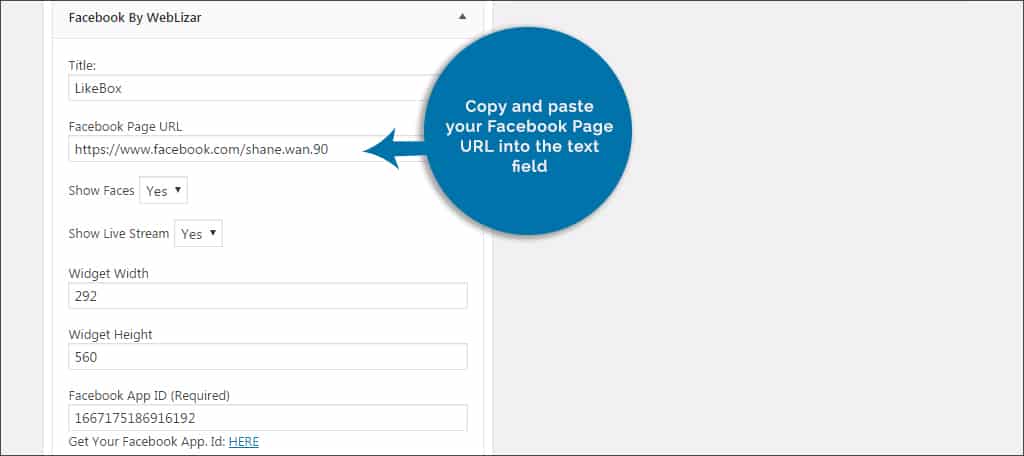
Step 17: Copy and paste your Facebook Page URL into the text field.
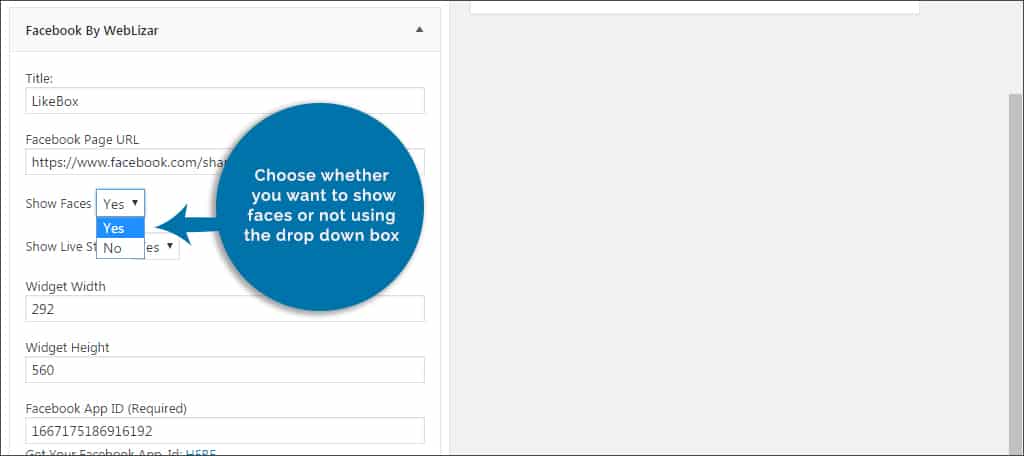
Step 18: Choose whether you want to show faces or not using the drop down box.
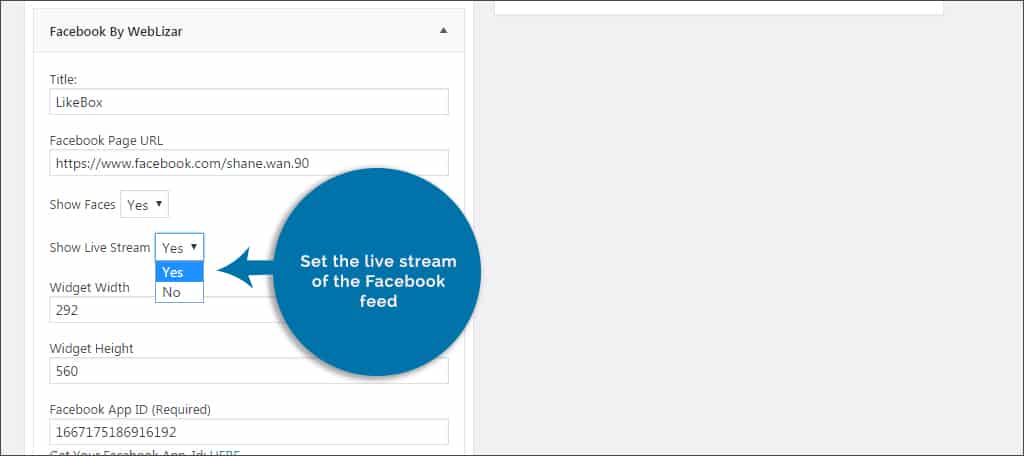
Step 19: Set the live stream of the Facebook feed. This will update automatically anytime your add new content to your social profile.
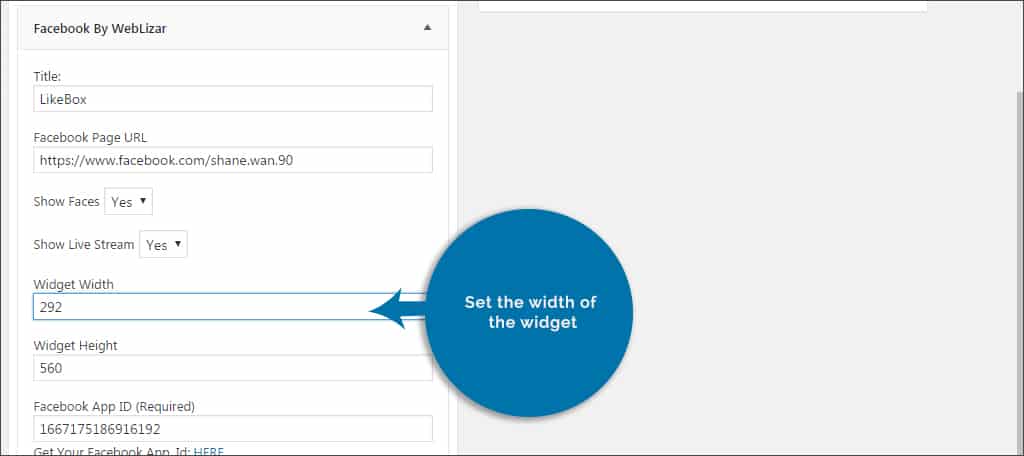
Step 20: Set the width of the widget. If you know the exact width your theme uses for the sidebar, this is where you would put it.
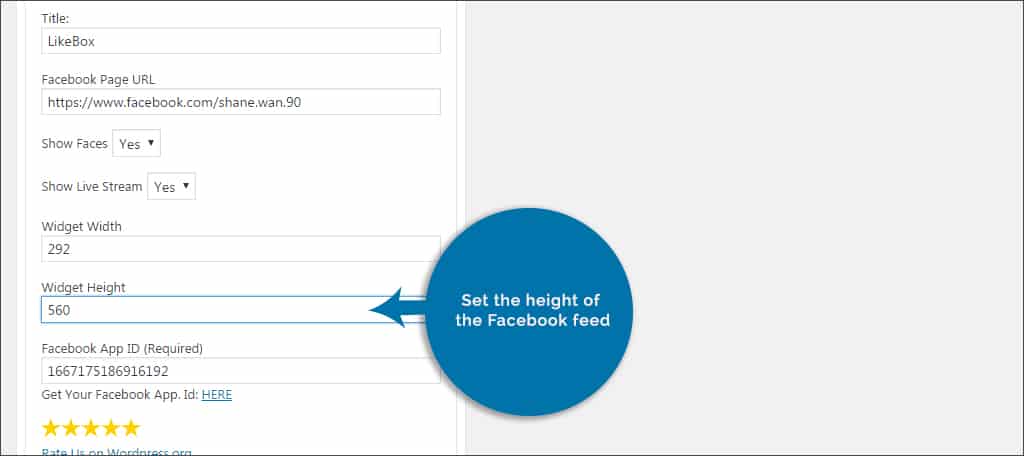
Step 21: Set the height of the Facebook feed. You want to use a height that looks good for the site, but not too long because it can be a distraction to visitors.
Step 22: Click the save button on the bottom of the widget. Your Facebook like button is now ready for visitors.
Alternatively, you can also go into the tool in the WordPress admin panel on the left for “Facebook By Weblizar.” By using the same app ID and information put into the widget, you can create a shortcode to use throughout the website. This will let you place the Facebook feed and like button in any post and page within WordPress.
This widget is responsive, which means it will resize according to the space on the page. If you don’t know the exact dimensions of the sidebar, then you don’t have to worry about it breaking the site by being too wide.
Method 2: Using Jetpack
If your installation of WordPress comes with the Jetpack plugin, then you already have access to a Facebook module. This process is much faster than the above method. However, it doesn’t have the tracking tools offered through the Facebook Developers portal or the ability to create a shortcode.
The Facebook widget is only one of the many add-ons delivered by Jetpack. There are more than 30 available and can be quite useful.
To enable the Facebook Module:
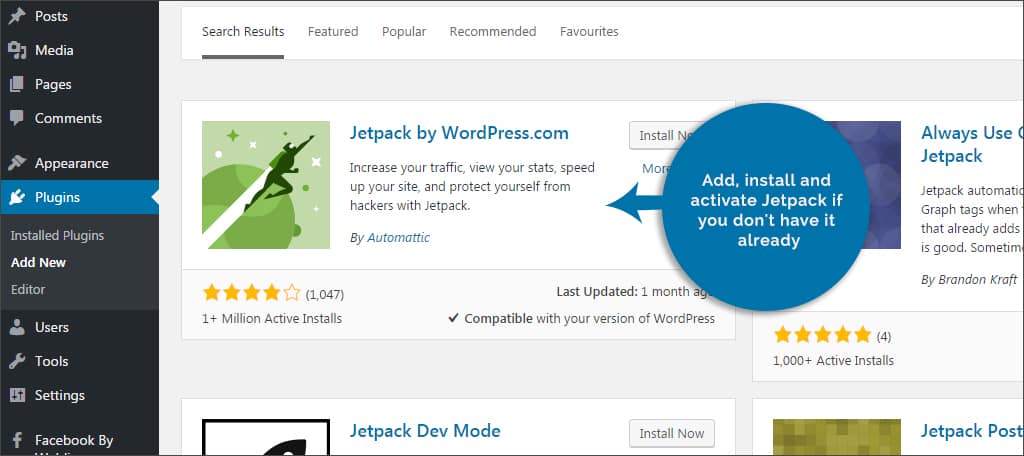
Step 1: Add, install and activate Jetpack if you don’t have it already. Many WordPress installations already come with this plugin.
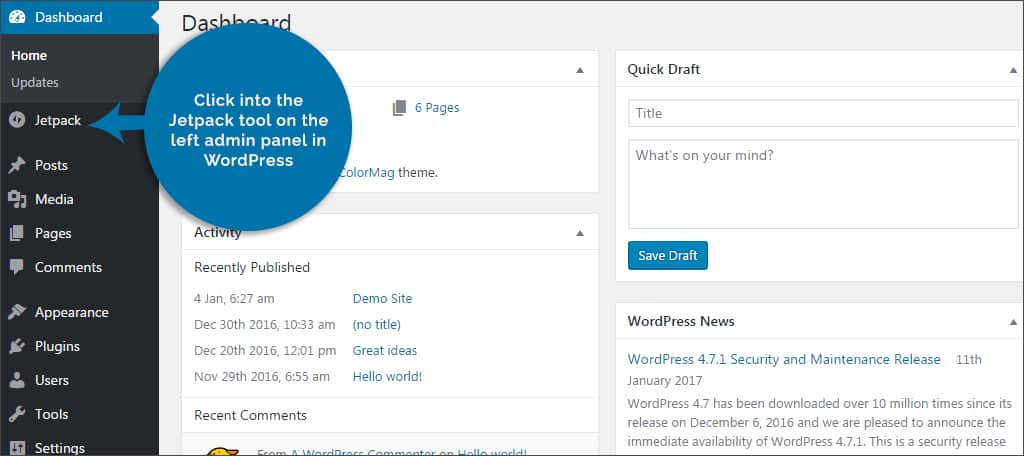
Step 2: Click into the Jetpack tool on the left admin panel in WordPress.
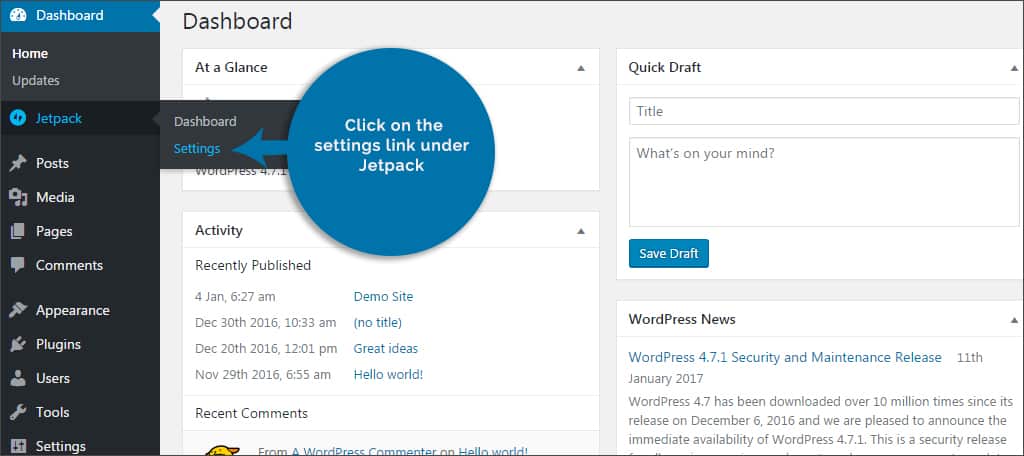
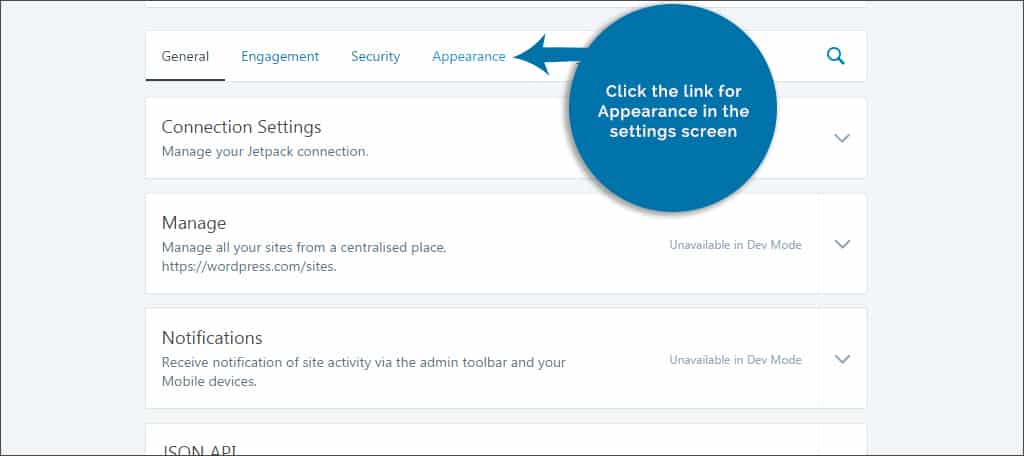
Step 3: Click on the settings link under Jetpack.
Step 4: Click the link for Appearance in the settings screen.
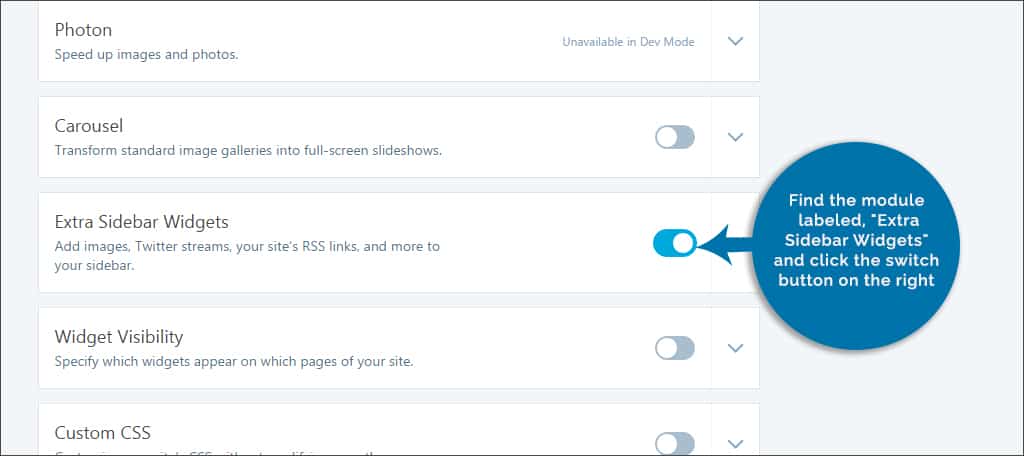
Step 5: Find the module labeled, “Extra Sidebar Widgets” and click the switch button on the right.
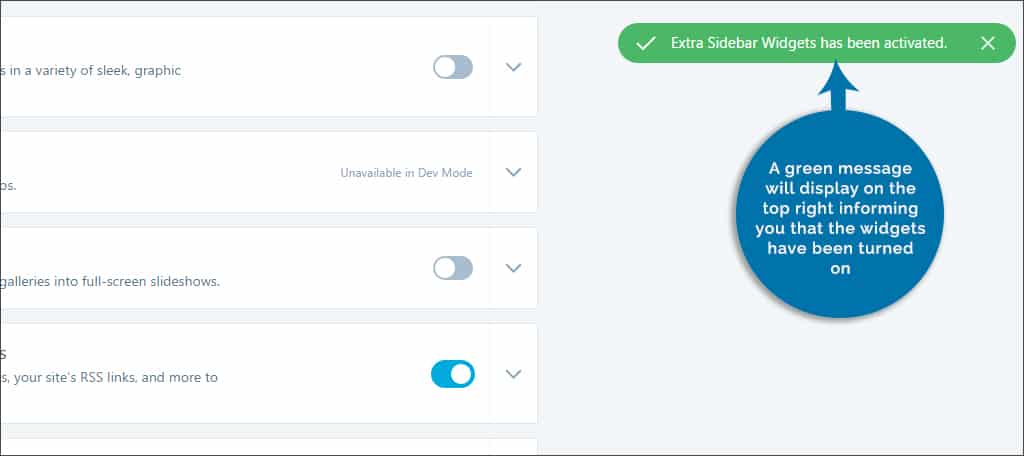
Step 6: A green message will display on the top right informing you that the widgets have been turned on. Click the module itself to expand it.
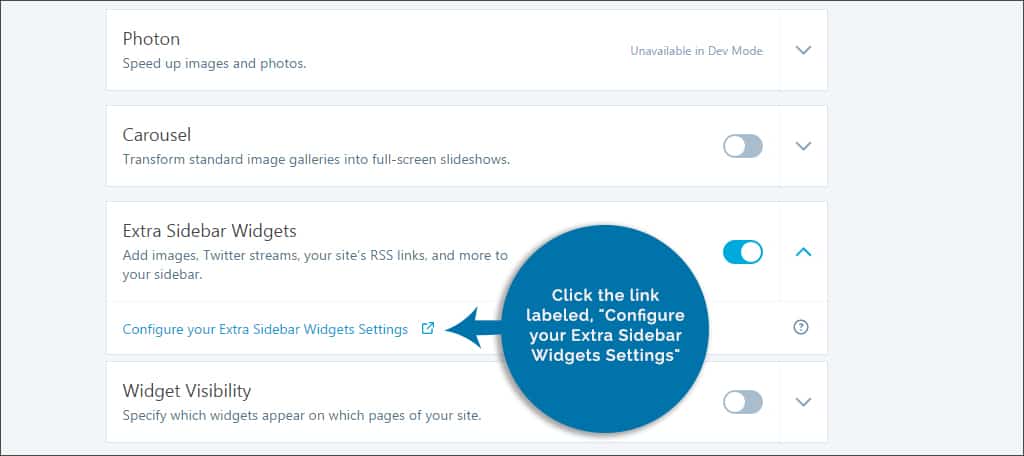
Step 7: Click the link labeled, “Configure your Extra Sidebar Widgets Settings.” This will take you to the widgets area of WordPress.
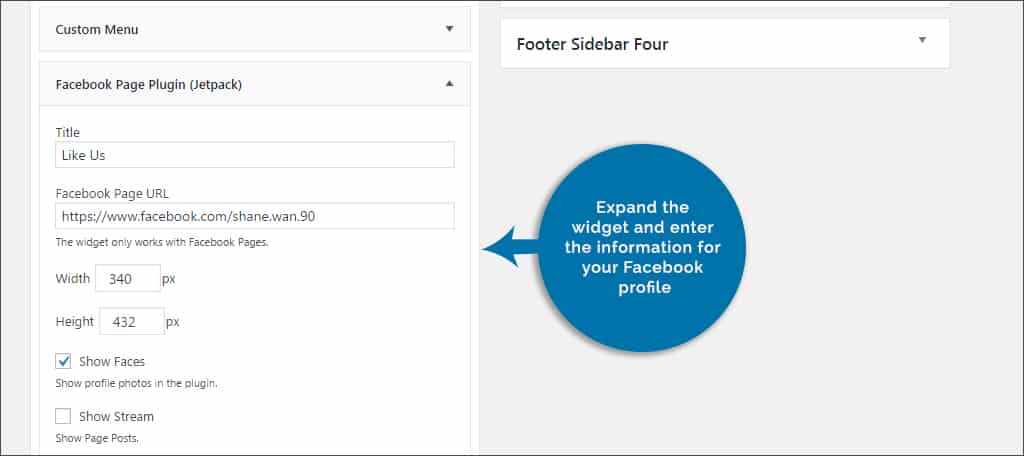
Step 8: In this screen, find the “Facebook Page Plugin (Jetpack)” widget and drag it to your sidebar.

Step 9: Expand the widget and enter the information for your Facebook profile.
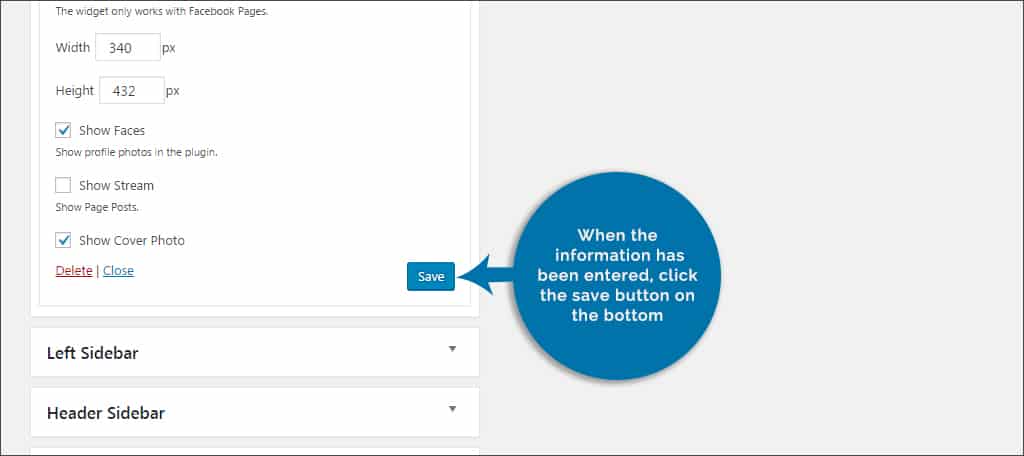
Step 10: When the information has been entered, click the save button on the bottom. You now have a Facebook like button.
The biggest difference about using Jetpack as opposed to the plugin by Weblizar is that you don’t need an app ID to start using the like button. This entire process can take less than a few minutes and you don’t have to leave the WordPress admin screen.
Method 3: Using Code
If you don’t want to use a plugin, you can always get the code directly from Facebook. By visiting the developers’ area and creating a like button from scratch, you can paste the provided code in a myriad of areas of WordPress. This is for more experienced developers as you will have to edit various files of WordPress to use the code.
To make your manual button:
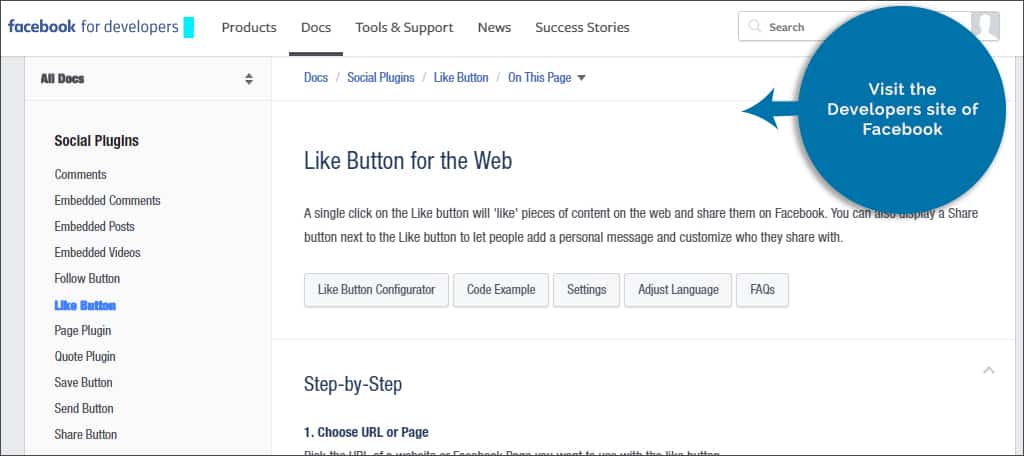
Step 1: Visit the Developers site of Facebook.
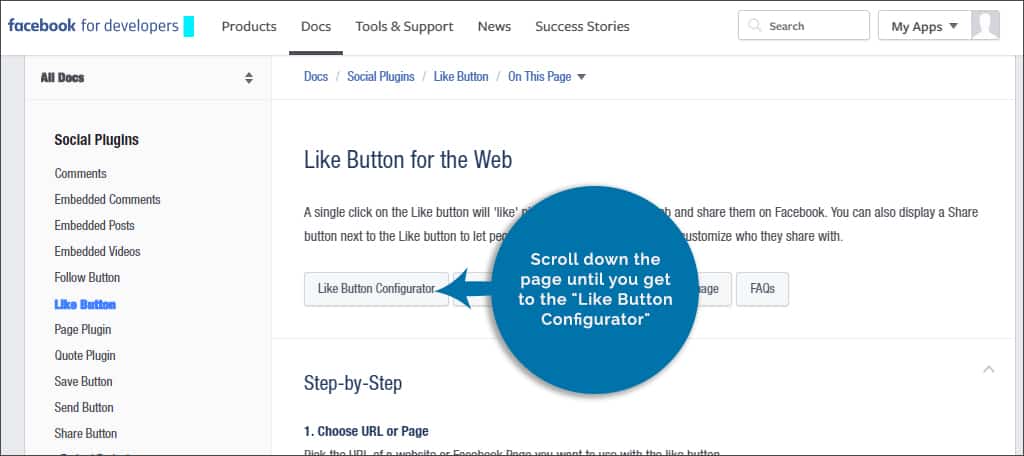
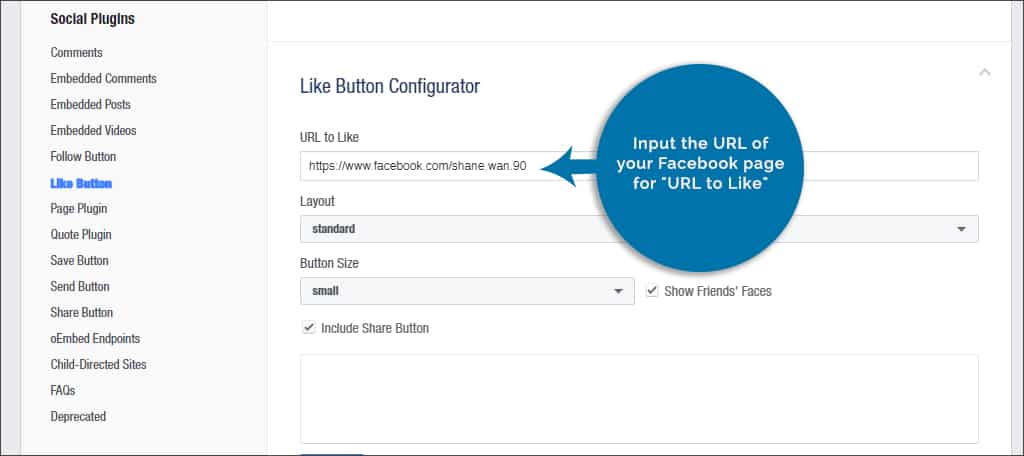
Step 2: Scroll down the page until you get to the “Like Button Configurator.”
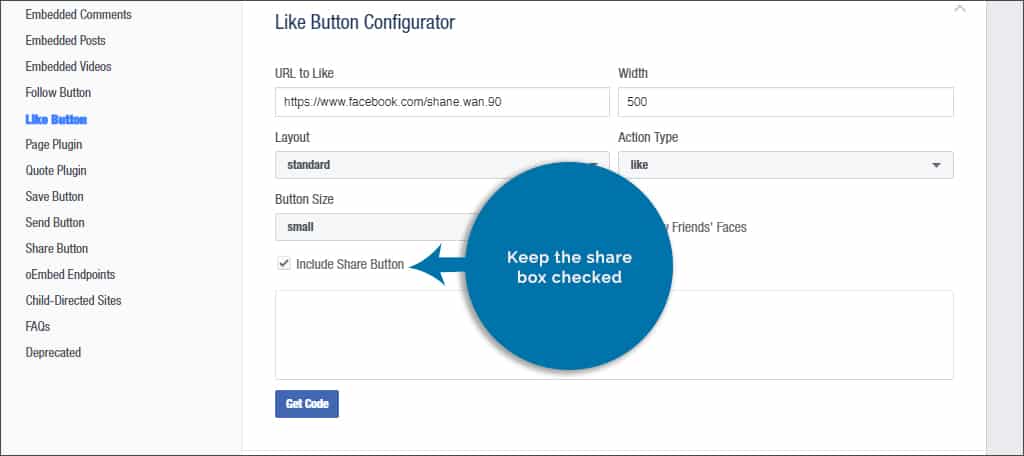
Step 3: Input the URL of your Facebook page for “URL to Like.”
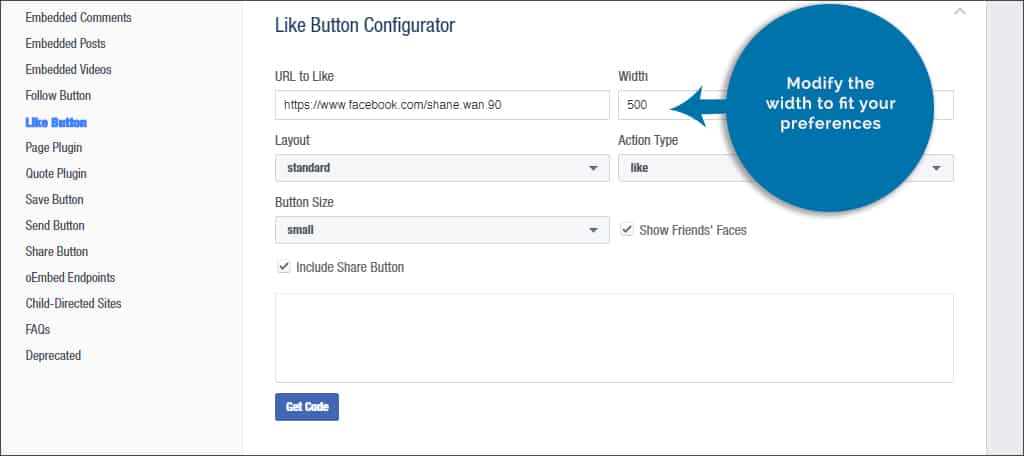
Step 4: Modify the width to fit your preferences.
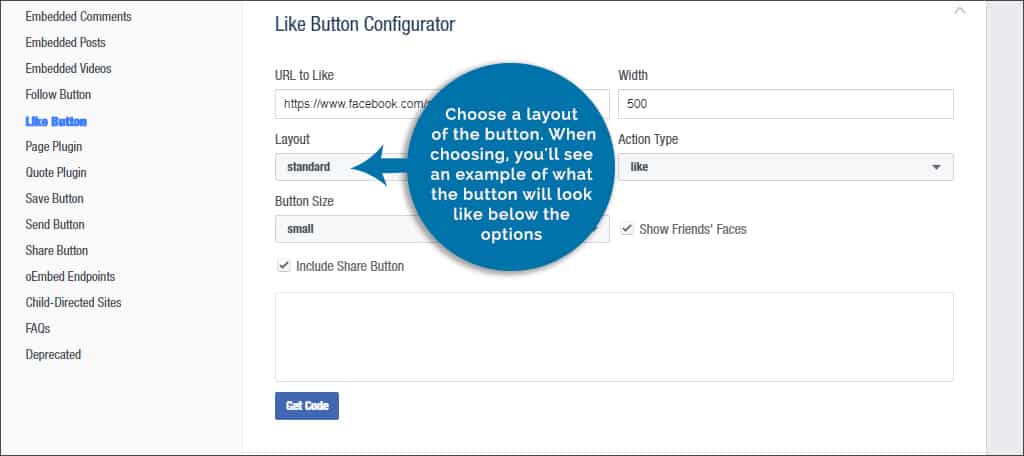
Step 5: Choose a layout of the button. When choosing, you’ll see an example of what the button will look like below the options.
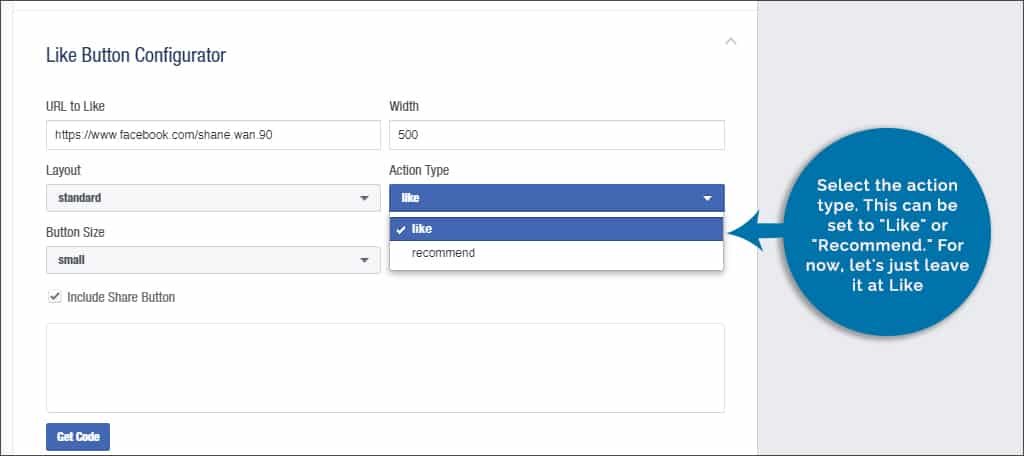
Step 6: Select the action type. This can be set to “Like” or “Recommend.” For now, let’s just leave it at Like.
Step 7: Keep the share box checked.
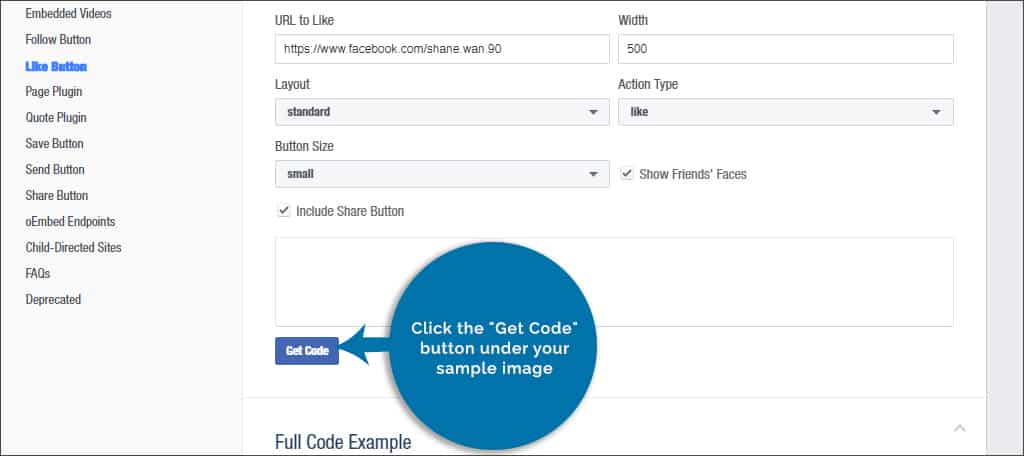
Step 8: Click the “Get Code” button under your sample image.
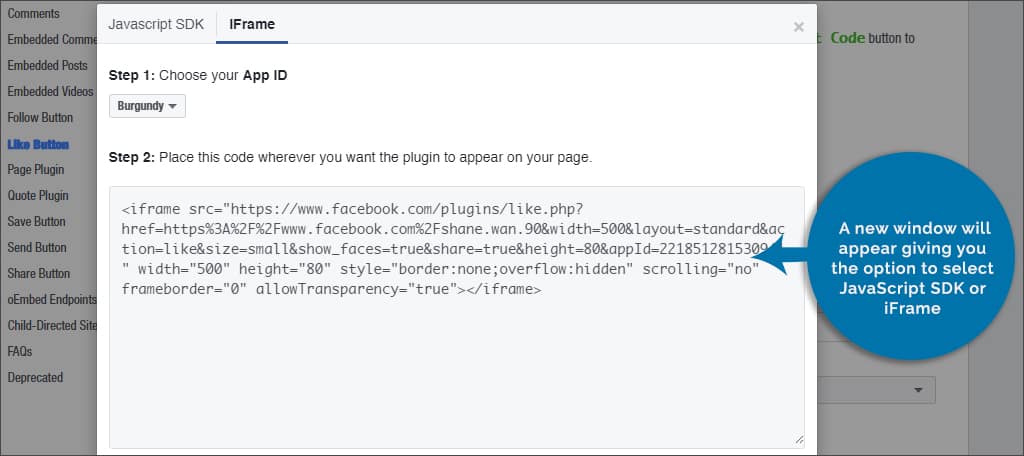
Step 9: A new window will appear giving you the option to select JavaScript SDK or iFrame. It may be better to use the iFrame method as it is easier to implement in WordPress. It’s also less of a hassle.
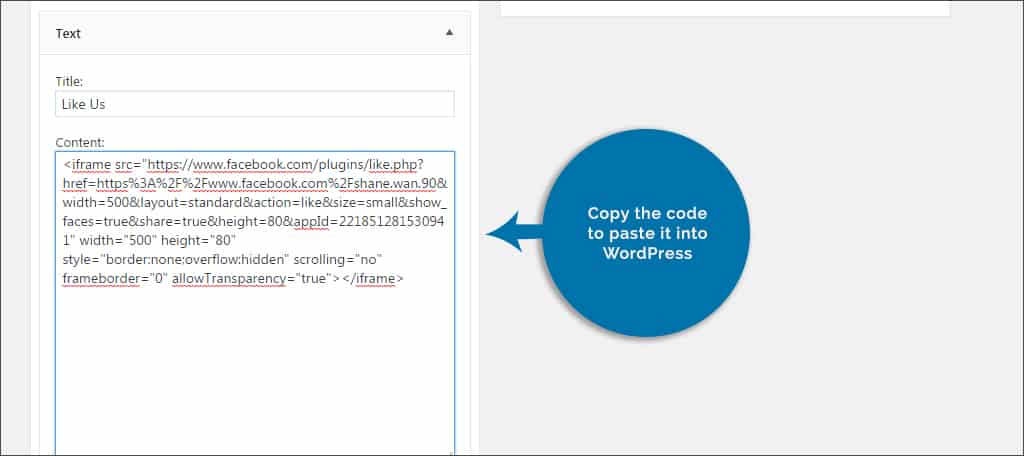
Step 10: Copy the code to paste it into WordPress.
The Facebook like box can be a great way to encourage interaction from visitors while growing a following on the social media website. It can add a sense of continuity and help build trust within visitors. Install your own like box and give people a reason to follow the account.
What kind of social elements do you put in WordPress? How often do you gain followers on sites like Facebook and Twitter directly from your website?
Thanks for your tips. It really works.
Hello Mohd,
Glad this was able to solve your problem!