Website security is one of the most important parts of running a website and CAPTCHA in WordPress can help make your website less vulnerable to spambots. This is extremely important, especially when you can sign up for free.
This would give bots access to your login, registration forms, and comment sections. To better protect your WordPress website CAPTCHA tests can help.
There are many disadvantages to having spam bots enter your website. Bots can lead to inflated visitor numbers, disrupt comment sections, and harass or disturb visitors. WordPress CAPTCHA can help keep your website spam bot free by adding a simple test that any human can pass, but no spam bot can.
Today I will demonstrate how to accomplish this with the Advanced noCaptcha plugin.
Why Spam Bots Hurt Your Website
Spambots are never a good thing to have on a website.
For starters, they can inflate your website’s visitor and registration numbers. While experienced web developers may understand that this is normal, beginners do not. Instead, they may think their website is really taking off.
This can make them spend more on resources because they think it will pay off. This can have serious financial consequences.
The comments section is always an interesting place to find different views on topics, but it is also an easy spot for spambots to advertise for other websites or products. If half the comments are about the content and the rest are all advertising other websites it can really hurt the discussion on a blog.
This can be avoided by having a WordPress CAPTCHA registration in the comments section. This will ensure that bots cannot leave a comment without passing a CAPTCHA test.
Installing Advanced noCaptcha
The Advanced noCaptcha plugin allows you to add CAPTCHA protection to your website in a multitude of ways. It supports noCaptcha and invisible CAPTCHA. NoCaptcha just makes users check a simple, “I am not a robot” checkbox.
While invisible CAPTCHA is where an algorithm determines if you are a robot based on your mouse movement and typing behavior. If it thinks that you are a robot, you will have to pass a test.
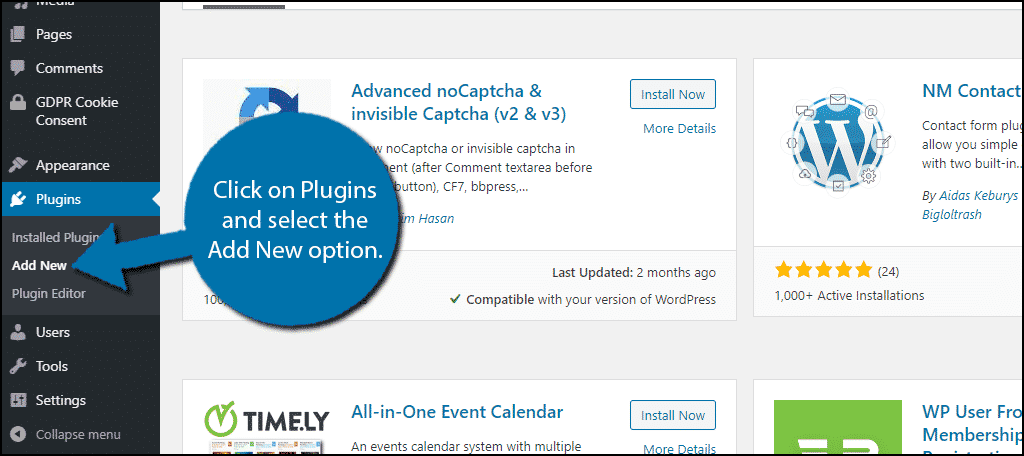
Let’s start by going to the plugins area of WordPress and click on the “Add New” button.
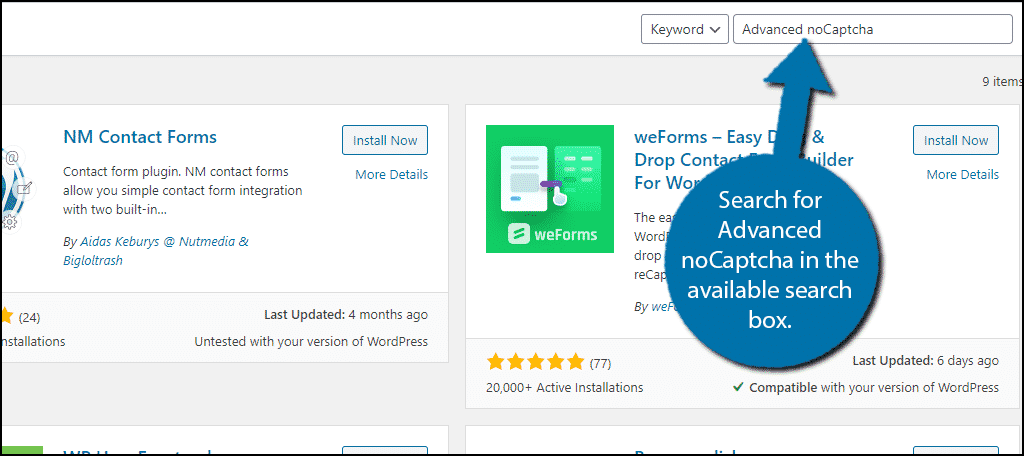
Search for Advanced noCaptcha in the available search box. This will pull up plugins that have similar functionality.
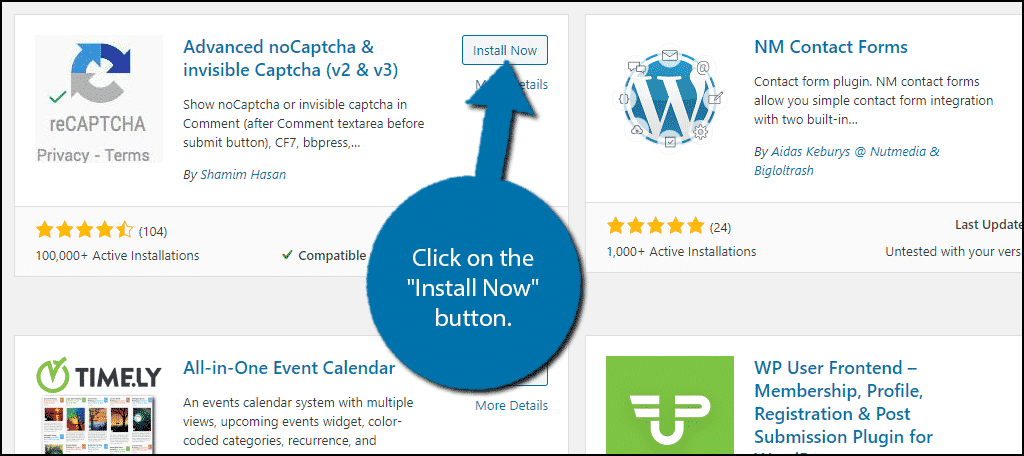
Scroll down until you find the Advanced noCaptcha plugin and click on the “Install Now” button and activate the plugin for use.
Setting Up the Plugin
On the left-hand admin panel, click on Settings and select the Advanced noCaptcha & invisible captcha option.
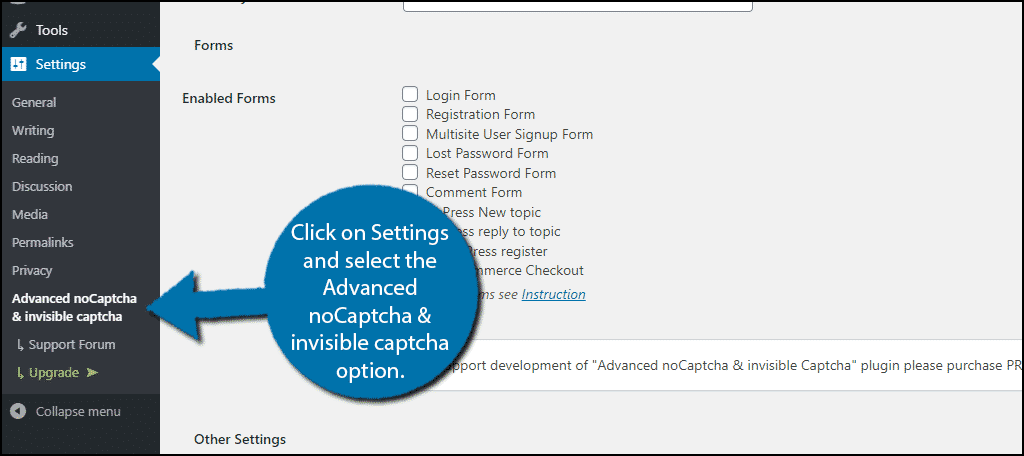
The plugin does most of the work for you. All you really need to do is pick your Captach type, enter your site key from Google, and select where it will be present on your website.
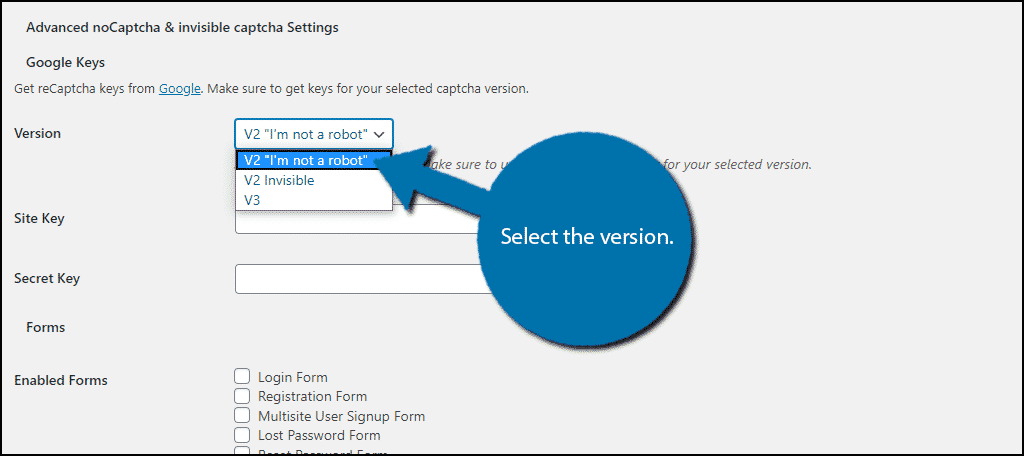
The first option you need to decide on is what type of Captcha you will select. You have 3 options V2 “I’m not a robot,” V2 Invisible, and V3.
Note: V3 is not like v2. It simply detects abusive traffic and sends you a report on it to help you implement the correct response. It will not stop spambots, it will simply inform you about them.
Next, you need to enter your site key. This comes straight from Google, the owner of reCAPTCHA. Simply visit the reCAPTCHA site and log in. You will need to register your website and create a label to obtain a site key.
If you already know how to get your site key feel free to skip the next section.
Obtaining a Site Key
The process is really easy and quick once you are logged in, you can register your website. Simply enter the Label (title), the reCAPTCHA type, the domain name (your website’s URL), owner email (should be auto-filled), accept the terms and conditions and click on the submit button.
Note: Make sure to select the correct reCPATCH type. If it does not match what you select in the plugin, it will not work.

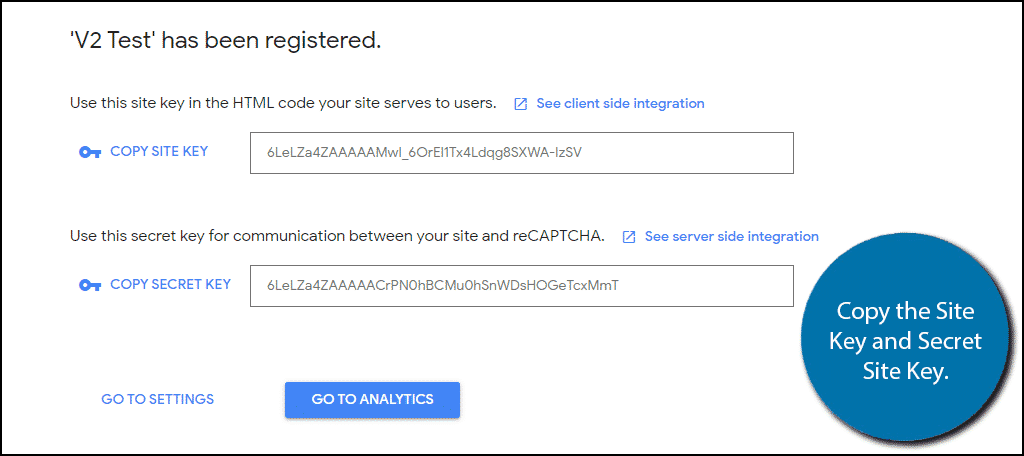
You will now be on this page and see your API keys. Copy these keys for later use.
Now go back to your website.
Back to Setup
Paste the Site Key and Secret Key into the appropriate boxes.
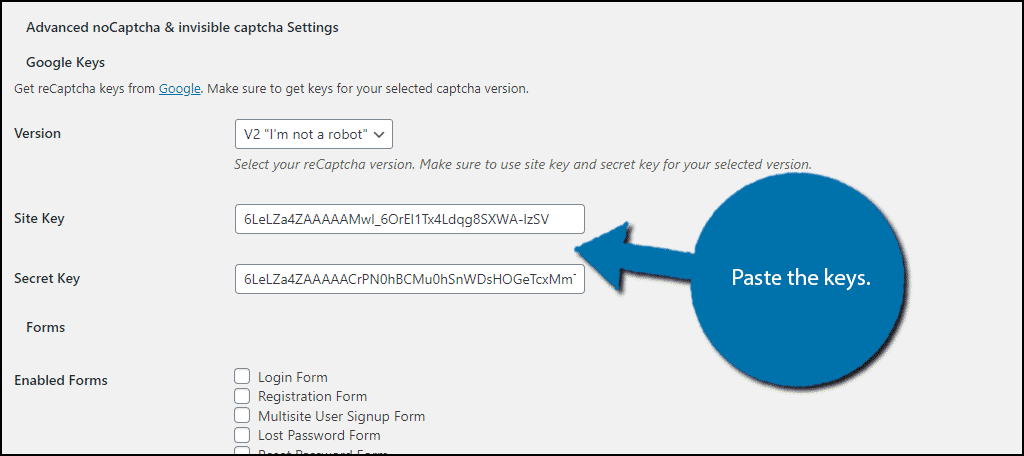
Now you must select which forms you will select to have the reCAPTCHA appear on. You can enable the plugin on the following forms:
- Login Form
- Registration Form
- Multisite User Signup Form
- Lost Password Form
- Reset Password Form
- Comment Form
- bbPress New topic
- bbPress reply to topic
- BuddyPress register
- WooCommerce Checkout
Simply check the boxes of the ones you want.
Note: Some of these are for specific plugins, so do not check them carelessly.
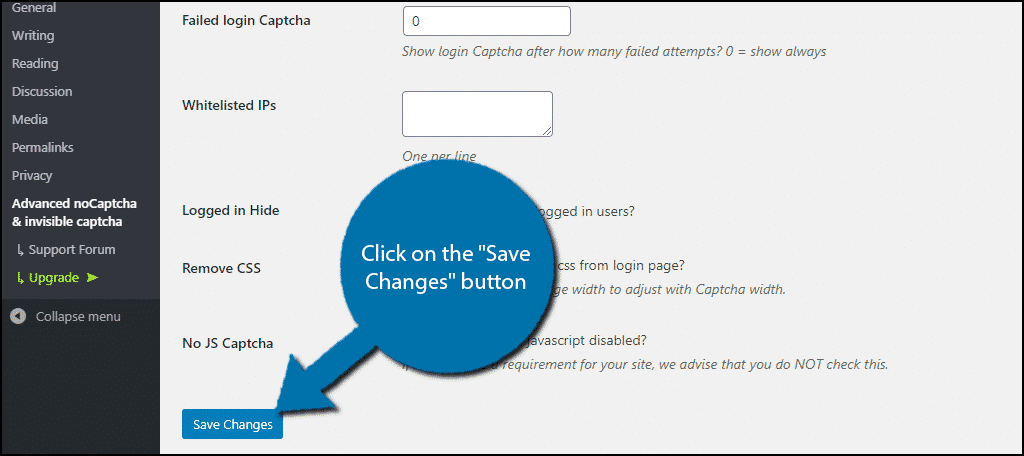
You will then have some other settings you can fill in. These include the Error message, language detect, light or dark mode, size, and more. Simply go through them and change them to your website’s needs.
Once you have made your selections click on the “Save Changes” button to finish setting up the plugin.
You can now view the reCAPTCHA on your website.
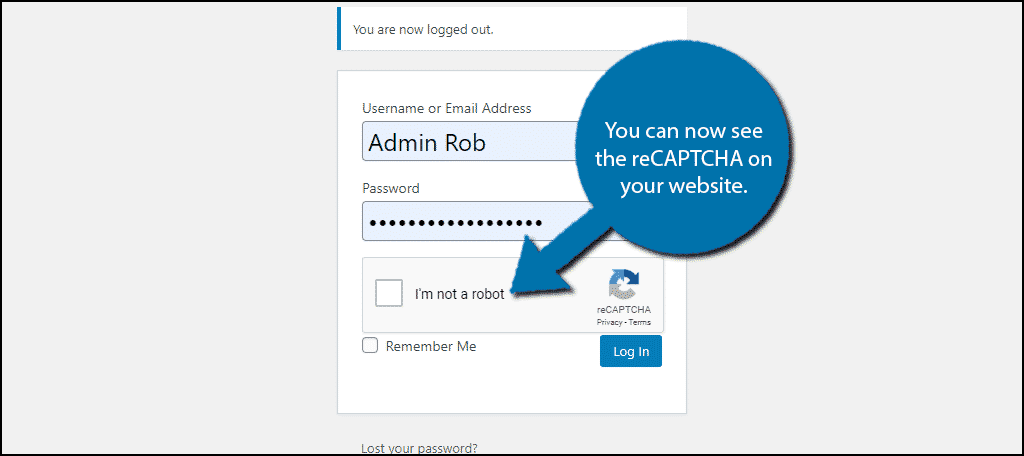
Congratulations, you have successfully enabled reCAPTCHA on your WordPress website.
Other Useful CAPTCHA Plugins
WordPress is home to many other fine plugins that can help with CAPTCHA. There are many CAPTCHA plugins that can better suit your site depending on how you wish to test your visitors. Here are a few plugins I can recommend trying.
Really Simple CAPTCHA

Really Simple CAPTCHA is a very popular WordPress CAPTCHA plugin with over 700.000 active installers. It is unique because it does not use PHP sessions to store states, but instead stores them as temporary files. Perhaps its biggest advantage is how easy it is to set up as the name suggests but does not offer full security like other plugins.
Simple Google reCAPTCHA

If you want the quickest plugin to set up reCAPTCHA on your website, look no further than Simple Google reCAPTCHA. This plugin will is straight to the point. Simply enter the site keys and your good to go. No settings to change, it’s really that simple.
Login No Captcha reCAPTCHA
Another very simple plugin you can use is the Login No Captcha reCAPTCHA plugin. Just like the above mentioned one, all you need to do is add the site keys from google. This plugin supports both the “I’m not a robot” text box and is as simple as it gets.
Keep Your Website Spam Bot Free
The end goal of any website should be to share their content with real visitors, spam-free. Spambots, unfortunately, advertise other businesses’ services and products on your site, inflate your traffic, and disrupt your comments section.
However, all of this can be prevented by using WordPress CAPTCHA plugins to test each visitor when logging in, commenting, or using a registration form.
By enabling these plugins, your site will remain secure and spam bot free. This will let visitors see your content and other visitor’s comments, without any spam.
Almost every major company uses CAPTCHA to prevent bots from invading their websites but this is important for smaller websites as well.
Has using CAPTCHA cleaned up your comments section, registration forms, and login forms? Do you have a better sense of the real traffic on your website with bots blocked?
The Better WordPress reCAPTCHA plugin is not showing up in my search results. Just thought there might be some kind of issue.
I installed it but still too many registration per day.
I use:
Invisible reCaptcha
Login No Captcha reCAPTCHA (Google)
I use V3 for reCaptcha on some forms as well. It really depends on what you’re trying to protect and what kind of spam filters you already have in WordPress. For example, I found activating Akismet to be a blessing.