As much as we like to think we remember everything, we don’t, but that’s okay and easily fixable. You can add a WordPress to-do list to your dashboard in under a minute with the right plugin. And I have found two that work perfectly for different reasons.
The first plugin, Dashboard To-Do List is ideal for individuals who manage their own website. It allows you to fill out a list directly in the WordPress dashboard and you can even push it to the front end of your website.
And for those in a team environment, you want everyone to be on the same page when it comes to information and tasks. That’s where the Posts To-Do List plugin comes in, it allows everyone to see and interact with the list to check off each completed task.
In this tutorial, I’ll demonstrate two methods to add a to-do list in WordPress.
Consider Premium Options for Teams
Before you proceed with this tutorial, it’s important to realize that there are plenty of premium and feature-rich tools for you to choose from outside of WordPress. And they can drastically improve the workflow and clarity of the tasks employees carry out.
For instance, Asana is an excellent tool to use that even has a free plan for teams that are just starting out. This is perfect for small teams or collaborations between websites. With it, you can assign due dates, add steps (with individual due dates), add comments, and much more.
It’s one of many comprehensive tools available that can scale up with your company.
Another option to consider that is free is Discord. Discord has exploded in popularity over the years, and while it is closely associated with gaming, it is a great choice for small developer teams to use and interact with each other in.
There’s even bot support that can be set up to display daily information to the server. However, this does require more advanced knowledge to set up. Although with the popularity of Discord, you will find no shortage of guides online.
That said, if you are still set on using a free plugin, here are two options that will work wonders on your site.
How to Easily Add A To-Do List in WordPress
Method 1: Dashboard To-Do List
The Dashboard To-Do List is ideal for individual developers that just want to help remind themselves of what needs to be done. The plugin is simple and works immediately after activation. With it, you can create a list and view it on your dashboard.
Just keep in mind that the only person who can see it is the admin on the back-end. If you put it on the front-end, everyone can see it.
Step 1: Install Dashboard To-Do List
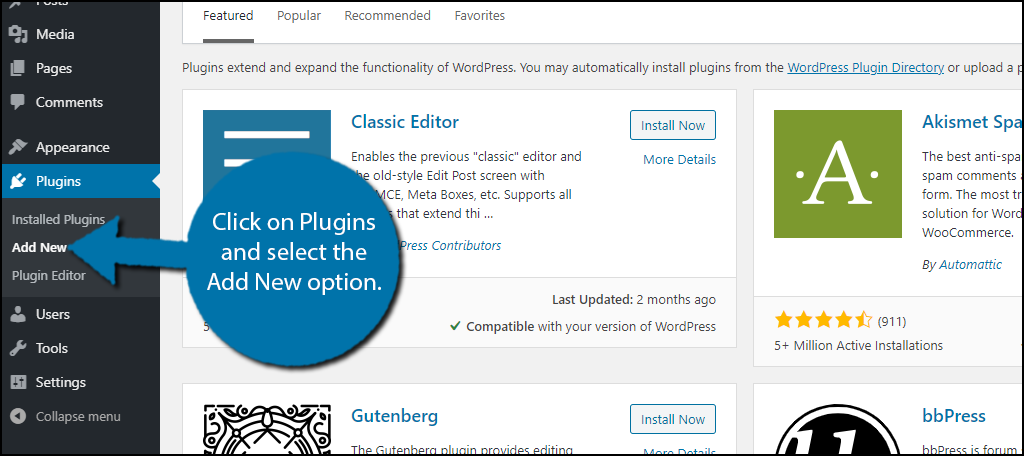
Click on Plugins and select the Add New option on the left-hand admin panel.
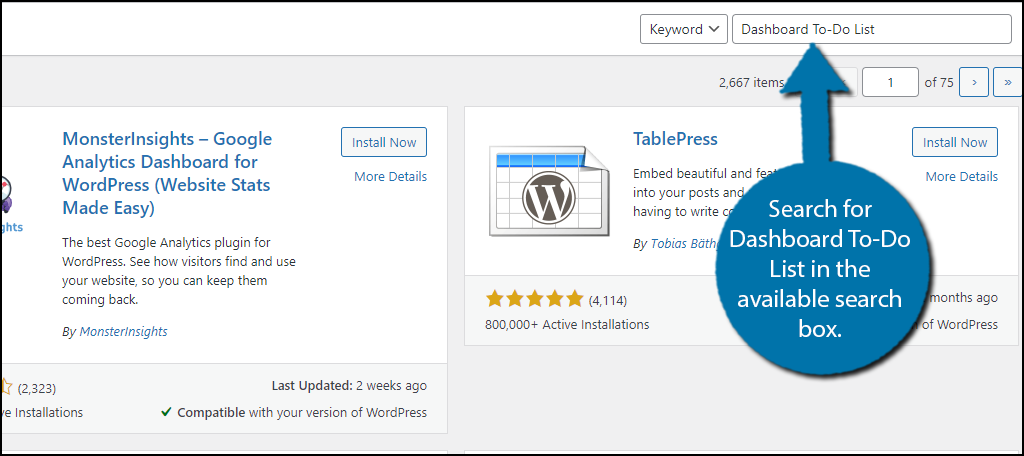
Search for Dashboard To-Do List in the available search box. This will pull up additional plugins that you may find helpful.
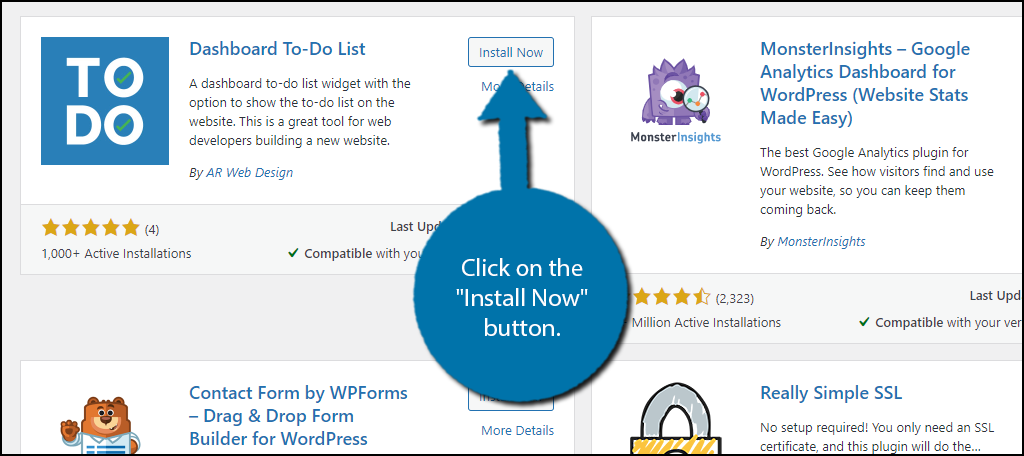
Scroll down until you find the Dashboard To-Do List plugin and click on the “Install Now” button and activate the plugin for use.
Step 2: Create A To-Do List
Upon activation, the to-do list is added to your WordPress dashboard. Keep in mind that the location on the dashboard will be dependent on what spots are open. You can drag it to the desired location at any time.
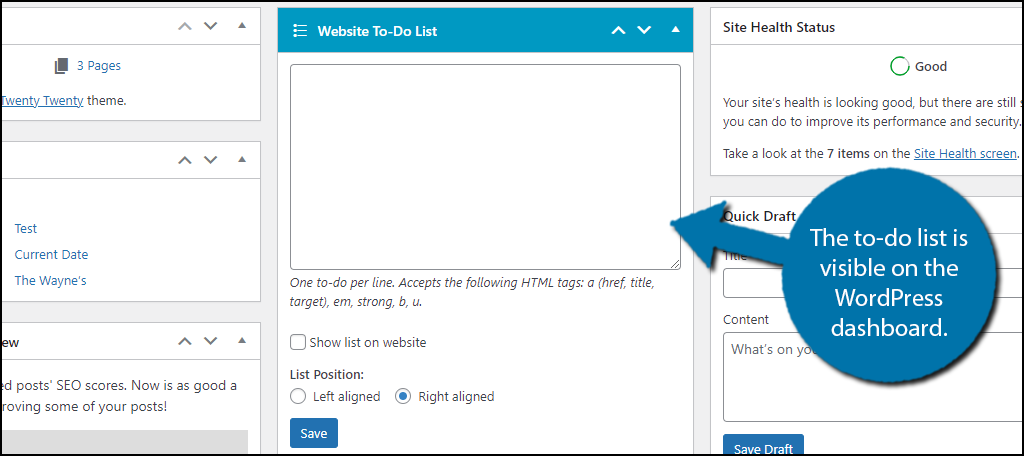
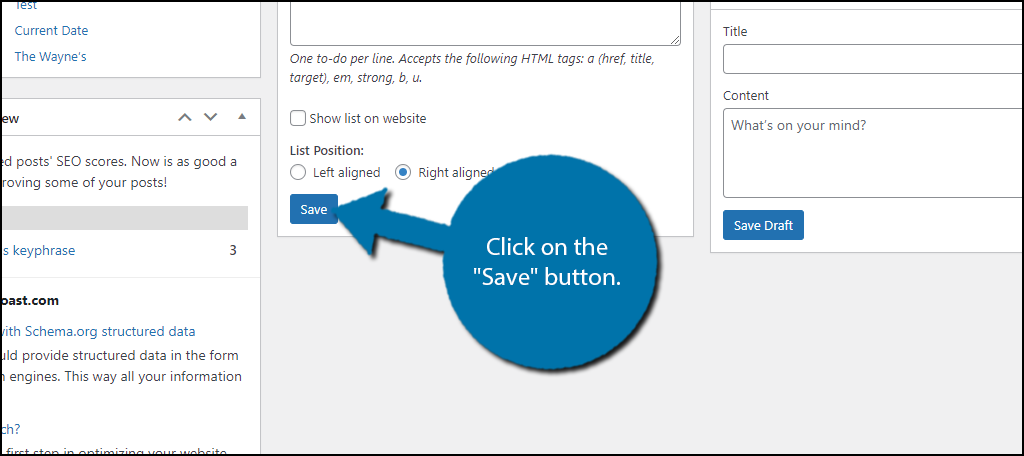
Use the text box to fill in the information on the list. It is a blank canvas, thus, how you go about creating a list is entirely up to you. You can also use HTML tags like strong, b, or u to add font effect for better organization and clarity.
Underneath the textbox, you will find a small checkbox that enables you to show the list on the website. In most cases, you will want to leave this unchecked. The only purpose to show this is if you are trying to keep visitors informed of new features or content on the way.
And finally, there is an option to align the list to the left or to the right. This is purely up to your preference.
Click on the “Save” button to save the changes.
Congratulations, on setting up this plugin. for those who want a more team-oriented option, the next method is for you.
Method 2: Posts To-Do List
The Posts To-Do List plugin is a great choice for teams. It adds an interactable checklist that members of your team can use. It allows you to enter the title, post idea, keywords, and more. You can fully customize who has access to the list with user role permissions.
You can even open the list to your subscribers. That way you can receive post ideas directly from your visitors.
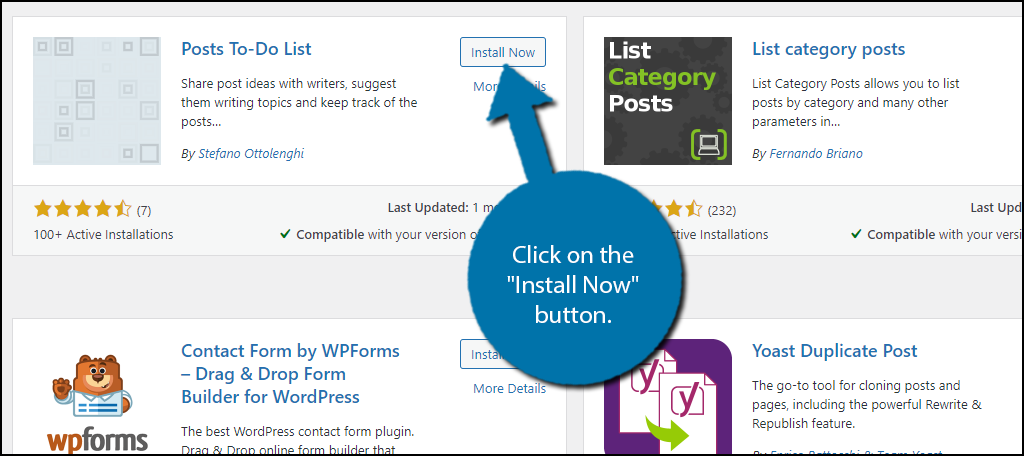
Step 1: Install Posts To-Do List
As with all plugins, the first step is to install them. Search the plugin directory for Posts To-Do-List and click on the “Install Now” button.
Step 2: Configure Settings
This plugin actually has quite a few settings you can configure, but none of them are overly complex. In fact, they all consist of checkboxes or radio buttons. Thus, it doesn’t really get much easier.
Click on Settings and select the Posts To Do List option.
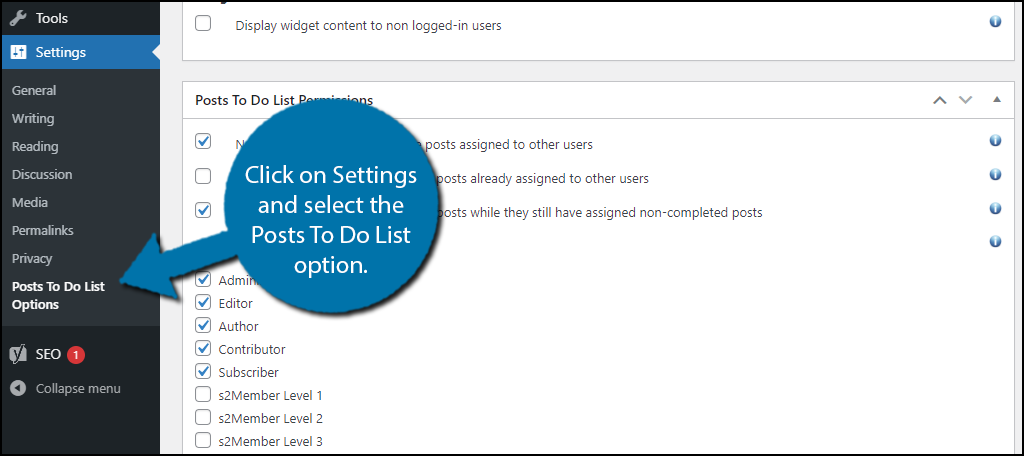
Here you can change the settings to whatever you like. Some of these include which user roles are able to add new post ideas or delete them, the number of items to display, publication time range, and much more.
Once you have gone through the settings, don’t forget to click on the “Save options” button.

Step 3: Create Add Posts Ideas
Now it’s time to start assigning posts to staff members or yourself. However, before we start, let me just emphasize that you don’t have to use this as a very precise way to add. While it is a viable solution for assigning work to staff, you can also just make them closer to suggestions.
How you choose to use it is up to you.
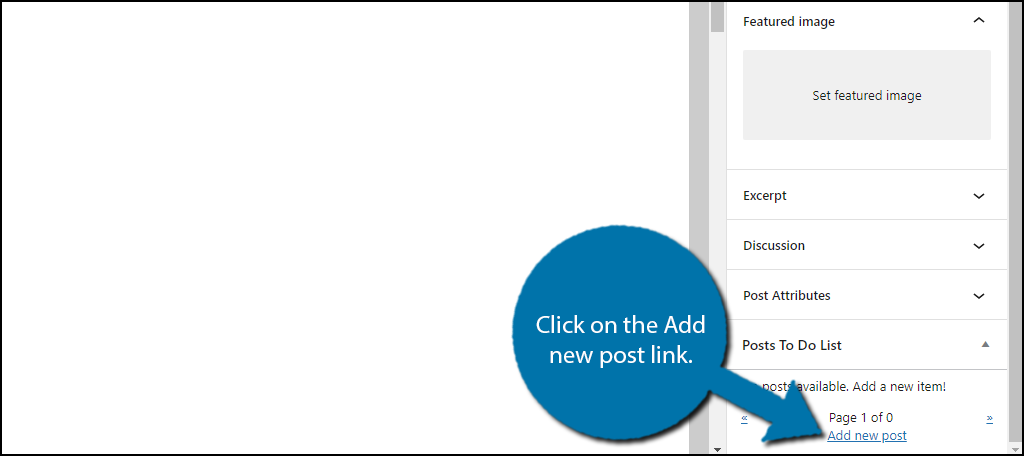
Create a new post and click on the settings wheel.
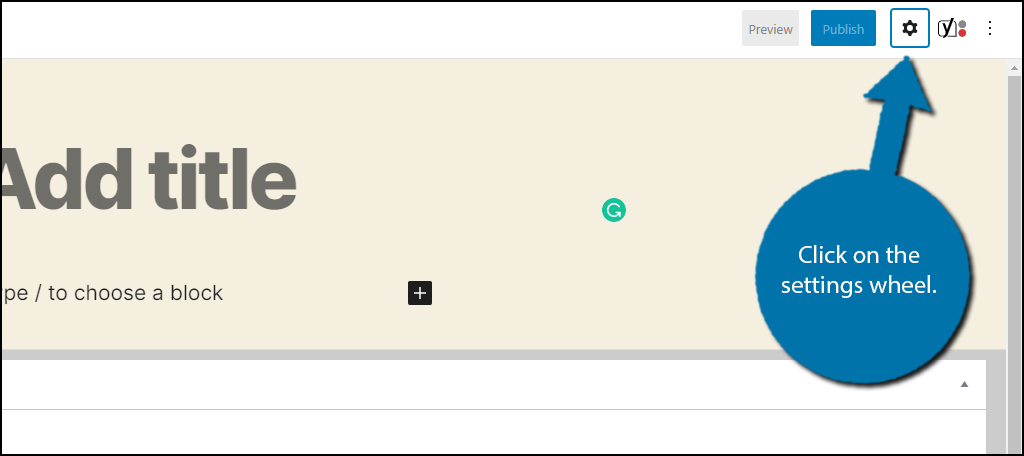
Towards the bottom, you should see a Posts To Do List option. Click on the Add new post link.
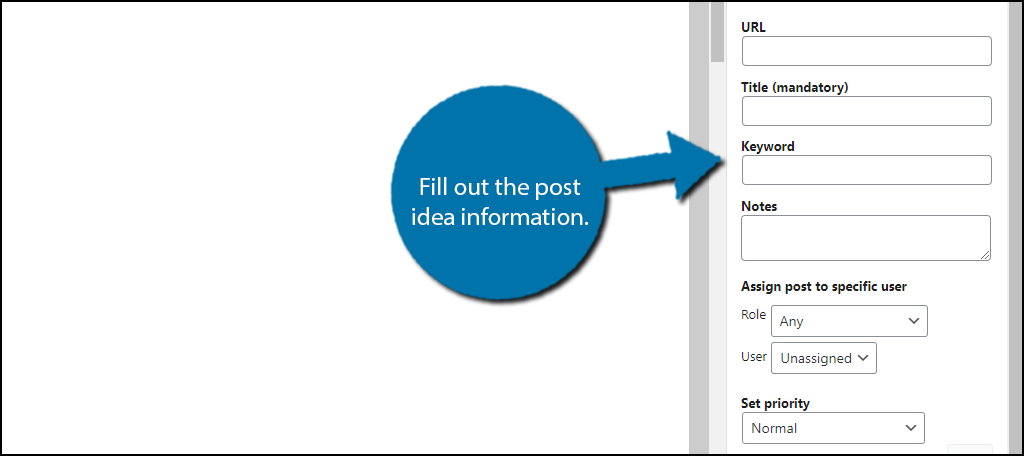
Here, you can enter a URL (for reference), Title, Keyword, Notes, select the role that can see it or select a specific user, and set a priority level.
Once the info is entered, click on the “Add” button.
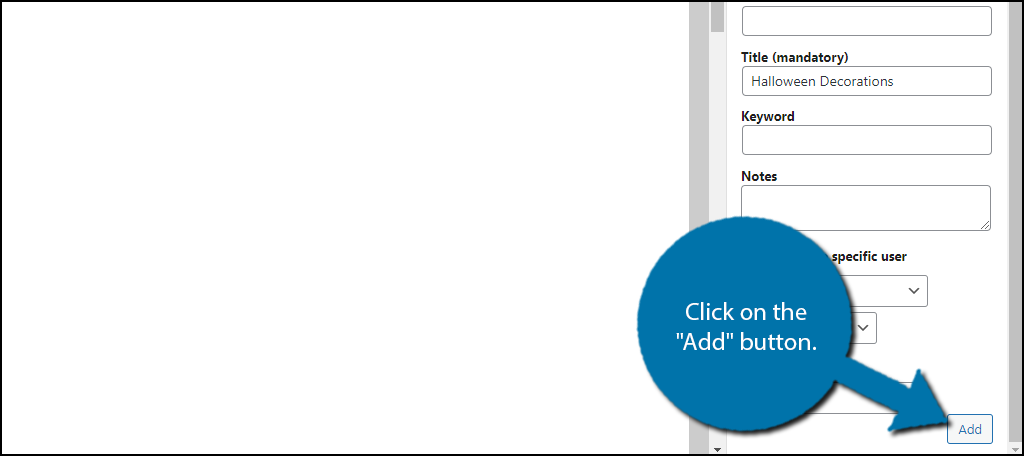
Repeat this step as many times as necessary to add all of the tasks for yourself or your team.
Congratulations on setting up this plugin. It’s quite handy and works perfectly in team environments.
Keeping Workflow Efficient
These plugins are great tools for any website, especially on a low budget. However, I still highly recommend getting a dedicated team assignment tool like Asana. It has far more features and customization options available than either of these plugins.
It’s also worth mentioning that every plugin can have a negative impact on your website’s speed. It might not be very noticeable or impactful, but avoiding plugins when possible on the front-end is always a good practice. Speed is a factor that search engines use for ranking after all.
What plugins do you use to improve team efficiency? Did adding a to-do list in WordPress help improve your work efficiency?