
Are you interested in incorporating AI into your WordPress site? If so, then GetGenie is the perfect plugin for the job. This tool introduces an AI assistant to help you manage tasks in WordPress as well as write content.
Without a doubt, AI is changing the landscape of web development in just about every way possible, or at least, it is beginning to change it. The GetGenie plugin is a great way to start exploring how AI can help you manage a WordPress website.
That said, it is important to temper expectations and remind everyone that AI is still in its infancy. That means you will most likely end up changing a lot of what it does, so you are still going to have to be an active developer.
The main purpose of it is to save time and today, I am going to show you how it can help.
This tutorial is for:WordPress 6.4.3Plugin: GetGenie v3.9.2
What is GetGenie for WordPress?
GetGenie is an AI assistant for WordPress that can help you manage just about every aspect of your site. This ranges from entering metadata for you to writing content.
It offers dozens of features that can help your site in different ways. The main purpose of the plugin is to help you save time, thus it is important to understand that it is not a replacement for developers, but a tool to help them accomplish more in less time.
It is also worth mentioning that this tool extends beyond just WordPress.
Today, most websites rely on social media to help spread their brand and grow traffic. GetGenie can also help by automating updates on various platforms. Granted this is probably more basic than you are imagining, but it is very exciting.
Using GetGenie in WordPress
Using GetGenie in WordPress is actually rather simple. However, there are a lot of features for the plugin, thus I won’t be able to show every single one.
Instead, I will go through the initial installation, and highlight the key features of the plugin.
Installing and Setting Up GetGenie
As with all WordPress plugins, the first step is always installing it. However, once you activate the plugin, you will not be able to use it just yet. You’ll need to obtain the license for it. And yes, you need the license for the free version.
Luckily, it is free and very easy to obtain.
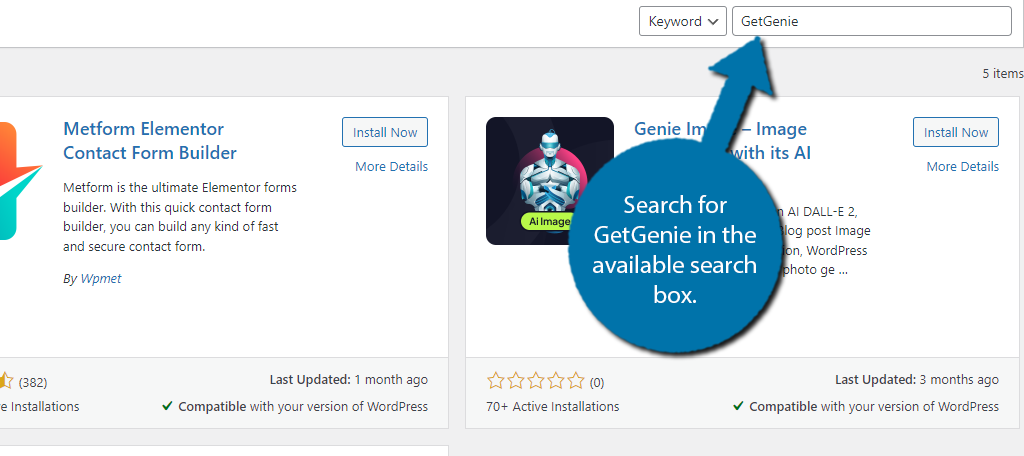
Let’s start by clicking on Plugins and selecting the Add New option on the left-hand admin panel.

Search for GetGenie in the available search box. This will pull up additional plugins that you may find helpful.
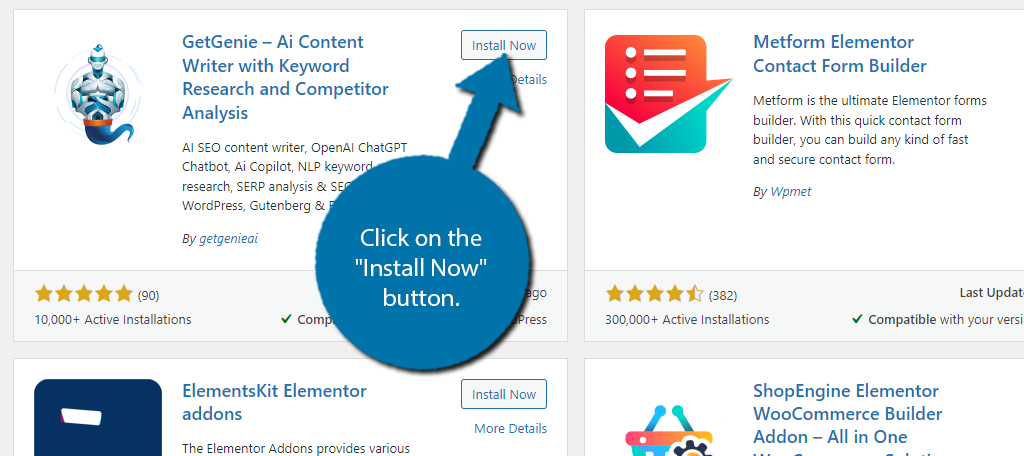
Find the GetGenie plugin and click on the “Install Now” button and activate the plugin for use.
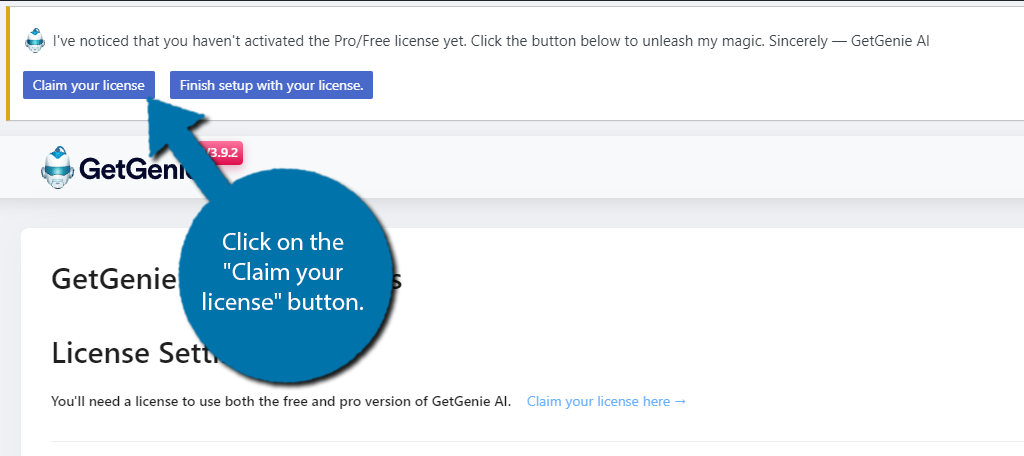
With the plugin installed, it is time to get that license. You should see a notification at the top of WordPress mentioning that you need a license.
Click on the “Claim your license” button.
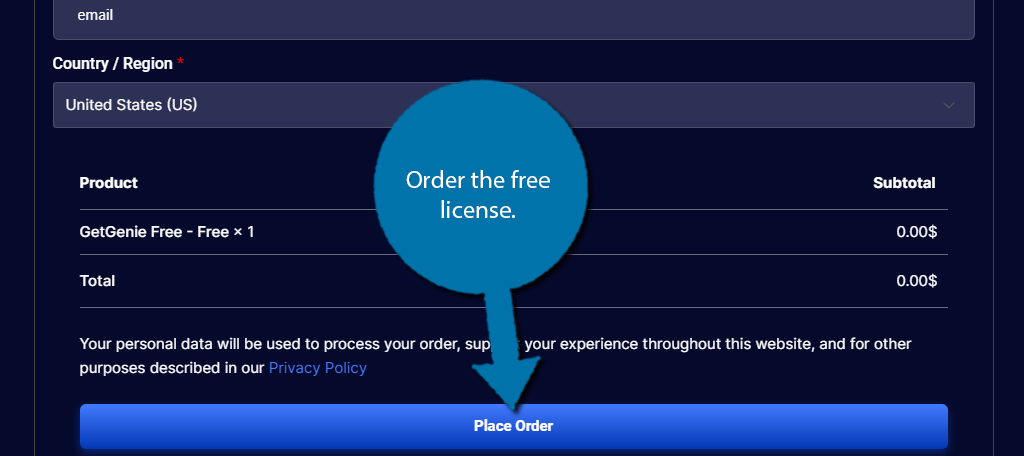
This will bring you to the GetGenie site with the free license added to your cart. You will just need to enter a name and email address. Then just place the order.
You will then be asked some simple questions like your role, how you heard about the plugin, your industry, company size, and so on. Be sure to select that you want to use it on your WordPress site.
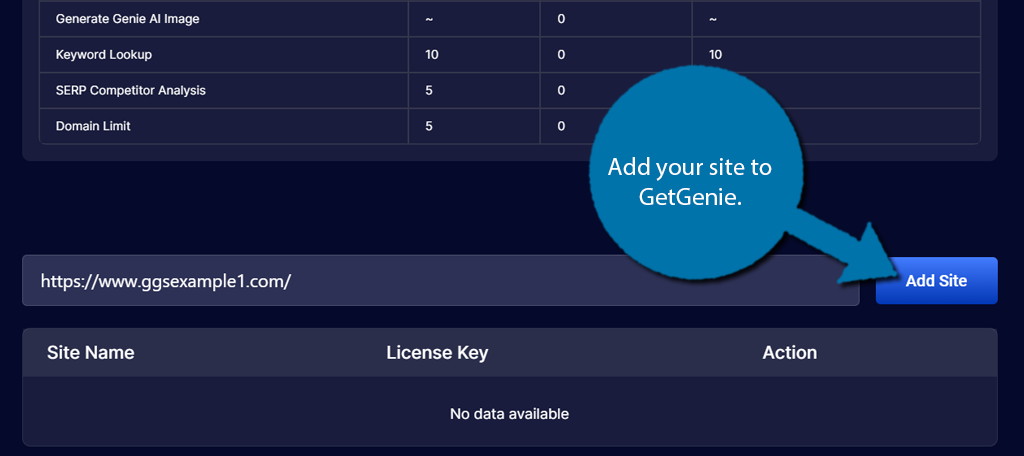
Once you get through all of that, you should be in the Manage Sites section. Enter your website’s URL in the text box and click the “Add Site” button.
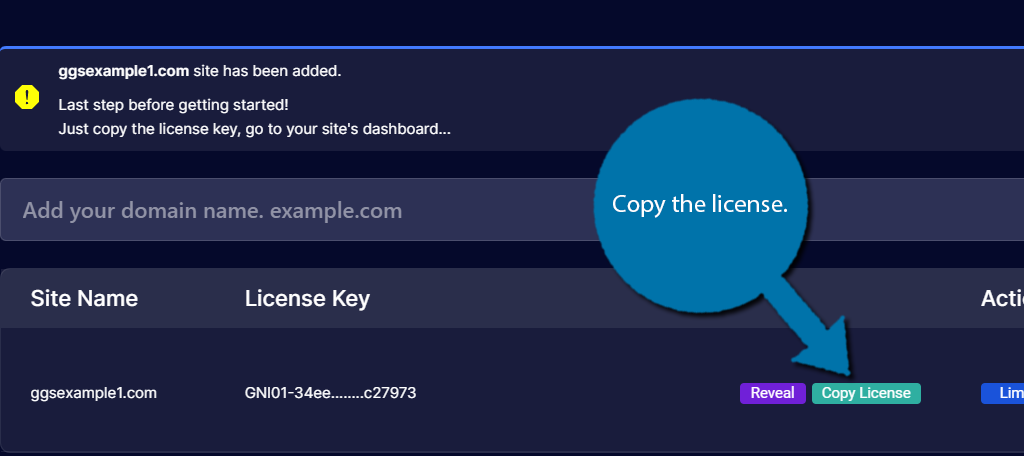
This will generate a license key you can copy. Do so.
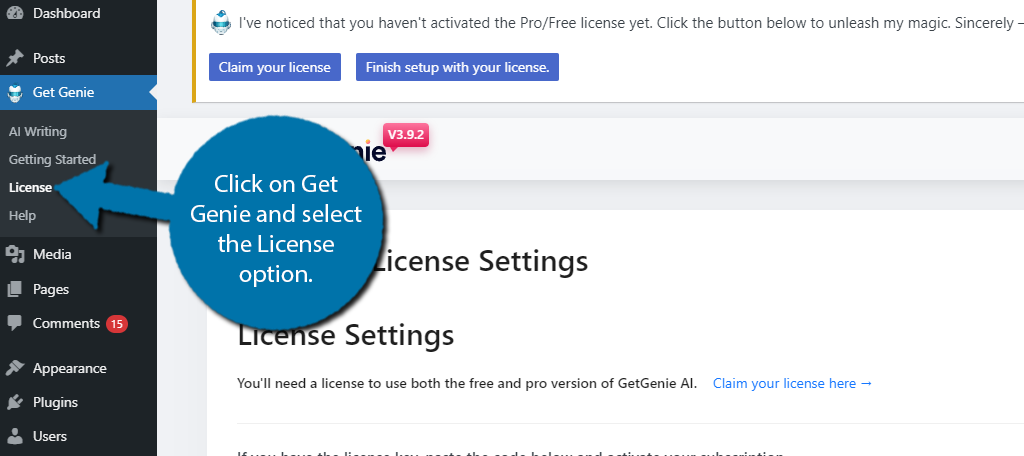
Go back to WordPress, click on Get Genie, and select the License option.
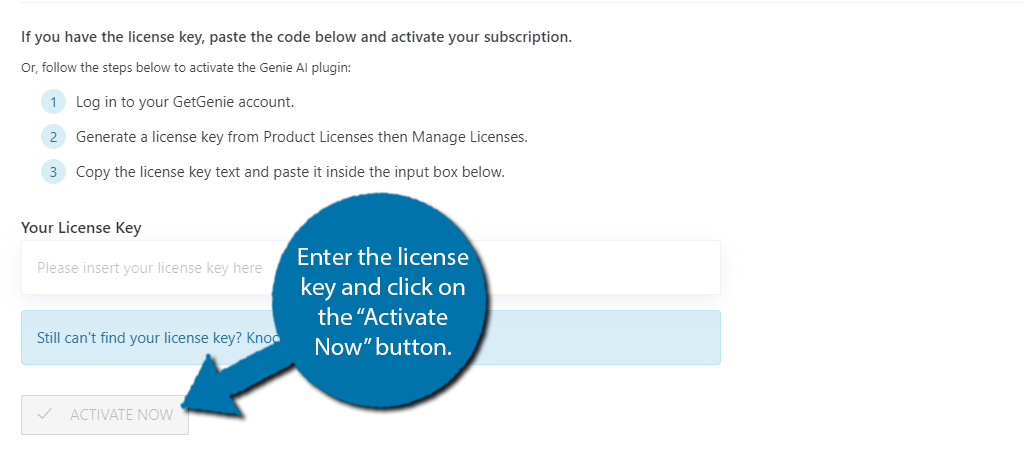
Now, you just need to paste the license key into the appropriate text box. Click on the “Activate Now” button to finish.
And that’s it.
Top 10 Functions You Should Look At
Now that your plugin is ready for use, it is time to explore what it can do. The free license does come with some limitations.
These include:
- 2500 Words from AI Writing per month
- 10 Keyword Lookups per month
- 5 SERP Competitor Analyses per month
- 1 website per account
This will give you enough to test out the features, but if you plan on using the plugin regularly, you are going to need the Pro version to remove these limits. Otherwise, you won’t be able to generate a lot of AI content.
Again, there are a lot of features inside of GetGenie, so there’s no way to cover them all. Instead, I am going to showcase the top 10 features to take a look at.
1. AI Writing
One of the first things that most people consider when thinking about AI and a website is having that AI write content for you. GetGenie can do this quite easily as long as it’s not too long of a blog post for free users. It actually breaks the writing into several parts.
For example, let’s say you’ve written an entire blog and all that is left is to write the conclusion.
GetGenie has a dedicated Conclusion writing tool you can use. This is located in the AI Writing section of the plugin.
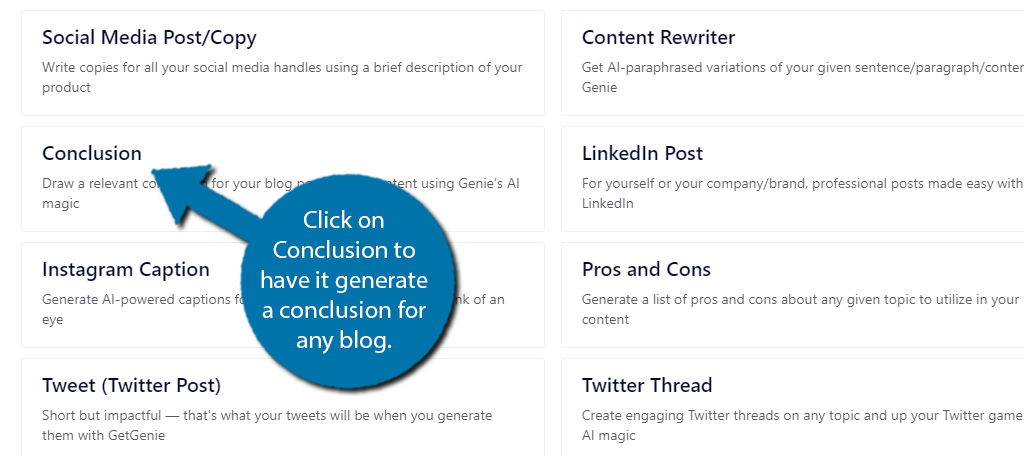
This pulls up a side window where you can enter the name of the blog and the intro of that piece. The AI will then use this to generate it.
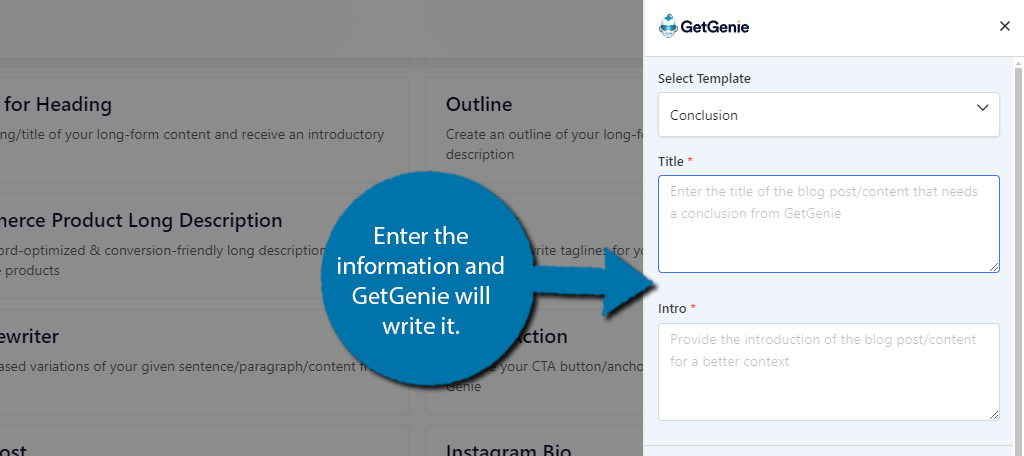
Reminder: The free license only supports 2500 words of writing. Once that total is reached, you will need to upgrade to the Pro version.
While I used the Conclusion as the example, this works for most other things like full outlines, next sentence, next paragraph, and so on. Now, what I am sure you are wondering is how good is this for content.
Well, it’s not exactly that great. Again, AI is still learning, and I think most people can identify if a human or an AI wrote something. I would say the AI writing can be a good starting point to save some time or to generate some ideas for you.
You should definitely plan on reviewing and editing anything an AI writes for you.
2. WooCommerce Products
If you sell products on your WordPress site, you probably use WooCommerce to do it. GetGenie has a WooCommerce mode for entering Product Titles and Descriptions. Just be aware, that you can’t check out this feature unless you have WooCommerce installed.
Click on the WooCommerce Wizard option.
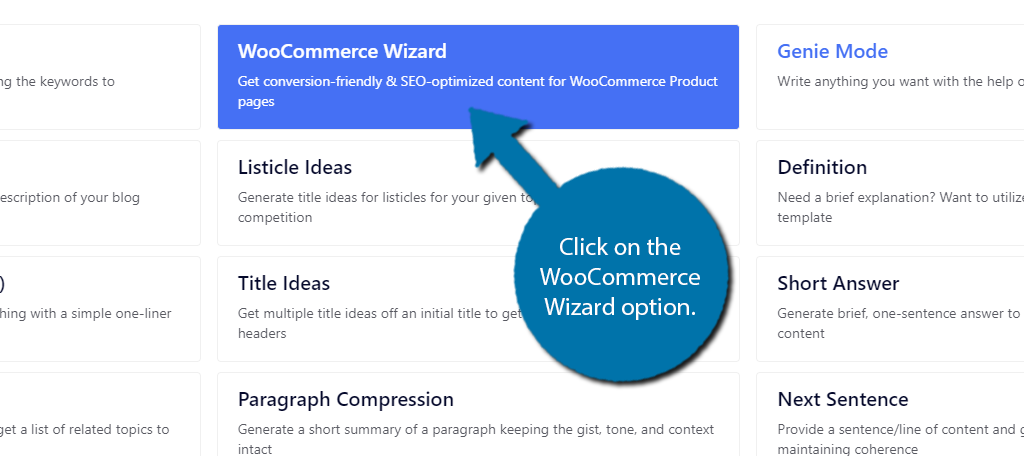
This will open up a new tab for a new product in WooCommerce.
The GetGenie window will open up on the side. Here you can enter the Product Name and Product Brief. In the brief, you want to enter the keywords you want to rank for separated by a comma.
The AI will then generate the product title. The other tabs are for a long or short description.
3. Meta Description
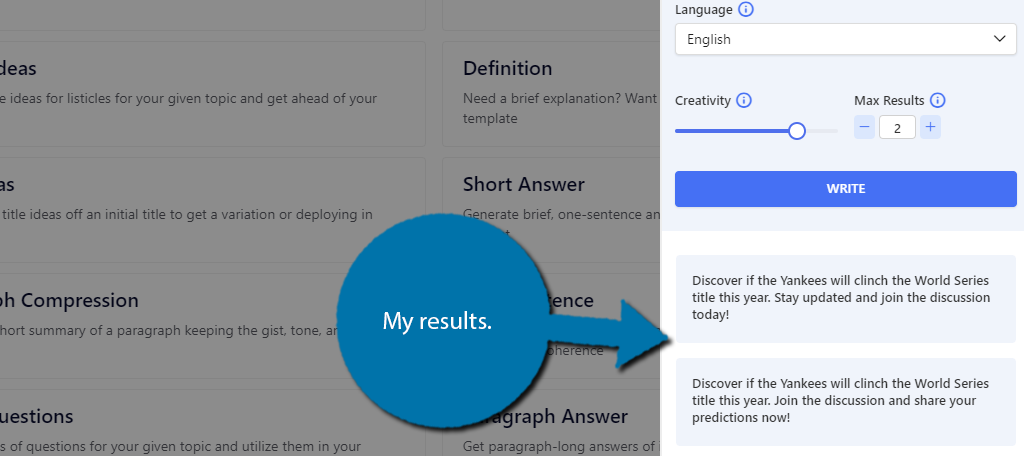
When it comes to metadata for WordPress, the Meta Description is typically one of the most important. Whenever someone searches on Google or other search engines, the text that appears under the link is often the meta description.
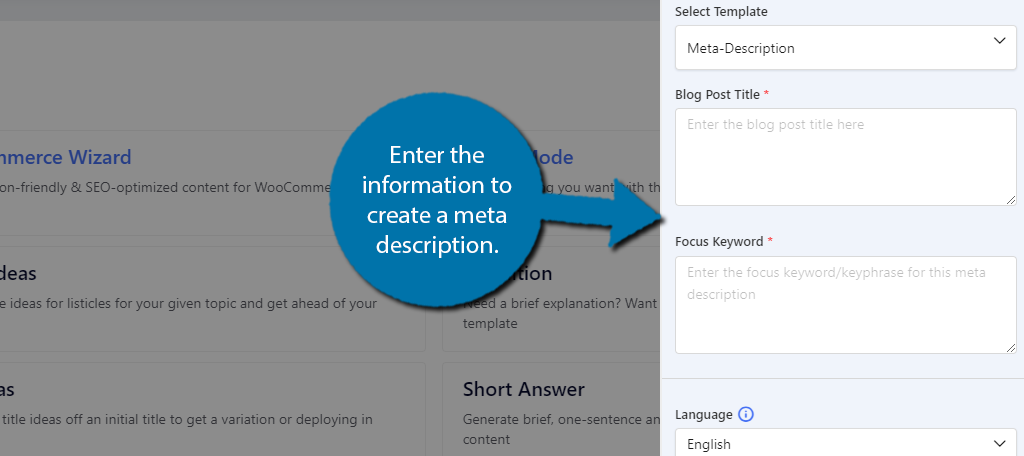
Having a good one can dramatically increase the amount of clicks you get, not to mention influence your overall rankings. The GetGenie plugin can create a meta description for you. It only requires the title of the post and the keywords you are ranking for.
To find it, click on GetGenie, select the AI Writing option, and choose the Meta-Description tool.

On the right side of the screen, the GetGenie window will appear. Enter the Post title and the keywords you are ranking for. Click on the “Write” button and the AI will take care of the rest.
As a simple example, I entered “Will the Yankees win the World Series?” as the title and “Yankees” as the keyword. These were the results:
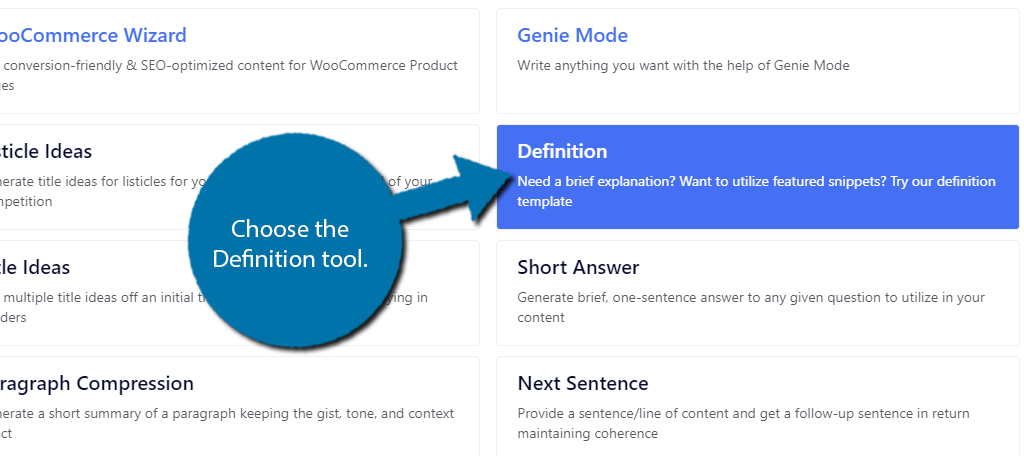
4. Definition
When creating how-to content, you often have to define a term to help the readers understand something. Doing so can help you get into the frequently asked questions section of Google.
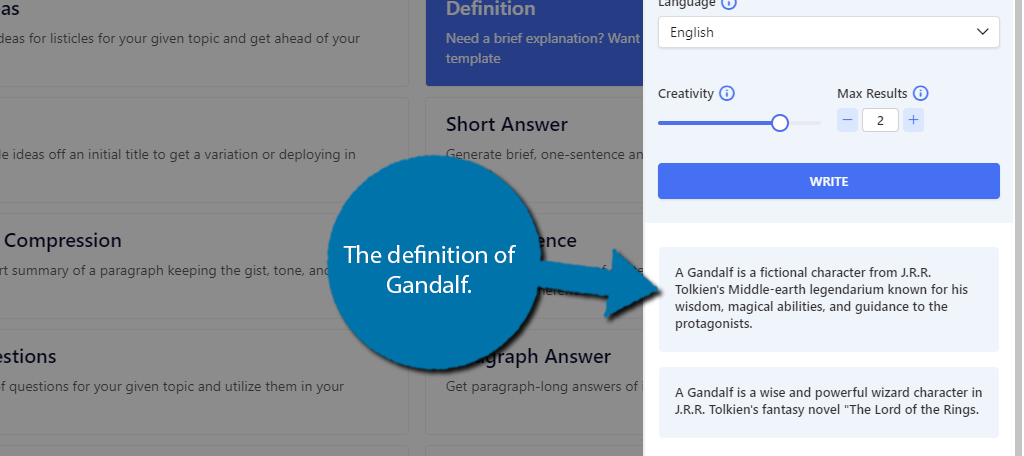
GetGenie can help simplify this with the Definition tool. Essentially, you enter a term and the AI will provide a definition of that term. It can be an item, location, or person. It can even be fictional.
To find it, click on GetGenie, select the AI Writing option, and choose the Definition tool.
All you need to do is enter the term and click enter. Let’s see what it has to say about everyone’s favorite wizard from Middle-Earth, Gandalf.
5. Pros and Cons
Many blogs include small lists of pros and cons, advantages and disadvantages, benefits and drawbacks, and so on. The GetGenie plugin can generate these lists for you. All you’ll need to do is enter the topic you want it to generate.
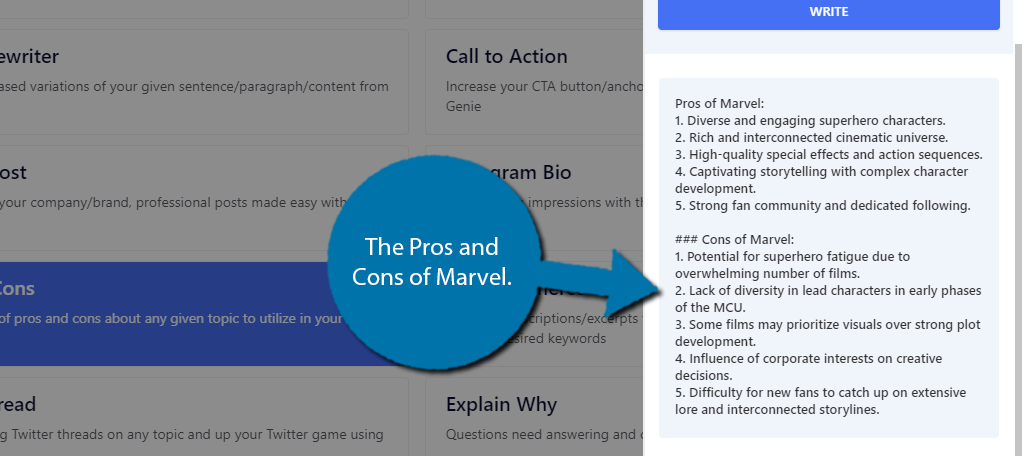
To find it, click on GetGenie, select the AI Writing option, and choose the Pros and Cons tool.
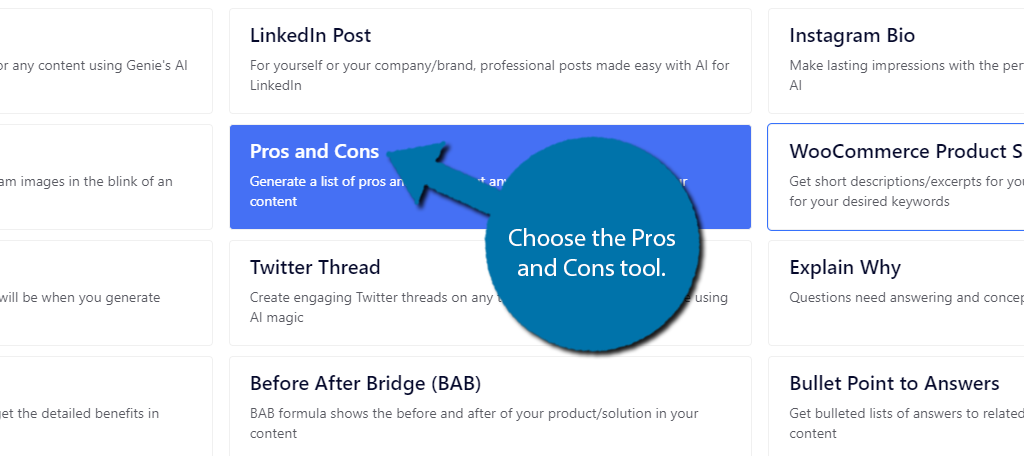
Simply enter the topic you want to create a pros and cons list for in the appropriate box. You can also enter additional details to help refine the list.
Click on the “Write” button to finish. In this example, I entered “Marvel” into the field, and here are my results:
6. Tweet (X/Twitter Post Generator)
Even after its name change, X (Twitter) continues to be a massive social media platform with no signs of slowing down. Naturally, that means having a presence on the platform is good for your marketing efforts.
The GetGenie plugin can generate Tweets for you. All you need to do is enter some context and the plugin will generate a Tweet that is ready to go. It’s perfect for saving time when you need to plan out several social media posts across different platforms.
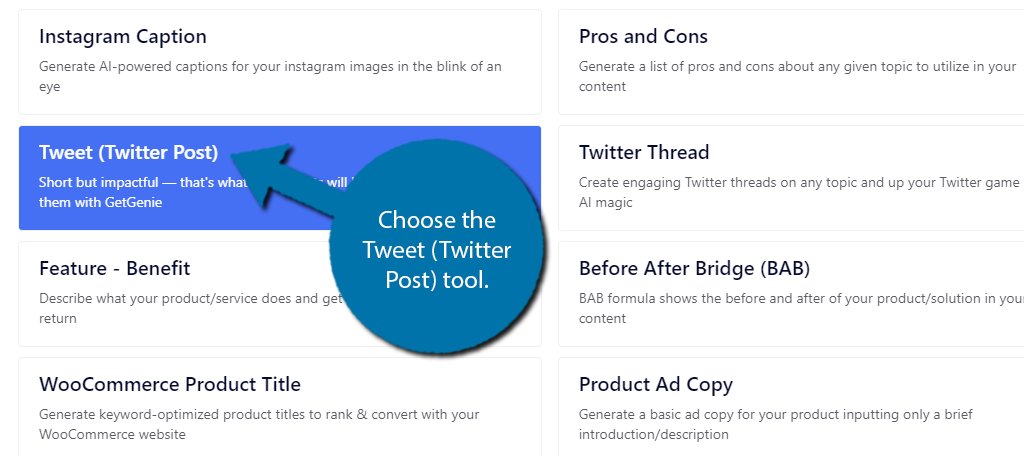
To find it, click on GetGenie, select the AI Writing option, and choose the Tweet (Twitter Post) tool.
In this case, I will tell the AI to write a post with the following context: “Announcing a new product line that goes live on Friday.”
Here are the results:
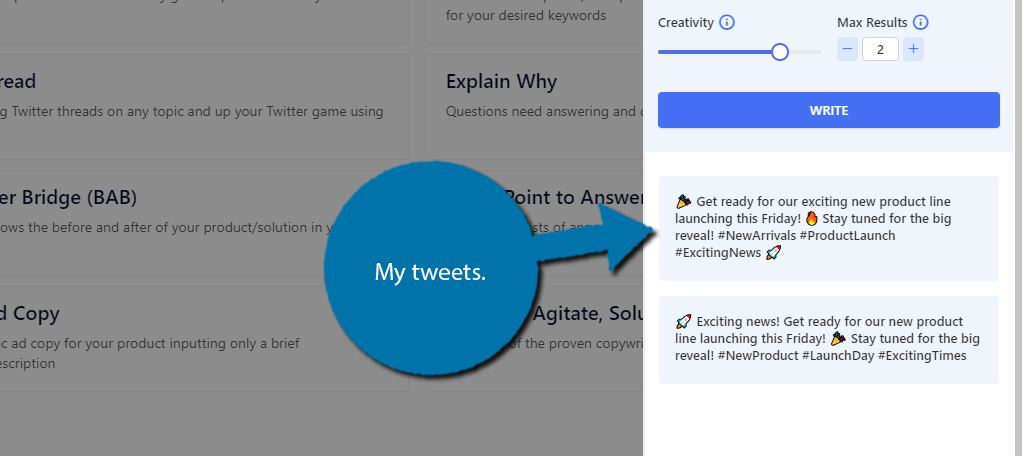
As you can see, it includes emojis and even hashtags. Overall, it is pretty impressive considering how vague I was.
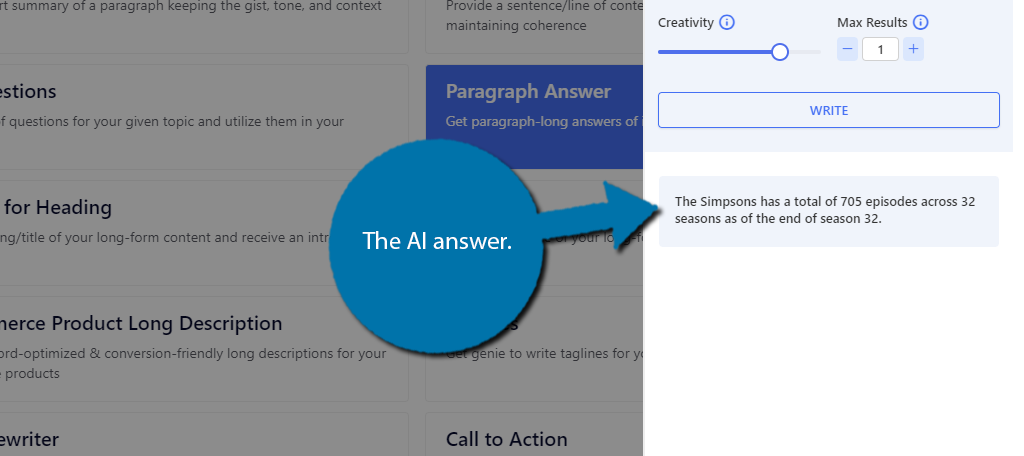
7. Paragraph Answer
The Paragraph Answer tool is very similar to the Definition tool we covered earlier. Essentially, you ask the AI a question, and it gives you an answer. Similar to the Definition tool, it is great when aiming for Frequently Asked Questions on Google.
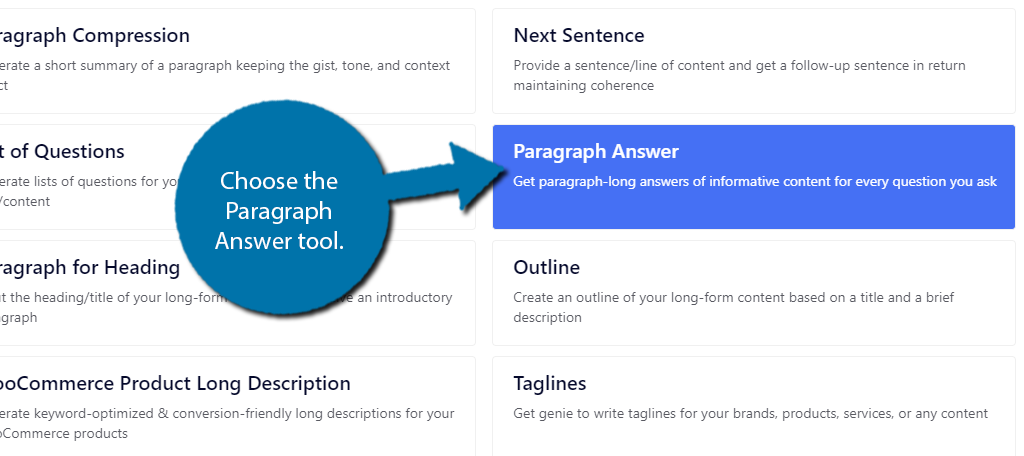
To find it, click on GetGenie, select the AI Writing option, and choose the Paragraph Answer tool.
Simply enter the question into the AI and click on the “Write” button to see the results. In this case, I asked the AI “How many episodes are in the Simpsons?” and the AI answered correctly with:
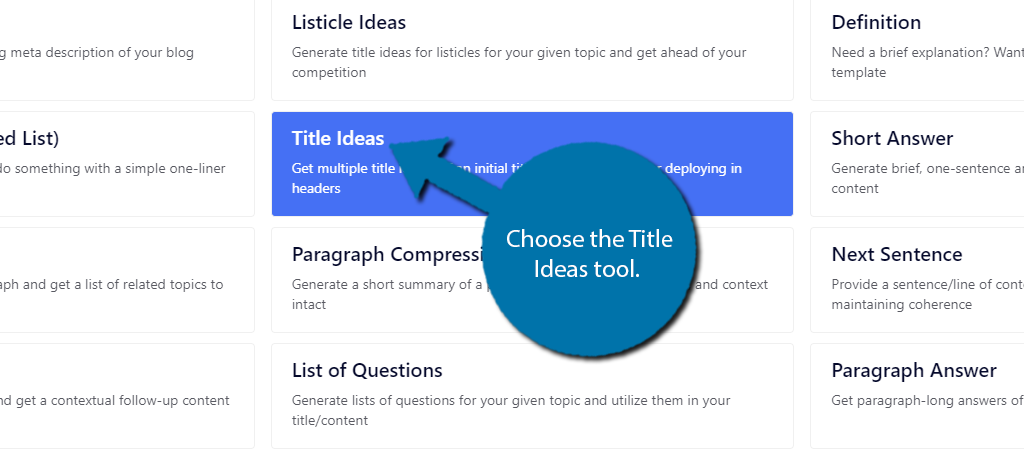
8. Title Ideas
Sometimes it can be a real challenge to create interesting titles for your content. GetGenie can help with this. The Title Ideas tool allows you to enter a title into the AI and it will give you multiple alternative titles to consider.
To find it, click on GetGenie, select the AI Writing option, and choose the Title Ideas tool.
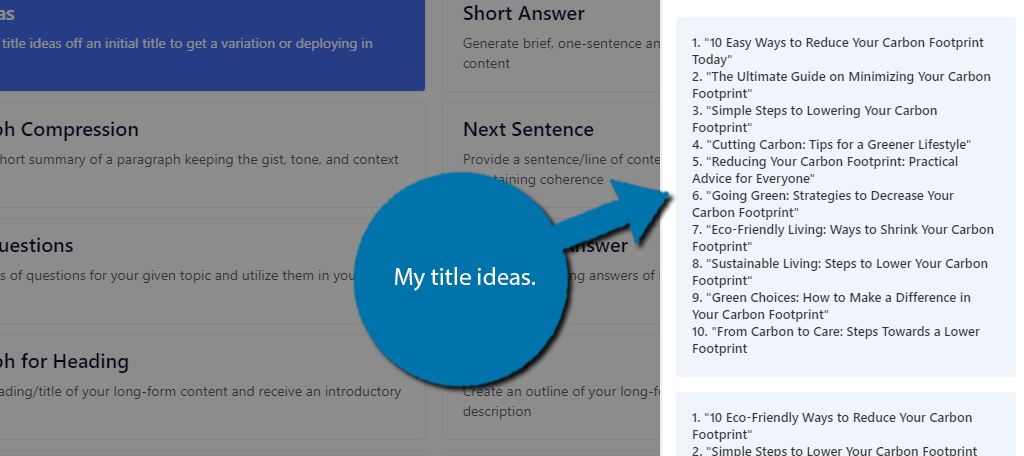
Simply enter the topic idea you want to generate ideas for. You can be specific and enter your current title or be vague and just enter a few terms. In my case, I entered “How to Lower My Carbon Footprint” and here are the results:
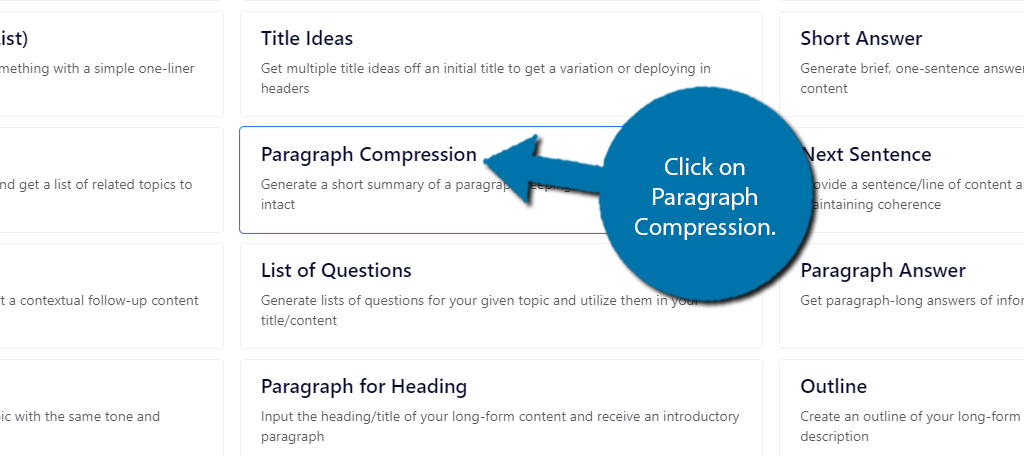
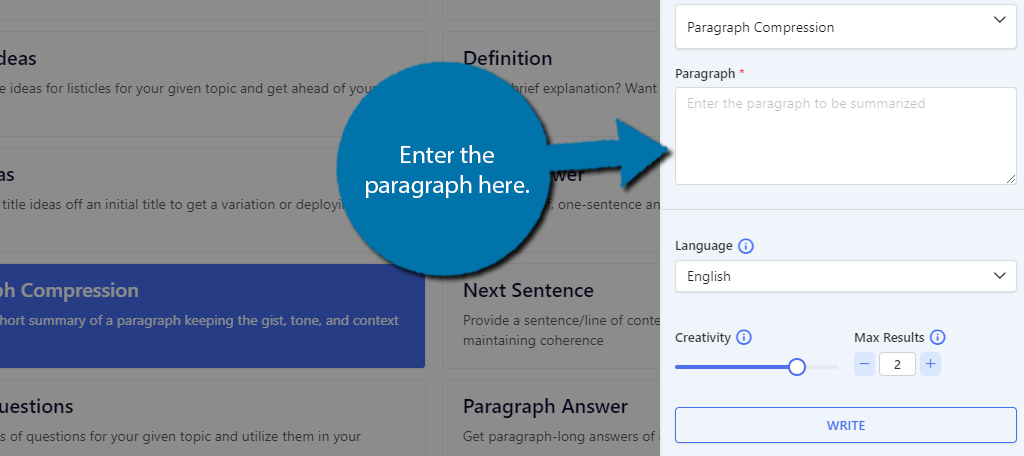
9. Paragraph Compression
While we are told when it comes to SEO, longer is better, there are definitely times writers can get long-winded. GetGenie offers a Paragraph Compression feature that will analyze a paragraph and shrink it down while keeping the gist of it intact.
To find it, click on GetGenie, select the AI Writing option, and choose the Paragraph Compression tool.
The GetGenie window will open on the right side of the screen. Here, you can enter the paragraph you want to compress. Then, just click on the “Write” button to let the AI do its magic.
As far as results go, the AI does a great job of trimming the text without losing the meaning. The only issue is that to save space, the AI will usually use complicated vocabulary, that could be challenging to read.
Remember the average reading level for the US is only between 7th and 8th grade levels.
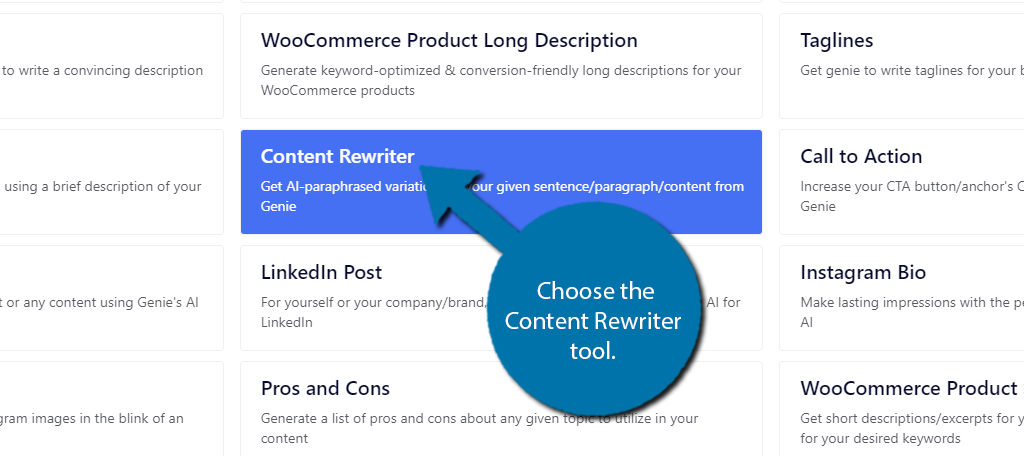
10. Content Rewriter
Many blogs will release similar pieces of content yet make them different enough so search engines don’t see them as duplicates. The Content Rewriter can help you achieve this faster as it does the rewriting for you.
To find it, click on GetGenie, select the AI Writing option, and choose the Content Rewriter tool.
Similarly to everything else, enter the text you want rewritten into the box and click on the “Write” button to let the AI take care of everything else. And with that, we have covered the major features of the plugin.
Other Functions of GetGenie to Consider
As I said at the beginning, GetGenie has a lot of features that you may find useful. These 10 are just some of the major functions I liked about the plugin. Here are some additional ones you may find useful.
- Keyword Analyzer
- Google Rank Checker AI
- LinkedIn Post Creator
- Instagram Caption Generator
- Create Summary Bullets for Paragraphs
- Call to Action Generator
Luckily, the plugin is very easy to use, so you’ll have no trouble figuring out how these features work.
Get More Out of WordPress with GetGenie
As you can see the GetGenie plugin offers a lot of useful features that you can take advantage of. From my own testing, the AI responses were quite good, but sometimes missed the mark.
As the AI becomes more intelligent, the responses will only get better. Again, you will need to upgrade to the Pro version. Just testing it for this tutorial exhausted my free words limit.
I hope you found this tutorial helpful in learning how to incorporate AI into your WordPress website.
Did you find GetGenie to be easy to use? Do you expect AI to change web design?