There are several ways to share information with visitors, but perhaps one of the most important is infographics. These are visual aids that help you share statistics and other information in a visual format, and you can easily add an infographic to WordPress.
Traditionally, you would need to create the infographics from scratch or hire someone, which could either require effort or money to achieve. However, today, that is not the case. There are several tools that can make one for you.
One such tool is the AI Infographic Maker plugin. As the name suggests, it utilizes AI to create an infographic that is usable in WordPress. And they have several designs you can utilize and match with your website.
Today, I will demonstrate how to create and add an infographic in WordPress with AI Infographic Maker.
This tutorial is for:WordPress 6.5.3Plugin: AI Infographic Maker v4.7.0
How Can Infographics Help Your Site?
Infographics allow you to share large amounts of information while only taking up a small amount of space.
While this sounds similar to other graphics like charts, the real difference is that infographics are often more well-designed and only consist of bullet-point facts. This makes it easier for the average user to understand, thus making them more effective.
Due to their visual appeal, infographics are highly shareable on social media, which can help them gain a lot of traction.
Normally, the same information would be displayed within a body of text making it harder to pick out, or they would be in bullet points, which while easier to read, lack the visual appeal of an infographic.
Perhaps their most important aspect is the impact they have on sales.
Infographics and other colorful visuals increase the chances of making a sale by 80%. In many cases, when you check a product description on Amazon or other sites, you’ll often notice most of them have an infographic.
Luckily, they are easy enough to add, so let’s get started.
How to Add an Infographic in WordPress
The AI Infographic Maker is an excellent plugin you can use to add infographics to your site. While the plugin boasts “AI,” based on my use of the plugin, that is not really the case. You simply pick a series of options, and the plugin puts them together.
In terms of ease of use, this plugin is very easy. You simply need to pick how you want the infographic to look, add the information you want to display, and add the infographic to the desired location.
Step 1: Install AI Infographic Maker
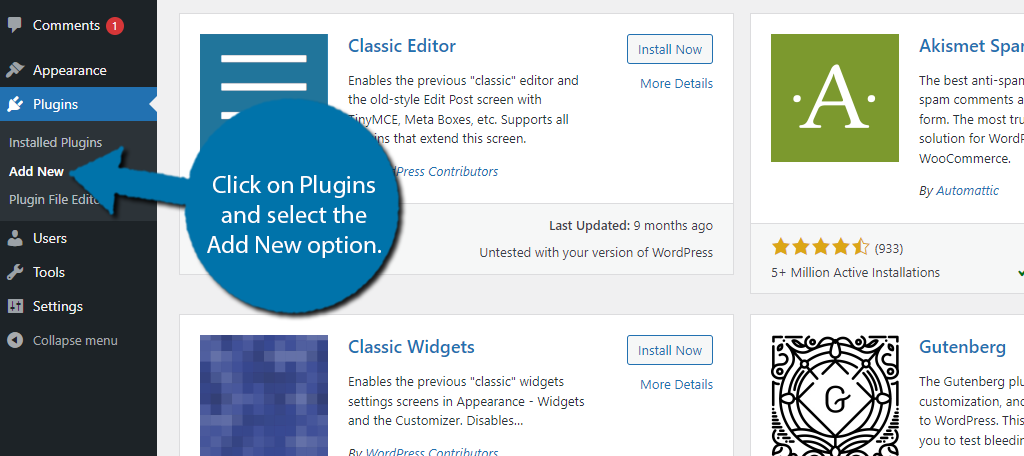
Let’s start by clicking on Plugins and selecting the Add New option on the left-hand admin panel.
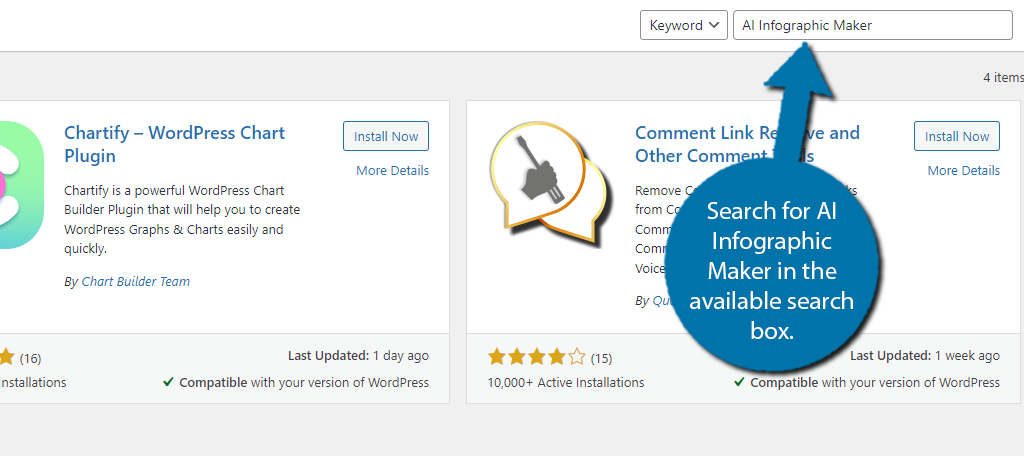
Search for AI Infographic Maker in the available search box. This will pull up additional plugins that you may find helpful.
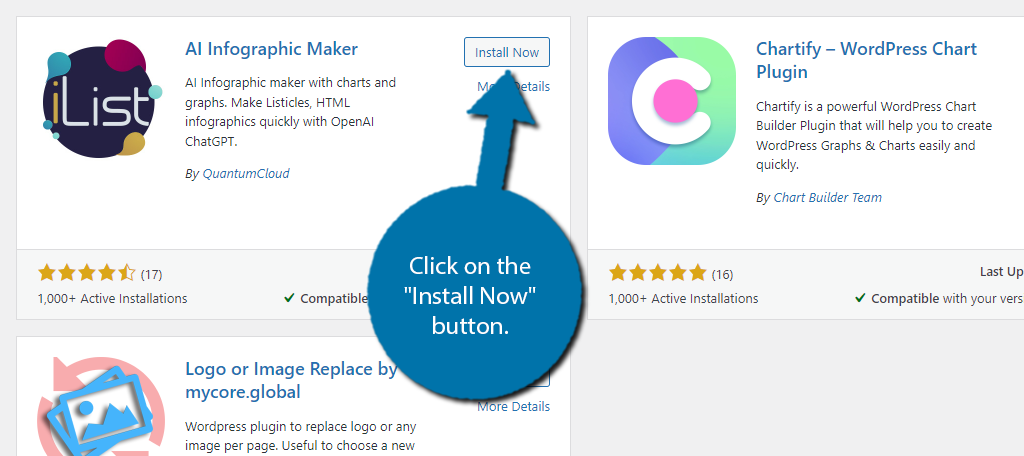
Find the AI Infographic Maker plugin and click on the “Install Now” button and activate the plugin for use.
Step 2: Create An Infographic
With the plugin activated, you can immediately start creating your infographic. To do so, click on iList and select the New iList option.
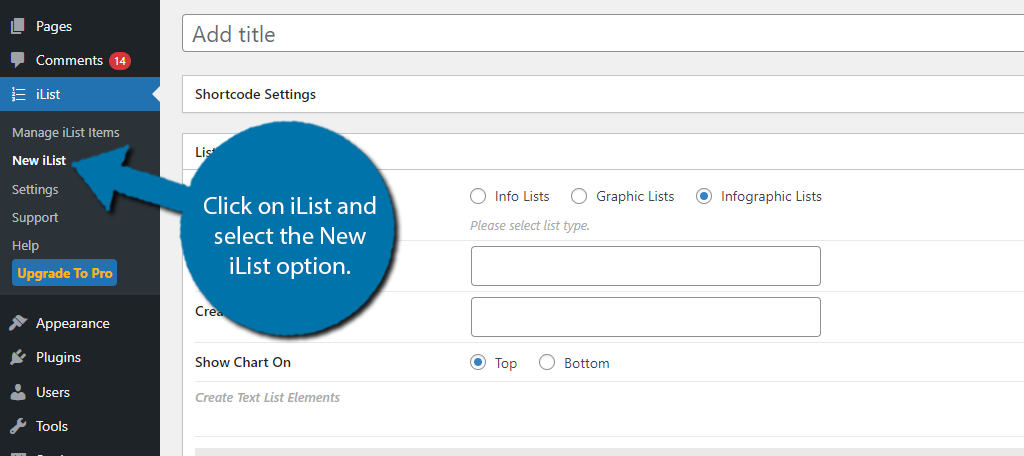
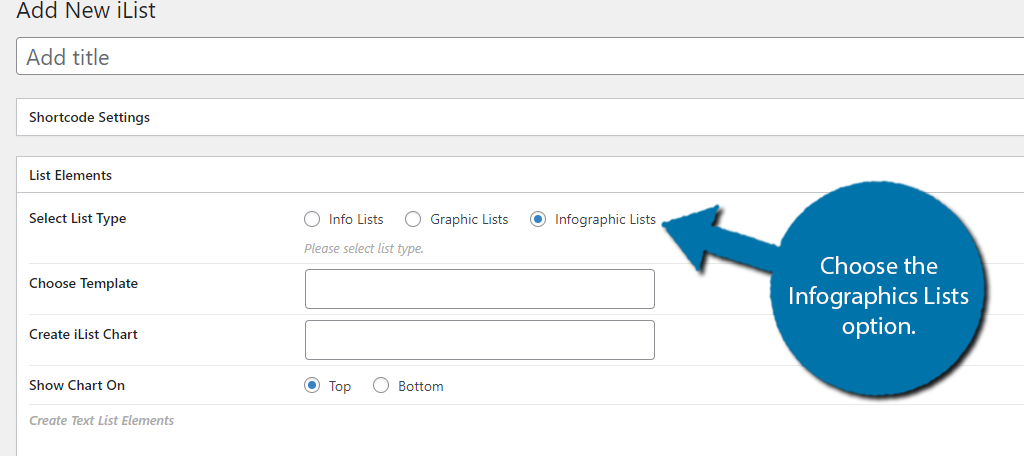
At the top, you can enter the title of the infographic. You should make sure it is catchy and reflects what the infographic is trying to inform visitors about. Below this, you can select the list types.
In this case, you want to choose the Infographics Lists option.
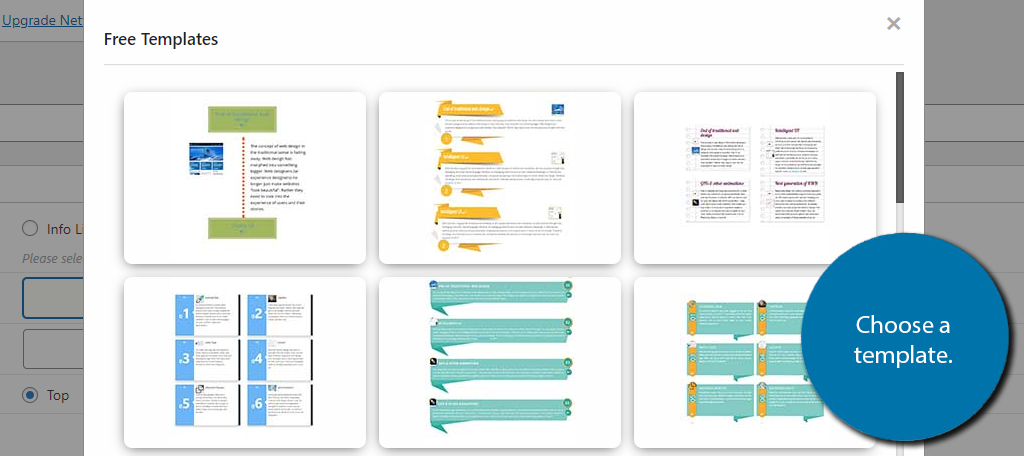
Next, you can choose your template. There are 15 options for the free version of this plugin, and many more if you purchase the Pro version. Simply click on the template you want to use.
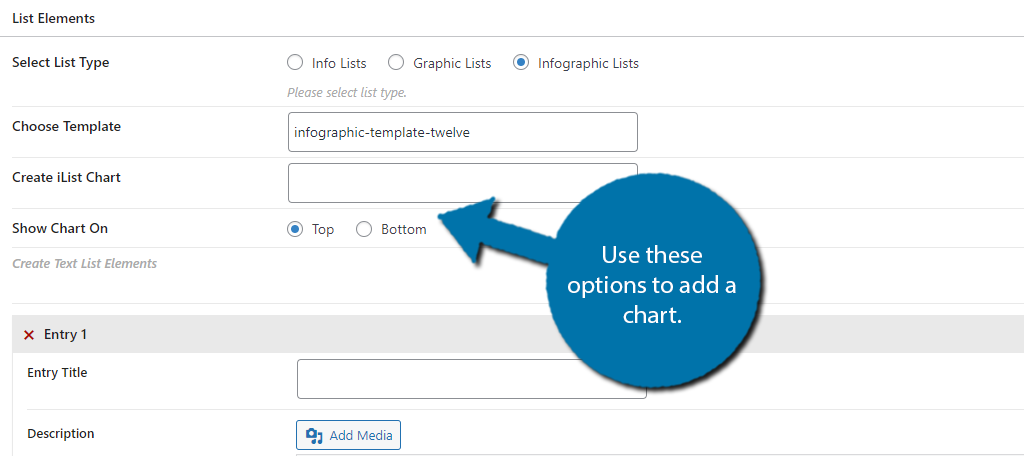
After this, there is an option that allows you to generate a chart to accompany your graphic. If you do not want to create a chart, then simply leave the selection field blank. If you do click on it and enter the appropriate information and select the chart type to generate.
Your options include line, bar, radar, polar area, pie, and doughnut. I will not be including one as most infographics do not include charts, but the option can be very handy in some cases.
There is also an option to choose if the chart should be at the top or bottom of the graphic below this option.
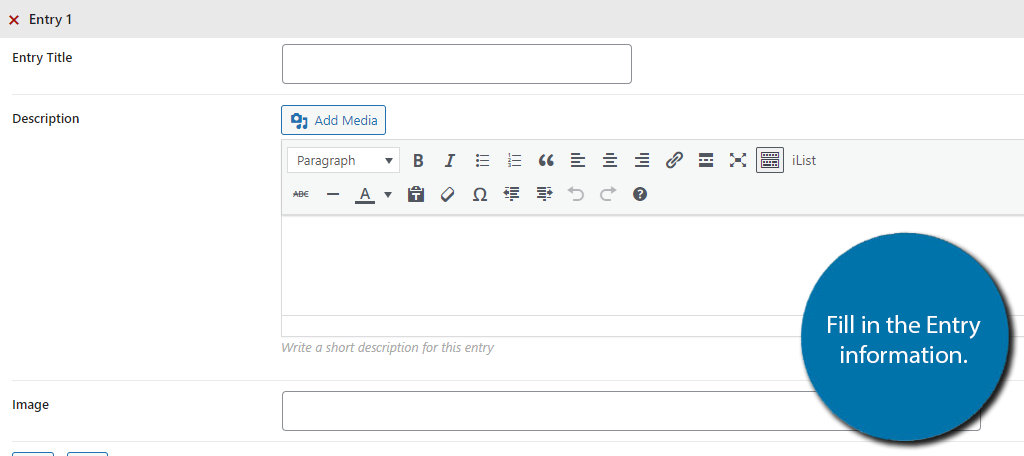
Now, it is time to start entering the information into your infographic. These are called Entries. Each entry allows you to choose a title (you can opt to leave it blank), add any relevant media, and write in the text.
You can add as many entries as necessary, but keep in mind that smaller infographics are easier to share than larger ones.
And that’s it. Once you have finished adding content, click on the “Published” button to finish.
Step 3: Add Your Infographic to WordPress
Now that the infographic is completed, you just need to add it to your site. To do this, the plugin utilizes shortcodes, which means you just need to copy and paste the shortcode. You can find the shortcode when looking at the list of iLists.
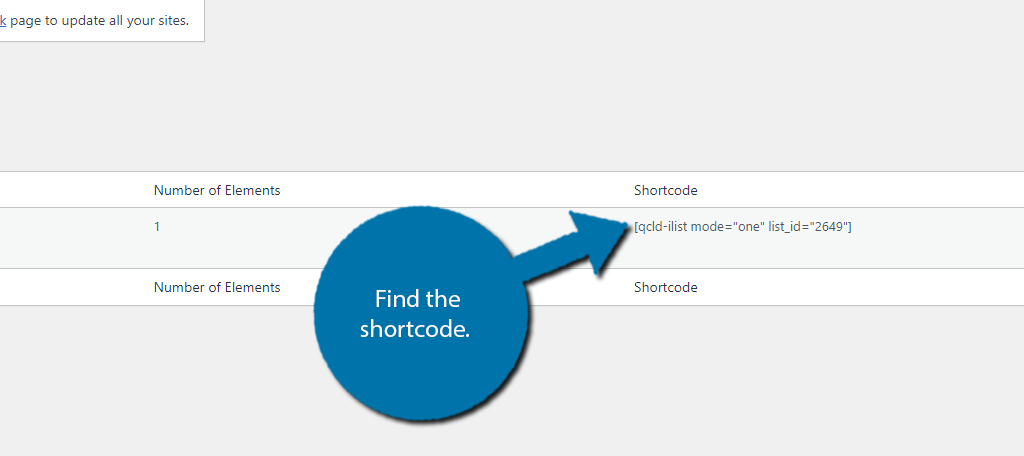
Take this shortcode and paste it into any shortcode block on a page or post. Save the changes and you can view your infographic on the live page. Overall, the plugin is very simple and effective at what it does with a good deal of customization.
Other Ways to Add Infographics in WordPress
Using a plugin is just a single option to add infographics in WordPress, here are some other options to consider:
Manually Create Them
There are several pieces of software you can use to create infographics with the most popular being Photoshop. If you have some basic understanding of the software, you can put one together in a reasonable time frame.
And even better, if you create your own template, you can reuse it with different information. This can significantly save you time and give you more freedom over the appearance of the infographic.
Once you have created one, you can upload it to the media library in WordPress and embed it directly on any post or page. With this said, it is important that the infographic looks good. Using low-effort graphics can hurt your site more than they help.
Canva

What if you lack the skill to make visually appealing infographics yourself and don’t want to install a plugin to make them? Well, you visit the Canva website and use their free infographics builder.
This site provides far more options than the plugin with the quality you would expect from a professional. This site utilizes a drag-and-drop interface to ensure it is accessible to users of any skill level.
In most cases, you pick a template, change the colors, and add your content. It is very simple and once you are done, simply download the image, and upload it to WordPress. Finally, add it to the desired page or post and you’re good to go.
Picktochart

Piktochart is another infographic builder you can use. This one focuses on a more professional setting with graphics typically used by corporations, but that said, it can work nicely for many sites and small businesses.
The tool uses a drag-and-drop builder that allows users to choose an element and add it to their graphics. There are also pre-built templates that you can use to start with and add your own content.
Adding them to WordPress is as simple as uploading them to the media library and adding them to a post or page. Overall, the tool is a great option for small businesses looking to create professional-grade infographics for WordPress.
Build Stunning Infographics for WordPress Today
As you can see, there are several ways to add high-quality infographics in WordPress. And these tools are free to use, which makes them a great asset to any website. That said, as with most things in life, too much of something good can be bad.
As such, the overuse of infographics can actually diminish their impact over time. As such, I strongly recommend using them in a reserved manner to maximize their impact on your audience.
I hope you found this tutorial helpful in learning how to add an infographic in WordPress with AI Infographic Maker.
Why do you want to add infographics to your website? Do you make your own infographics?


