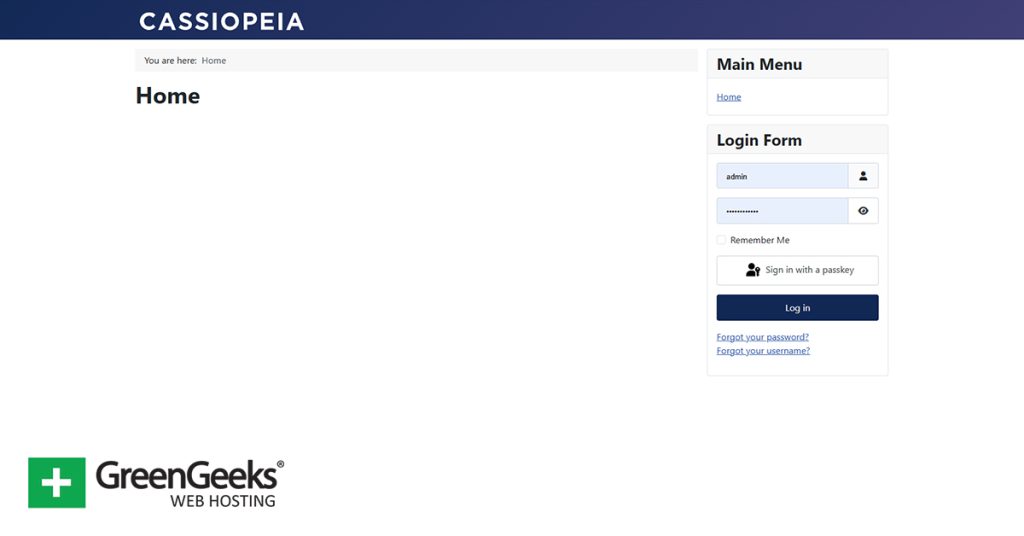
How to Add Content-Aware Widgets to the WordPress Sidebar

You may ask yourself, “What the heck are ‘content-aware’ widgets?” I know I did. But as it turns out, “content-aware” is just another way of saying “conditional.” Meaning you can show different widgets based on the content of the page or post.

So let’s say you want to show the default WordPress footer on every article written by one author, but a custom footer on another author’s articles. A content-aware widget will let you do that. (And that’s what we’re going to do in this tutorial.)

Or maybe you want to display some widget type information in an area where a standard widget can’t be placed. Like in the middle of a page or in a template. Well, you can do that, too.

Content-aware or conditional widgets may be the answer to a question you didn’t know you had. But I’ll bet you’re already thinking of some useful ways you could put such a widget into action, aren’t you?

Let’s get started.

Installing the Content Aware Sidebars WordPress Plugin

As you may have gathered, we’ll be using a plugin called Content Aware Sidebars to work this particular bit of WordPress magic.

Log in to your WordPress admin panel.

In the left column navigation, mouse over the “Plugins” link and click the “Add New” link.

mouse over the "Plugins" link and click the "Add New" link

In the “Search plugins…” box, enter “Content Aware Sidebars.”

search for the WordPress Content Aware Sidebars plugin

Once you have located the plugin, click the “Install Now” button.

click to install the WordPress Content Aware Sidebars plugin

When the plugin has been installed, click the “Activate” button.

click to activate the WordPress Content Aware Sidebars plugin

Creating and Configuring a Content-Aware Widget

In the left column navigation, mouse over the “Content Aware” link and click the “Add New” link.

click the "Add New" link

Let’s go tab by tab and work our way through WordPress conditional widgets.

Note that any time you make a change that’s saved automatically, you’ll see a “Conditions updated” notice.

"Conditions updated" notice

Conditions Tab

Start by giving the sidebar a name.

The term “sidebar” is used in the plugin, but you’re creating something that can be used not only in a widget area – such as a sidebar or footer – but pretty much anywhere since it can also be called with a shortcode.

name the sidebar

The “+ New condition group” dropdown contains “General,” “Post Types,” and “Taxonomies” options. For the sake of simplicity in this tutorial, I’m going to choose one of the “Quick Add” options, “Posts by Author.”

The Content Aware Sidebars plugin authors have a page that walks you through more advanced options.

select posts by author

The “Settings” button has a “Page Types” dropdown that allows you to select single or archived pages. As well as on/off toggles for “Negate conditions,” and “Auto-select new children of selected items.”

We’re not going to change any of the defaults.

settings button options

In the “Where to display” section, the first thing you’ll see is a “+ Meet ALL of these conditions” dropdown.

meet ALL conditions drop-down

That has the same list of conditions options as the “New condition group” dropdown we saw in the previous step (“General,” “Post Types,” and “Taxonomies”). Selecting a condition from the dropdown adds another option field in the “AND” section.

Again, to keep things simple, we’re just going to go with the options that are already presented, “Posts / Blog” and “Authors.” So we’ll leave that dropdown alone.

I want to display a sidebar only on the articles written by Jane Doe. When you start typing in the “Authors” field, the plugin automatically searches and displays the matches. I select Jane Doe, and she’s added to the condition.

select Jane Doe to add to the condition

If we stopped right here, our sidebar would be displayed on all of the articles written by Jane Doe. Which is ultimately what we want, but let’s talk about how these conditions work.

IF, AND, OR, And More

In our “Authors” field, we have specified Jane Doe. But notice the “AND” between the “Authors” field the “Posts / Blog” field above it. That’s telling us that the sidebar we’re creating will display articles that match both of the fields, “Authors” and “Posts / Blog.”

By default (if we do not enter anything in the “Posts / Blog” field), the sidebar will show up on all posts and pages written by Jane Doe because she’s the “AND” subject.

But, if we choose a post or a page that Jane Doe didn’t write, the sidebar will not be displayed anywhere.

Why? Because no post would match the conditions that we laid out. Those conditions would only show the sidebar on this post not written by Jane Doe and only show it on posts written by Jane Doe.

See, we gave two conditions that cancel each other out.

Jane didn't write the article so nothing will be displayed

All of which is to point out that it’s easy to make mistakes with conditional settings. If you set up a sidebar and it isn’t displayed where you expect it to be, check your configuration for an error that might prevent it from being shown.

So to do what we want to do here – show a custom sidebar on all of Jane Doe’s posts – we leave the “Posts / Blog” field blank.

don't add an AND condition

As you see, the “Where to display” section also has an “OR” field. That gives us the option of displaying something if our first set of options comes up empty.

We’re not going to add an “OR” condition in this tutorial, but you can see how it could be useful as a backup in case your main conditions can’t be met.

For example, we may not be aware that Jane didn’t write a certain article. Or that an article doesn’t have a certain tag or category. We could inadvertently enter conditions that would result in no display.

If we enter an “OR” option, we won’t present an empty result to visitors.

Action Tab

In the “How to display” section, there are three dropdowns, “Action,” “Target Sidebar,” and “Merge Position.”

Action controls whether the new sidebar replaces or merges with a target (existing) sidebar. There’s also a shortcode option if you want to use the new sidebar outside of a widget area.
Target Sidebar is a list of all of your active sidebars. In our demo here, the only existing widget area in the theme is the footer.
Merge Position controls where this new sidebar data appears in a merged sidebar, above or below the existing data.

In this tab, if we choose “Merge” as the action, “Footer” as the target sidebar, and “Top” as the merge position, our sidebar should appear at the top of the footer.

sidebar configuration, merge

If instead of “Merge” we choose “Shortcode” as the action, a shortcode is generated that we can place into any page, post, or template.

sidebar configuration, shortcode

I’ll show you what these look like in a minute after we create a widget for the Jane Doe sidebar.

Design Tab

The “Design” tab has a “Styles” section that lets you add CSS to various aspects of the sidebar. We’re not going to change any of those. If we don’t make any changes here, the style for our new sidebar will be inherited from the theme.

Schedule Tab

The “Schedule” tab lets you schedule a specific time for the sidebar to be automatically activated. That could come in handy if you want to configure content-aware widgets before you actually use them. By default, new sidebars will be activated when they’re created, so they’re visible right away.

Options Tab

Here’s where you set the display order. That only comes into play if multiple sidebars appear in the same area or on the same page.

This is also where you delete a widget by clicking the “Move to Trash” button.

Let’s Make Our Jane Doe Sidebar Do Something

We’ve configured a sidebar to give Jane Doe’s articles different footer, but we haven’t added anything to that footer yet.

In the left column navigation, mouse over the “Appearance” link and click the “Widgets” link.

click the "Widgets" link

You can see that there’s a new widget in town — our “Jane Doe posts” widget.

new widget

But it’s empty, so I’ll drag “Tag cloud” over into the “Jane Doe posts” widget. You may notice there’s also a toggle switch that you can use to temporarily disable the widget if you ever need to do so.

dragged an item into the new widget

Once I click the “Save” button, the tag cloud should appear at the top of the footer, but only on articles written by Jane Doe.

footer for article written by Jane Doe

footer for article not written by Jane Doe

Inserting the Jane Doe Sidebar Using Shortcode

Now, let’s see what happens if we change the “Action” from “Merge” to “Shortcode.”

In the left column navigation, mouse over the “Content Aware” link and click the “All Sidebars” link.

Click “Edit” under “Jane Doe posts.”

click Edit under Jane Doe posts

Click the “Action” tab and change “Action” from “Merge” to “Shortcode.”

change Action from Merge to Shortcode

Now copy the shortcode.

copy the shortcode

And we’ll paste it into a post written by Jane Doe.

paste shortcode into a post

So now, if we go to the article, there’s the tag cloud, right where we inserted the shortcode.

tag cloud inserted using shortcode

Try doing that with a standard WordPress widget! (Spoiler alert: you can’t.)

Sidebars Aren’t Just for Sides Anymore

As you can see, Content Aware Sidebars is more than just another WordPress widgets plugin. It’s a powerful tool for creating custom layouts based on an almost endless number of options and conditions.

We scratched the surface here and demonstrated some basics. But hopefully, your wheels are turning now and you’re coming up with some interesting uses for conditional widgets and sidebars that aren’t really sidebars at all.

Have you ever experimented with any manual methods of conditional presentation in WordPress? Now that you know it can be achieved more easily, will you give the plugin a try? Let me know in the comments.

Leave a Comment

Your email address will not be published. Required fields are marked *

This site uses Akismet to reduce spam. Learn how your comment data is processed.