
WordPress comes with a variety of predefined fields that users can use to label content. However, some sites need their own custom fields for media, and with the right plugin, it is easy to add new ones to WordPress.
This can help you keep track of your content and improve site navigation by labeling content appropriately. When it comes to adding custom fields in WordPress, the Advanced Custom Fields plugin is the best option.
With it, you can add custom fields to any kind of content including media. Best of all, the plugin is very easy to use, so no matter what your skill level is, you can create custom fields in minutes.
Today, I will demonstrate how to use the Advanced Custom Fields (ACF) plugin to add custom fields to media.
How to Create Custom Fields for Media
The Advanced Custom Fields (ACF) plugin is a great choice when you want to add any custom field in WordPress. This includes things like custom post types, or what we are after, custom media fields.
While you can create any kind of field type, I am going to add a Photographer custom field to my media. That way, anytime I use a photo, I can list the photographer who took it. That said, you can make it whatever you want, or as many as you want.
The tutorial should only take a few minutes to go through, so let’s begin.
Step 1: Install Advanced Custom Fields (ACF)
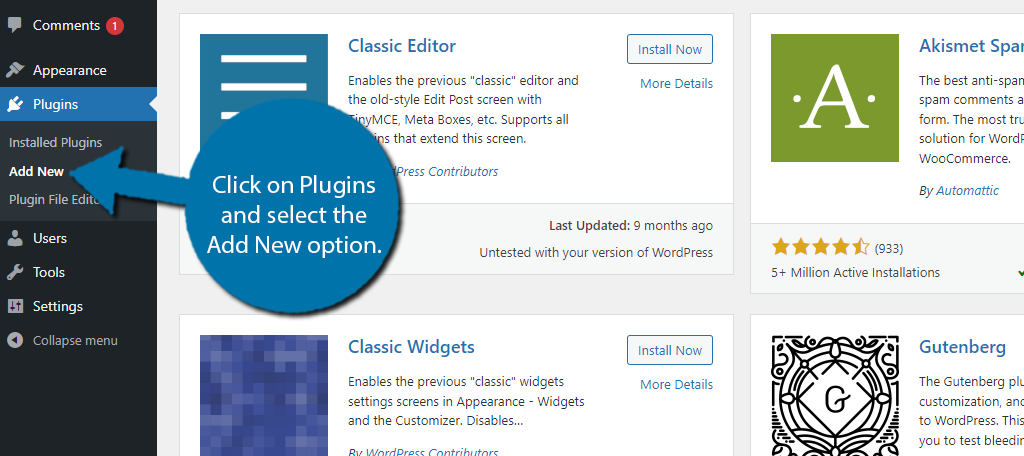
Let’s start by clicking on Plugins and selecting the Add New option on the left-hand admin panel.
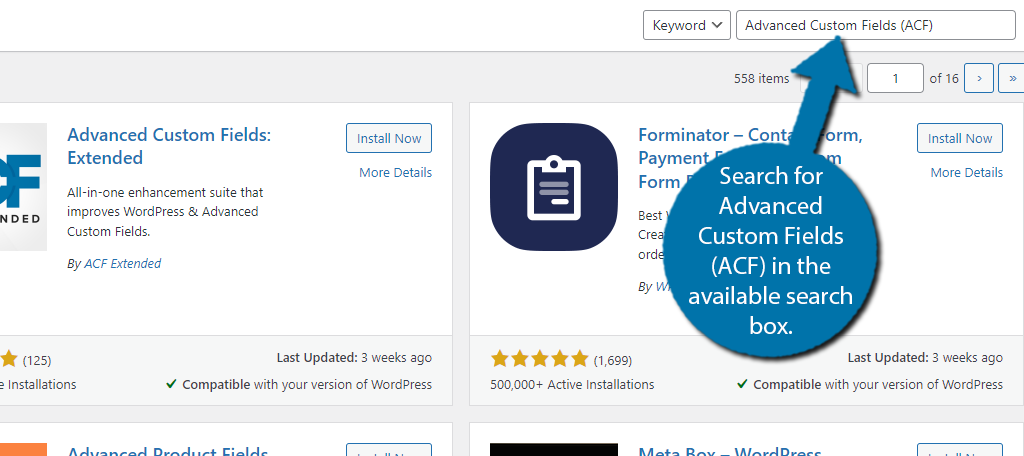
Search for Advanced Custom Fields (ACF) in the available search box. This will pull up additional plugins that you may find helpful.
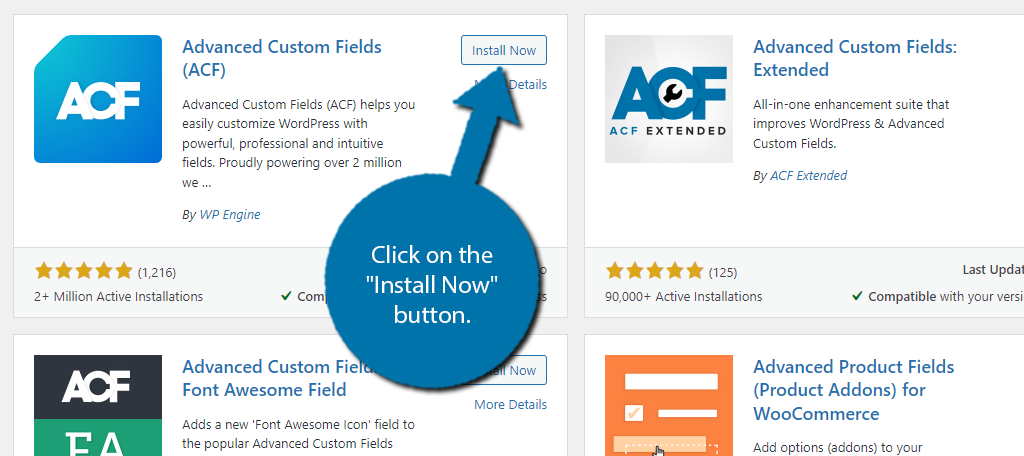
Find the Advanced Custom Fields (ACF) plugin and click on the “Install Now” button and activate the plugin for use.
Step 2: Create a New Group
You can save fields in ACF according to groups. This is helpful if you want to keep things separated, such as fields for posts or images. Today, we’ll create one for the media library.
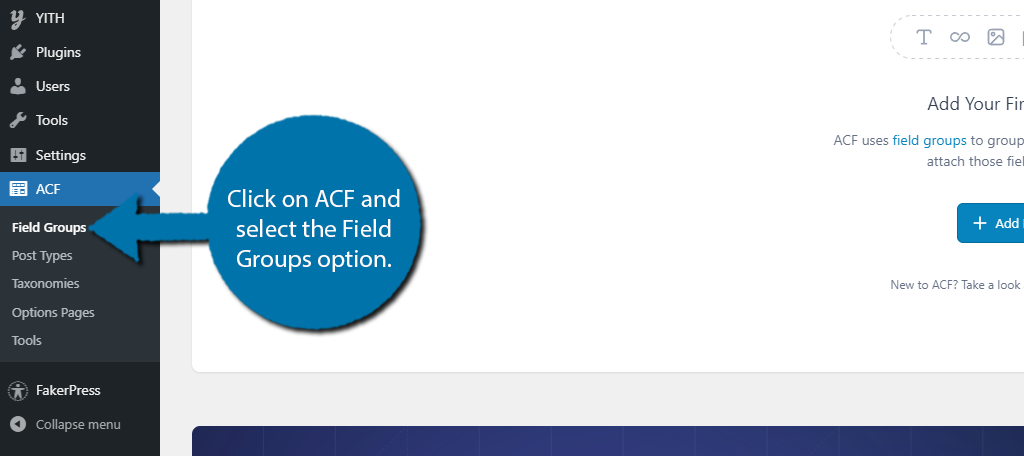
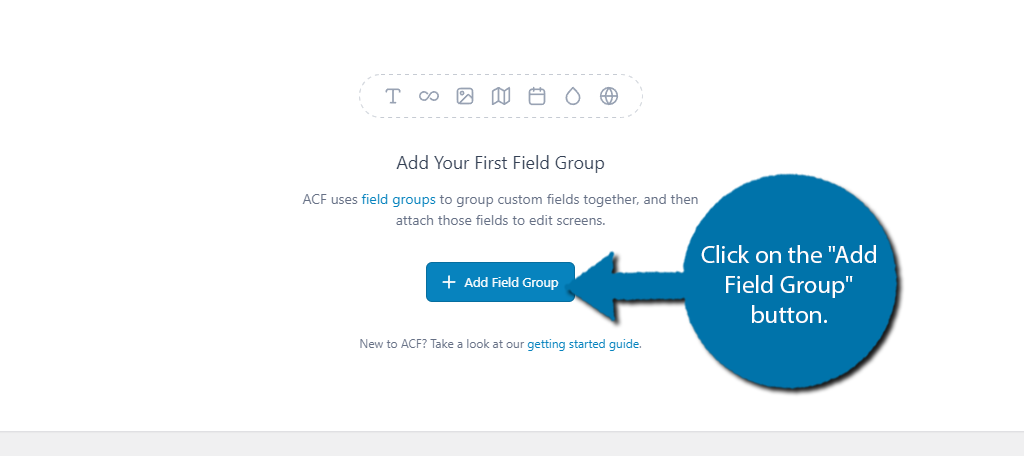
First, click on ACF and select the Field Groups option.
You can either click the “Add New” button on the top or click on the “Add Field Group” button in the middle of the screen.
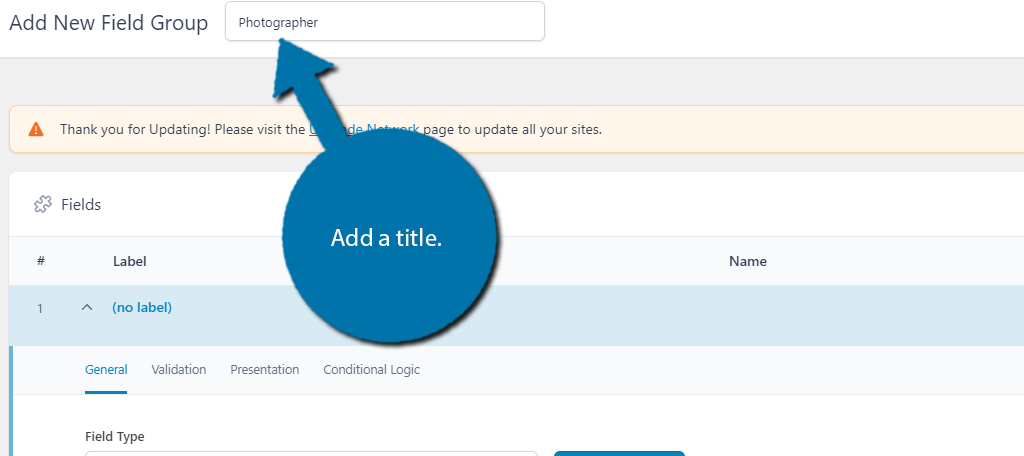
The next screen is full of options that you can customize. It may seem like a lot, but it’s actually pretty quick to go through. At the top, you can name the field group. In my case, I am going to call it Photographer.
The first option is to choose what kind of field type this is. In my case, I am selecting Text, but feel free to choose any of the options that suit your needs.
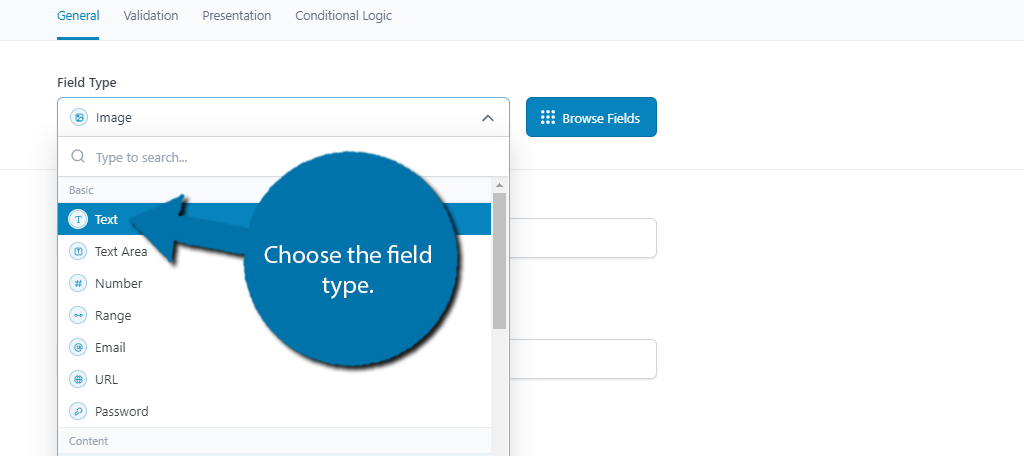
Doing so will actually change some of the options that are available. This is because different field types have different settings as images are very different than a text area.
Next, you need to create the Field Label. This is what the custom field will be named within the media library. In my case, I am calling it Photographer, but you can choose anything you want.
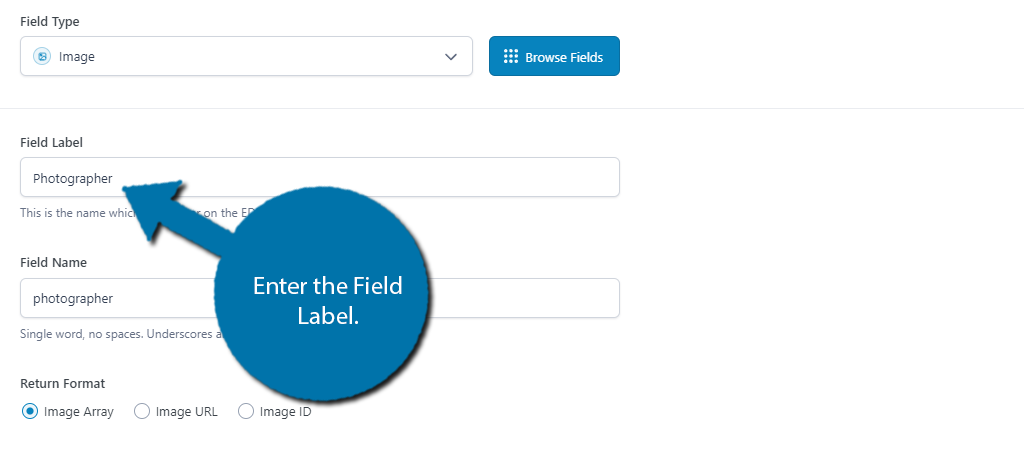
The Field Name will automatically change to reflect the label you entered. This is an identifier for the plugin, and you can make this whatever you want. I suggest keeping it as the default, though.
The next options are specific to the field type you chose. In the case of Text, you can enter the default value, or just leave it blank.
The rest of the settings are also dependent on the field type. So instead of going into specifics, I will outline the purpose of the Tab.
Validation
The Validation tab exists for you to set criteria for the field type. This can be the number of characters if you selected text, or it could be choosing a maximum and minimum size for any images you plan to add.
By default, the settings are disabled, meaning users can add just about anything into the respective field. What you choose to do here is entirely dependent on your needs, so choose wisely.
Presentation
The Presentation tab exists so you can dictate how the label will appear. The universal setting is the instructions box. This allows you to explain the purpose of the field. In my case, I will have it say “Insert the name of the photographer” to keep it simple.

The other options depend on the type of field you created. Images will let you see the preview options, while text will provide more fields you can fill out.
Conditional Logic
The final tab is the Conditional Logic tab. This will give you control over when the field will appear. You can leave this off if you want the field to appear on every image. In my case, I want it on every image, so I will not change the options.
However, to explain it quickly, you would just create a series of “If” statements that display the custom field if that condition is met. This is intended for more advanced users, so I won’t go into too much detail.
Step 3: Create A Rule
At this point, you are pretty much done but still have one more thing to do. You need to set a rule, which will dictate where the custom field type will appear. You can find this section by scrolling down.
In this case, we want the field type to appear on media, thus we want to select the Attachment option.
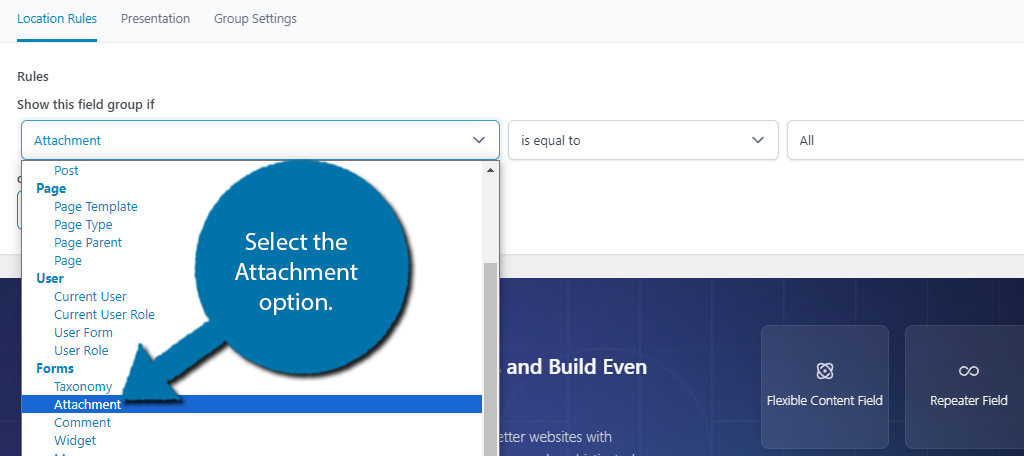
The other options can be left alone if you want it to appear on every piece of media. If not, you can customize the rule to fine-tune where it appears. In my case, I wanted it on everything, so I left the other options alone.
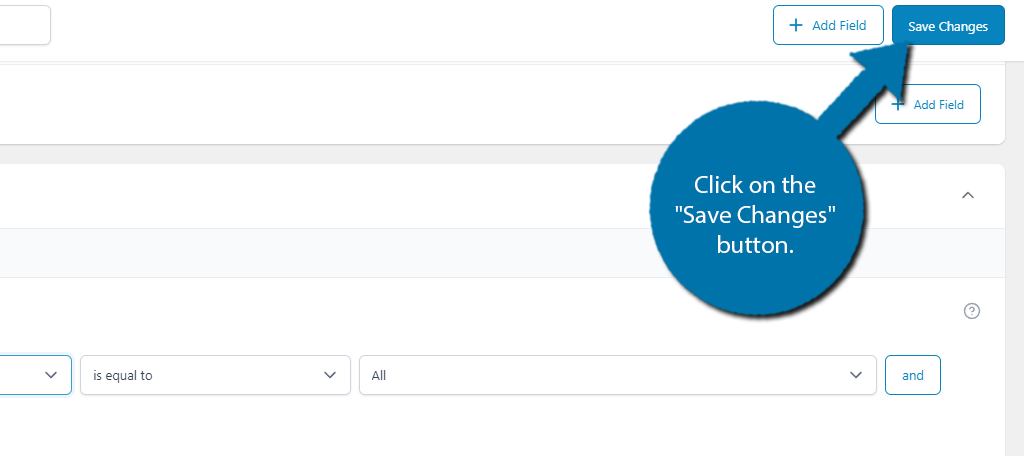
To finish, click on the “Save Changes” button.
If you visit your media library, you should see the newly created custom field.

And that’s it. You can repeat these steps as many times as you want to create multiple custom media fields for WordPress. And remember this is just one type of field. The plugin can add them to any type of content in WordPress.
Other Things You Can Do With ACF
The ACF plugin is extremely versatile, which is why it has over 2 million active installs. As such, there is a lot we have not covered in this tutorial. Here are a few things you can do with ACF that may benefit your site:
- Create custom taxonomies
- Create custom admin pages (Pro Only)
- Import and export your custom fields
- Create custom post yypes
- ACF Blocks allow you to create your own block in Gutenberg (Pro Only)
- Gain access to the Repeater Field which can be used for content regularly repeated on your site (Pro Only)
- Set up conditional logic to ensure fields only appear when they need to
Do Custom Fields Improve Your Site’s SEO?
Yes, but not in the way you might think they do. It is true that they can improve site navigation and make it easier to find specific types of content. This will improve your SEO, but there’s actually another reason they improve SEO.
The truth is the extra fields that appear on the front end appear like extra content on your site. And in the eyes of search engines, the more content you have the better it must be. Thus, you’ll rank better.
So, yeah, adding custom fields in WordPress should help you improve rankings if handled responsibly.
Create Custom Media Fields in WordPress Today
As you can see it is quite easy to add custom media fields in WordPress by using the Advanced Custom Fields (ACF) plugin. Doing so can help you create more ways to find the media content you are looking for and improve SEO.
It’s really worth pointing out that while this tutorial was focused on media content, it can be used for all types of custom fields. As such, I would strongly encourage you to use it in other areas of your site.
I hope you found this tutorial helpful in learning how to add custom media fields in WordPress.
What kind of custom fields did you create for your media? Did you find ACF to be easy to use?
How To display Those Field Values in The Gallery Or Post