
When it comes to engaging your audience in WordPress, there is no substitute for the comment section. Like most things in WordPress, you can customize the comment section to better suit your needs.
A comment section helps increase user engagement by allowing them to leave feedback and talk with other users. The WordPress platform has a great selection of plugins that can help you customize the comment section in a variety of ways.
Today, I will demonstrate how to customize the comment section in WordPress with the wpDiscuz plugin.
How to Customize the Comment Section with wpDiscuz
Comments by wpDiscuz is one of the best comment plugins for WordPress. It boasts an excellent interface that makes it easy to follow threaded comment conversations. It also has a lot of customization options available.
As such, it easily complements any kind of website design. In terms of usability, it is also very easy to set up and customize, which is why it has become such a popular choice in WordPress.
Step 1: Installing wpDiscuz
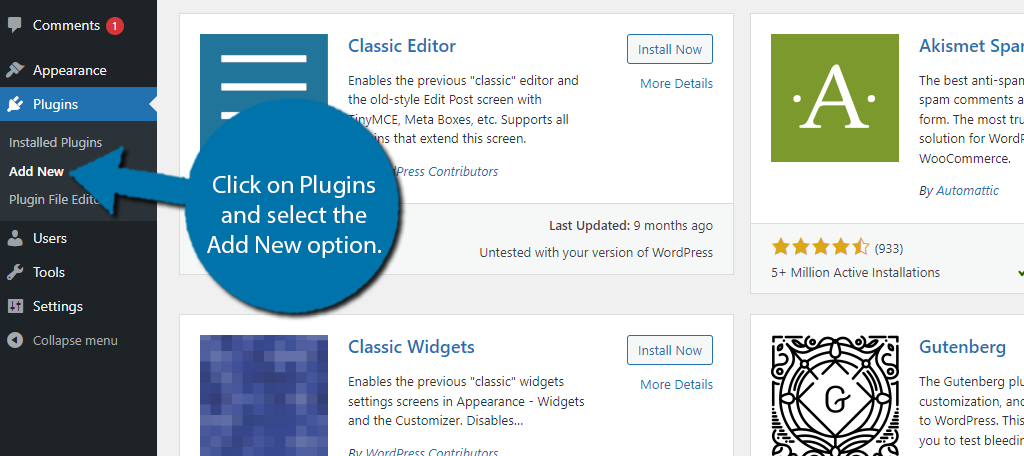
Let’s start by clicking on Plugins and selecting the Add New option on the left-hand admin panel.
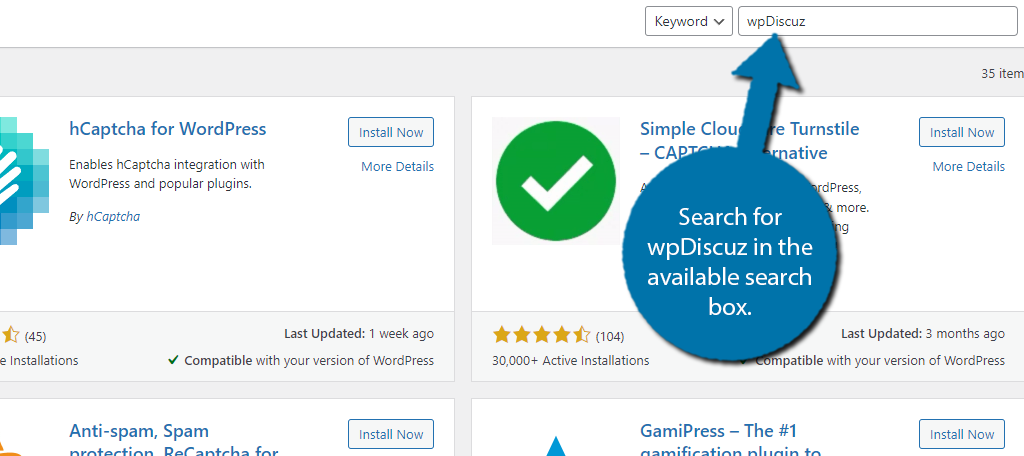
Search for wpDiscuz in the available search box. This will pull up additional plugins that you may find helpful.
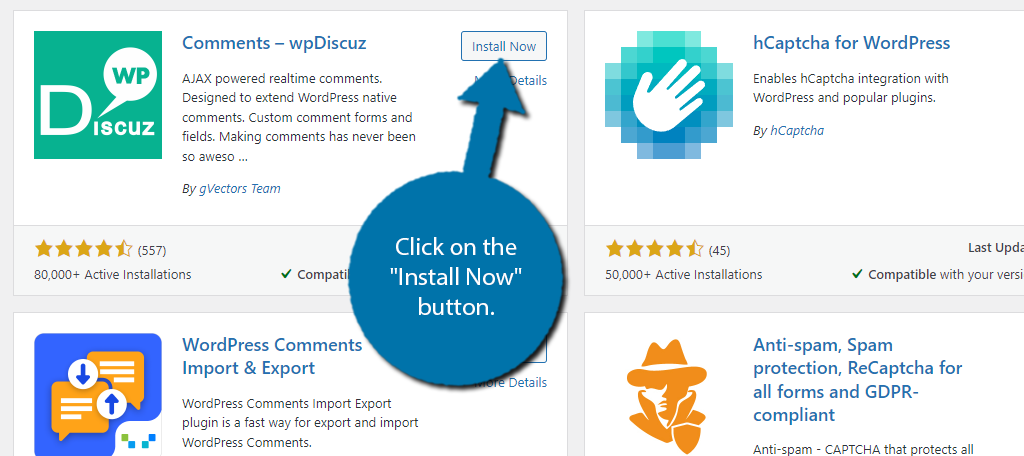
Find the wpDiscuz plugin and click on the “Install Now” button and activate the plugin for use.
Step 2: Setup Wizard
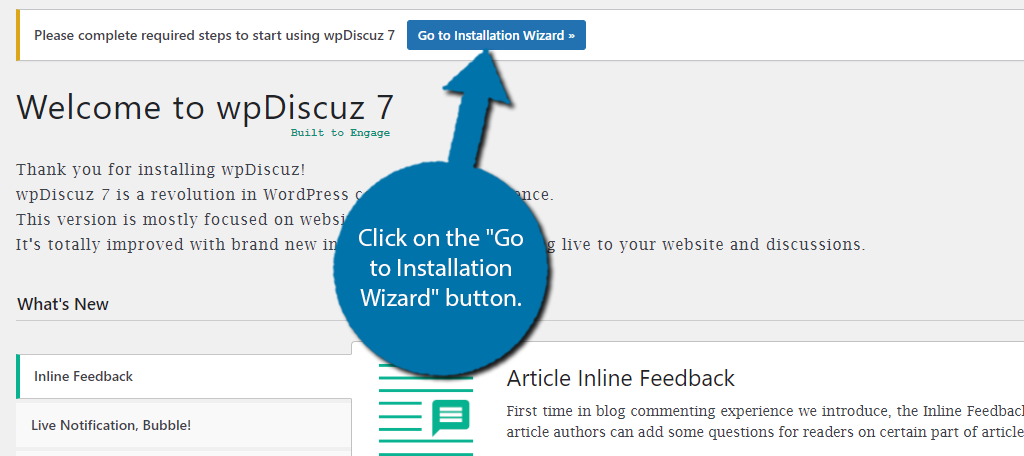
The first thing you will want to do is to go through the Setup Wizard. This will lead you through the settings necessary for the plugin to operate smoothly. You should see a “Go to Installation Wizard” button at the top of WordPress. Click it.
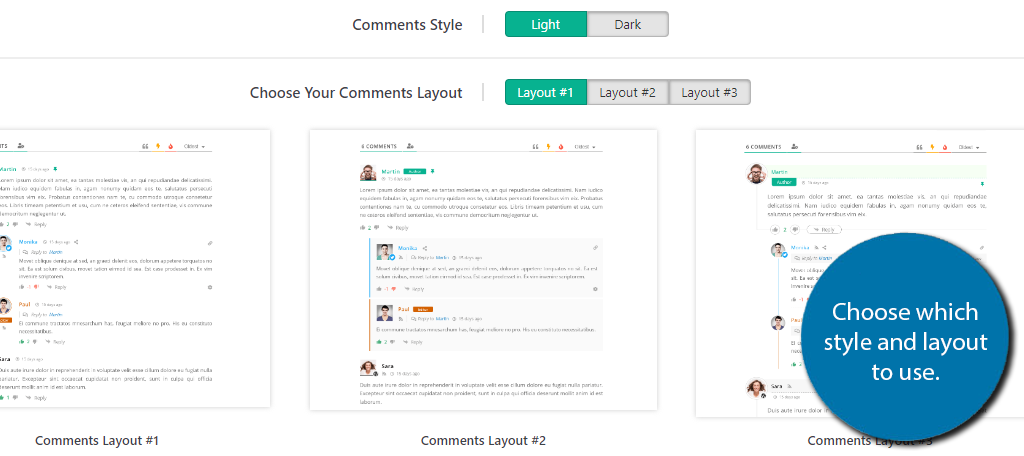
The first step of the Setup Wizard is to select if you want to use light or dark mode and which comment layout you want to use. Click on the “Next Step” button to continue.
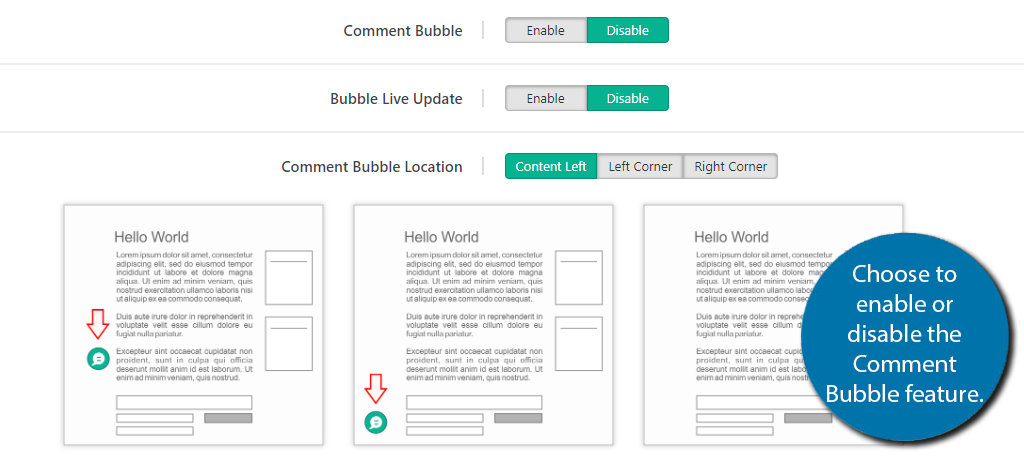
The next step is for the Comment Bubble feature. This will add a small icon for the comment section when users load a page that they can use to quickly get to the comment section. It will also show the number of new comments that were made.
You can choose to enable or disable the feature. Continue to the next step.
The last step is to enable or disable two features. The first is the inline commenting form. This feature allows you to leave inline comments that ask the readers questions like “Do you agree with this?” or something to that effect.
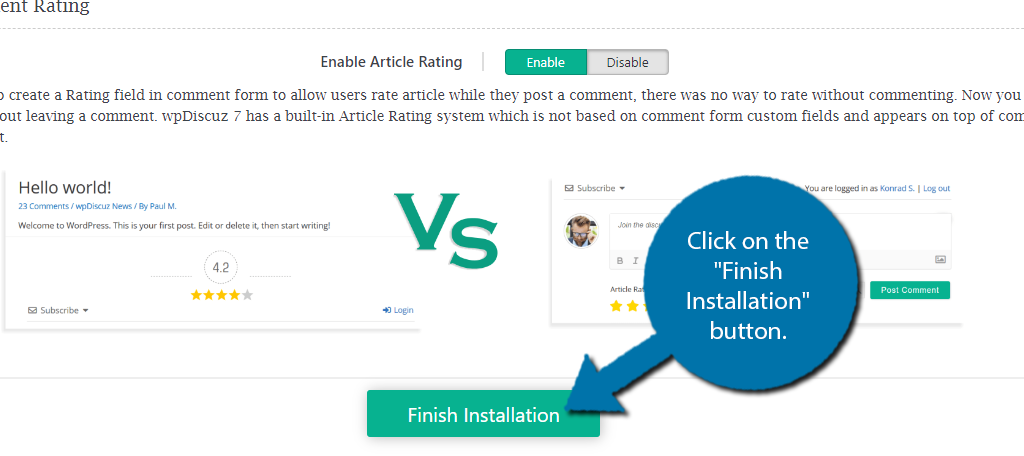
The second feature is the article rating system. This gives users the ability to leave a rating from 1 to 5 stars. This will give you a great idea of what your audience is thinking about the overall topic.
Simply choose to enable or disable any features and click on the “Finish Installation” button.
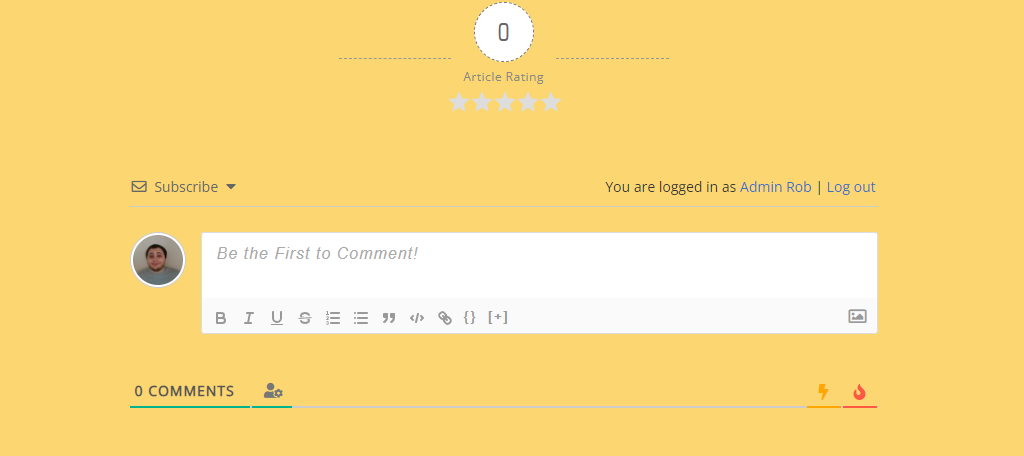
Once you finish this process, you can go to any post or page where comments are active and see what the comment section looks like.
Step 3: Customizing the Plugin
The strongest aspect of the wpDiscuz plugin is that it has a lot of settings you can customize. It has so many that we can’t cover every one of them, and instead, I will just look at what each section of the settings does.
To find the settings, click on wpDiscuz and select the Settings option.
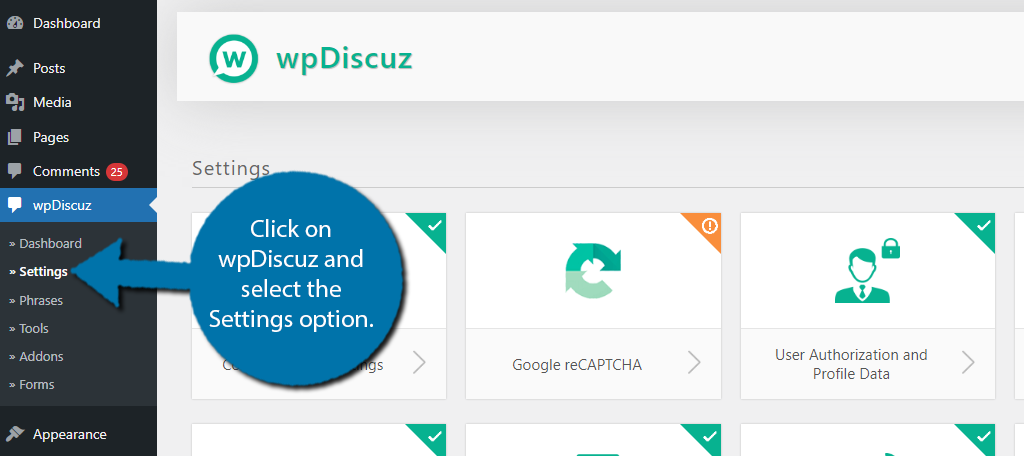
The settings are broken up into multiple sections that you can click on. I will be going through most of them but encourage you to look through each option. The plugin does a good job of explaining what each one does, so you shouldn’t have any trouble.
Comment Form Settings
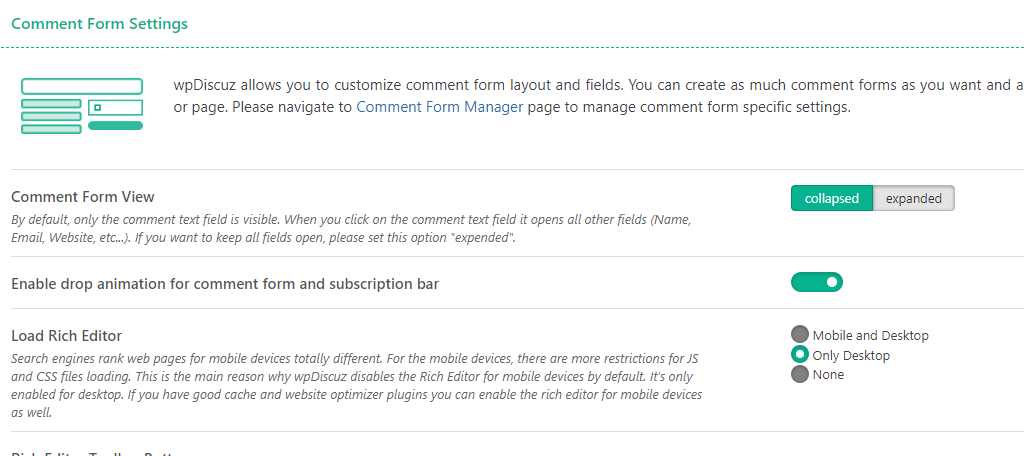
These settings allow you to choose the comment form view (collapsed or expanded), animations, rich editor settings, Quicktags, the length of usernames, and how long the guest credentials will be stored by cookies.
You may wonder why you would want to limit the number of characters in a username. The first reason is that more characters do mean more data, thus by limiting them, you can save on site resources. The other is for spam.
If you set a minimum number of characters, some spambots will fail to create an account to leave a post.
Live Commenting and Notifications
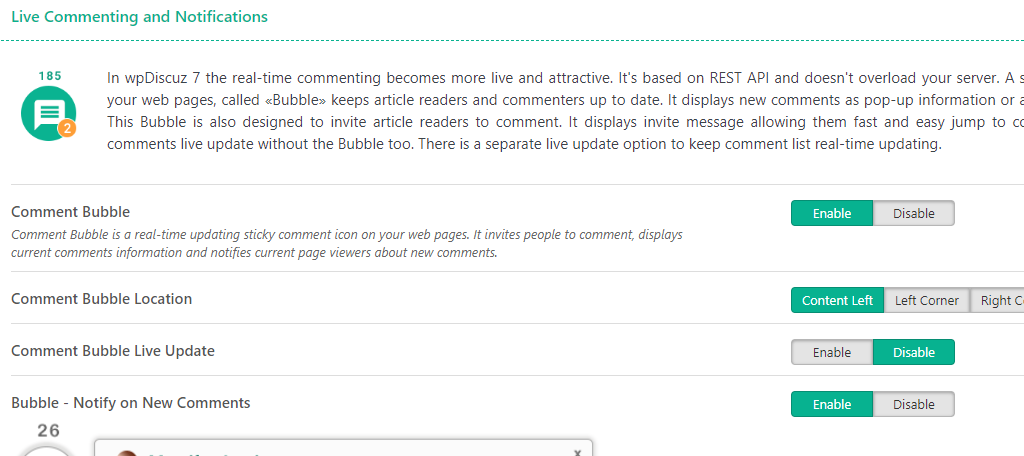
This allows you to customize the Comment Bubble from the setup wizard. There are also settings for enabling live updates. Essentially, this means that as comments are made, they will appear immediately.
This is great for an active comment section, but it is worth noting that it can eat up site resources. If you are on a shared hosting plan with limited resources, you may want to keep this feature disabled.
Subscription
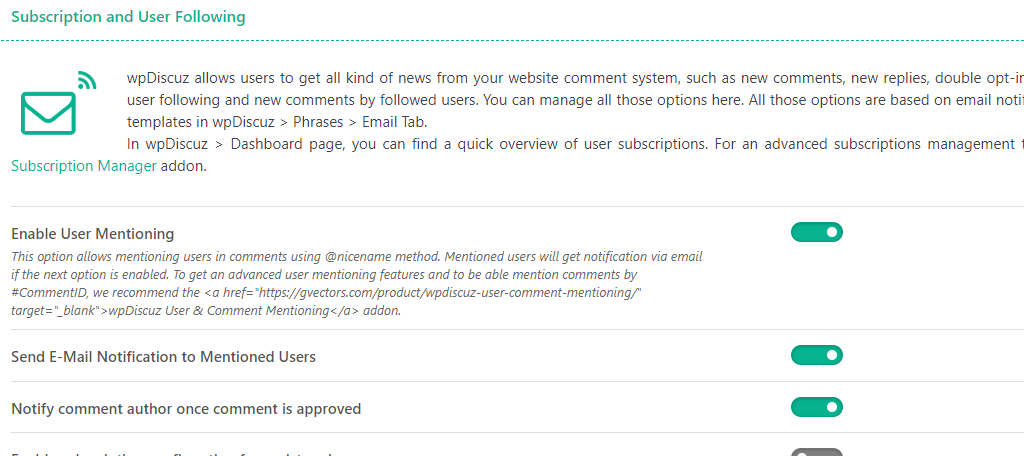
One of the best parts of wpDiscuz is the ability for users to subscribe to the comment section. This part of the settings is all about enabling and disabling what will trigger notifications for users.
This is something you should communicate with your community, as getting too many notifications can turn users away from the comment section instead of enhancing the experience.
No one wants to get bombarded by an endless stream of update emails.
Styles and Colors
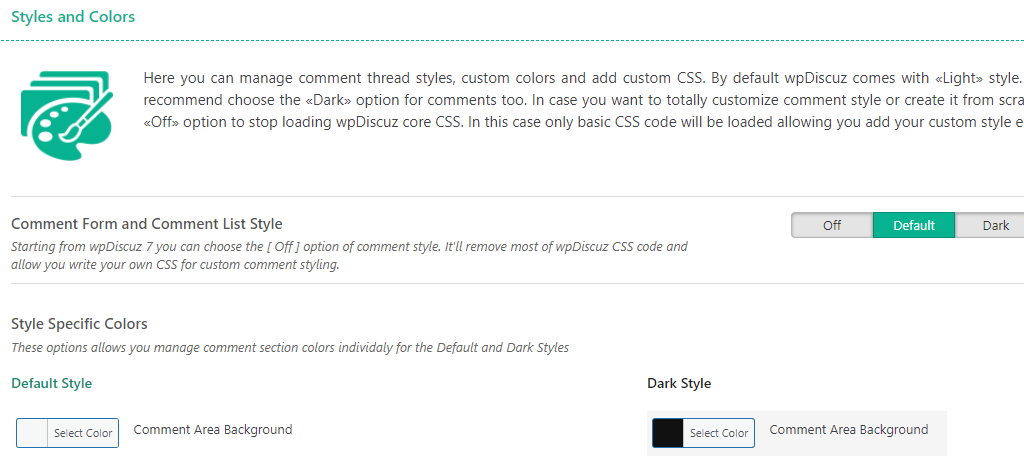
As the name suggests, this section is all about styling your comment section and customizing the appearance to match the rest of your site. Here, you can adjust the colors the comment section uses or enter your own custom CSS code.
Unfortunately, since you can’t preview the changes you make, you’ll probably want a second tab open that you can use to view the changes from your site. Each color is self-explanatory, so spend some time to get it right.
Social Login and Share
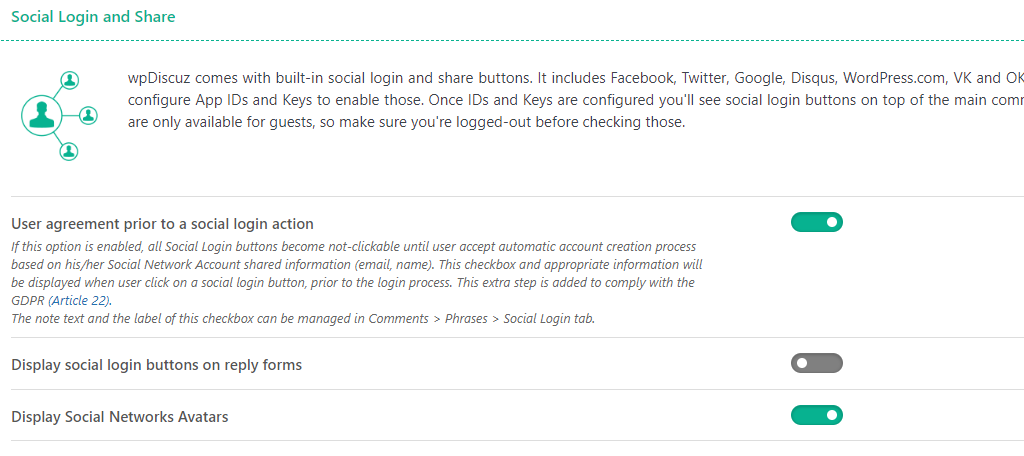
Many sites today support the ability for users to log in using their favorite social media platform. These include things link Facebook, X (Twitter), Google, and other platforms. Each one has its own process to enable.
That said, they are mostly just obtaining an API key, so simply refer to that platform’s API guides. Signing in this way also gives users the ability to use avatars from those platforms.
It’s a great feature, so I recommend taking the time to set it up.
Comment Moderation
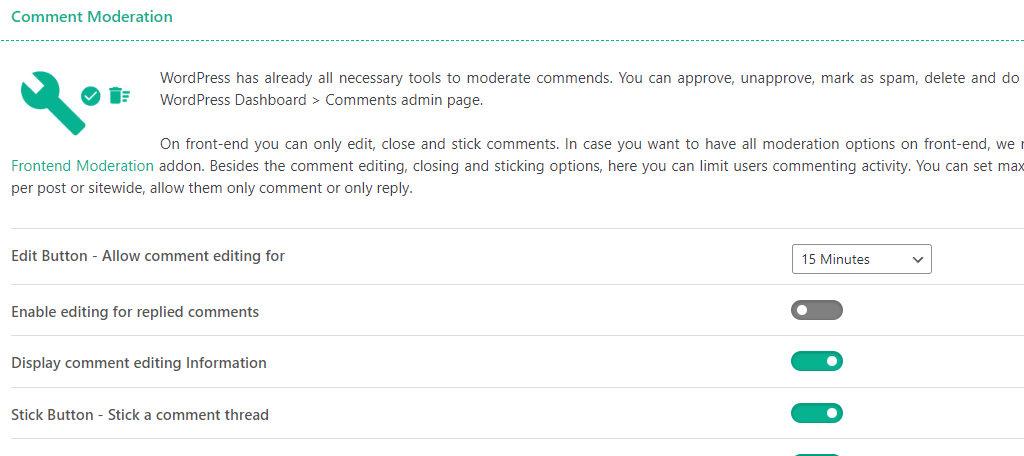
The comment moderation section is not what you might expect. All of the approval, spam, deletion, and whatnot are handled by WordPress, such as using the Akismet plugin.
These settings are for users to moderate themselves.
Essentially, this allows the users to edit their comments, set a window for how long they can edit it, and show if a comment was edited. You can also add a stick option to help users keep track of comment threads they are interested in.
Other Plugins for Customizing Comments
The wpDiscuz plugin is not the only option you can use to customize the comment section in WordPress. There are a lot of great plugins to choose from, so let’s take a look at some other you may want to consider using.
Social comments by WpDevArt
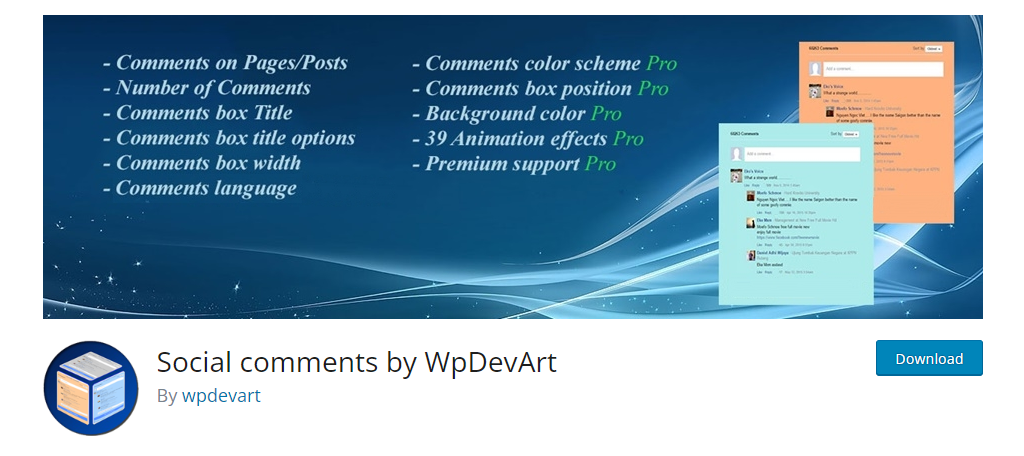
The Social comments by WPDevArt plugin transforms your comment section to appear just like the comment section you would find on Facebook. In fact, users can log in with their Facebook account to use the same Avatar.
The customization options allow you to change the background color of the section. This can help you better match the color scheme of your website. There are also some animation effects you can add.
Overall, the plugin is very simple to use and gives your site a familiar look that users will feel comfortable using.
Disqus Comment System
The Disqus Comment System is one of the most recognizable on the internet. I am willing to bet that most users have used this system in the past. This system is unique in that users can log into it and access their account on any site.
This has made it a popular option in and outside of the WordPress space. The comment section design is great and fits into most websites without a problem. There are customization options that you can use to change the colors and whatnot.
One thing that is very important to point out is that the free version will display advertisements on your site. This is how the comments system funds itself. To remove these ads, you will need to use the paid plan.
Make Your Comment Section Engaging
The comment section is a great way to gauge how users are enjoying your content and help build a strong community. In some cases, the comment section can even become one of the reasons users visit your site.
If you build an active community that always shares interesting thoughts, memes, and insights, it can be a huge boon for your traffic as word about it grows. Just be sure to take proper moderation steps.
Your comment section will fail if it is saturated with spam messages linking or advertising other sites. As such, you need to make sure you have an anti-spam plugin installed to ensure the comments being left are from humans.
I hope you found this tutorial helpful in learning how to customize the comment section in WordPress.
How active has your comment section become after customizing it? Do you like the default comment system in WordPress?
This is best plugin for comment modification with a lot features.
Thank you.