Setting up classified ads is just one of many ways to make money from your site. Not only does this help put a bit of money in your pocket through posting fees and ads, but it also has the potential for driving traffic. This is especially easy if you’re using a platform like WordPress.
It’s just one of many ways that you can accentuate your online presence.
In this tutorial, I’m going to show you how to install classified ads plugins for WordPress. It’s a quick process that may have you making money in no time.
Installing WP Classified
Classified plugins are quite useful whether you want to set up a free community for peddling goods or a paid service. It can even be quite beneficial for local companies as your direct offline market can contribute to building the site.
Today, you are going to install a plugin called, “WP Classified.” It’s a good plugin for running your own ad section of a website and comes with a variety of customization options.
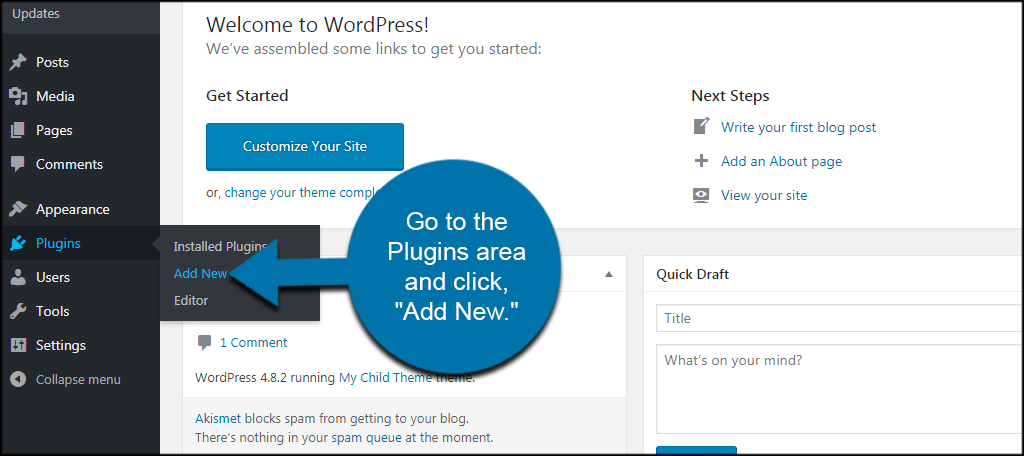
From the WordPress dashboard, go to the Plugins area and click, “Add New.”
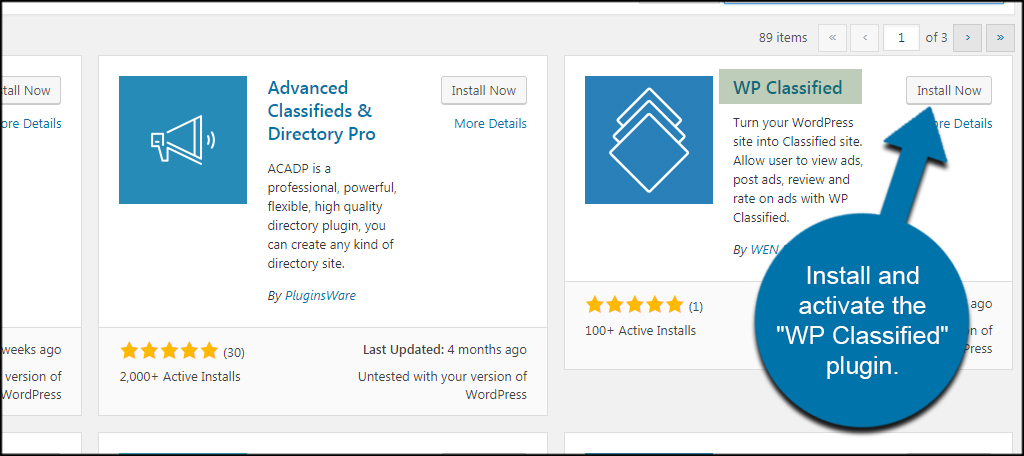
Install and activate the “WP Classified” plugin. Make sure you install the correct tool. You will see a lot of similar plugins available, and this tutorial is for WP Classified. This will add a new function to the left WordPress admin column.
Setting Up WP Classified
WP Classified will install its own pages to use on your website. These are pre-created and are ready for your input. However, you’ll want to adjust your settings before you start allowing people to post goods for sale.
With the plugin installed, let’s go over some of the features you’ll want to customize. I’ll go over the basics so you can get an idea of what you want to set up for your specific classified section.
Settings
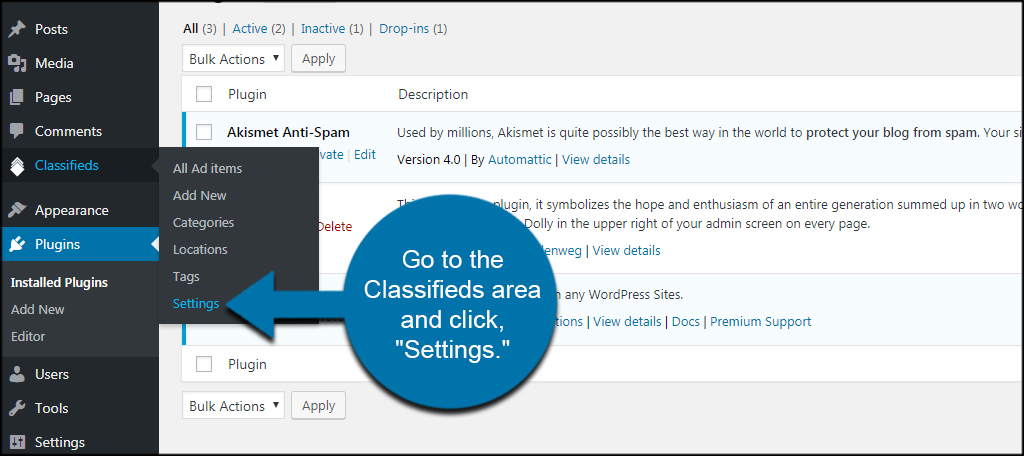
Go to the Classifieds area and click, “Settings.”
The settings of the plugin are broken into several segments. Let me go over these areas with you.
General Options
Under General Options, you can change the pages WP Classified will use for various areas. This means you can easily switch to custom pages if you want to use something like SiteOrigin’s Page Builder to develop a unique look and feel.
Page Display Type
When someone accesses the classified section, you can set what elements are immediately visible. For instance, you can change the shop page to show products, categories or both.
Frontend Submission Form
Using the drop down selection, you can change what page people use to submit items for sale. You can also check to make the plugin publish those items automatically.
Currency Options
The Currency Options section is where you make adjustments regarding the currency of your specific geographic location. WP Classified supports many different types of currencies, which makes it useful for many areas around the world.
Reviews
Using the check boxes available, you can set how the ratings system works in the website. For example, you can force users to leave a rating if they plan on leaving a review.
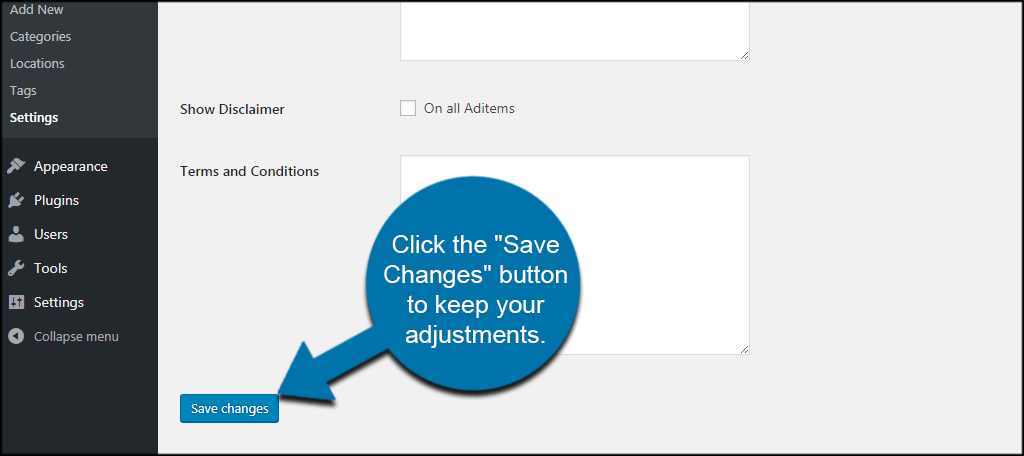
Terms and Conditions & Disclaimer
In these two areas, you can specify the disclaimer as well as the terms and conditions for using your website. These are important aspects to consider as they may protect you from lawsuits and other legal complications. It also makes the site look more professional.
Click the “Save Changes” button to keep your adjustments.
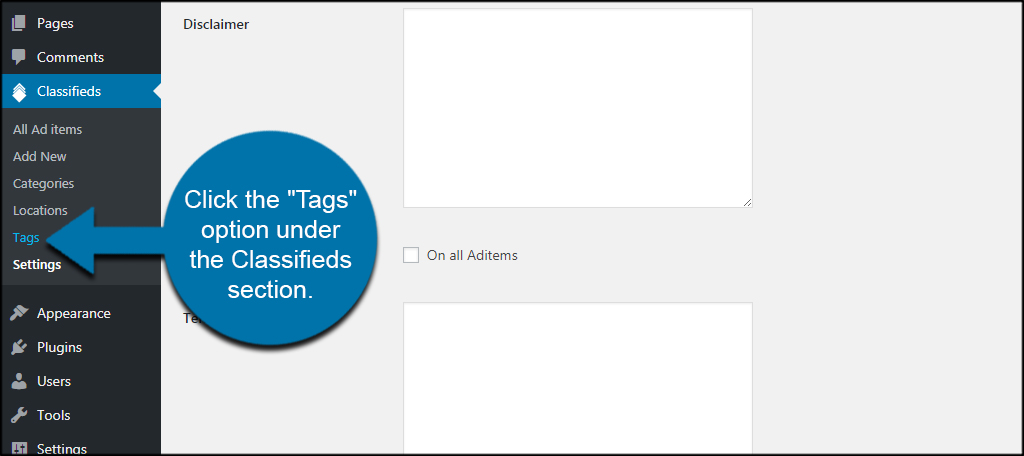
Tags
Click the “Tags” option under the Classifieds section.
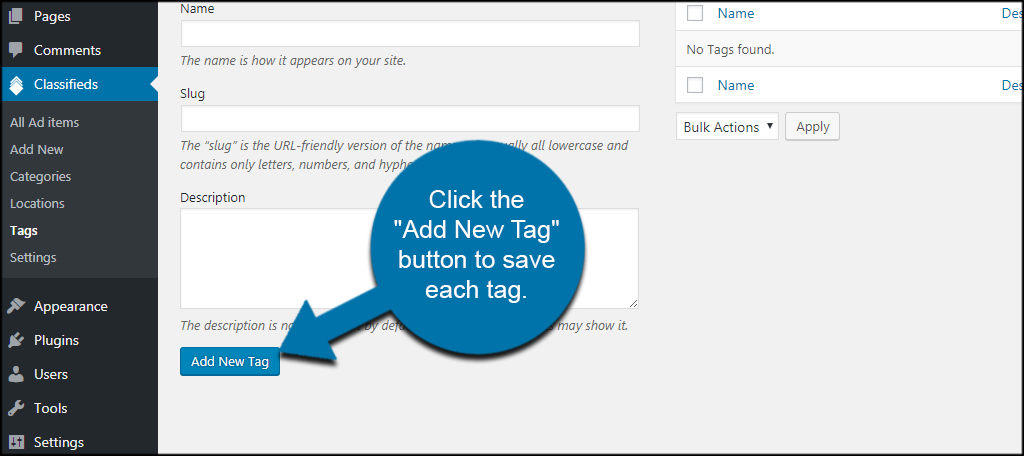
WP Classified tags work similarly to the ones already available in WordPress. They let people find items according to specific words. These tags are completely separate from the ones you use for WordPress content. It’s a good idea to add common terms you want people to use when advertising and looking for specific products.
Click the “Add New Tag” button to save each tag.
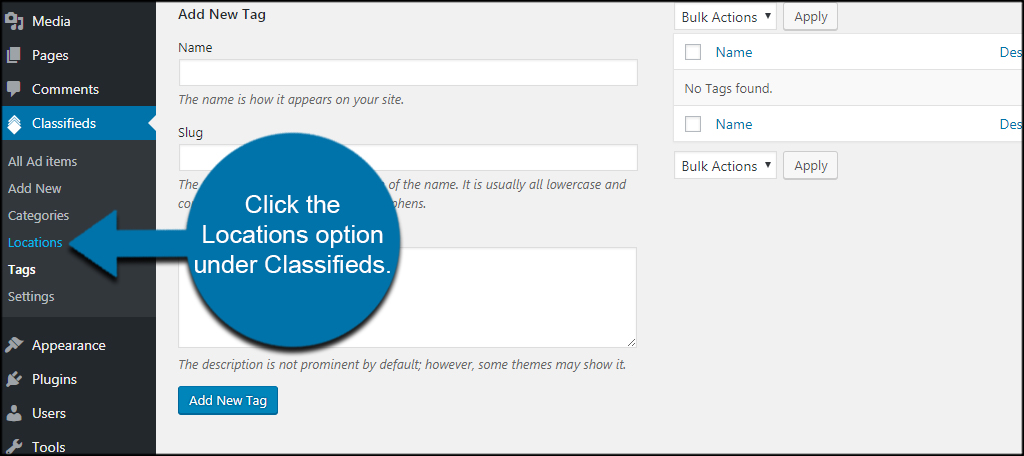
Locations
Click the Locations option under Classifieds.
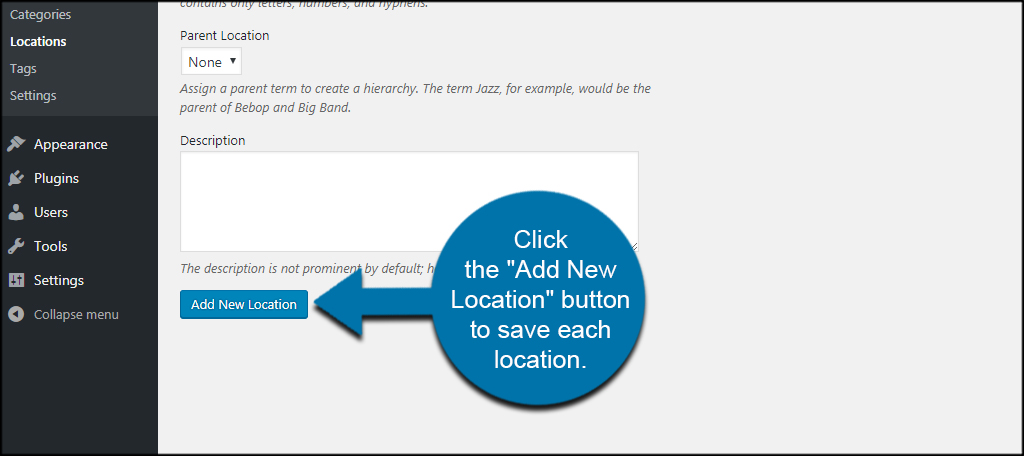
Locations are great if you’re looking to promote a local community for the classified section of your site. This lets you focus advertisements for specific locations. Using the Parent Location option, you can even fine tune the list to promote suburbs of major cities or even neighborhoods.
For instance, you can create a parent location for “California” and then add “Los Angeles” and “Santa Monica” under it.
It all depends on what you want to market to your online and offline customers.
Click the “Add New Location” button to save each location you want to use.
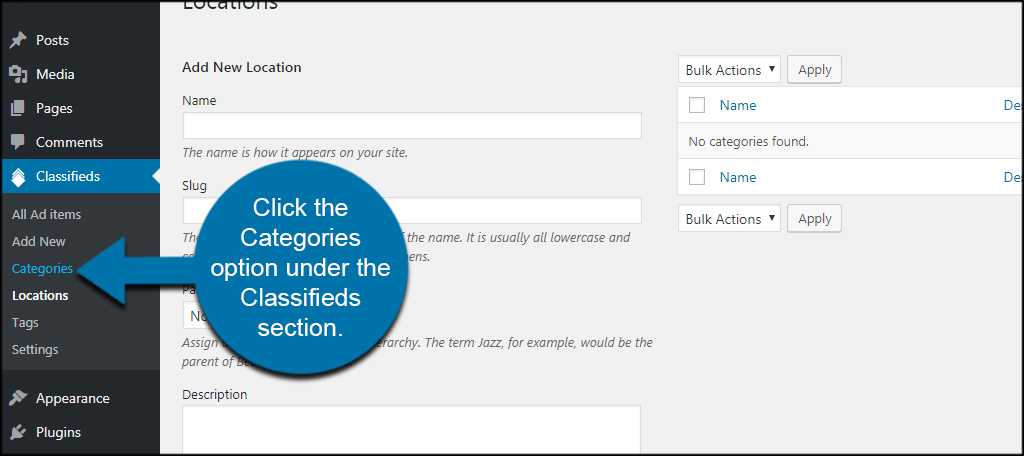
Categories
Click the Categories option under the Classifieds section.
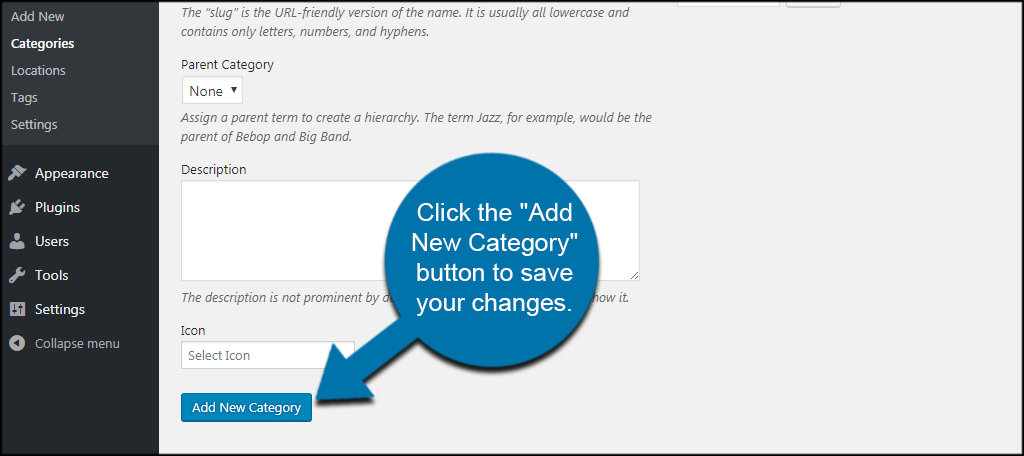
The Categories area in WP Classified works the same as it does for WordPress. You’ll put in specific categories for yourself and others to use when advertising goods. For instance, you would put something like “Hard Drives” and “Memory” as categories if you’re running a computer-specific business.
When you’re done, click the “Add New Category” button to save your changes.
With all of your options ready, you can now post your own items or allow visitors to add their own as well.
Market the Site
With a feature as large as the classified section, you’ll want to make sure you market it well. After all, no one is going to use your site to sell goods if they don’t know it’s available. Use the best marketing tools for your business and improve the chance of being a success. WordPress can only do so much, and it will be up to you to put in the effort to boost your brand.
What kind of features do you have on your WordPress website? What other ways have you experimented with making money from your content?