You don’t have to be a hardcore developer to benefit from setting up a WordPress staging site. If you add new plugins or do theme customizations, a development environment allows you to experiment without a negative effect on your live site.
Everyone can, and should, use a copy of their WordPress site for testing especially now that it’s so easy to set up (more on that in a minute).
“Development environment” is just a fancy way of saying “a copy of your site.” When you create an exact copy, you can see the effects of any changes before you apply them to your live site. We’ll also use the term “staging” to refer to a copy of your WordPress site.
In professional development circles, there is a difference between a development environment and staging, but for the purposes of this tutorial, we’ll use both terms interchangeably.
Why Do You Need A WordPress Staging Site?
If your WordPress site has been around for a while, you’ve probably done a lot of customization and experimentation on it. The more plugins you use and the more customizations you’ve made, the greater the chance of a WordPress update or a new plugin installation breaking some, or even all, of your site.
Perhaps you’ve been unfortunate enough to experience that firsthand. If so, you probably don’t need any convincing. You realize how valuable a development environment could be.
But even if you’ve never broken your live site, when you experiment with changes, you run the risk of visitors finding broken pages or catching you in the middle of some change that makes the site look or function in a strange way.
What’s even worse is if Google, or any search engine, happens to be crawling your site when something is broken. They can remove the URLs for those broken pages from their index. So a 30-minute period of experimentation can potentially knock you out of a search index for weeks.
Finally, if you are working on website development for a third party, a development environment is a necessity. It allows you to demonstrate changes and updates exactly as they will appear on the client’s site before making them live.
We’re going to cover a couple of different methods for setting up and using WordPress staging. The first is quick and easy, but may not be available to everyone. The second is a manual method that anyone can use.
The First Step for Any Development Environment
I mentioned search engines potentially crawling your live site while you’re testing changes and why you want to avoid that possibility. The same thing applies to your development environment.
You don’t want search engines to find it because they see it as duplicate content. And technically it is since it’s a copy of your live site. Duplicate content is a big no-no in the search engine world, and it can lead to search engine penalties.
When you create a development environment, you want to let the search engines know that they shouldn’t crawl it. You do that with a robots.txt file.
If you are staging in a subdirectory, like https://ggexample.com/staging/, add these lines to a robots.txt file in the root directory of your site:
User-agent: *
Disallow: /staging/
If you are staging on a subdomain, like https://dev.ggexample.com, add a robots.txt file to the root directory of the subdomain, and set it to disallow crawling of everything on the subdomain:
User-agent: *
Disallow: /
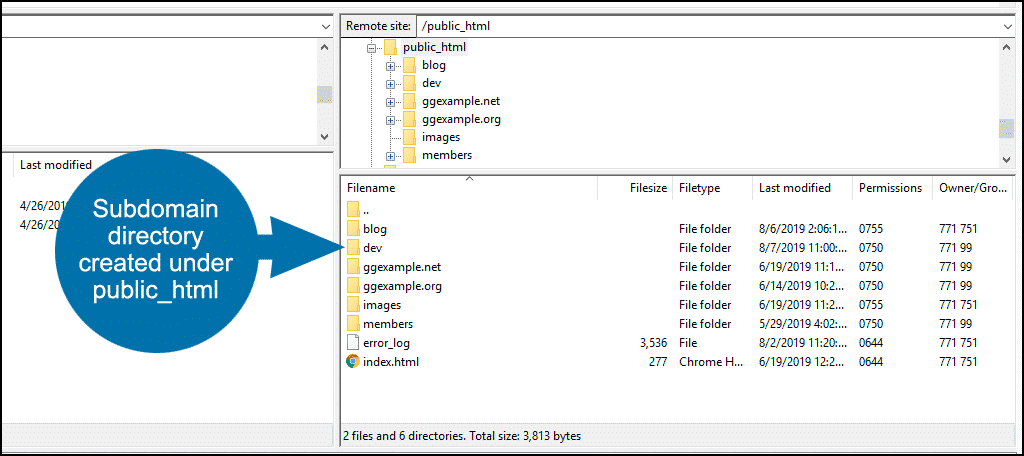
Normally search engines only look for a robots.txt file in the root directory of the domain. But when you set up a subdomain, a directory is typically created under public_html with its name. Most search engines will obey robots.txt files in subdomain directories.
Method 1: Set up WordPress Staging Site With Softaculous
If your website uses cPanel and you used Softaculous to install WordPress, you’re in luck. Setting up WordPress staging couldn’t be any easier.
If you have access to Softaculous but didn’t use it to install WordPress, you’re still in luck. You can import your existing WordPress installation into Softaculous with a few clicks.
Step 1: Create A Staging Site in WordPress
Log in to cPanel.
In the “Softaculous Apps Installer” section, click the “WordPress” link or icon.
In the “Current Installations” section, click the “Create Staging” icon.
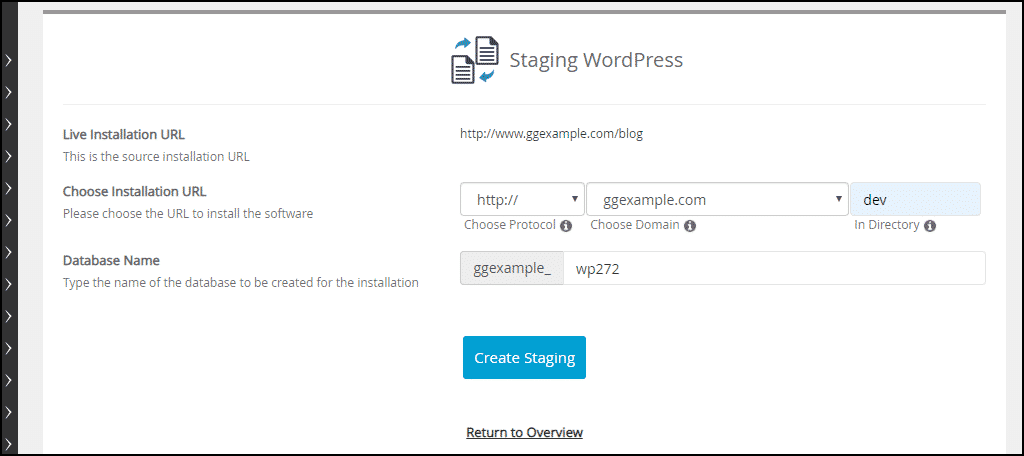
Live Installation URL is the WordPress installation that will be copied.
Choose Installation URL
- Choose Protocol
You can choose HTTP or HTTPS, with or without www. Choose whatever matches the live site. - Choose Domain
If you have multiple domains, choose the same domain as the live site. You can also select a subdomain if you have one set up. - In Directory
Enter the name of the directory where you want your development/staging site to be set up. If the directory doesn’t exist, it will be created automatically.
Database Name – you can leave whatever default value is entered here unless you need to name the database a certain way.
Click the “Create Staging” button.
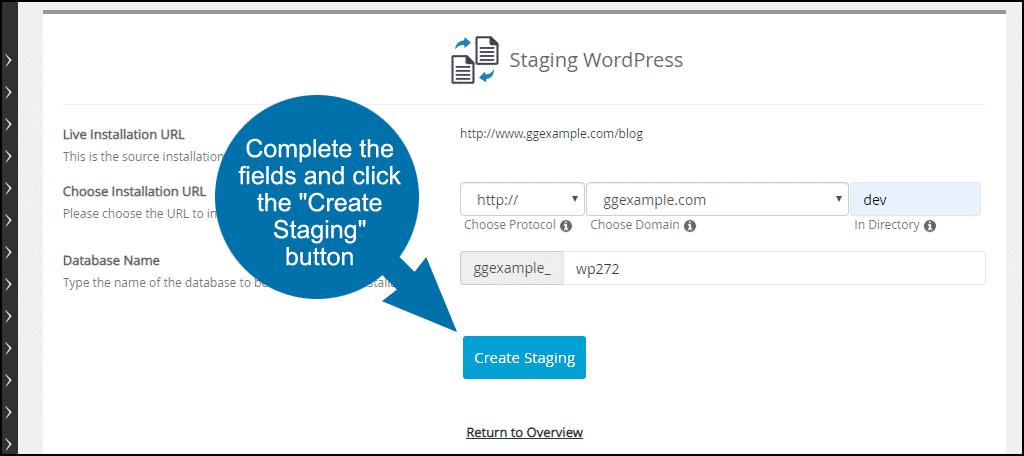
You’ll see a success message.
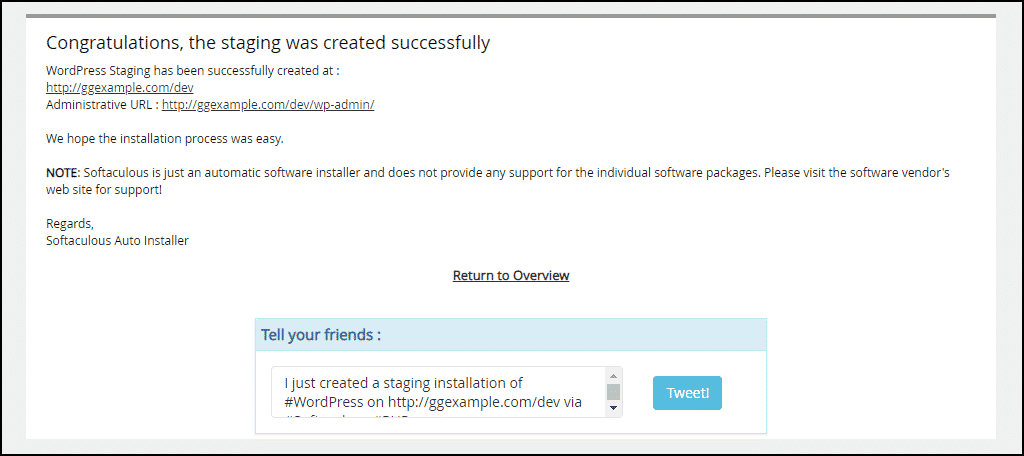
That’s it. Your staging site is ready to go.
Step 2: Using Softaculous Staging
When you create a staging site with Softaculous, you log in to /wp-admin using the same username and password as the live site. Make your changes to the staging site, and when you’re satisfied that everything is working properly, you can “push” the staging site to the live site.
“Pushing from staging” means replacing the live site with the version from the staging area. But there are a couple of different ways of doing that.
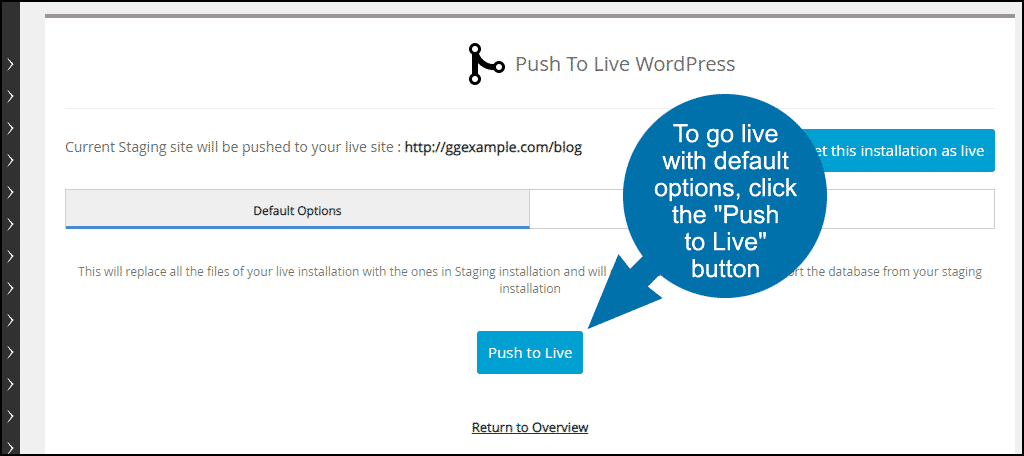
First, in the “Current Installations” section of Softaculous, click the “Push to Live” icon on the staging site line.
The first method is to use the default options. The default options replace everything on the live site, files, and database, with the versions that exist on the staging platform.
That may sound scary, but the Staging system creates a backup of your live site before replacing it. So if anything were to go wrong, you would have a backup.
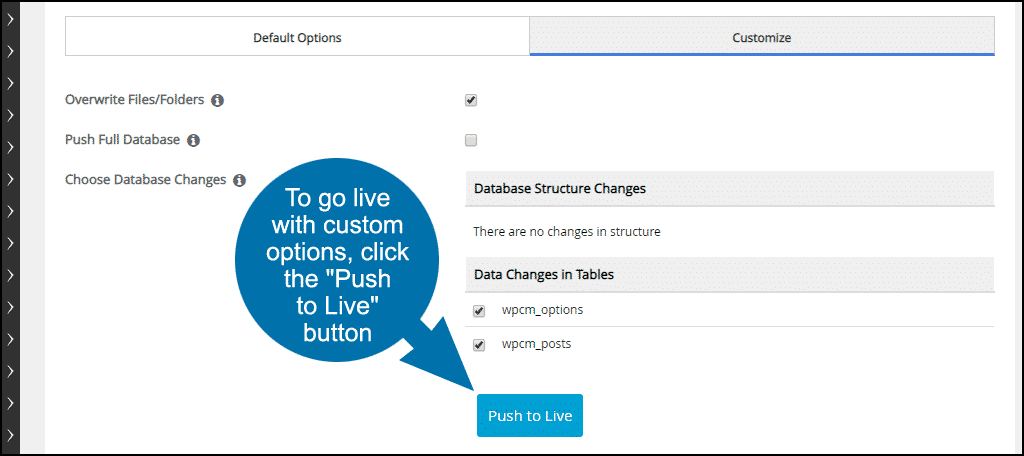
Clicking the “Customize” tab will allow you to push only certain database tables. You should only choose this option if you’re sure of what you’re doing and comfortable with pushing incremental or partial changes.
Most of us should use the default options.
According to Softaculous, the “Set this installation as live” button should also push the staging site to the live site. But in my testing, it did not. It did, however, remove the “Push to live” icon from the staging version installation, which essentially made the staging version unusable.
I‘m not sure if that’s a bug or something else that happened on my end. For now, I would recommend avoiding the “Set this installation as live” button.
Step 3: Delete Staging (Optional)
Since it’s so easy to create a staging site, there isn’t any reason to let it remain active when you’re finished using it. Assuming you only use staging occasionally, of course.
To delete the staging site and database, go to the “Current Installations” section of Softaculous and click the “X” icon on the staging site line.
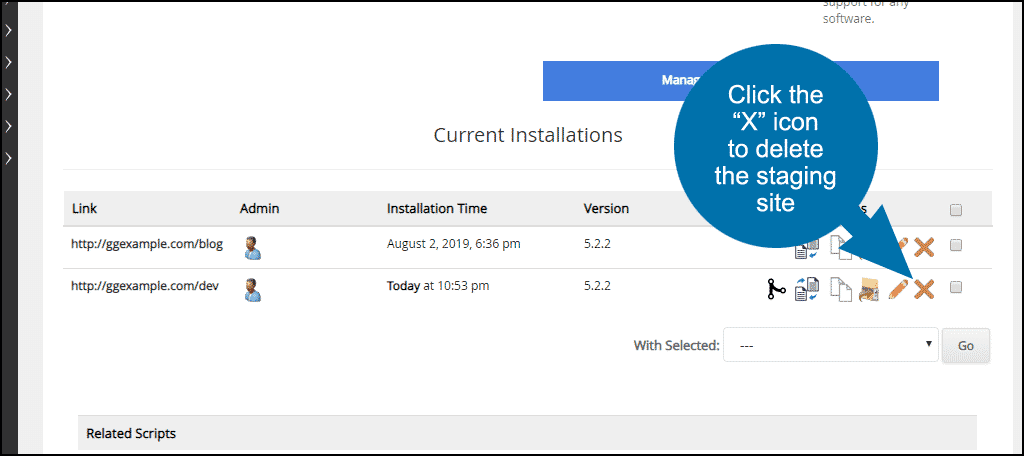
To completely remove the staging site, leave all of the options selected.
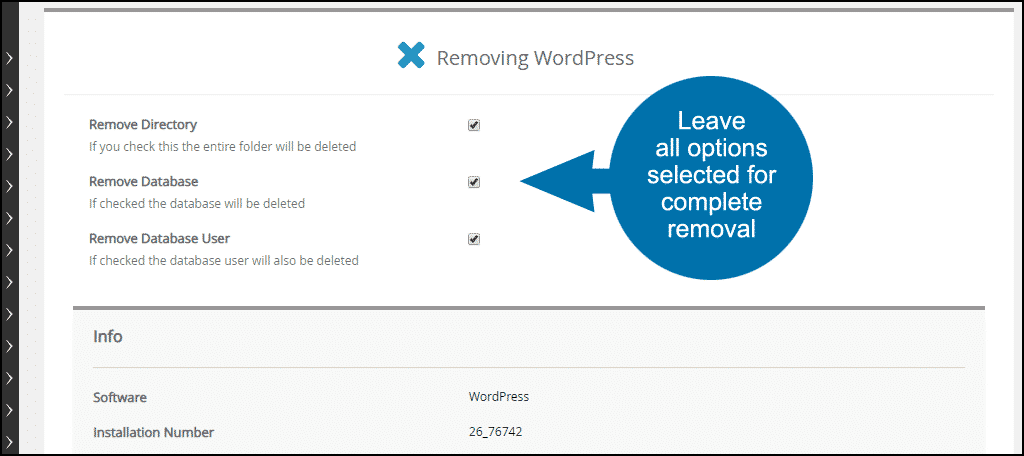
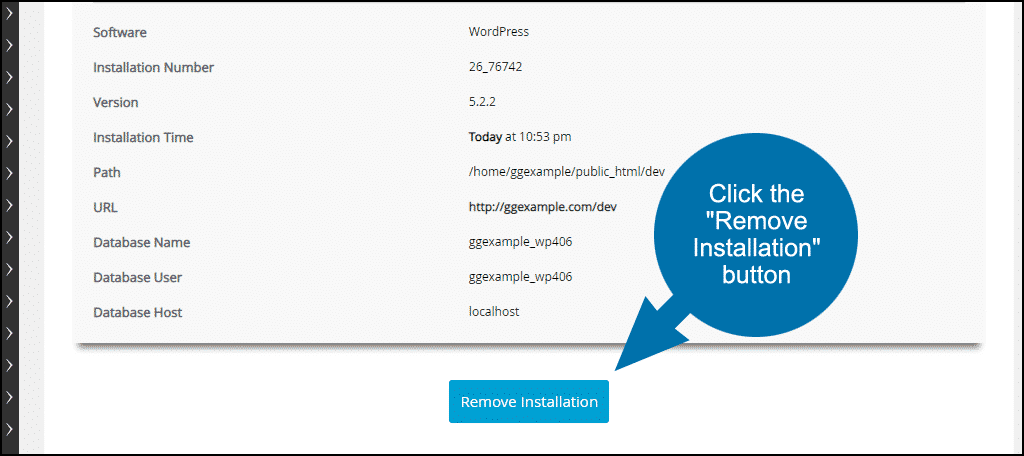
Click the “Remove Installation” button.
Method 2: Create A WordPress Staging Site With Plugins
If you don’t have access to Softaculous, you can still set up a WordPress staging site. It’s a bit more complicated, but if you’ve ever broken a site by making live changes (and I think it’s safe to say that most of us have), you may consider it to be time well spent.
There are several staging plugins available for WordPress. Though like most things in life, the full-featured, easy-to-use versions come at a cost. Many of the paid plugins have free tiers or versions, and we’re going to use one of them.
It’s called Duplicator.
Before we get started I should point out that while this method works perfectly well, when you push the staging site to live, you are overwriting the live site’s WordPress database. So the potential for mistakes is there.
As always, back up your site and database files before you do anything that’s potentially destructive. If these kinds of things make you nervous, you might consider paying for a professional staging plugin or finding a host that offers the cPanel/Softaculous method.
All right, that being said, let’s dive into setting up a staging site with Duplicator. Here’s what we’re going to do:
- Create an empty database for the staging site.
- Install the Duplicator plugin on the live WordPress site.
- Export a copy of the live WordPress site.
- Install the copy of the live site into an empty directory to create the staging site.
- Make changes on the staging site.
- Export a copy of the staging site.
- Install the copy of the staging site on the live site.
Step 1: Create an Empty MySQL Database
The method for doing this varies depending on your host. But you need to create a MySQL database name, username, and password to proceed. You can do this by accessing MySQL Databases from cPanel.
The free version of Duplicator will copy your existing database, but it cannot create a new one.
Step 2: Installing the Duplicator Plugin
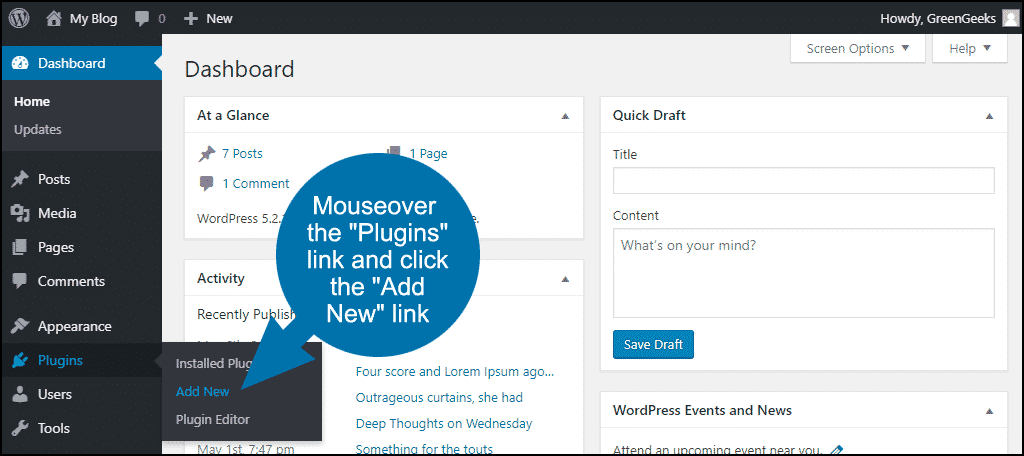
Log in to the WordPress admin panel for your live site.
In the left column navigation, mouse over the “Plugins” link and click the “Add New” link.
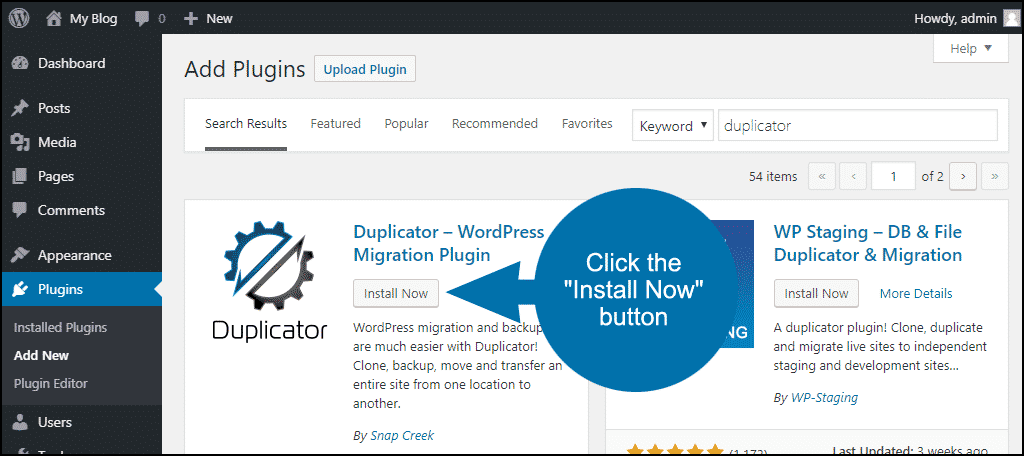
In the “Search plugins…” box, enter “Duplicator.”
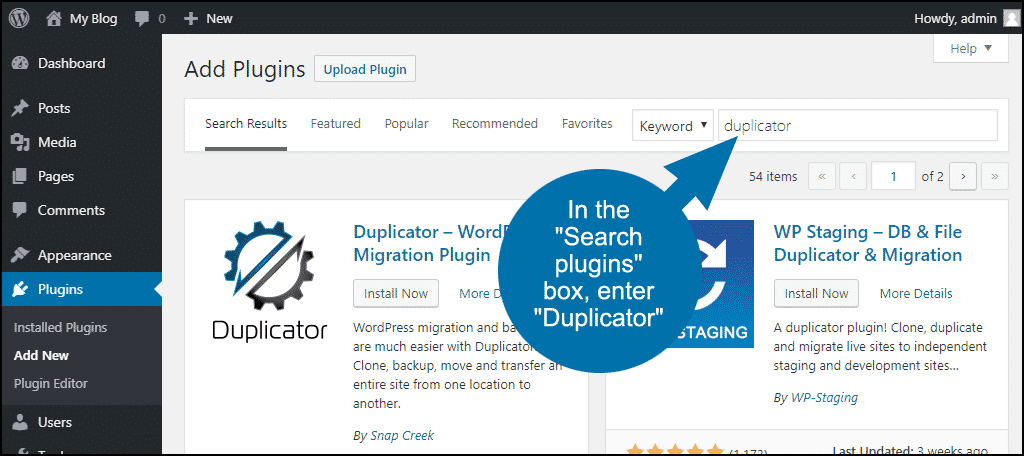
Once you have located the plugin, click the “Install Now” button.
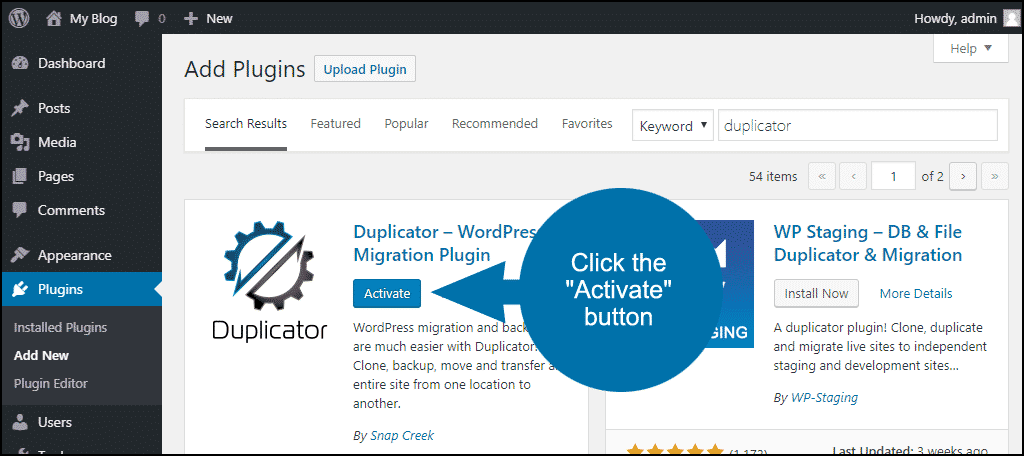
When the plugin has been installed, click the “Activate” button.
Step 3: Create a Copy of the Live Website
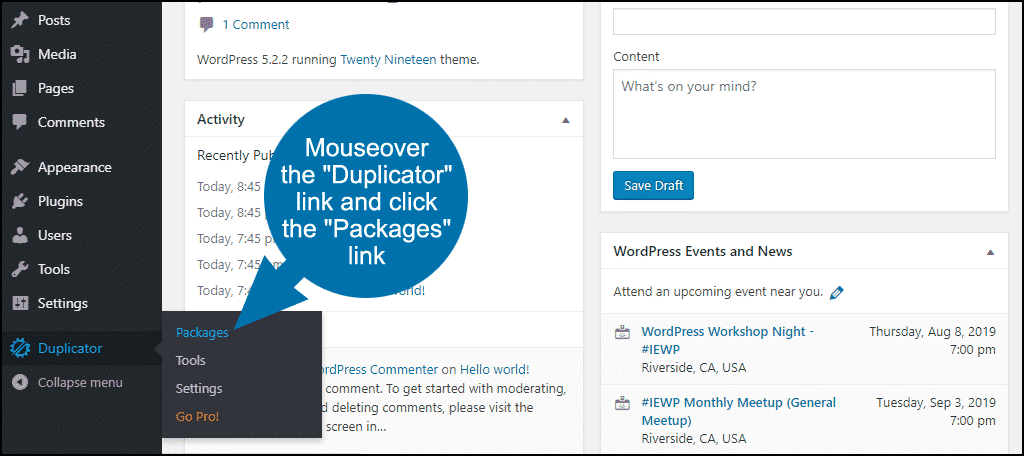
In the left column navigation, mouse over the “Duplicator” link and click the “Packages” link.
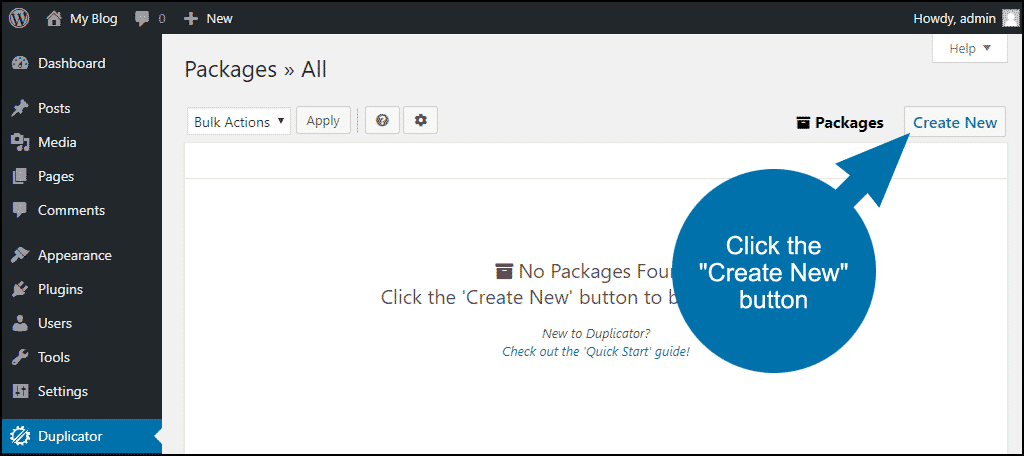
Click the “Create New” button in the upper right corner.
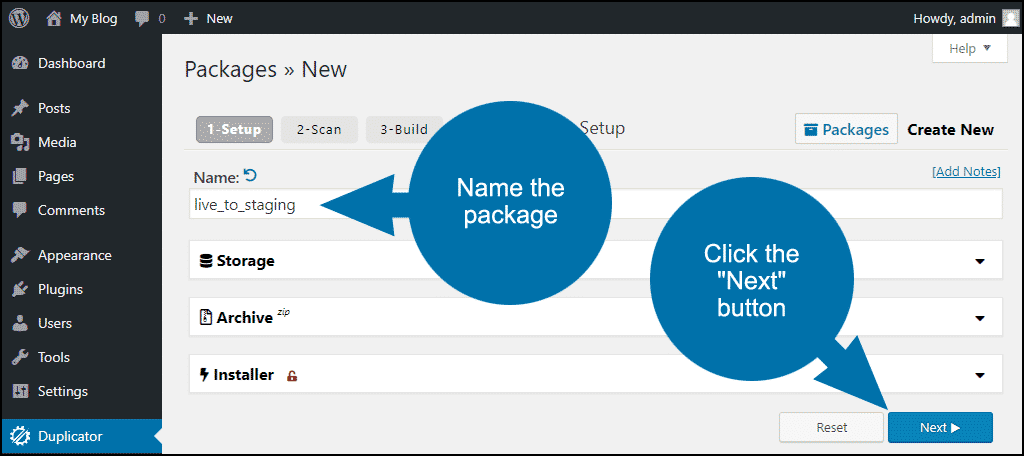
Name the package.
Leave all of the values in “Storage,” “Archive,” and “Installer” as they are.
Click the “Next’ button at the bottom of the page.
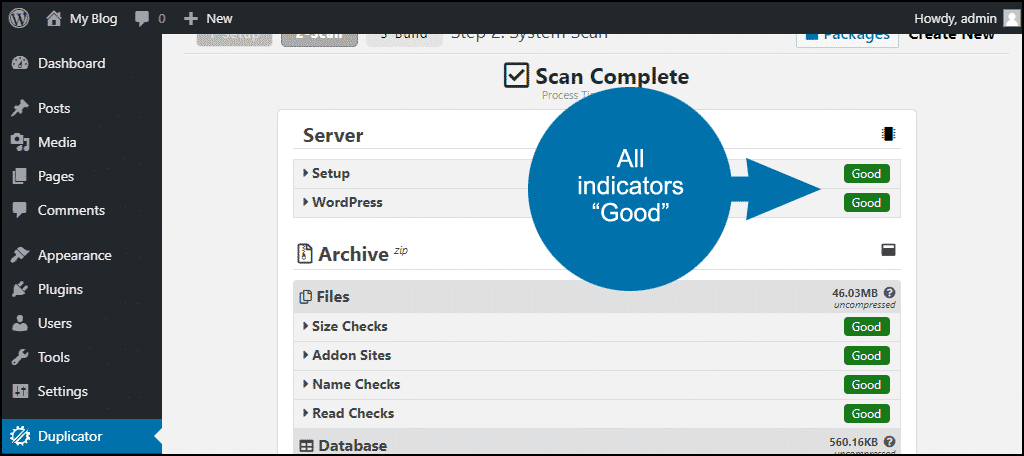
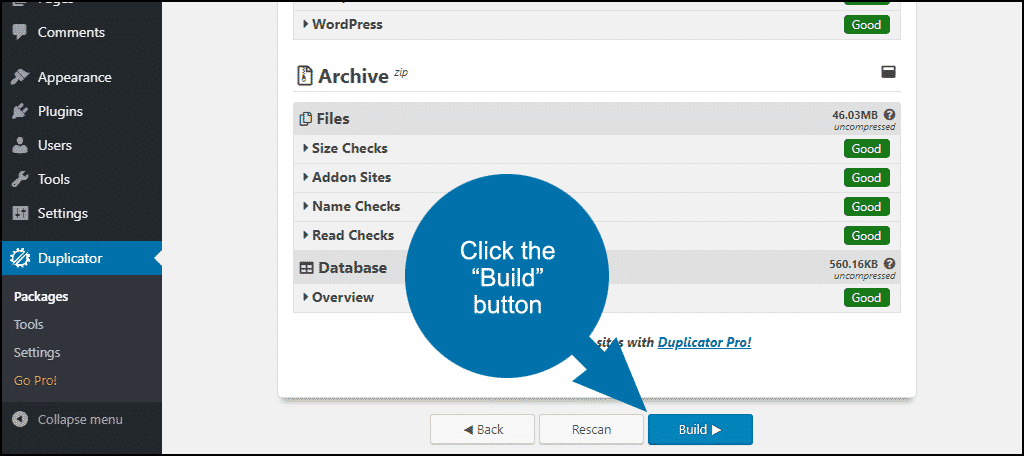
The site will be scanned, and you’ll come to a “Scan Complete” page. If all of the checks are “Good” (green), click the “Build” button.
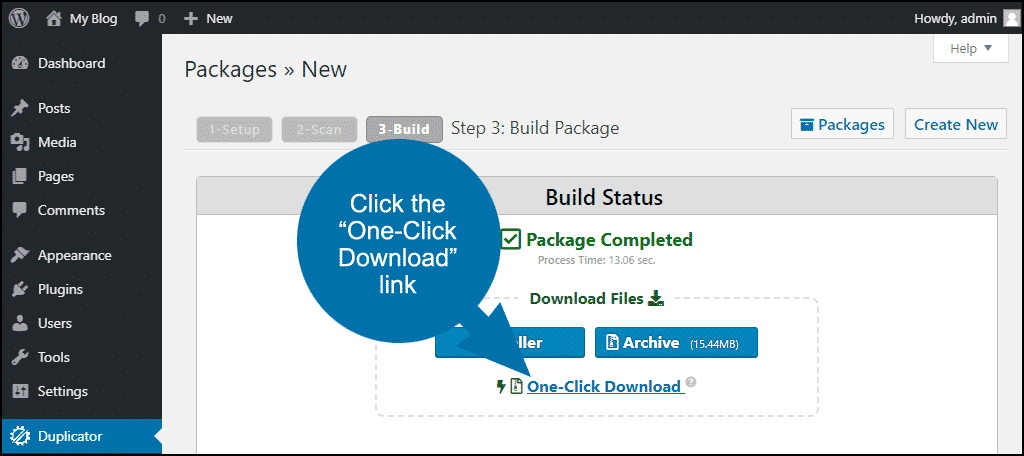
On the “Package Completed” page, click the “One-Click Download” link.
Create an empty directory on your site. This will be the staging directory. Upload the two Duplicator package files to that directory.
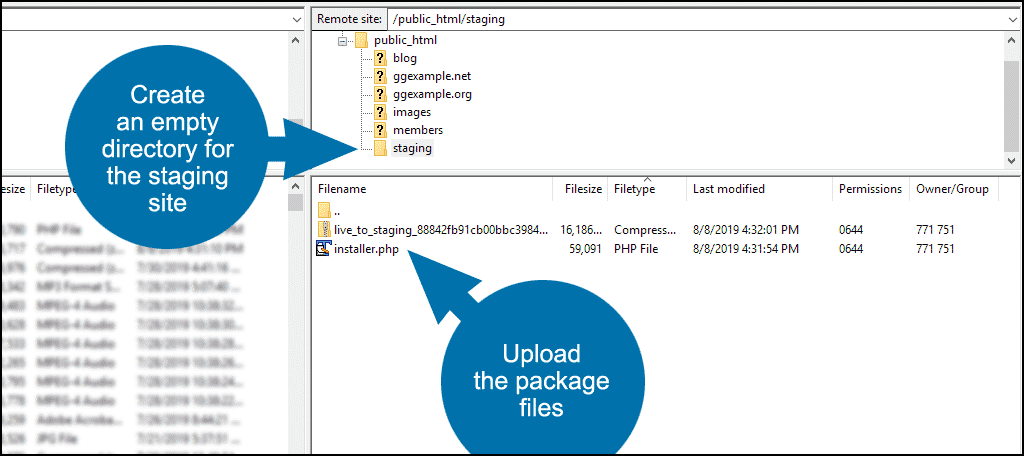
Go to the installer file URL.
In this example, I am copying a site from ggexample.com/blog/ to ggexample.com/staging/, so the installer file URL is https://ggexample.com/staging/installer.php
You’ll see a “Step 1 of 4: Deployment” page. The “Archive” and “Validation” sections should say “Pass” (green). Click the “I have read and accept all terms & notices” box and click the “Next” button.

The archive files will be extracted, which will take a moment.
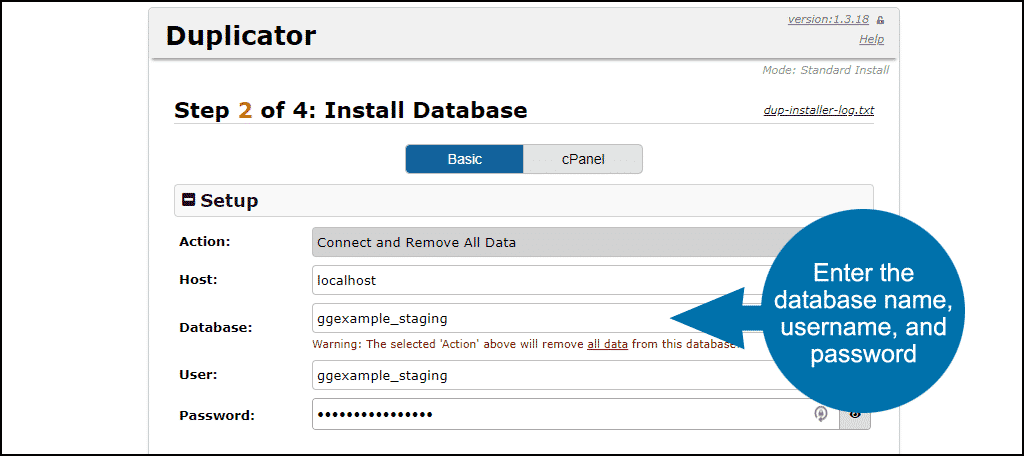
Enter the database name, database username, and password for the blank database you created.
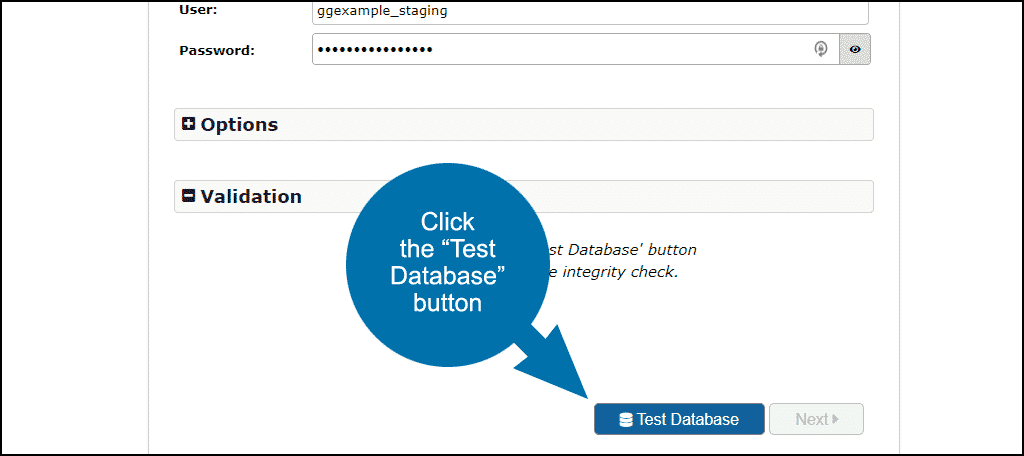
Click the “Test Database” button.
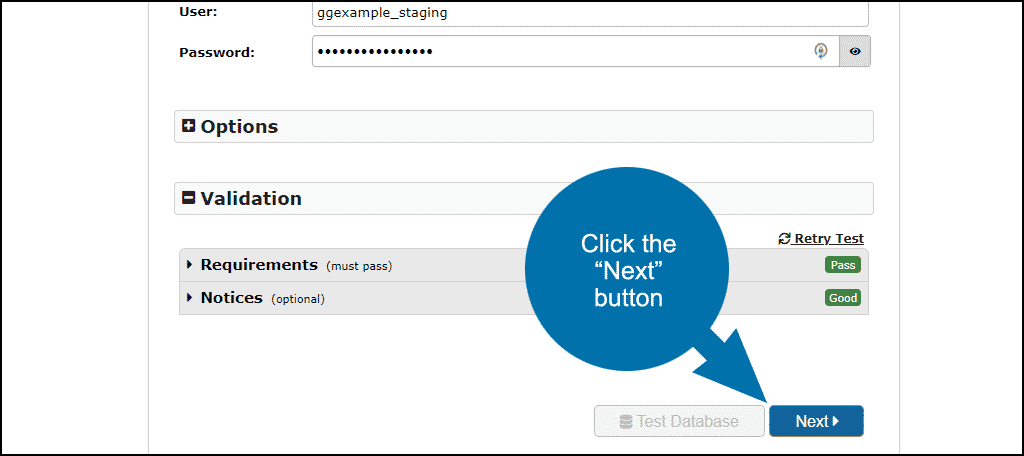
In the Validation” section, “Requirements” and “Notices” should say “Pass” and “Good” (both green).
Click the “Next” button.
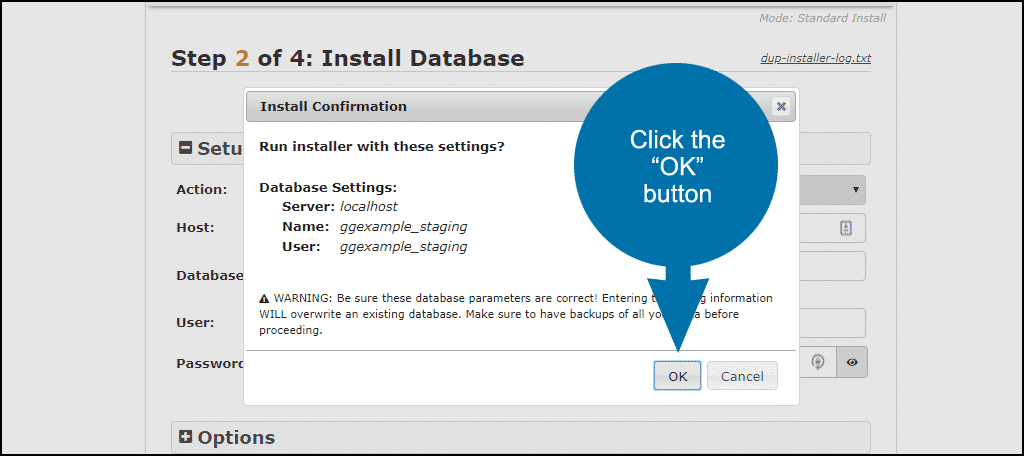
An “Install Confirmation” box will pop up. Verify that the information is correct and click the “OK” button.
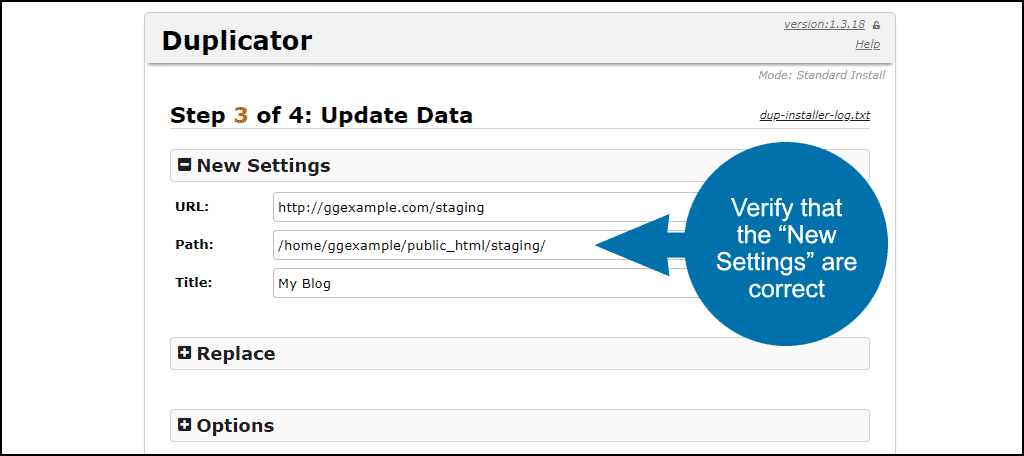
That will bring you to “Step 3 of 4: Update Data.” Verify that the “New Settings” information is correct.
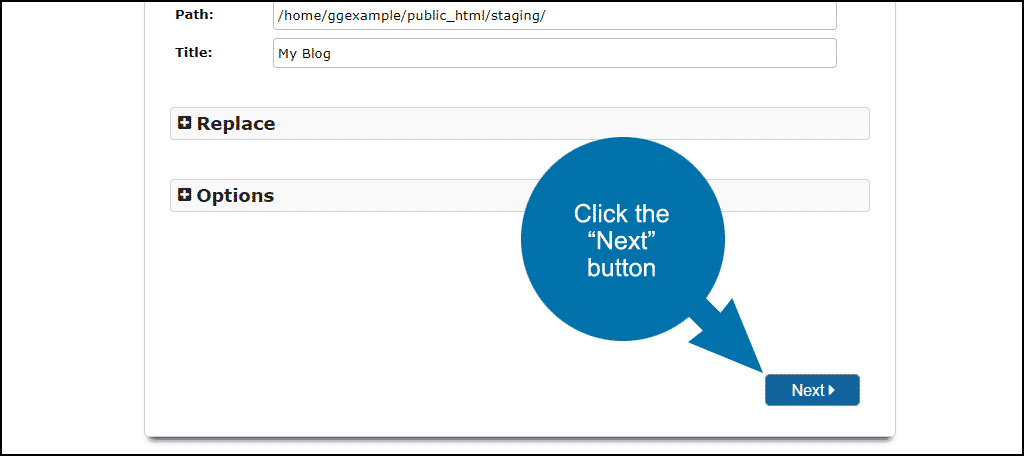
Click the “Next” button.
The “Step 4 of 4: Test Site” page will open. Click the “Admin Login” button to complete the installation.
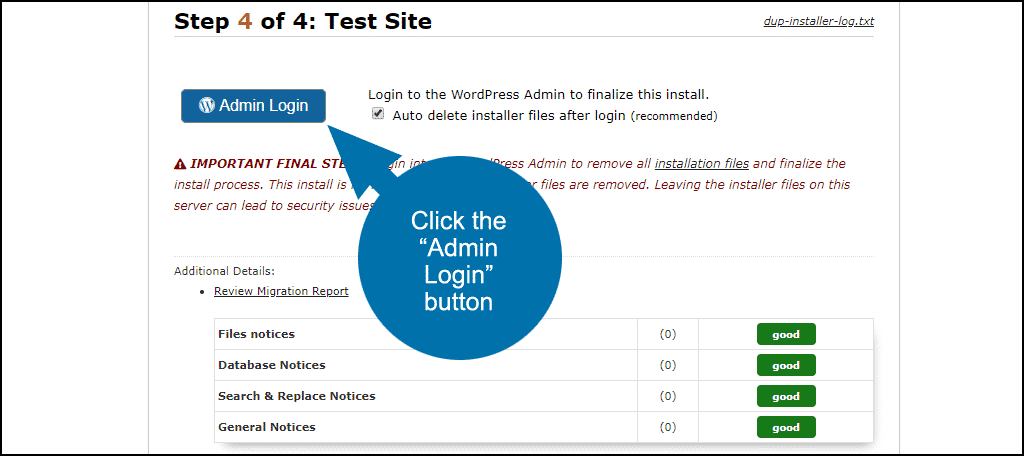
Your staging site is now up and running with the same admin username and password as your live site.
Step 4: Pushing the WordPress Staging Site to Live
Once you’ve made your changes on the staging site and verified that everything is working properly, you can export the staging site.
The steps to import the staging package files to the live site are almost the same as the steps above, but there are some differences (noted here in bold).
- Create and name a new package on the staging site.
- Click the “Next’ button at the bottom of the page.
- If all of the checks are “Good” (green), click the “Build” button.
- Click the “One-Click Download” link.
- Upload the two package files to the live site.
- Copy the MySQL database name, username, and password from the wp-config.php file on the live site.
- Delete or rename the wp-config.php file on the live site.
- Go to the installer file URL on the live site (for our example that would be https://ggexample.com/blog/installer.php).
- Click the “I have read and accept all terms & notices” box and click the “Next” button.
- Enter the MySQL database name, username, and password that you copied from the wp-config.php file on the live site.
- Click the “Test Database” button.
- Click the “Next” button.
- Verify that the “Install Confirmation” information is correct and click the “OK” button.
- Verify that the “New Settings” information is correct and click the “Next” button.
- Click the “Admin Login” button to complete the installation.
Now your live site should be updated with the changes that you made to the staging site.
Step 5: Notes on Pushing the Staging Files to the Live Site
You may have noticed the warnings that the target directory should be empty except for the two Duplicator package files. You may have also noticed that we did not empty the directory for the live site before pushing the staging site to live.
That wasn’t a mistake or oversight. I did that to minimize the live site downtime during the push from staging.
In my testing, I didn’t run into any problems leaving the WordPress files in the live site directory, but it may be wise to take precautions anyway.
If your WordPress site is in the root directory of your account, download or copy the live site files to another directory for safekeeping. Then, delete all of the WordPress files, upload the Duplicator package files and run the install script.
If your WordPress installation is in a subdirectory, such as /blog in our examples here, you can rename the live directory to /blog2. Then create a new empty /blog directory, upload the Duplicator package files and run the install script.
Step 6: Back up, Back up, Back up
Whatever you do, back up your WordPress site files and database before you do anything with Duplicator (or with anything else that alters your site or database).
You will never regret backing up your website and database files. But I can guarantee that sooner or later you will regret not backing up.
We’ve all been there, which is why I remind you to back up, back up, back up!
There are several WordPress backup plugins that will do the job. You may also want to take a look at Cloud backup services that will automatically back up your website and database every day.
The Cloud backup services vary in cost and complexity. I like DropMySite because it’s inexpensive and it hasn’t failed me once in five years of use.
That’s not an advertisement or affiliate link, just a personal recommendation.
Method 3: Use Your Hosting Account
Step 1: Create A Staging
Some web hosts offer you the ability to create a staging directly from your web hosting account. It’s by far the easiest way to create and manage one.
Note: Since this depends on your web host, the process may be different. This guide will demonstrate how to do it with GreenGeeks.
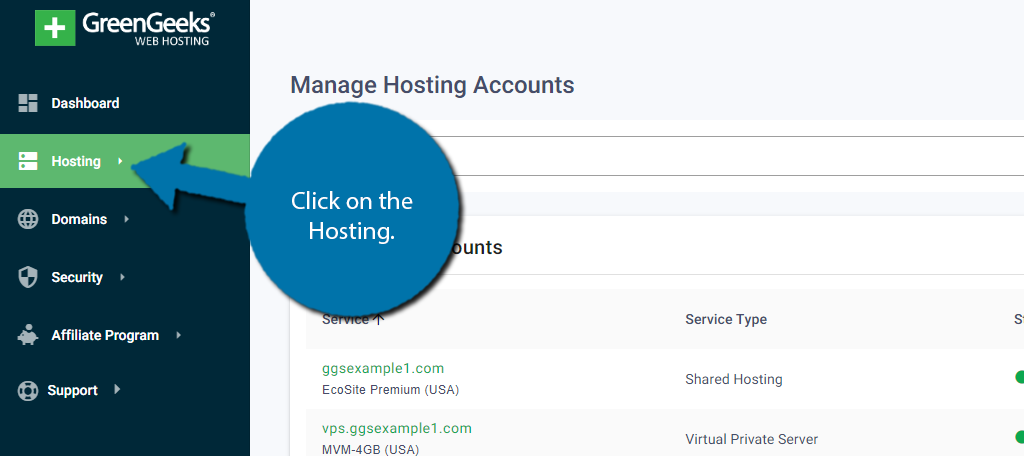
First, start by logging into your hosting account. Click on the Hosting.
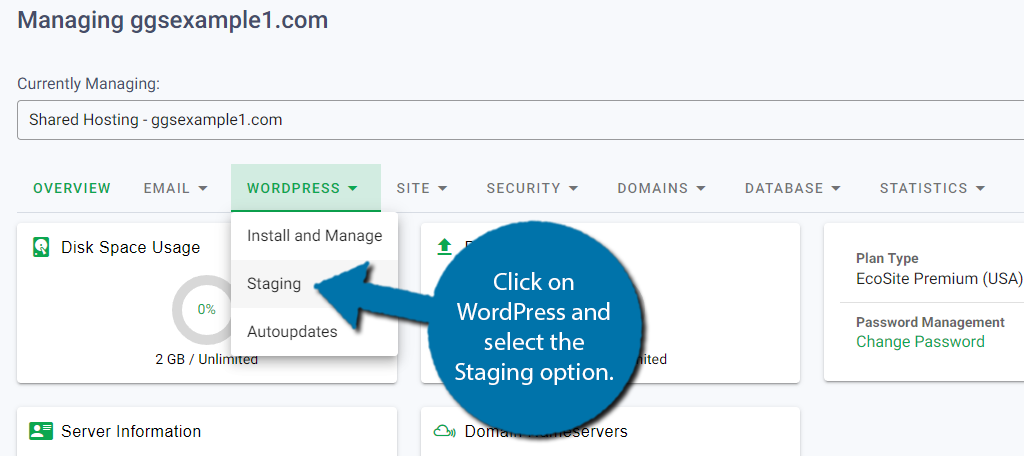
If you have multiple hosting accounts, you need to select which hosting account you want to create a staging site for. Once you have chosen the account, click on WordPress and select the Staging option.
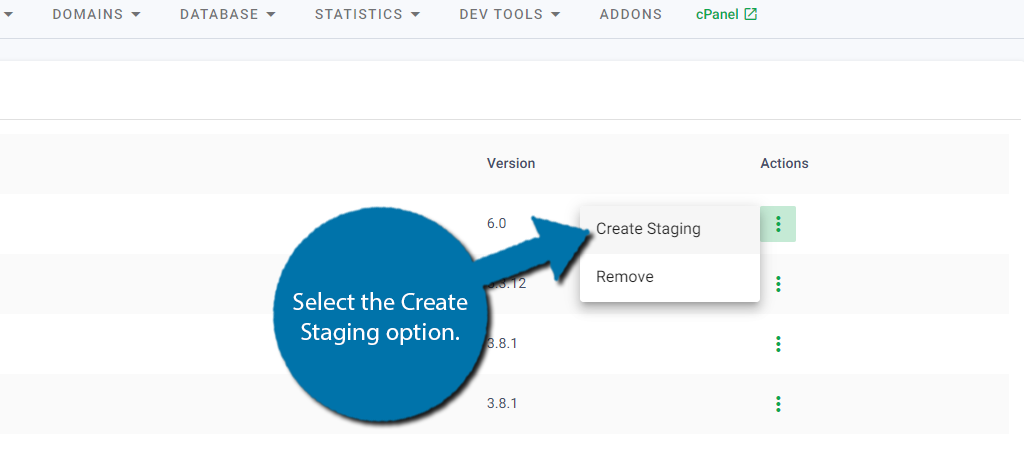
You will now see a list of your domain and subdomains. Click on the three dots next to the domain or subdomain you want to create a staging site for and select the Create Staging option.
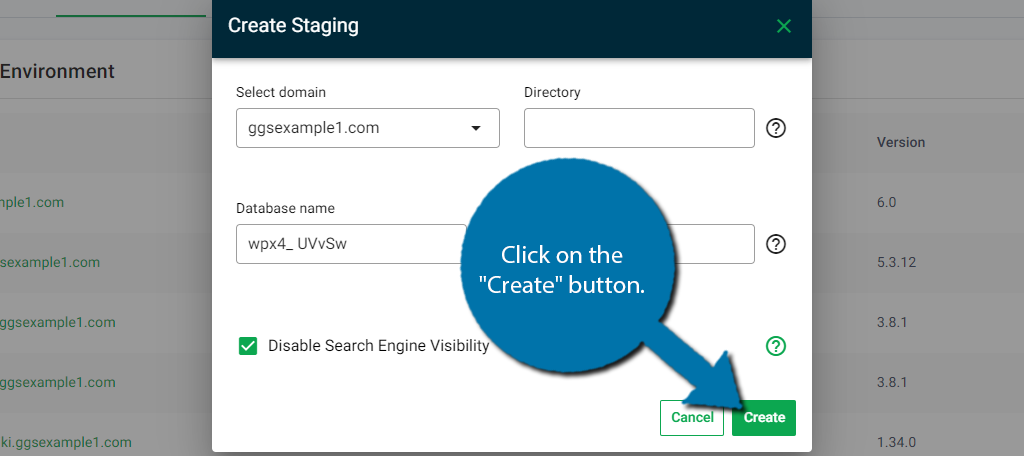
A small pop-up will appear. Here you can choose what directory and database to use and what to call it. The database option will already be filled in. For the directory, type in “dr” and create a staging name.
There is also an option to disable search engine visibility. Check the box because you do not want this to rank.
Click on the “Create” button when you are done.
Step 2: Manage the Staging Site
You should now have a staging site created. Reload the current page you are on to see it appear at the bottom. You can click on the link to be brought to your staging site, which is an identical copy of your website.
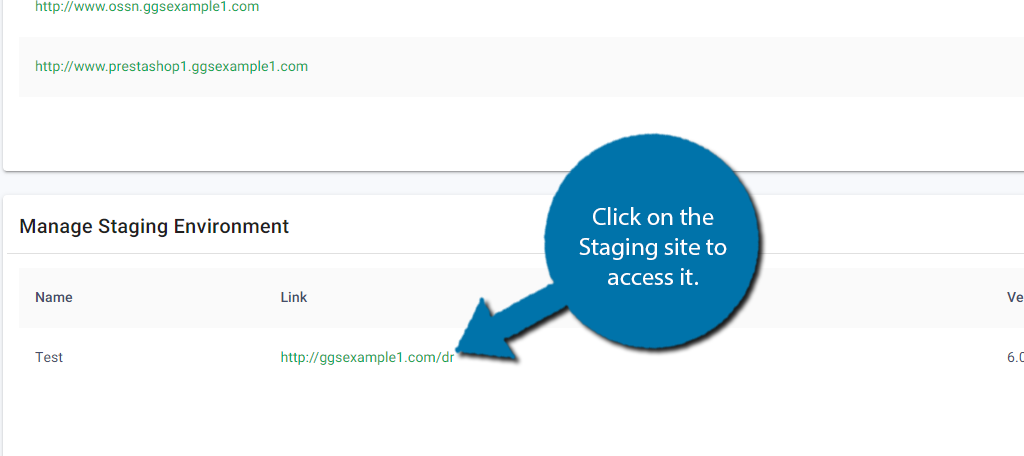
It also has the exact same admin account information, so you can log in to it using the info from your main site. You can begin using the staging site for whatever you need.
When you are done with it, you can click on the three dots next to it and click on the Remove option to delete it.
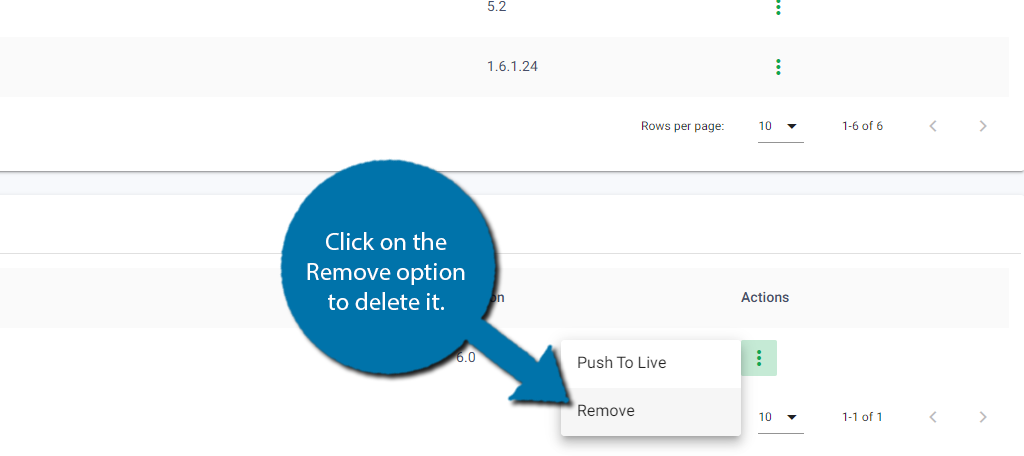
You can create these as many times as necessary, so it’s quite a handy tool.
Method 4: Installing WordPress Locally
Step 1: Install Bitnami
While there are several ways to install WordPress locally, I will demonstrate it using Bitnami. It is free software that you can use to install a virtual Linux machine on your computer with WordPress installed.
It’s quite easy to set up, which is why it’s a great option. You will need a virtual machine installed. There are many solutions available, but if you want to follow along, I am using VirtualBox.
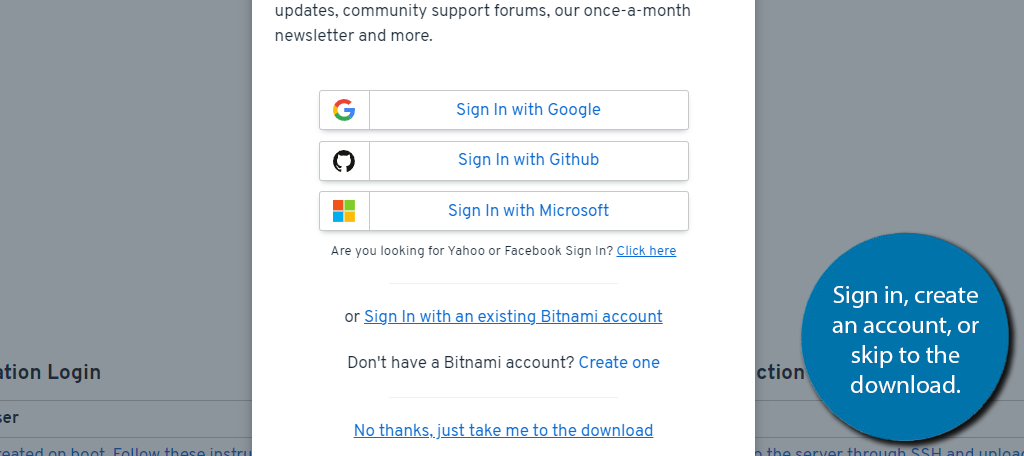
Start by going to the Bitnami website and install the Bitnami Virtual Machine.

A pop-up will appear asking you to sign in. You can use your Google, Github, or Microsoft. If you do not have a Bitnami account, you can create one here. Alternatively, you can click on the “No thanks, just take me to the download” link to bypass this.
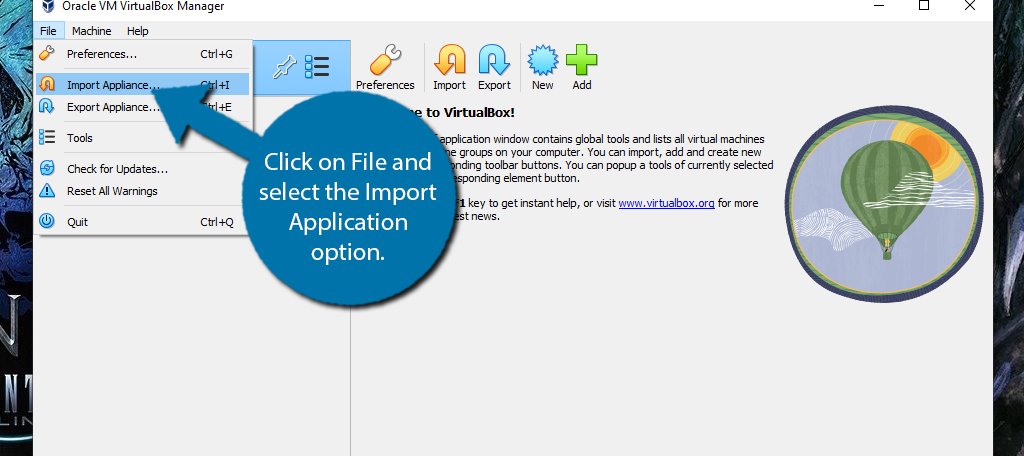
Step 2: Import the Bitnami into Your Virtual Machine
Now that you have the Bitnami file installed, you just need to import it into your virtual machine. All of these have an import tool. In the case of VirtualBox, click on File and select the Import Application option.
Another popup will appear. Enter the file you downloaded in the previous step. Alternatively, you can just right-click the file you downloaded and open it. It should default to the virtual machine you have installed.
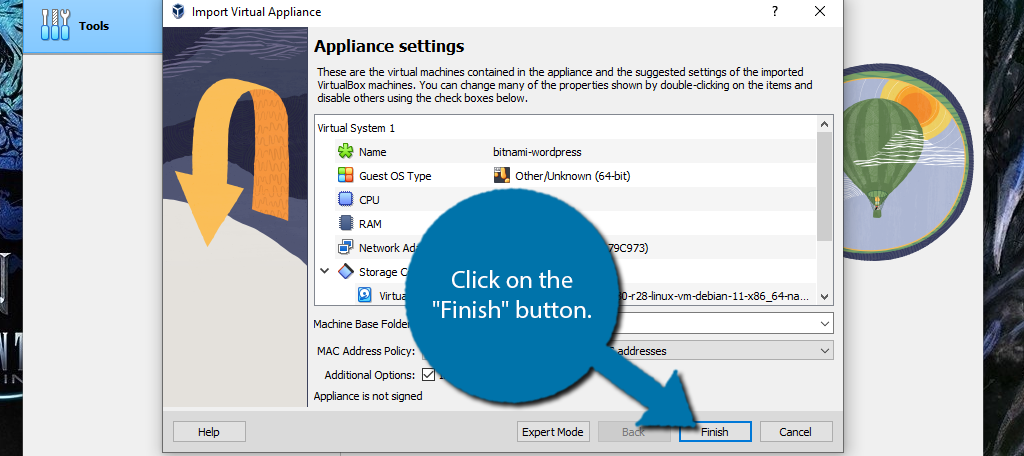
In either case, you should see the application settings. Review them and click on the “Finish” button.
The process will take a moment to finish. Once it does, your local version of WordPress will be ready for use.
Step 3: Use Your Local Version of WordPress
All you need to do is start the application you installed and you are in WordPress.

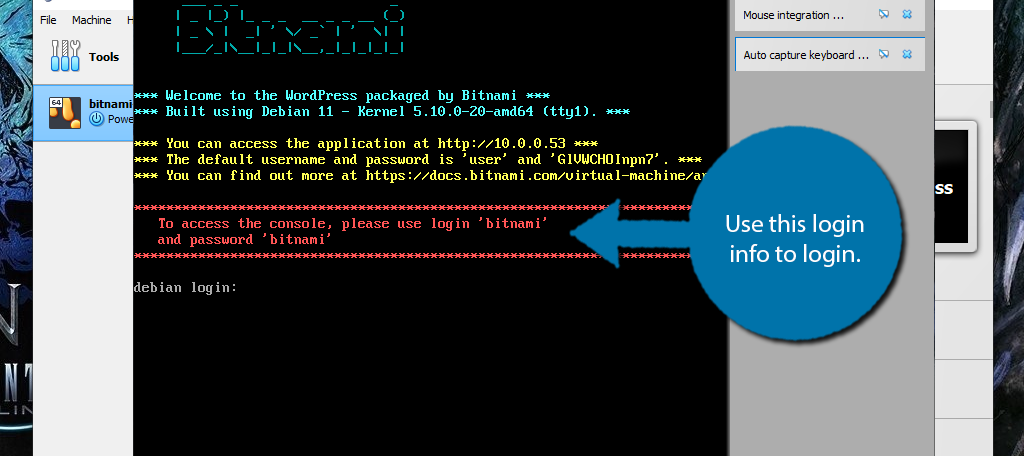
Your Virtual Machine will now open. You will need to enter the login info to gain access to it. There are default values that are randomly generated, but they are visible from the login screen.
Use them to log in.
To actually access your local website, you just need to enter your VM’s IP address and add the “/wp-admin” at the end of it. The VMs IP address is visible when you start the Virtual Machine.
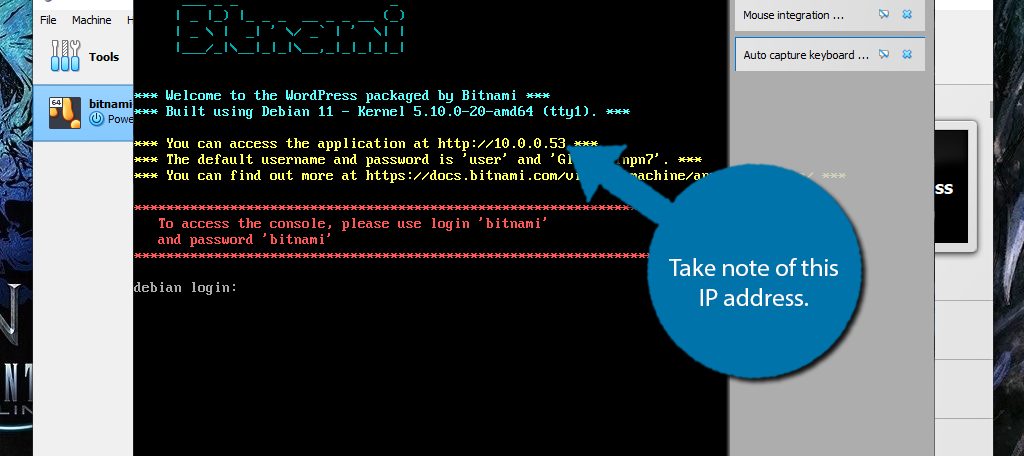
So in this case, I just need to enter http://10.0.0.53/wp-admin and I will be brought to the login screen of WordPress. Just use the login credentials and you have fully customizable local WordPress at your fingertips.
Note: You need to have your Virtual Machine on for this URL to work.
Create A WordPress Staging Site Today
Whether you’re developing code or experimenting with a new plugin, using staging for WordPress is a great way to experiment. The ability to see the effect of your changes on a site that exactly mirrors your live site is invaluable.
What kind of changes have you made to WordPress that you could have used a staging area for? How often do you make design or functionality changes to your live site?
WP Clone is deprecated. Support said this article was going to be updated accordingly with current best-practices. It hasn’t been.
We’re in the process of updating our WordPress tutorials to make sure everything works with WordPress 5.x, so this article will be updated. We have over a thousand tutorials, so I can’t tell you exactly when this one will be updated.
WP Clone was deprecated a couple years ago. If this article was just updated last month, why wasn’t that section updated?
I used Softaculous installer for staging and cloning. I don’t know if this is new, but I noticed it has great extra features like staging and cloning. After I installed WordPress – I went back to the install screen and noticed some icons appeared for staging and cloning at the bottom. I used the staging feature and installed an identical replica on a folder – I could have used a sub-domain but installing it on a folder kept my SSL. After this install a new icon appeared to push back my changes to the main site. I never noticed this before but it does the job perfectly in a few clicks.
I just noticed it myself. That is a handy feature, and we’ll have to add that in a future update. Thank you for pointing that out! 🙂
Looking at the help page for both Softaculous functions, it’s really difficult to see any difference between them. Do you know what it is? Staging sure looks like a clone to me.
Hi Chris. Funny you should mention it because I’m doing a rewrite of the article right now that includes Softaculous Staging. You are correct, there’s no reason to go through all the steps in the article if you have access to Softaculous. The revision will make that clear.
Good to hear. On the difference between the Softaculous “Clone” and “Create staging” functions, the latter was introduced last year, while the former has been around several years.
http://www.softaculous.com/blog/prevent-breaking-your-live-website-with-our-staging-feature
It’s possible that the only difference between them is that the “Push to Live” function may require staging as opposed to cloning.
Very good job with the update. A few notes that might help someone:
-A couple weeks ago, I made several attempts at getting Duplicator to actually complete with our site (on Shared Hosting – EcoSite Starter), but all attempts errored out. This included implementing the workarounds Duplicator recommends for such situations. Whether it’s because of limited resources, or, what I mostly suspect, the hard limit of the “max_execution_time” PHP value of 180 seconds, I don’t know.
And it doesn’t really matter now, because the Softaculous way is far better. But there are some gotchas to be aware of, at least in the case where you’re staging to a subdomain:
-If you use WordFence’s “extended” protection, then look up the procedure to remove extended protection temporarily *before* staging. Alternatively, after staging, use something like WinSCP to edit /public_html/yourstagingfolder/.htaccess and remove the WordFence section you see there. If you do neither of these things, you will not be able to access the staging site (including its admin page) in a browser.
-If you find that accessing the staging site (including its admin page) redirects you to your production site, which is an infamous issue, then add these lines (edited for your URL) to /public_html/yourstagingfolder/wp-config.php:
define( ‘WP_HOME’, ‘http://staging.example.com’ );
define( ‘WP_SITEURL’, ‘http://staging.example.com’ );
BTW, if it *still* redirects, there could be other reasons, but it’s probably because you need to clear browser cache, as hard as that is to believe.
One more try to see if you delete the message again.
Up to now we used Softaculous staging to test out how certain things will look/behave/etc should we later do those things on the live site.
However, let’s say we want to start over with the live site at some point and are looking to bring up a *fresh* staging site on the side until it’s ready to replace the live site.
One way might be to do a normal staging followed by a reset of the site to defaults (deleting database, files, etc). But is that actually advised?
I also thought of using Softaculous to do a new install. However, as that’s not using the staging feature in the first place, “push to live” AFAIK is out of the picture. Replacing the original site in that case would be more problematic.
If we have a staging site created with a subdomain (dev.example.com), we don’t want it to be discoverable by the public. But we might want clients or reviewers to be able to access it.
I’ve considered creating a Redirect so that most of the time dev.example.com redirects visitors to example.com, then while showing or testing changes live, temporarily switch off the redirect.
Is there a better way to handle this? Thanks!
So you have a staging site that is live?
Thanks, i have lots of questions in the mind, but here you have explained everything. Subscribed your blog.