Selling physical and digital goods online has become wildly popular. In fact, eCommerce is booming and website owners are trying to find ways to reach customers before, during, and after they make a purchase. One of the very best ways to do this is to use Mailchimp and WooCommerce together to reach customers.
Online digital marketing plays a huge role in the way an audience sees, understands, and interacts with a brand. There are so many ways you can market a brand online. from placing ads to using social media, the ways you market will directly affect your sales.
One of the best ways to market to an audience is through an email newsletter. While there are actually quite a few This allows for a solid start to marketing and gives you (the website owner) a good way to reach your audience (customers both current and potential).
You actually don’t have to be selling products and services to have an email newsletter. However, if you are, then this is a great way to build on sales and expand.
There are actually several excellent email marketing services available to choose from. However, today we are going to focus on Mailchimp because of the integration it allows with WooCommerce.
Combining these two giants together will provide you with a very popular and strong channel to reach your audience.
What is MailChimp?
Simply put, Mailchimp is software that gives you the ability to create and manage mailing lists, newsletters, automated campaigns, and more. It basically gives you every tool imaginable and puts you in the driver’s seat when it comes to marketing.
One of the best things about using Mailchimp for marketing is that it has the most robust free plan available. You can have up to 2,000 subscribers and send out up to 12,000 emails a month for free. After that, they have very fair pricing tiers, as well as a “pay as you go” option.
The paid options do provide more available tools, as well as get rid of MailChimp’s branding. However, all-in-all, the free version of Mailchimp is very robust and comes with a ton of marketing tools.
What is WooCommerce?
WooCommerce is an open-source eCommerce plugin that you can use to sell both physical and digital goods online right from your website. It is the most popular online selling platform available and integrates directly into your WordPress website via the plugin.
Again, much like Mailchimp, the WooCommerce platform is free. The free download gives you everything you need to see products online in just a few minutes. From shipping to payment gateways, the free version has it all.
From there, the software makes available dozens and dozens of paid extensions and add-ons that can help transform your online store into an eCommerce machine.
Since Mailchimp and WooCommerce are both leaders in their respective industries, it is only natural to combine them to boost online sales. You can set up all of this using a solid web host provider that supplies you with all the tools needed to build and run an online store.
Let’s take a look at the plugin we are going to use today in order to integrate Mailchimp into WooCommerce. We will also go over the plugin connection and setup together.
Note: This assumes that you already have WooCommerce installed and set up. It also assumes that you already have a Mailchimp account. If not, please go open a free account at this time. Your hosting environment also needs to meet WooCommerce minimum requirements of PHP 7.0 or higher.
Mailchimp for WooCommerce
Mailchimp for WooCommerce gives you the ability to automatically sync customer purchase data to your MailChimp account. This makes it easier for you to send targeted campaigns and automatically follow up with customers post-purchase.
You will also be able to build personalized emails to your customers, recommend products, recover abandoned carts, and measure the ROI (return on investment) of your marketing efforts.
It gives you a direct link from your eCommerce store to your mailing list, allowing you to better develop an eCommerce marketing strategy.
The plugin is lightweight and is easy to install and activate. It comes with a ton of functionality as well. Some of the main features include:
- Sync audience to Mailchimp with purchase data
- You can also sync new subscribers when they create accounts or opt-in
- Set up multiple marketing automations
- Show product recommendations
- Track purchase history and data
- View detailed data from Mailchimp dashboard
- Find new customers using social media sharing and ads
- Create and embed popup forms
- Add discount codes from WooCommerce to your emails
- Create landing pages when needed
The plugin offers everything you need and much more to gain subscribers, boost online sales, and market to a target audience that you have built.
Let’s take a look at how to get the plugin installed and activated.
Install and Activate Plugin
In order to connect Mailchimp to WooCommerce and start boosting sales and marketing to your audience, you first need to install and activate the plugin.
You can do this by going to the Plugins page in your WordPress admin dashboard. Simply search the plugin by name and install it right from there.
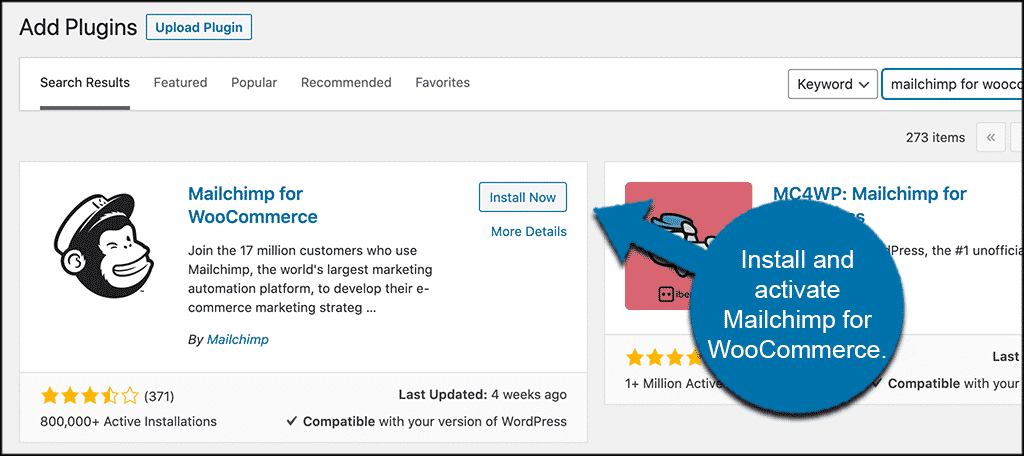
Once the plugin has been installed and activated, you will automatically be taken to the main setup page where you need to connect your Mailchimp account and move forward with setup.
If you aren’t taken there automatically, just click on the “Mailchimp” link that is now located in the left menu area of your dashboard.
![]()
Let’s get the plugin connected and set up together.
Connect Mailchimp Account to WooCommerce
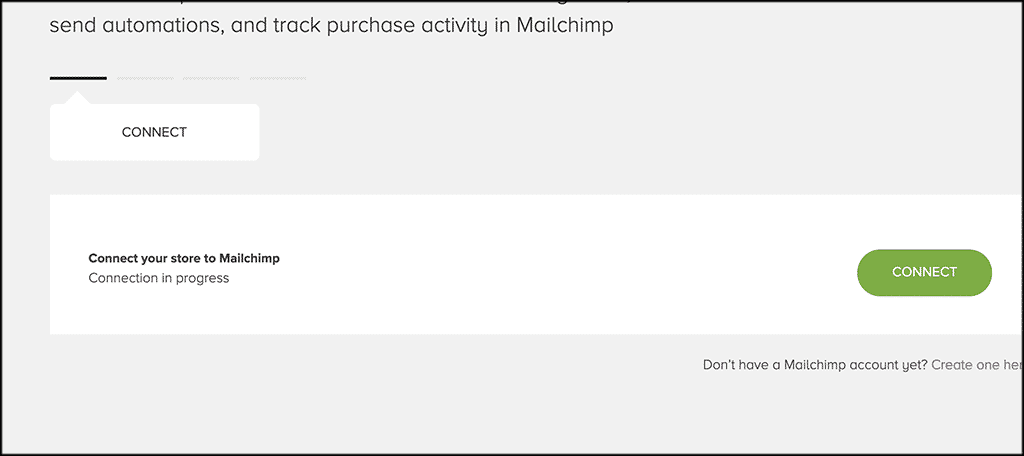
At this point, you will be on the connect page for the plugin. You first need to connect Mailchimp to WooCommerce before you can add a signup or opt-in form to your online store.
Note: Remember, you need a MailChimp account to continue this tutorial.
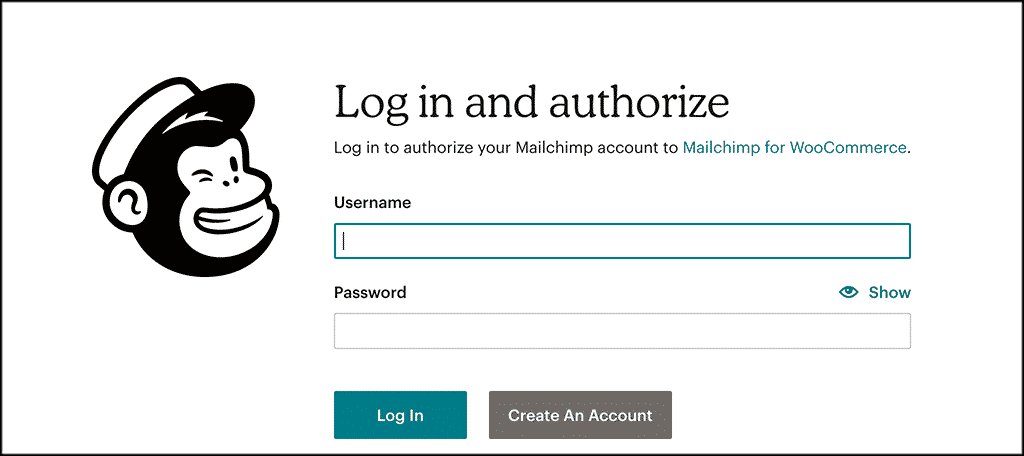
Click on the “Connect” button to get started.

You will see a popup window open that asks you to log in and authorize your Mailchimp account using your username and password. Go ahead and log in.
Once you are logged in, you will see a box that asks you to authorize Mailchimp for WooCommerce. Go ahead and click on the “Allow” button at the bottom of the box.
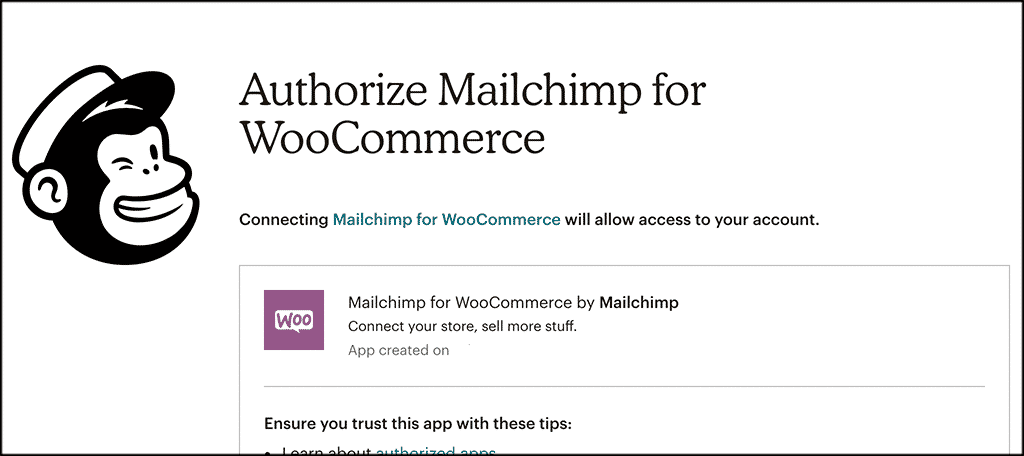
Once you do, this the box will close and you will be taken back to the main plugin connect screen. Here you will see a “Connection in progress” update. This means the plugin is trying to connect.
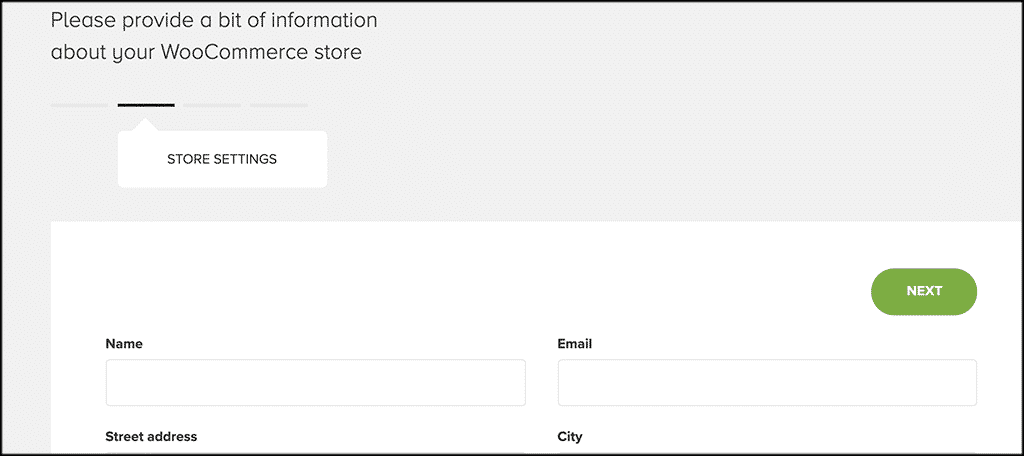
Store Settings
Once the plugin has successfully connected to your Mailchimp account, it is time to finish up some configuration. You will see now that you can fill out some store settings data.
Fill all of this out how you see fit based on your store. When you are finished, click on the “Next” button.
Audience Defaults
Here, you can fill in the data for your audience default settings. This is the info your audience will see. Again, click on the “Next” button when you are finished.

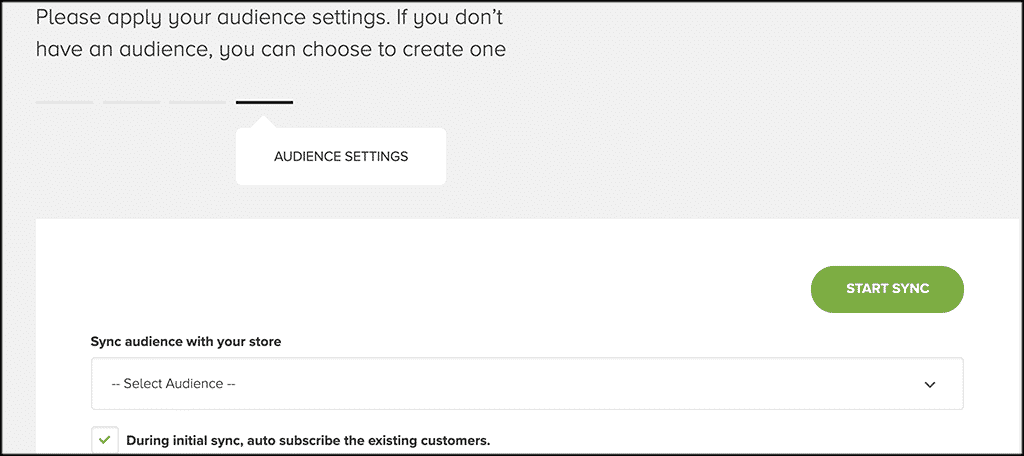
Audience Settings
Finally, select your audience settings and choose the list to sync everything. If you have more than one list in your Mailchimp account, you need to choose the one to sync all data and info.
When you are done with your selections, click on the “Start Sync” button.
That’s it! You are all set and good to go. You have successfully connected Mailchimp to WooCommerce and you can now reach your customers using all sorts of functions that the plugin provides.
Remember, the plugin only adds a simple little checkbox to the checkout cart portion of WooCommerce. It simply says “Subscribe to our newsletter.”

You can see that the box is auto-checked during the checkout process. The customer will need to uncheck it if they do not want to be subscribed. Once they are on the list, all of their purchase data is sent to Mailchimp.
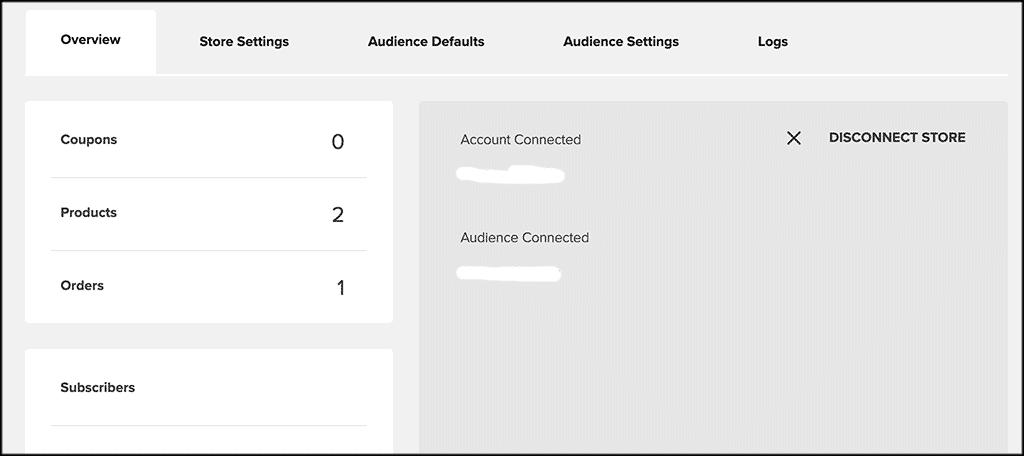
Overview and Historical Analytics Data
Back on the main settings page, you will see your full overview. Remember, you can make changes at any time. We set all the tabs up already above, but feel free to go back through them and change or update anything you need.
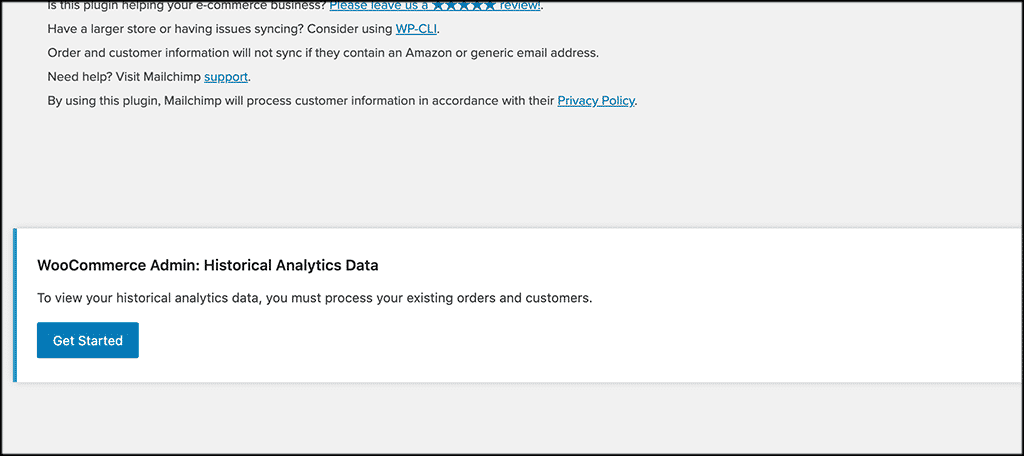
Process Historical Data
If you want to, you can process historical analytics and data based on past customers and orders. To do this, simply click on the “Get Started” button and follow the process.
This will sync up all past purchases and customer data and link it to your main overview.
Final Thoughts
Linking Mailchimp to WooCommerce is one of the best ways to boost online sales and connect on a more personal level with your customers.
Both of the plugins provide a ton of data that you can use to really gain more traction and even increase your customer base over time. If done correctly, you can use all the avenues the plugin provides to build your brand up.
The process of connecting the two plugins and getting it set up is not difficult. Simply have WooCommerce up and running and connect it to your already existing Mailchimp amount using the information above.
I hope this tutorial shows you how beneficial and easy it is to connect Mailchimp and WooCommerce together.
Have you used a different Mailchimp plugin to try and integrate with WooCommerce? Have you found this increases sales and customer engagement?
If using Mailchimp with WooCommerce and selling virtual products. Can’t seem to show the download-link in the order confirmation e-mail?
You may need to reach out to Mail Chimp and ask them if there is something blocking that link because they think it is SPAM.
Hello, I’ve the same problem. Really want to add the download link in mailchimp order confirmation, like how it is in default order confirmation.
But its not displaying at all in mailchimp.
Please make an tutorial about that!