Are you having trouble with certain users on your website? If so, it might be time to pull out the banhammer to remove users that bother you or other users. A ban prevents users from interacting with certain aspects of your website.
For example, if a user is leaving nasty comments on your site, you can ban them to prevent them from leaving anymore. Bans can be as short or long as you want, or even permanent if you choose them to be.
Bans can also be a great solution for spam bots that are infecting your comment section. Of course, the plugin is not just for comments as you can ban users from logging into your site or registering.
Today, I will demonstrate how to use the Banhammer plugin to ban users in WordPress.
This tutorial is for:WordPress 6.6.2Plugin: Banhammer v3.4.3
Why Ban Users In WordPress?
Unfortunately, the anonymity of the internet brings out the worst of people. For this reason, it is very common to see profanity, hate speech, or for users to upload inappropriate images to sites they frequent.
As such, websites must moderate their user base to prevent these actions from happening, and the most powerful tools in your arsenal are bans. They prevent a user who has broken the rules from leaving any more comments or interacting with your site.
Naturally, this means you need to take the time to construct a list of rules users must follow.
That way, when users break those rules, you can ban them for the desired amount of time. Most websites will ban users for increasing amounts of time based on the number of violations they make.
For example, the first time a user breaks the rules they may be banned for a day, the second time may result in a week ban, and the third may be permanent. Of course, if the initial offense is bad enough, you may just opt for a permanent ban from the get-go.
How to Use Banhammer to Ban Users in WordPress
The Banhammer plugin is a pretty simple tool you can add to WordPress to ban users. You can monitor interactions on your site and choose to ban users based on what was said. Naturally, you can also unban users if needed.
Anyone can use this plugin to moderate their website. Not only can you ban specific users, but you can also choose to ban entire IP addresses.
Without further ado, let’s get right into it.
Step 1: Install Banhammer
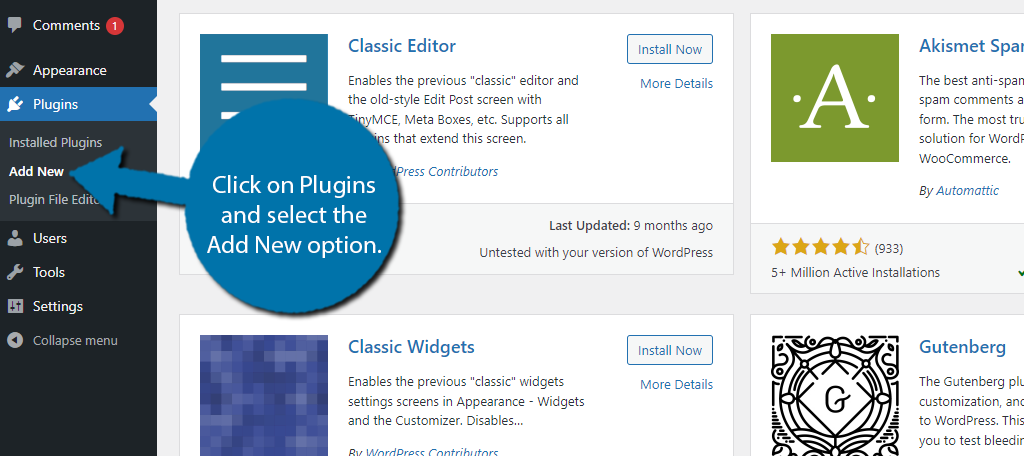
Let’s start by clicking on Plugins and selecting the Add New option on the left-hand admin panel.
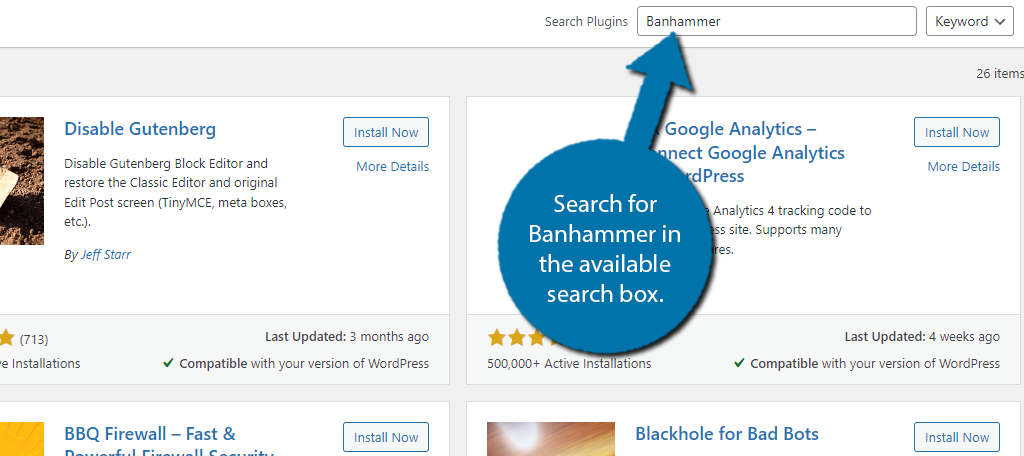
Search for Banhammer in the available search box. This will pull up additional plugins that you may find helpful.
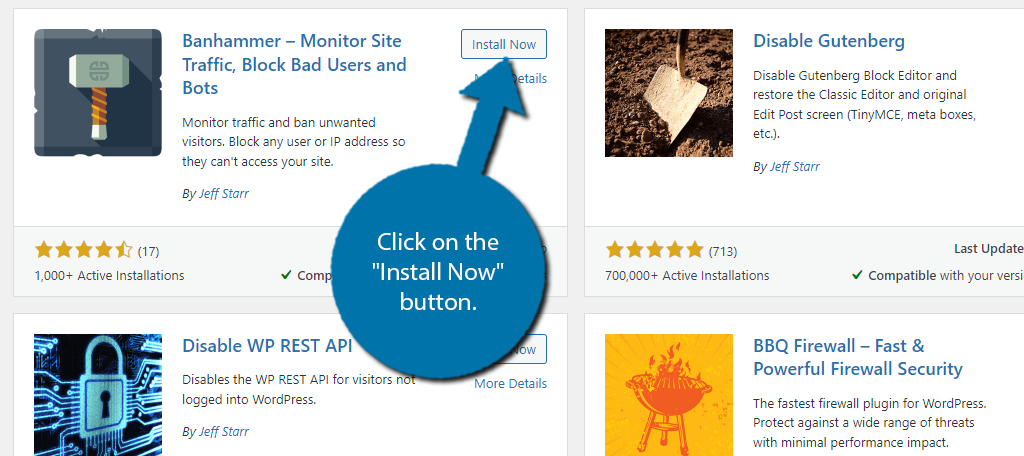
Find the Banhammer plugin and click on the “Install Now” button and activate the plugin for use.
Step 2: Configure Settings
The first thing you’ll want to take a look at is the Settings area of the plugin. While there is not much to do here, you can customize the messages the plugin will send out. You can also choose to enable or disable the plugin in certain areas of your site.
On the left-hand admin panel, click on Banhammer and select the Settings option.
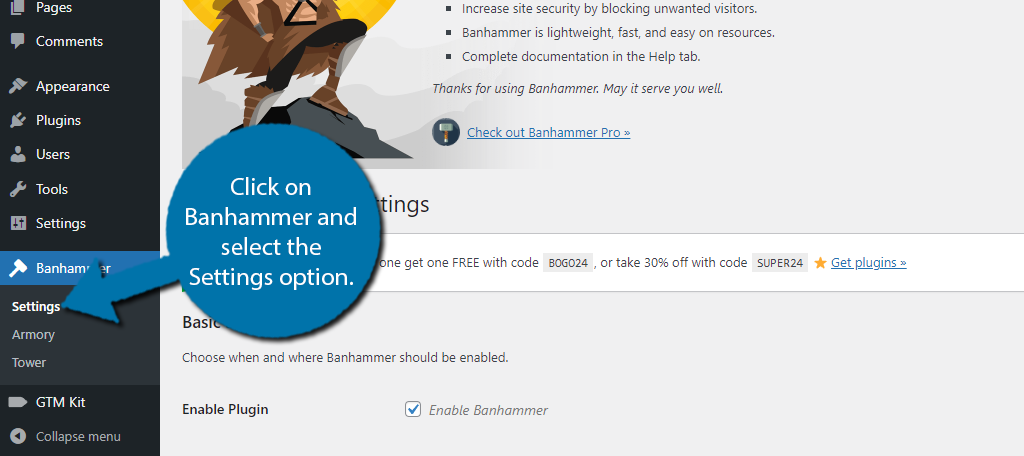
The Basic Settings section allows you to enable the plugin and use it in certain areas. By default, the plugin is enabled and will ignore logged-in users. You can also choose to enable it to protect your login area and the admin area if you wish.
Simply check or uncheck the boxes as you see fit.
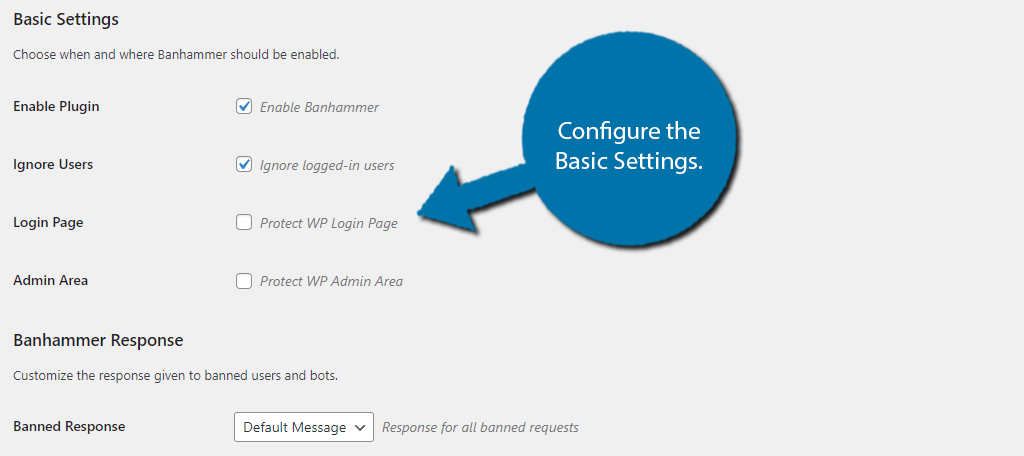
Below this is the Banhammer Response section. Here, you can customize the message when a user has been banned. You can also create a redirection page, which you may want to consider creating a custom page that explains all of the rules on your site.
There’s also the Advance Settings section, but there’s not much you need to do here, so you can skip it.
Be sure to save any changes you make.
Step 3: Ban Users
With the settings out of the way, you can immediately begin moderating your site. Click on the Armory option.
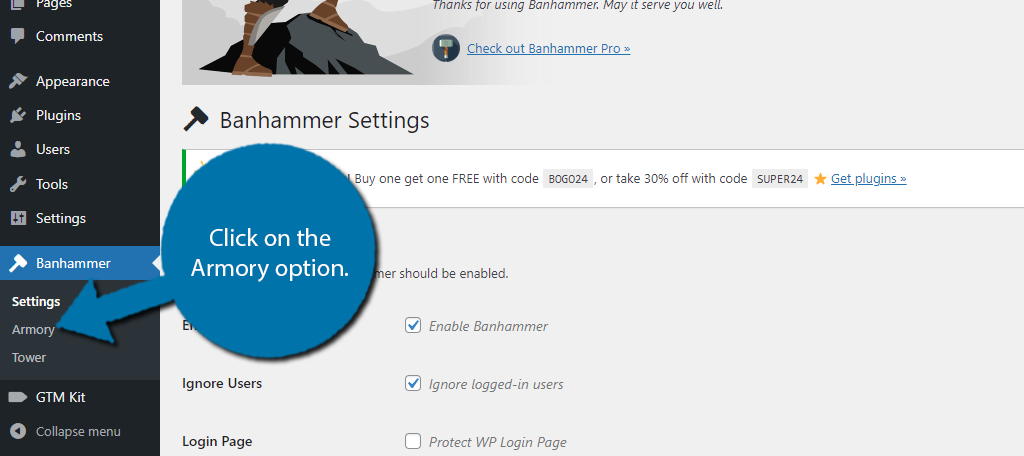
Here, you will be able to monitor your site traffic. This includes users leaving comments and users just accessing your site. Each entry will include the user’s country of origin, IP address, what page or post they were accessing, and so on.
Go through the armory until you find a user you want to ban. Once you find one, click on the banhammer to ban the user.
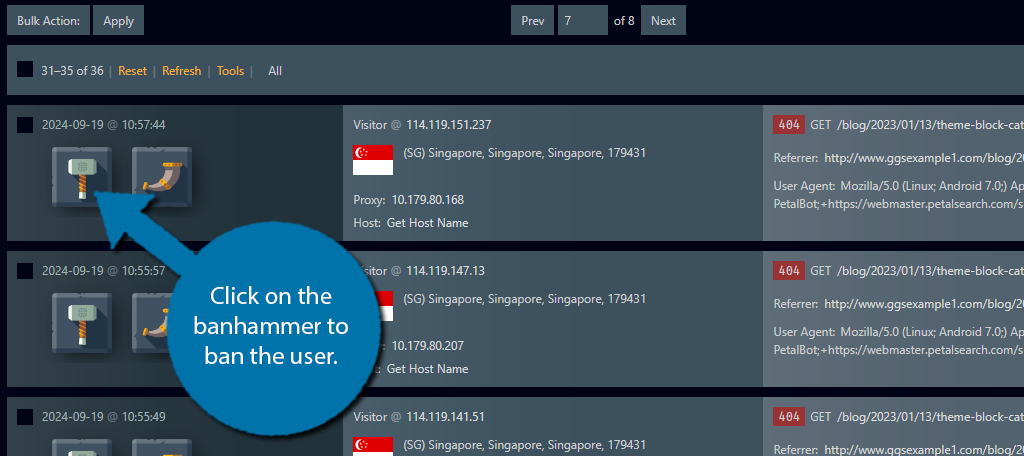
Alternatively, if you click on the Gjallarhorn icon, you can send that user a warning. Of course, if you don’t have to do anything, and can just delete this log in the armory. By default, the plugin will clear out the armory every day.
This is recommended because a full day’s worth of site activity is a lot of data. If you ban users, it will block them from accessing your WordPress site. It is possible to perform bulk action deleting with this plugin, but not bans or warnings.
Step 4: Unban Users
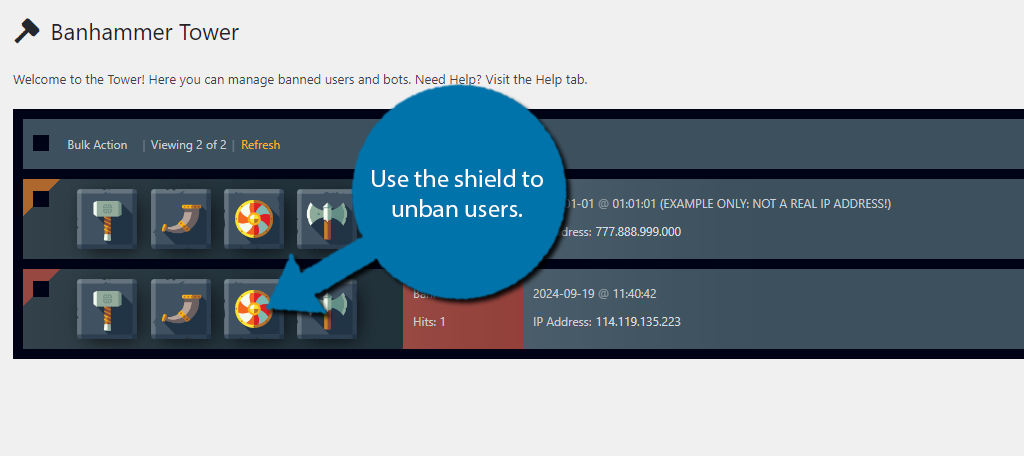
Not all bans are meant to be permanent, so you may need unban users from time to time. All banned users are stored in what the plugin calls the Tower. Simply click on the Tower option to access it.
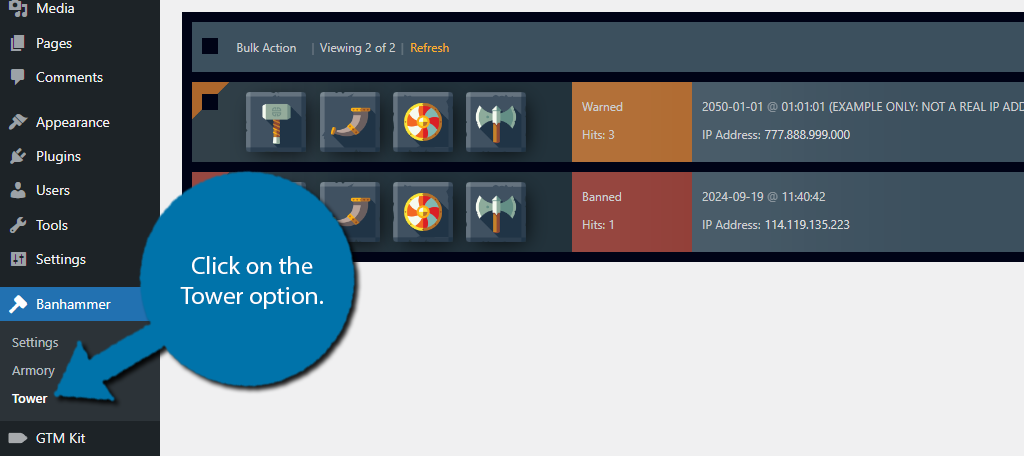
Here, you can see a list of users you have sent a warning to or banned. You can choose to click on the Axe icon to delete the listing, or the Shield to restore the user, which unbans them.
And that really covers everything you can do with the free version of the plugin. It is worth mentioning that a Pro version exists with even more options. For example, the Pro version has the ability to whitelist certain users.
It also includes the ability to send out email notifications to the banned parties informing them they are banned. The email can be customized to say whatever you need it to.
How Much Time Should I Dedicate to Moderation?
It really depends on the size of your website. The truth is that websites eventually become too big for a single person to moderate. That is why many sites hire moderators or appoint prominent users to a moderation position.
It really depends on the kind of site you are running and what kind of content you are trying to avoid on your platform.
In general, you should be spending several hours each week going through comments and removing those that contain content that you do not want on your site like hate speech, or inappropriate images.
A great way to combat this and reduce your own moderation time is to set up a user reporting system. This will make it so users who view harmful content can report it to a site admin. The admin can then take disciplinary measures against that account.
Unfortunately, the Banhammer plugin does not have this function, but you could install a plugin like Zeno Report Comments. As it incorporates a reporting system into the WordPress comment system that users can take advantage of.
Just be mindful that some users will abuse the reporting system, so keep track of those users to ban them for misuse of the system.
Start Moderating WordPress with Banhammer Today
As you can see, the Banhammer plugin is a great tool you can use to ban a user, block an IP address, or monitor your site traffic. It is simple to use and gives you a lot of control over who is viewing your content and what they are doing on the site.
It’s worth pointing out that if you are already using a plugin for comment moderation, it might be a bit simpler to use that tool than this one, or if you are using BuddyPress, that plugin allows users to block other users.
Thus, it may be redundant for you to spend time banning users unless you feel very strongly about it.
I hope you found this tutorial helpful in learning how to use the Banhammer plugin for WordPress.
Did you find Banhammer easy to use? How much time do you spend every week moderating your site?

