If you’ve ever wanted to use interactive images to engage your website visitors, today is the day to start. It’s easier than ever to create clickable maps, floor plans, even infographics. Draw visitors into any image by making it interactive in minutes.
If you were developing websites back in the 1990s, you’re probably familiar with imagemaps. They’re coordinates (often called “hotspots”) mapped out on top of an image. The coordinates made it possible to link to other pages by clicking certain areas in the image.
Modern imagemaps work on the same basic principals, but there are many more options available to us today. You can still link to pages, but now we have hover effects and popup windows that really supercharge imagemaps.
We’ll use the Draw Attention plugin to create interactive images that will engage and entertain your visitors.
Installing the Draw Attention Plugin
Log in to your WordPress admin panel.
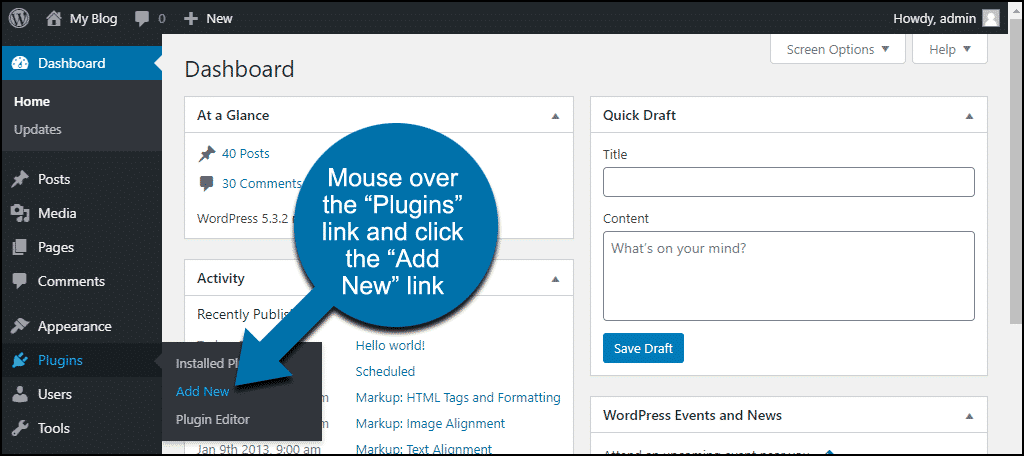
In the left column navigation, mouse over the “Plugins” link and click the “Add New” link.
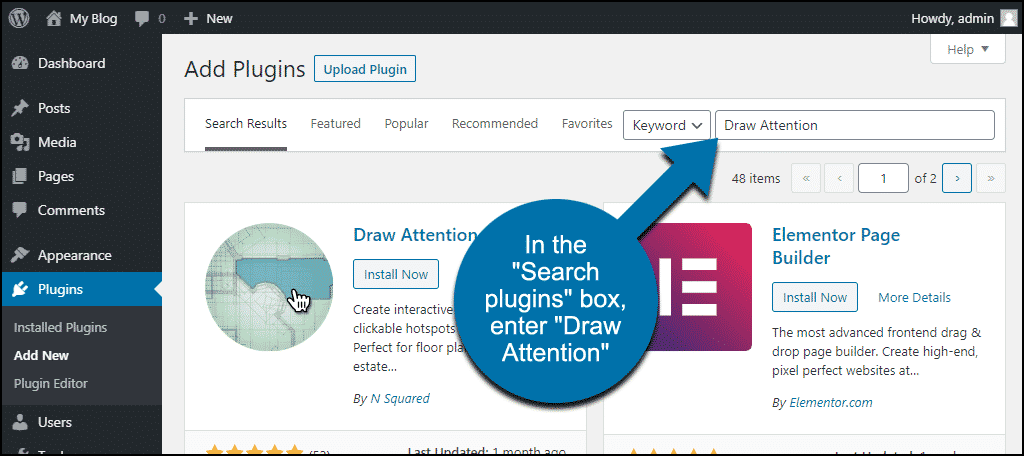
In the “Search plugins…” box, enter “Draw Attention.”
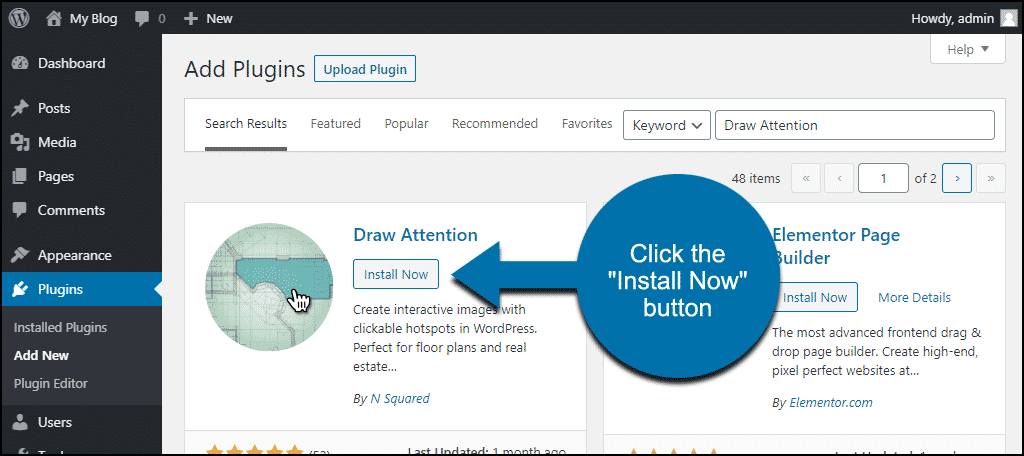
Once you have located the plugin, click the “Install Now” button.
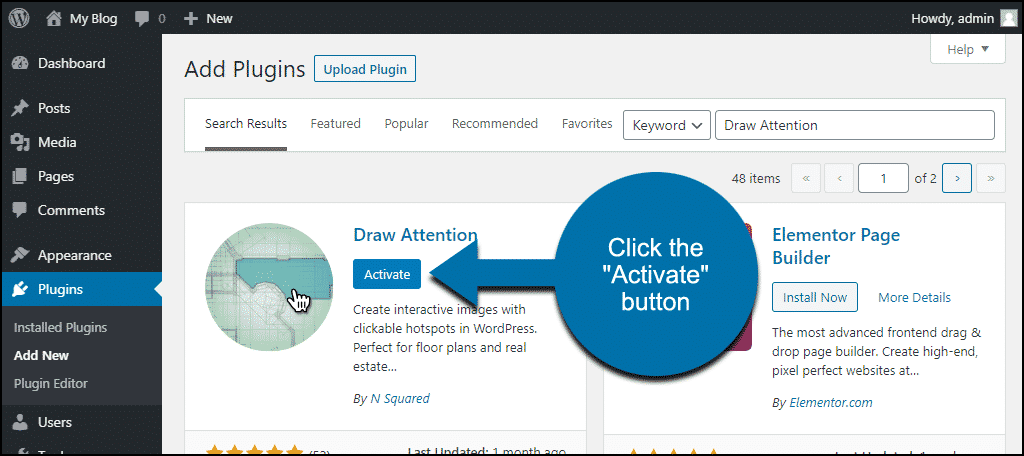
Click the “Activate” button.
Configuring Draw Attention
No plugin configuration is needed to make interactive jpg, png, or gif images using Draw Attention. We’ll map out the image interactions then include the image in a page or post using shortcodes.
How to Make an Image Clickable
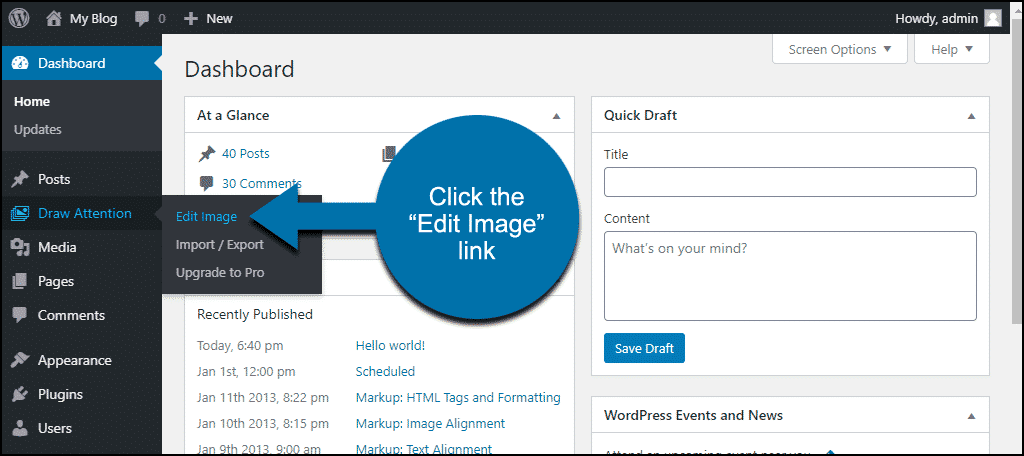
In the left column navigation, mouse over the “Draw Attention” link and click the “Edit Image” link.
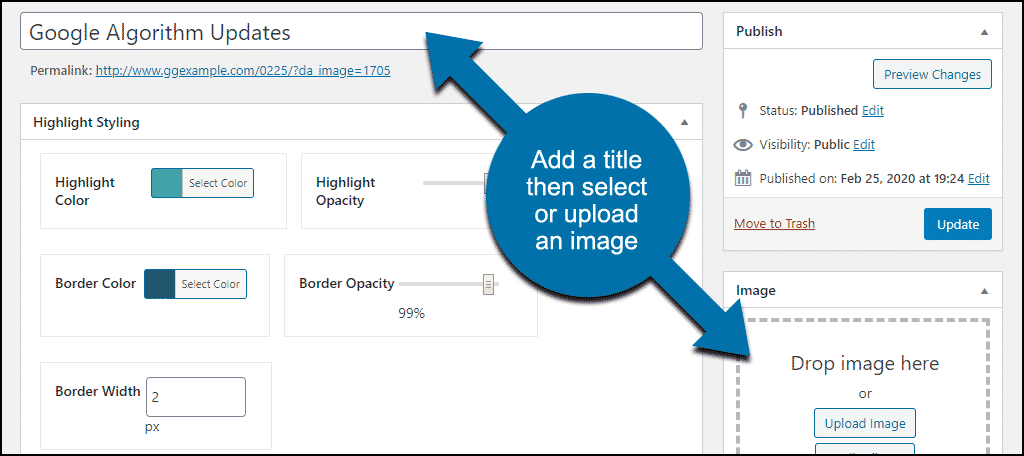
The first thing we’ll do is give the image a title. The title will be visible when we display the image, and it helps manage multiple images in the system.
Next, in the “Image” box in the right column, select an image. You can choose an image from your Media Library or upload a new one. We’re going to upload a new image for this tutorial.
Now scroll down to the “Hotspot Areas” section.
To draw our first coordinates, we’ll click the “Clickable Area #1” link.
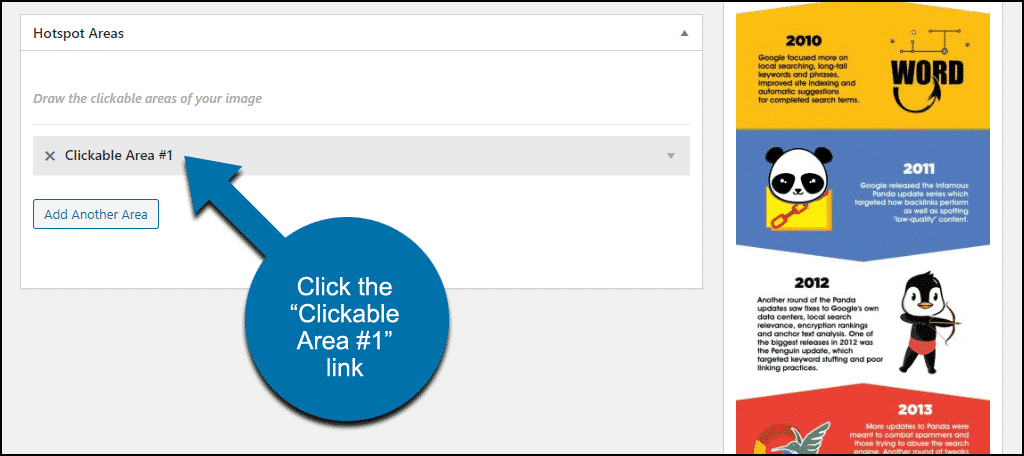
That adds the image that we uploaded to the “Coordinates” section.

To make this demonstration simple, I’ve chosen an infographic image with basic shapes to outline. You can outline more complex shapes as well once you get the hang of using the plugin.
To start, just click the image where you want your first point. Then click the rest of the points to complete the shape.
Clicking the first two points creates a line.
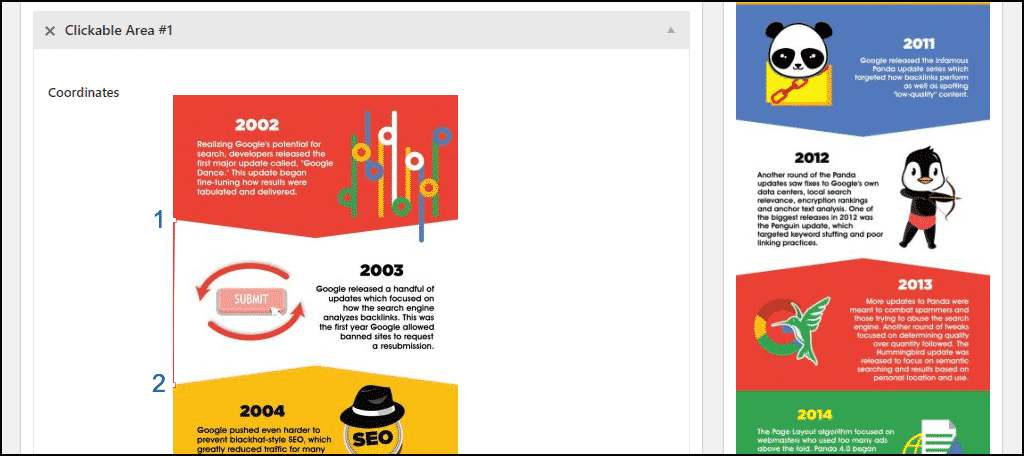
Clicking the third point creates the hotspot box.

Then we just click the rest of the points to complete the shape.
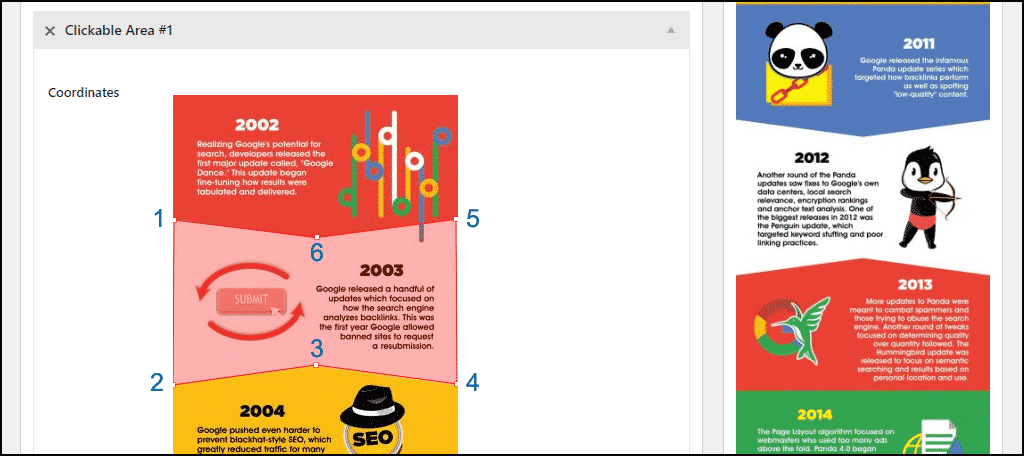
If you make a mistake and want to remove a point, hold down the Ctrl key and click the point. To remove all the points of a hotspot, click the “Reset” button just under the image.
For now, we’re just going to create a single hotspot so we can go through all the steps.
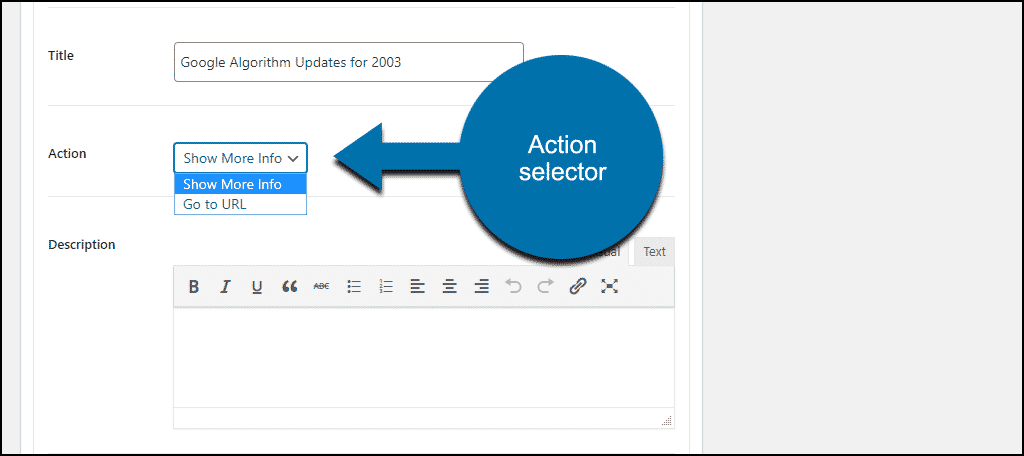
Scroll down to the “Title” section (below the image you just added a hotspot to) and enter a title. This will be the title for the hotspot we just drew.
The “Action” section is where you choose what happens when a visitor clicks the image hotspot. There are two options, “Show More Info” and “Go to URL.”
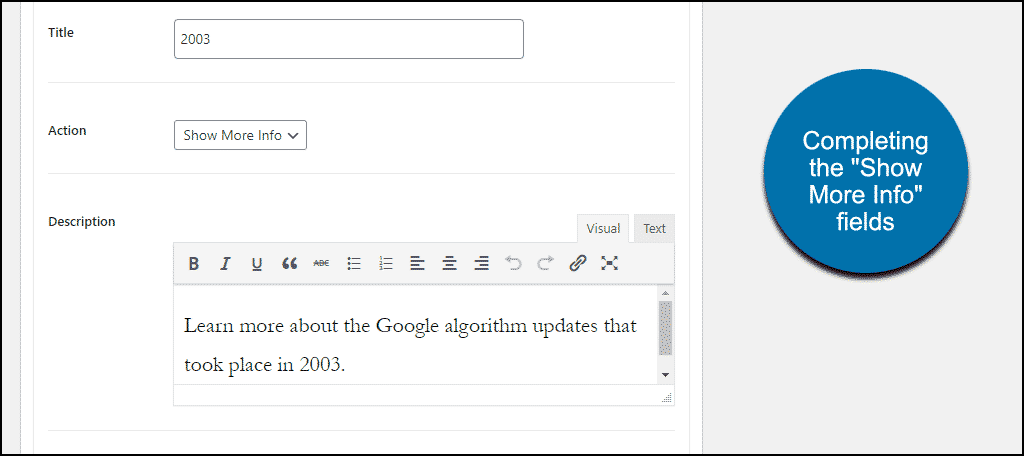
Show More Info
Choosing “Show More Info” allows you to enter text into the “Description” field, and an image into the “Detail Image” field.
Let’s take a closer look at what this option does.
- Add a title for the hotspot.
- Select “Show More Info” as the “Action.”
- Enter a “Description.”
- Upload a “Detail Image” that we want to display when the hotspot is clicked.

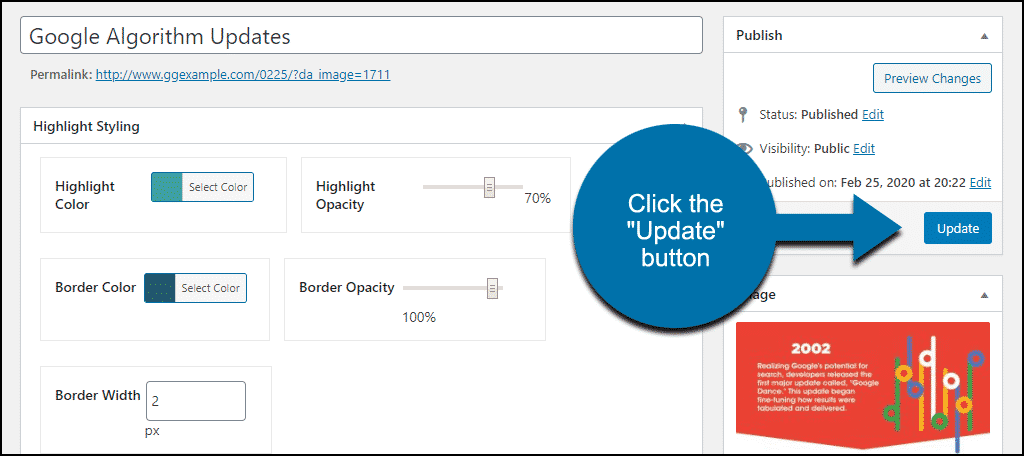
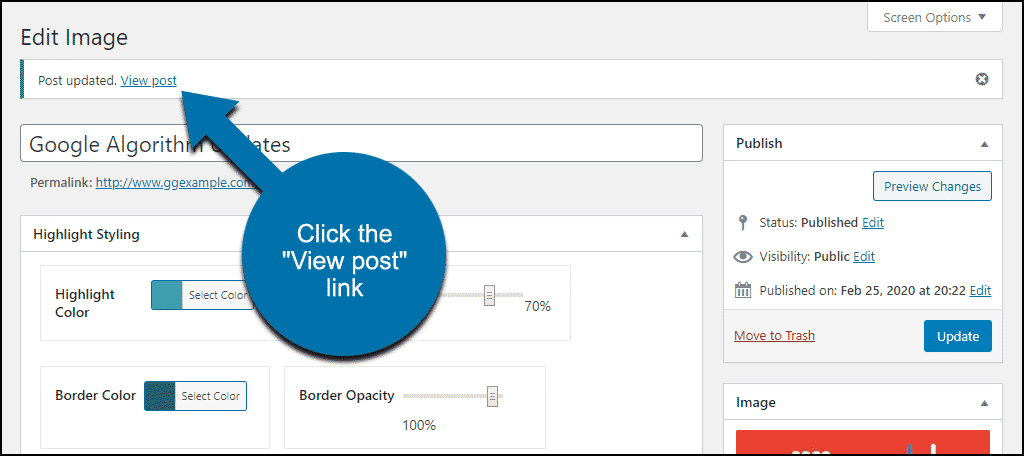
Scroll back up to the top and click the “Update” button.
Now click the “View post” link.
Now you can see the interactive image. Mouse over the hotspot, you’ll see the overlay and hotspot title.

And if you click the hotspot, the “Show More Info” information is displayed on the left.

Personally, I don’t love the default display. The paid version of the plugin provides more layout options so that the additional information box can be moved. But some parts of the appearance are changeable with CSS in the free version.
And of course, pages display differently in every theme. It’s really just a subjective aesthetic issue, though. Your experience may vary.
Go to URL
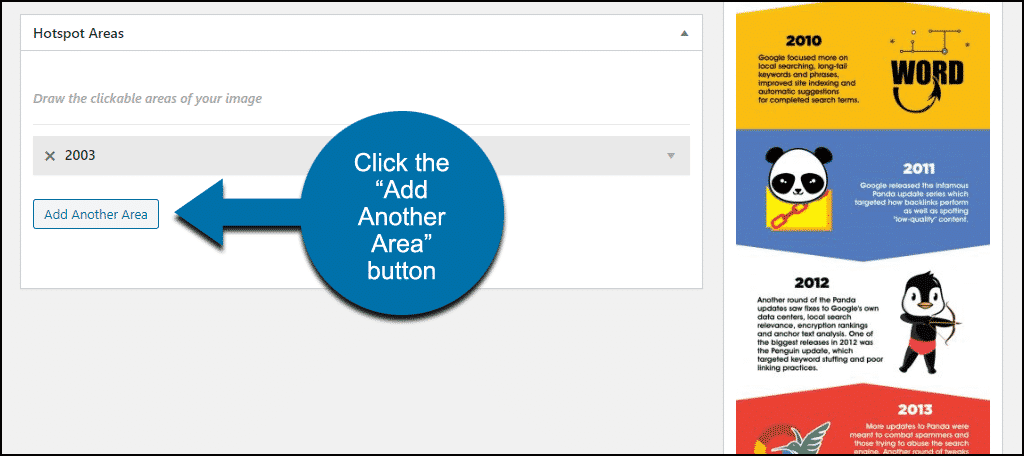
The other “Action” option is Go to URL. Let’s map out another hotspot and see how that works.
Go back to the image editing page and scroll down to the “Hotspot Areas” section.
Click the “Add Another Area” button.
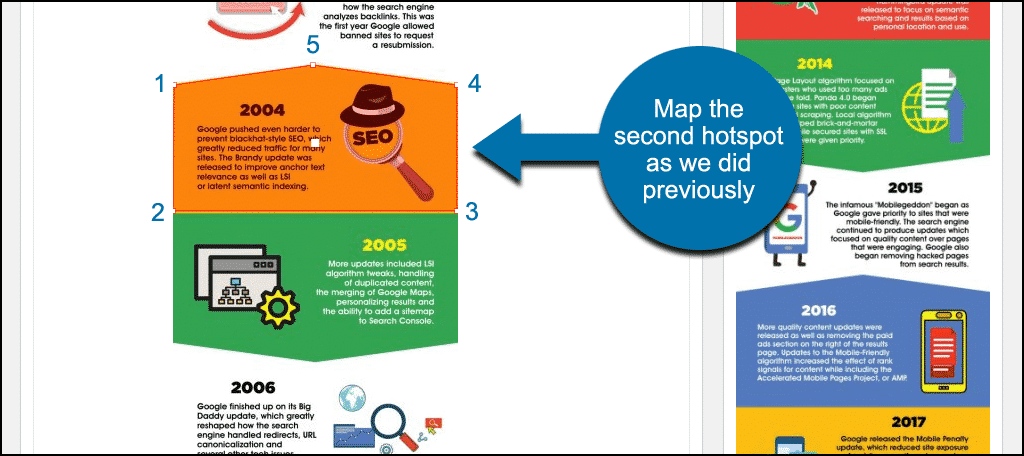
Map out the second hotspot.
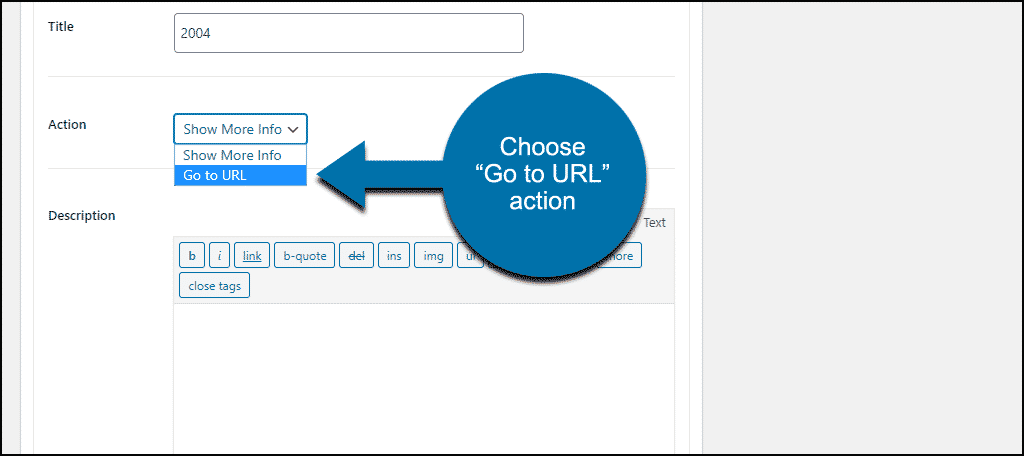
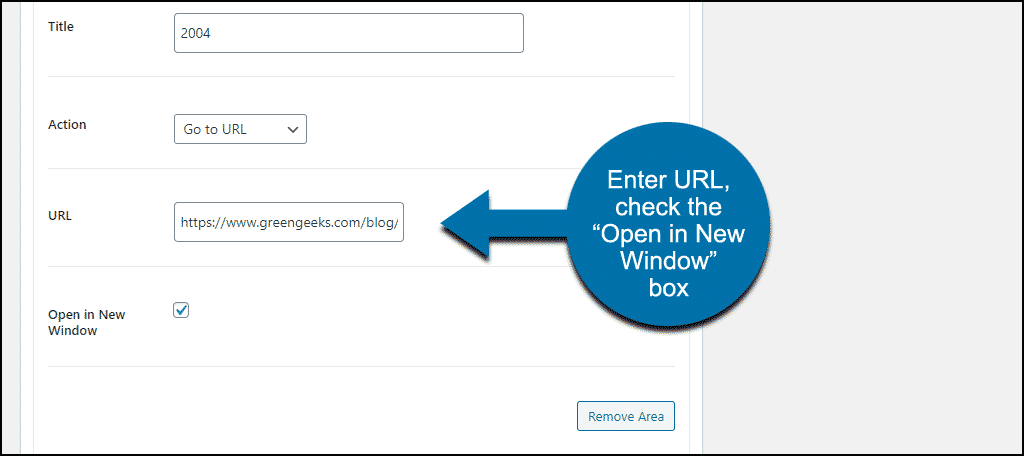
Scroll down and add a title for the hotspot.
For the “Action,” choose “Go to URL.”
Enter the URL you want to link to in the “URL” field.
Check the “Open in New Window” box if you’d like the link to open in a new window.
Scroll up and click the “Update” button at the top of the page.
Now when you click the “View post” link, you can see that the interactive image has another hotspot.

Clicking the hotspot takes us to the page that we linked to.
We checked the “Open in New Window” box, but a new window doesn’t open when the hotspot is clicked.
The only way I found to fix that was to go back to the image, open that hotspot, check the “Open in New Window” box (again), then save the image again. That made the hotspot link open a new window.
Adding the Image to a Page or Post
Up to now, we’ve been previewing the image on its own page. So how do we add it to a page or post on the site?
In the image editing section, scroll down and look for the “Copy Shortcode” box in the right column.
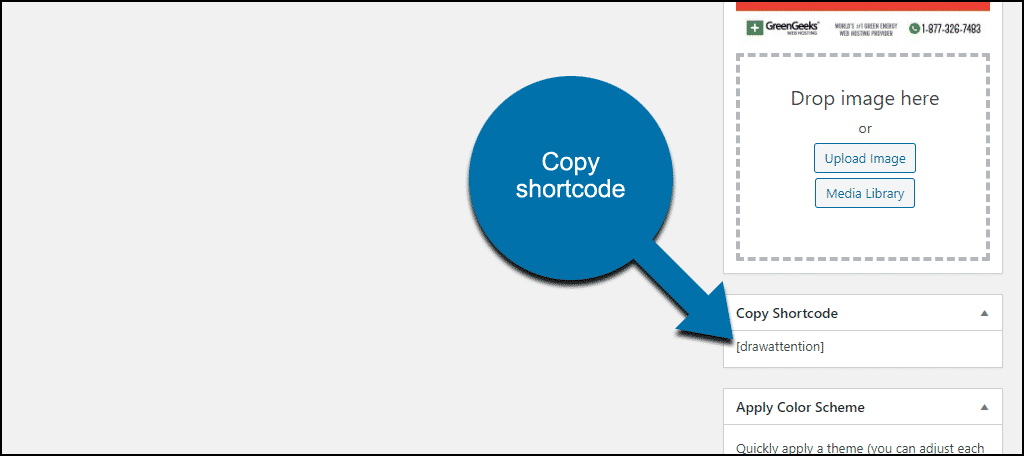
Copy that shortcode, [drawattention], and paste it into a page or post.
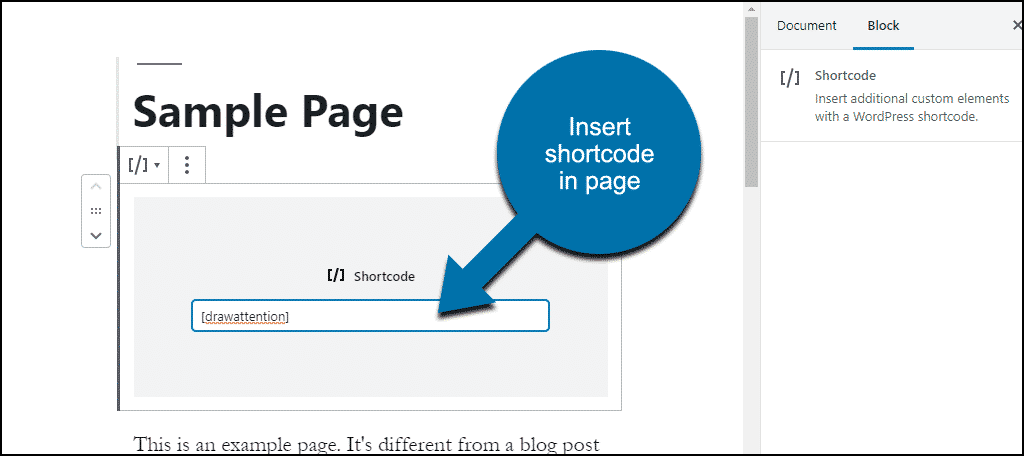
Update the page or post, and the image will be added.
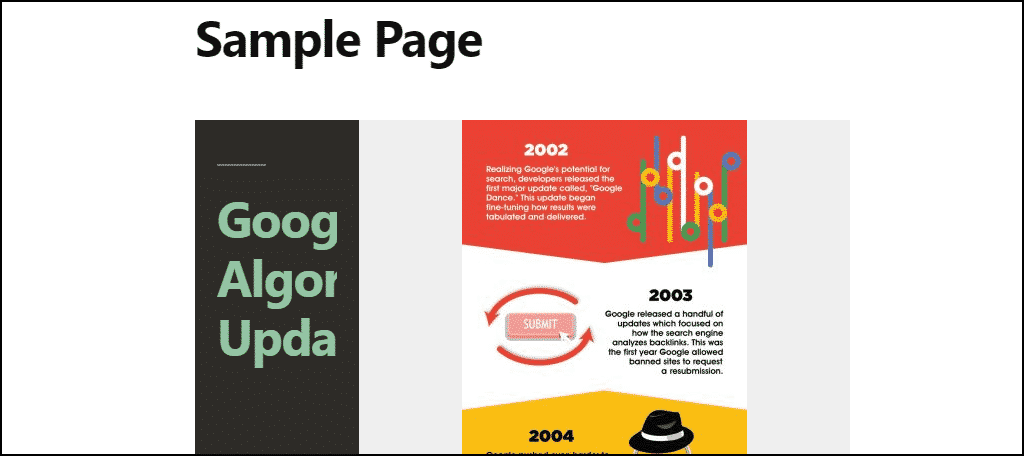
As you can see, the display is still problematic. But again, that will be theme-dependent, and certain elements can be tweaked with CSS changes.
If you’re unsure of how to add custom CSS to a WordPress site, we have a few pointers to help you out.
Further Customization
The color scheme used for the hotspots is customizable. First, in the “Highlight Styling” section, where the mouse over colors and opacity can be changed.
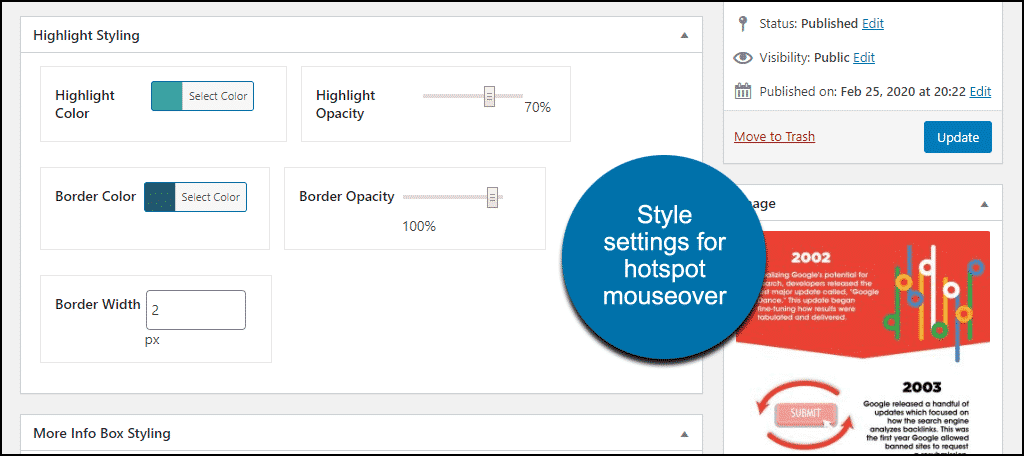
Then, you can also change it in the “More Info Box Styling” section, which controls the additional info bar that’s displayed next to the image.
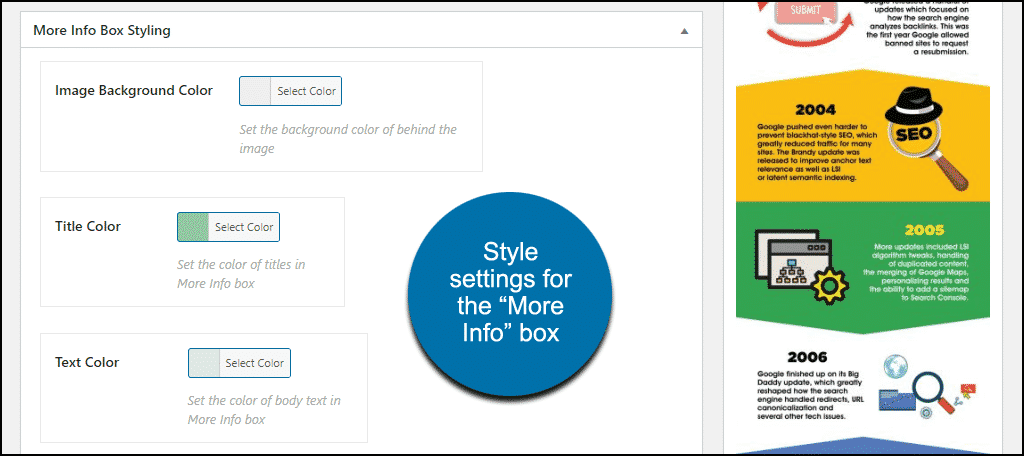
The “Default More Info” section lets you add text that will be shown before any hotspot interaction.

The free version of the plugin only allows you to create one interactive image. That makes it more of a demo plugin than a useful everyday tool.
But if you like the way it works, you can purchase a license. That unlocks the ability to create multiple images as well as the additional layout options we talked about earlier.
What Happens if You Uninstall the Draw Attention Plugin?
If you uninstall the plugin, pages and posts that used the plugin will be affected. Issues include the following:
- Interactive pictures created by the plugin will still be present, but the interactive features will no longer work.
- The plugin shortcodes will stop working, so the shortcodes themselves will be displayed anywhere they were used.
Interactive Images Have Come of Age
Imagemaps were like some sort of worldwide web black magic when they appeared on the scene. But they were primitive (and often poorly deployed) compared to what we can do now.
You’ve seen that whipping up an image hotspot in WordPress can be done quickly and effortlessly. And we walked through the steps for creating a couple of different kinds of hotspots and how to implement them.
With these building blocks, you can take your interactive images even further. If you can imagine it, you can probably make it happen.
Have you experimented with imagemaps, hotspots, and interaction with images on your site? Do you know of any exciting uses that we didn’t mention? Let me know in the comments!