
A cPanel Domain Alias points or redirects the alias domain to the contents of another. This is helpful if you own several types of one domain. For instance, you could own the “.com” and “.net” versions of your site. In this tutorial, I will show you how to set up a domain alias in cPanel.
How Does a Domain Alias Work?
If we set up ggexample.org as an alias of ggexample.com, a visitor going to ggexample.org would land on the ggexample.com site. The ggexample.com domain would remain in the browser address bar. Essentially, we are pointing multiple domains to the same location.
Note that older versions of cPanel used the term, “Parked Domains” rather than “Aliases.” Functionally, they are the same thing. Only the name has changed.
Set up a Domain Alias in cPanel
Log in to cPanel.
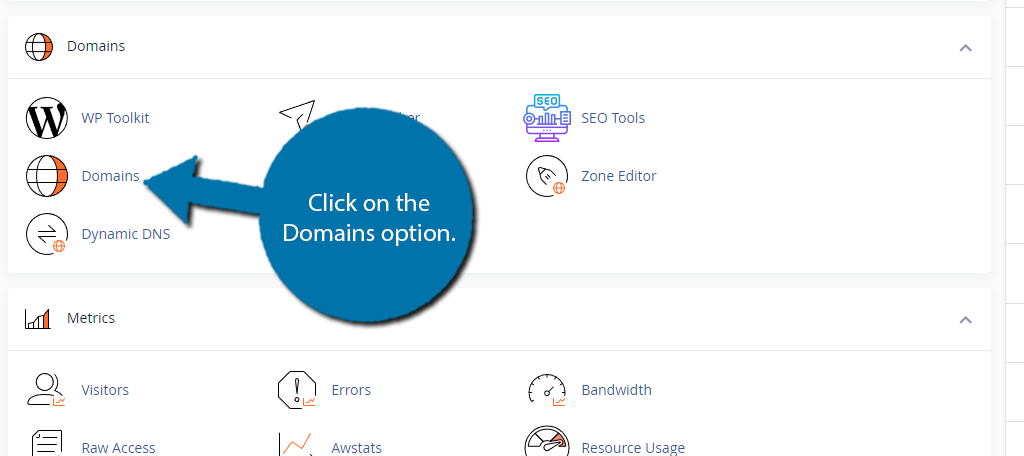
In the “Domains” section, click on the Domains option.
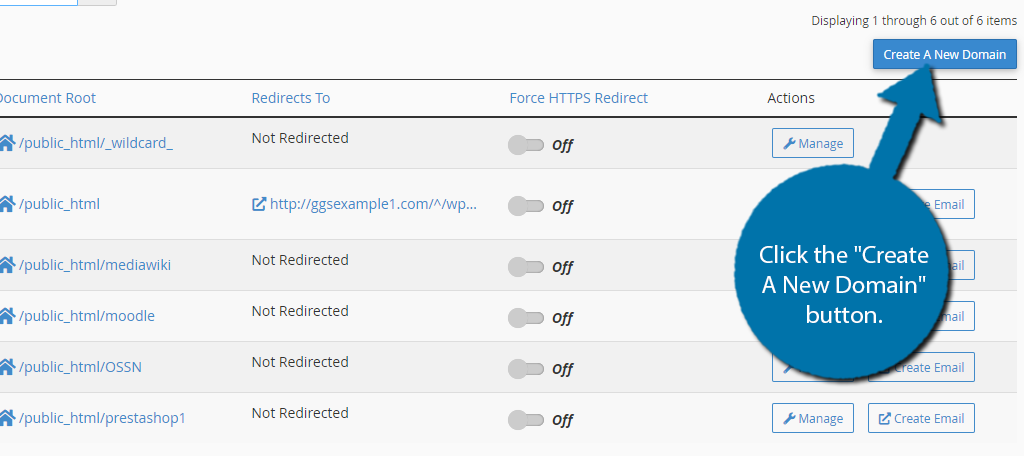
Click the “Create A New Domain” button.
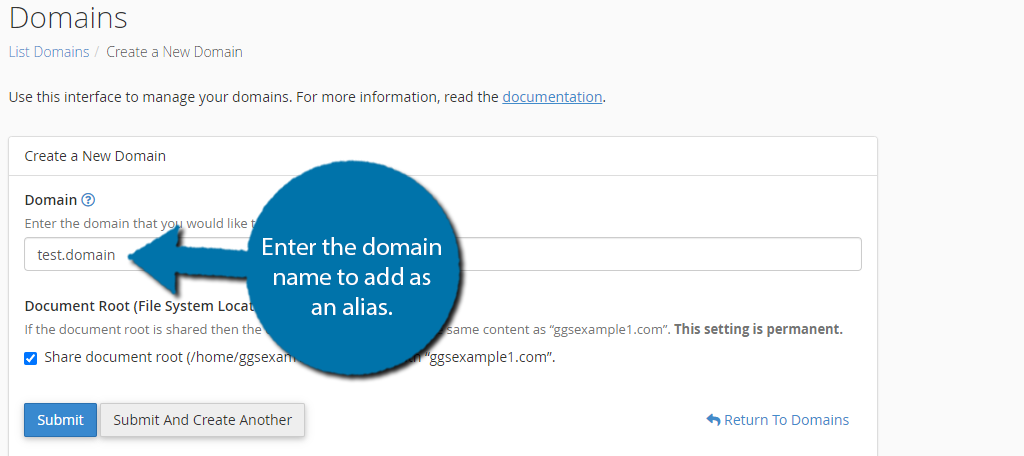
In the “Domain” text box, enter the domain name to add as an alias.
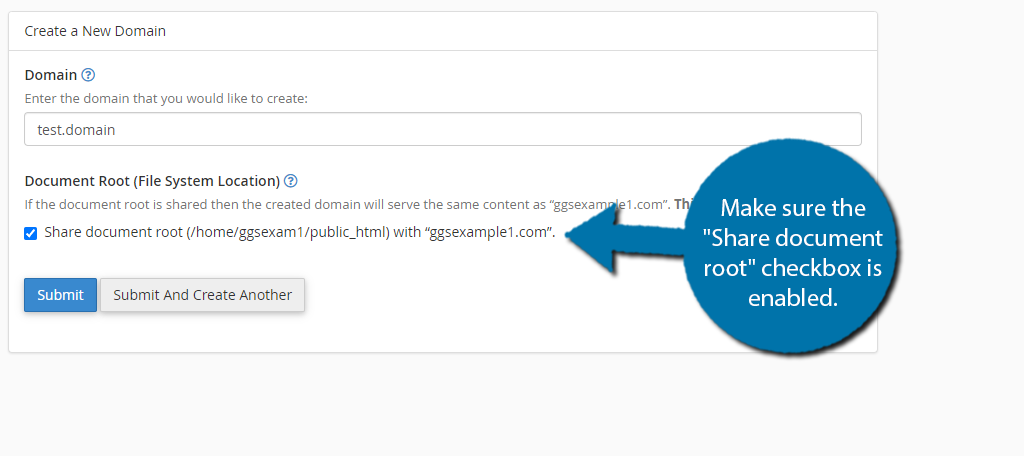
Make sure the “Share document root” checkbox is enabled. This will cause the domain to share the exact same content as the regular site, thus acting as an alias.
To finish up, just click on the “Submit” button and your alias will be created.
Removing the Domain Alias in cPanel
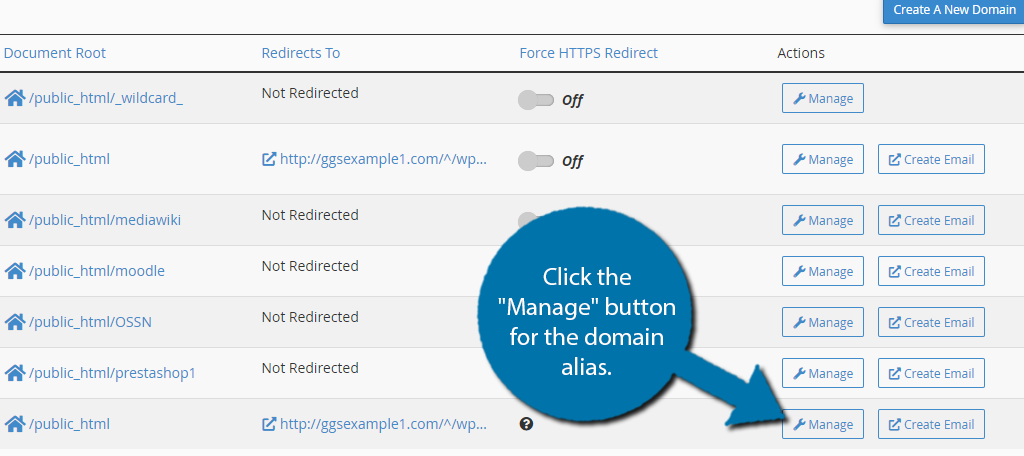
To remove the domain alias, you simply need to delete the domain we just created. To do so, enter the domain section of the cPanel, and click the “Manage” button for the domain alias.
Click the “Remove Domain” button.

That’s All There Is to It
As you’ve seen, Domain aliases are easy to set up. Do you point multiple domains to your website? If so, do you use domains other than the “big three” .com, .net, and .org?
Is it possible to create an email alias for an individual?