
Many websites exist as a portfolio to show off the developer’s skills, past projects, and more. For more experienced users, they can get quite large, which is why adding a filter can help users locate the information they are interested in within your portfolio.
While you may want someone to see everything you’ve made, the truth is, most people are looking for a specific thing or skill set. A filter provides an easier way to find what they are looking for, and can even be its own form of design.
After all, you can customize the filter appearance, which can give you an edge over portfolios that look very basic. Luckily, this is easy to do with a plugin like the Filterable Portfolio.
Today, I will demonstrate how to add a portfolio filter in WordPress.
Why Add A Filter to A Portfolio?
Take a moment and imagine the work a graphic designer does. It is a very broad term that can be responsible for all types of art from making avatars to company logos. Customers want to see what work you have done in specific settings.
A graphic designer could filter the portfolio by categories like Avatars, Banner Images, Logos, and so on.
The same logic can be applied to multiple professions like photography, construction, landscaping, and more. Creating a portfolio that shows off the right skills to the right customer is imperative for finding success in today’s highly competitive world.
It’s also worth pointing out that it is not just potential customers that enjoy filterable portfolios. Search engines also prefer more filtering options. You could treat each filter like its own category, which can help boost rankings.
Luckily, these are easy to add with the right plugin.
How to Add A Filter to A Portfolio In WordPress
Adding a filter to a portfolio in WordPress is very easy when using the Filterable Portfolio plugin. This tool allows you to create individual parts of a portfolio and display them on WordPress.
It is very similar to creating an individual post or page for each item in your portfolio. For example, you could create one filter for logos and another for avatars. It’s simple but highly effective at breaking up large portfolios into more manageable sizes.
Step 1: Install Filterable Portfolio
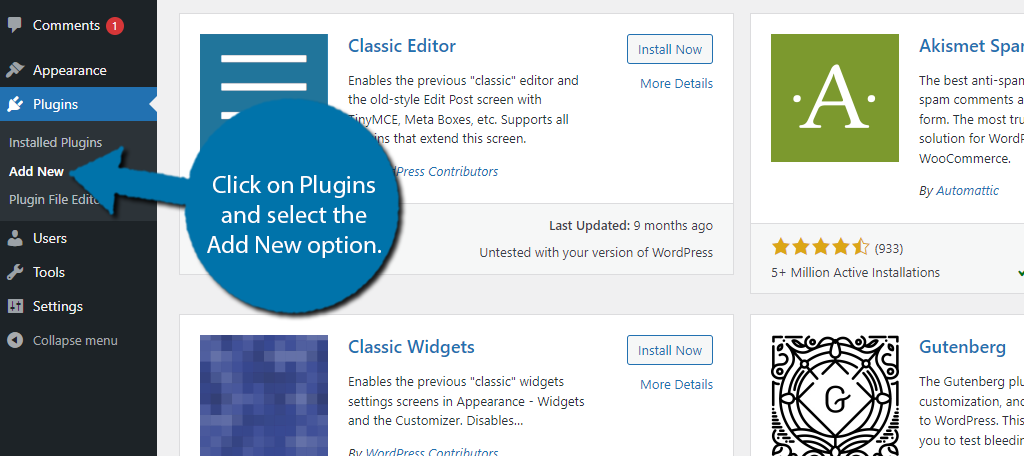
Let’s start by clicking on Plugins and selecting the Add New option on the left-hand admin panel.
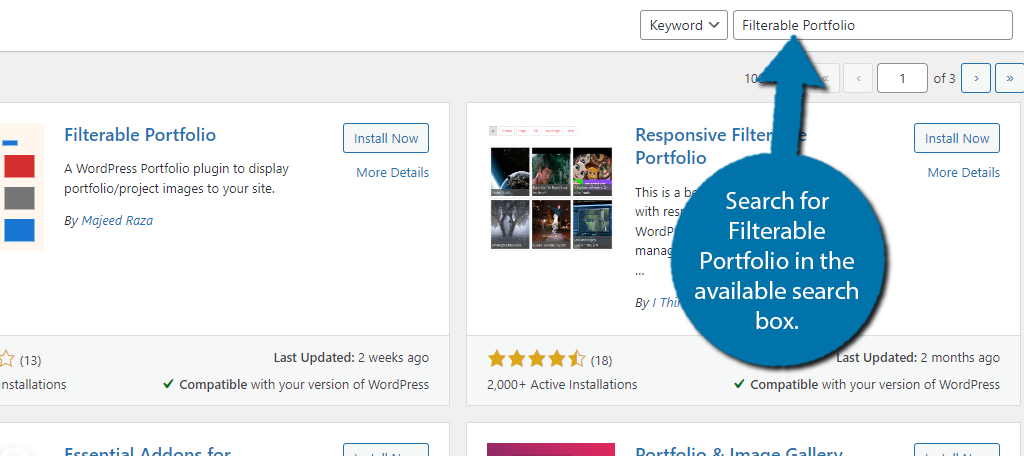
Search for Filterable Portfolio in the available search box. This will pull up additional plugins that you may find helpful.
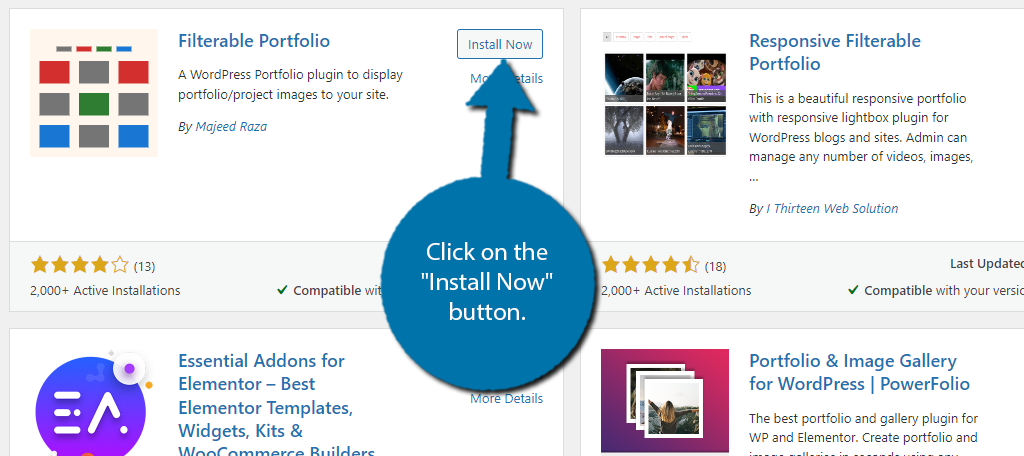
Scroll down until you find the Filterable Portfolio plugin and click on the “Install Now” button and activate the plugin for use.
Step 2: Create Categories & Skills
The plugin has its own set of taxonomies called categories and skills, and just to be clear, these categories are different than the ones available in WordPress. Creating these taxonomies is a great starting point for building your filterable portfolio.
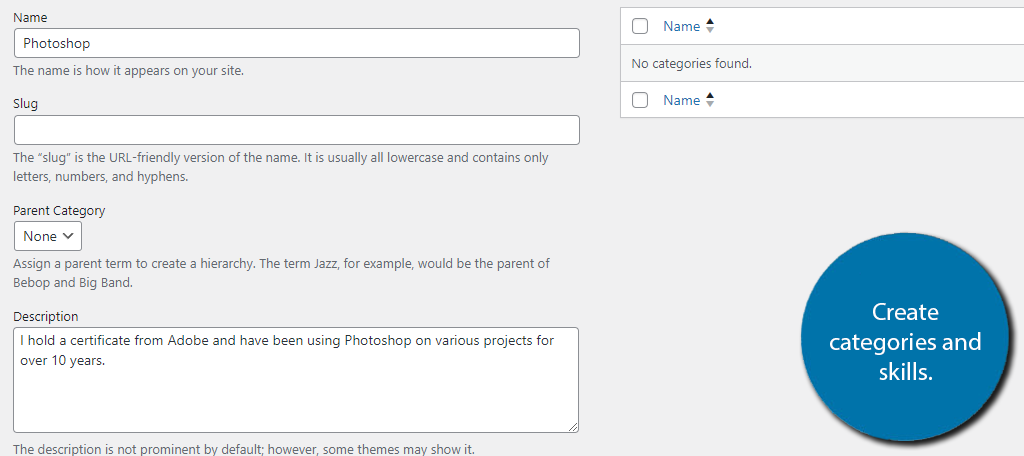
For example, let’s say you want to show off your Photoshop skills. Well, you would want to create a Skill for Photoshop and attach it to projects or art that you created using Photoshop.
It’s very simple and works exactly the same way as adding tags and categories within WordPress.
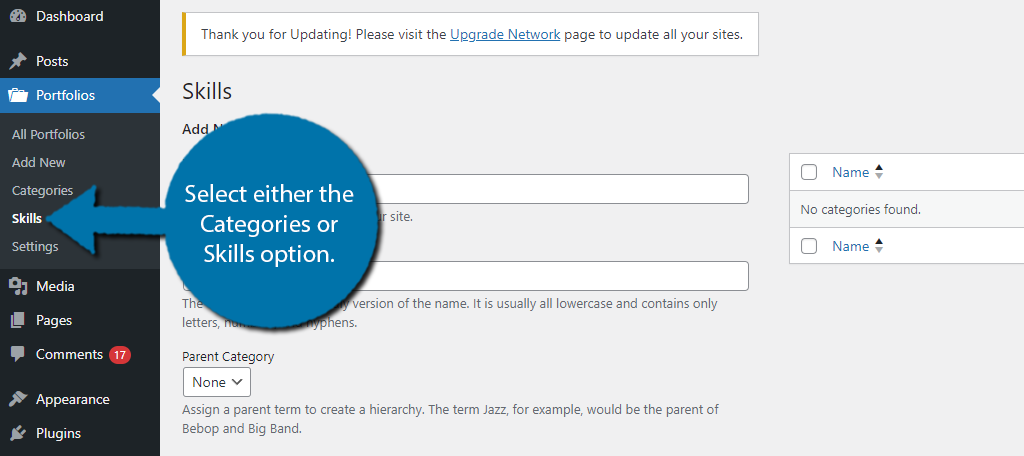
To create a Category or Skill in this plugin, click on Portfolios and select either the Categories or Skills option.
All you need to do is enter the name, Slug (optional as it will be created automatically), and enter a description. In the case of skills, you would enter the skill, and the description should be your proficiency with it.
So, in my example, the skill is Photoshop, and the description explains that I hold an Adobe Certification and have been using Photoshop for over a decade. If you plan on making a dedicated page for your skills, you may not want to go into too much detail.
Click on the “Add New Category” button to finish, and yes, even the skills section has this button.
Simply add as many categories and skills as you need. You can always come back later to add details if you forget something.
Step 3: Configure the Settings
Next, you will want to take some time and configure the settings of the plugin. A lot of the settings just boil down to cosmetic options, which are extremely important but are ultimately up to you. Thus, I will just give a brief overview of what you can find.
To access the plugin’s settings, click on Portfolios and select the Settings option.
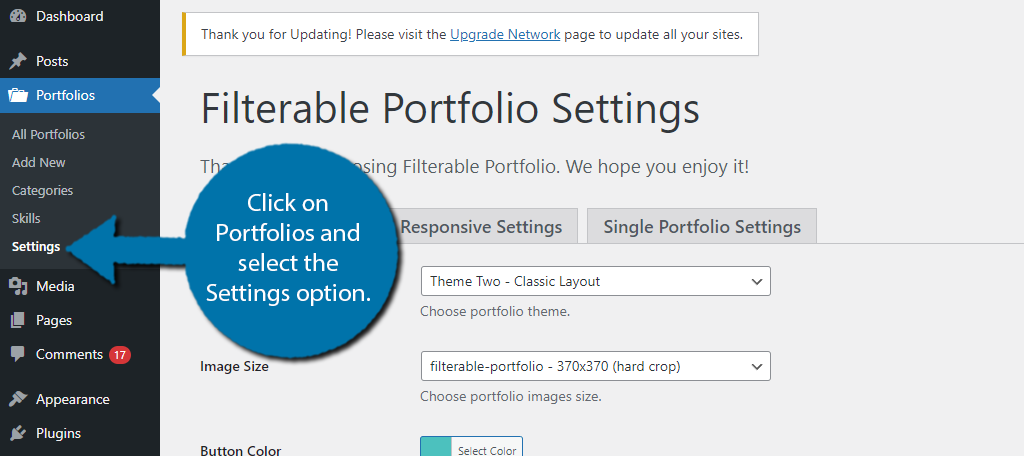
This area is broken up into three tabs. For the most part, the settings are self-explanatory and will ask you to choose an option from a drop-down like the image size or choose a color for the button and whatnot.
You’ll find options to order your portfolio, choose the number of columns, display related projects, and much more.
Step 4: Add Portfolio Content
With the categories created and settings configured, all that is left is to actually add the content to your portfolio. To do so, click on Portfolios and select the Add New option.
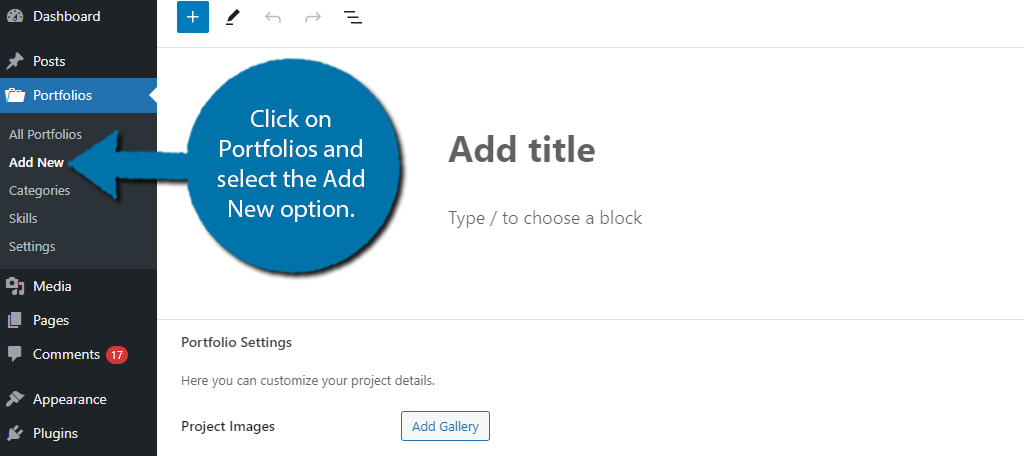
Here, you can add a title and use the Gutenberg editor to add any content. That said, if you are planning to add images, I would advise using the Gallery option that you will find below the editor. Simply, click on the “Add Gallery” button.
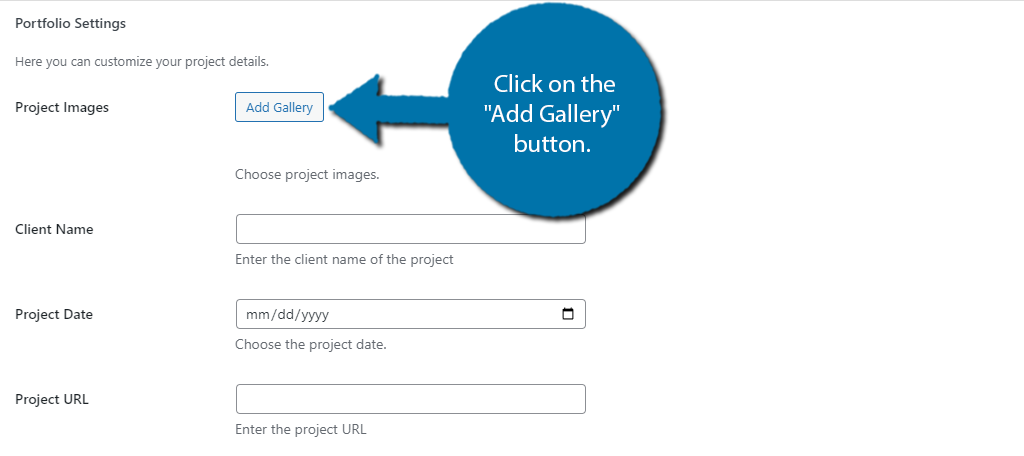
This will open the media library and allow you to add images to the gallery. It is great for showing multiple images for a single project. For instance, you can show a before and after of a landscaping job.
You can also find other information like who the project was for and when it occurred. If the project was a website, you can include the URL to the site itself. There is also a featured project checkbox.
This option will mark the project as something you want to be featured in your portfolio, so only use it if it is the best example of your work.
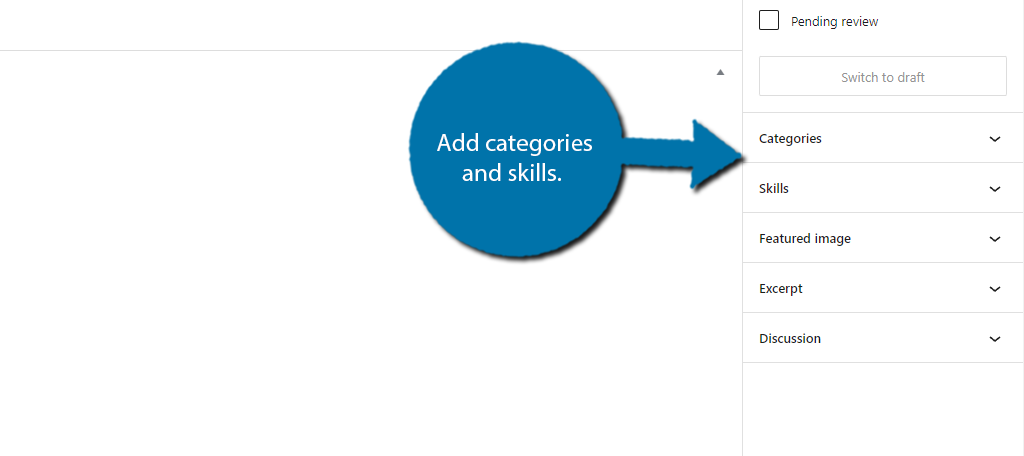
On the right-hand side, you will find even more settings. This includes adding Categories and Skills that you can use to filter your portfolio items with. Be sure to add any categories or skills that apply. You can also find an option for the featured image.
Be sure to add one of the final projects in all of its glory.
And that’s really it. Be sure to Publish the portfolio item and repeat this step for as many projects as you want to show off.
Step 5: Display the Portfolio
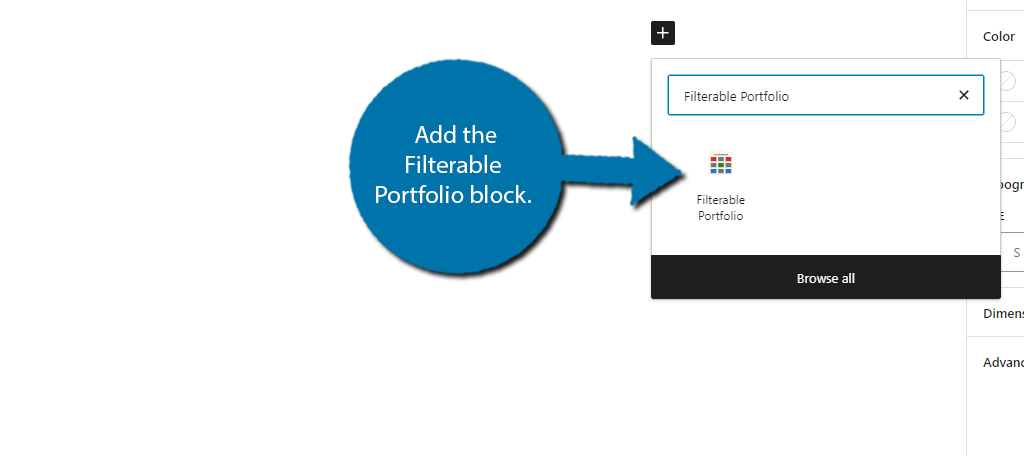
At this point, all you really have left is to display the portfolio. The plugin has its own block that allows you to display part of your portfolio by selecting the filtering criteria.
First, go to any post or page where you want the portfolio present. Once there, add the Filterable Portfolio block.
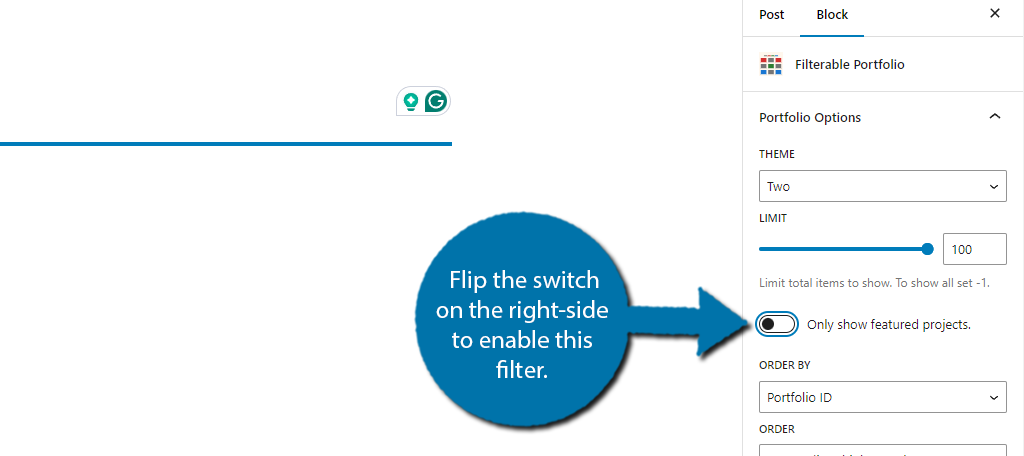
There are several ways you can filter your portfolio. The first is to filter it by only showing featured projects. This is a great way of showing off your best work across multiple categories or skills.
Simply flip the switch on the right side to enable this filter.
If you click on the Filter Settings section, you can choose to filter by categories or by skills. Simply select the one you want and users will be able to search by selecting the appropriate option.
And with that, you know how to add a filter to your WordPress portfolio.
Keep Your WordPress Portfolios Organized
As you can see the Filterable Portfolio plugin makes it quite easy to add filters to your portfolio in WordPress. There is a lot of customization, including the ability to add your own custom CSS.
Doing so can really help your portfolio look better, which is very important for an artist. Luckily, the plugin is accessible at any skill level, so most will not have any trouble getting it to work.
I hope you found this tutorial helpful in learning how to add a filter to your portfolio in WordPress.
What kind of filters did you create for your portfolio? Has adding filters made it easier for customers to find what they are looking for?