Does your website need a quality security plugin to guard against cyber-attacks? The Wordfence Security plugin may be exactly what you’re looking for. The Wordfence Security plugin is the most popular security plugin with over 2 million active installs and that is really impressive considering how many great security plugins exist.
Website security should be one of the biggest concerns of any website. Any downtime on your website will directly affect your website’s income and extended downtime could make you lose visitors permanently. Cyber attacks can be prevented by using a security plugin and it takes almost no time to set one up. Today, I will demonstrate how to set up the Wordfence Security plugin in WordPress.
How Can Wordfence Security Protect Your Website
There are many ways you can keep your website protected and they all require a security plugin. Wordfence Security’s rise to the most popular security plugin was no accident. This plugin can protect your website from a wide array of cyberattacks.
Specifically, it protects against hackers, DDoS, and malware. This is accomplished in part by the web application firewall, which can easily track malicious traffic. Its database allows it to identify all of the common malware that invades websites.
One of the best features is that all websites that run Wordfence communicate with each other. This means if website A is attacked by hacker Z, then website B can automatically block hacker Z before he tries anything on another website.
This essentially means the more websites that use Wordfence the better it is for everyone. The number of features and security customization is perfect for any website.
Wordfence Security

Wordfence Security is a powerful and popular plugin that provides a firewall and security scanner. it comes packed with security features and includes the newest firewall rules, malware signatures, and malicious IP addresses it needs to keep your website safe.
Add to that the 2FA and a suite of additional features, and Wordfence becomes one of the most comprehensive WordPress security solutions available today. The plugin includes all sorts of security tools and protects your site on all fronts. It includes:
- WordPress Firewall
- A Security Scanner for WordPress
- Login Security
- Wordfence Central
- Security Tools
Powered by the constantly updated Threat Defense Feed, Wordfence Firewall stops you from getting hacked. Wordfence Scan leverages the same proprietary feed, alerting you quickly about security issues or if your site is compromised. All-in-all, you will be hard-pressed to find a better security plugin for your WordPress website.
How to Setup Wordfence Security
Today I will demonstrate how to set up the Wordfence Security plugin in WordPress. It’s a great plugin that is widely used. Setting up the Wordfence Security plugin is very simple, but there are a few areas you really wanna make sure are running, like the Firewall.
Step 1: Install and Activate the Plugin
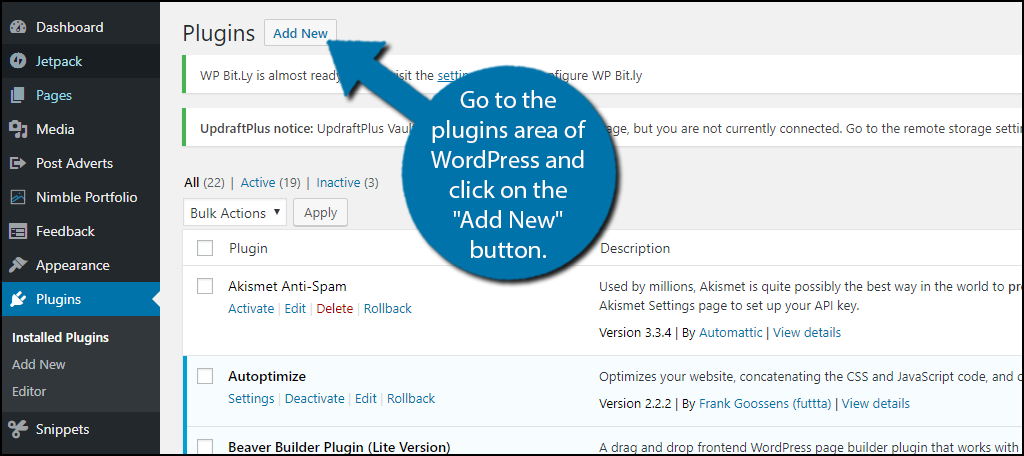
Let’s start by going to the plugins area of WordPress and click on the “Add New” button.
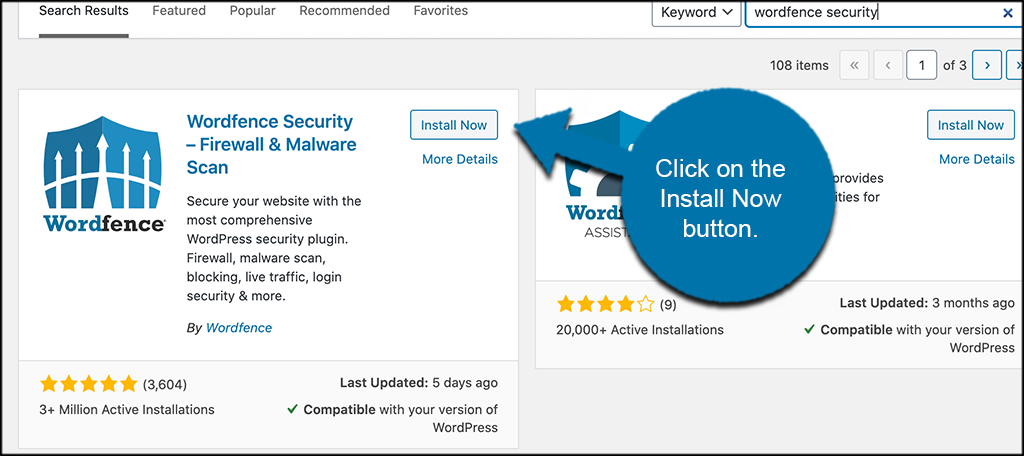
Search for Wordfence Security in the available search box. This will pull up additional plugins that you may find helpful.

Scroll down until you find the Wordfence Security plugin and click the “Install Now” button and activate the plugin for use. Upon activation, you will be asked to submit an email to receive security notifications on, but this is optional. You will also be given the option to take a tour, which will show you all of the features that the plugin offers and where you can edit their settings.
Step 2: Access the Plugin Dashboard
On the left-hand admin panel, click on Wordfence and select the Dashboard option. This will pull up the main settings page of the plugin. All of the information you need to see is on this page including the last scan, malware blocked, IP addresses blocked, etc.
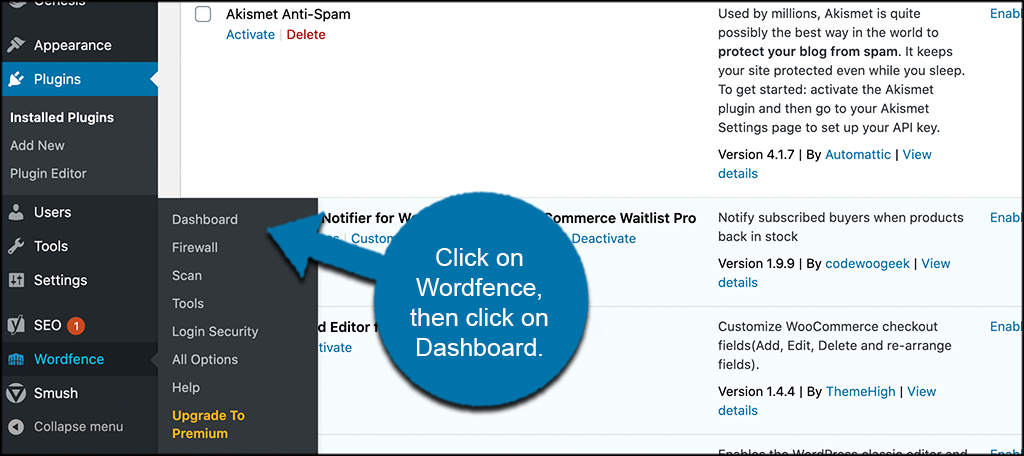
You can see this is now an available option after you have activated the plugin.
Step 3: Configure Dashboard Options
Once you click over to the dashboard area of the plugin, you will see that this is where you can view all sorts of data. You can also set up the global options for the Wordfence plugin. Simply click on the “Global Options” tab to open them up.
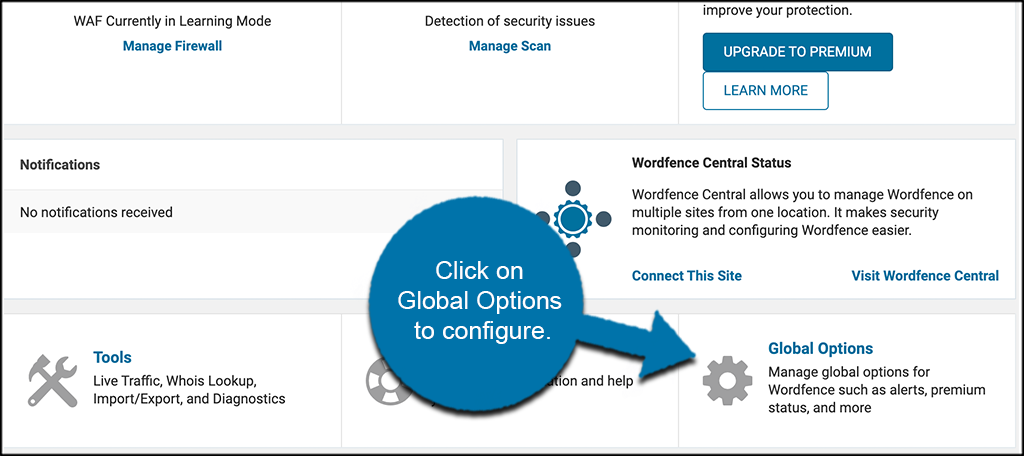
You see there are some configuration choices to make. Go ahead and fill those out how you see fit.
Let’s explore a little more of the plugin.
Step 4: View the Firewall Option
You can now click over to the “Firewall” option and check that out. You will see a link option listed under the main “Wordfence’ tab in the left side menu area.
Once on the page, you can set your blocking options and manage all the IP addresses you choose to block.
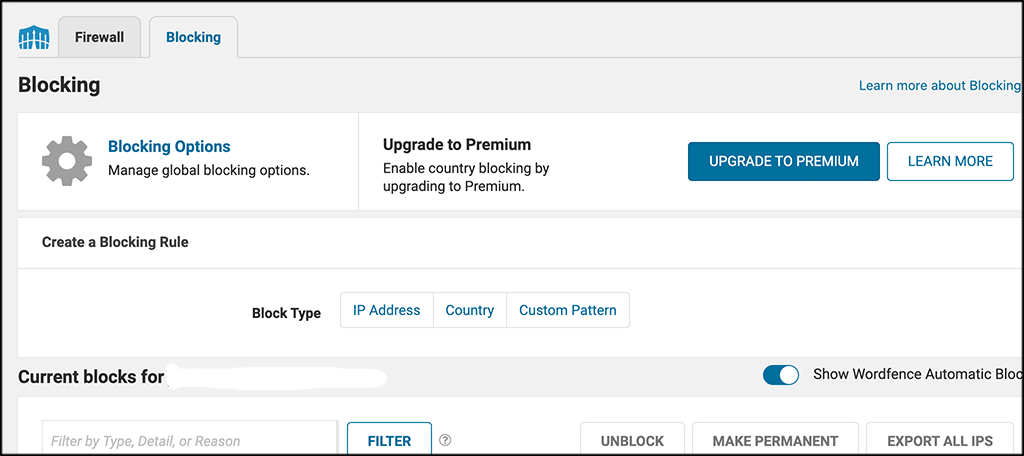
Now, click on the “Firewall” tab to manage your settings in this area. This is arguable the most important aspect of the plugin. Go ahead and set these options how you see fit.
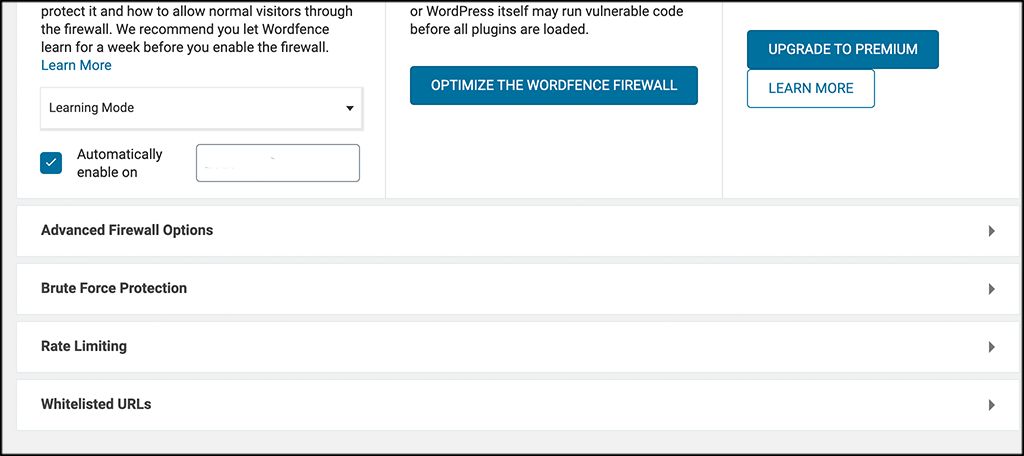
Step 5: Optimize the Wordfence Firewall
While in the Firewall section, you will notice a button titled “Optimize the Wordfence Firewall.” This is an important part of the setup process.
The most significant part of this security plugin is the Firewall. It will prevent most malicious activity on your website. Go ahead and click on that button now.
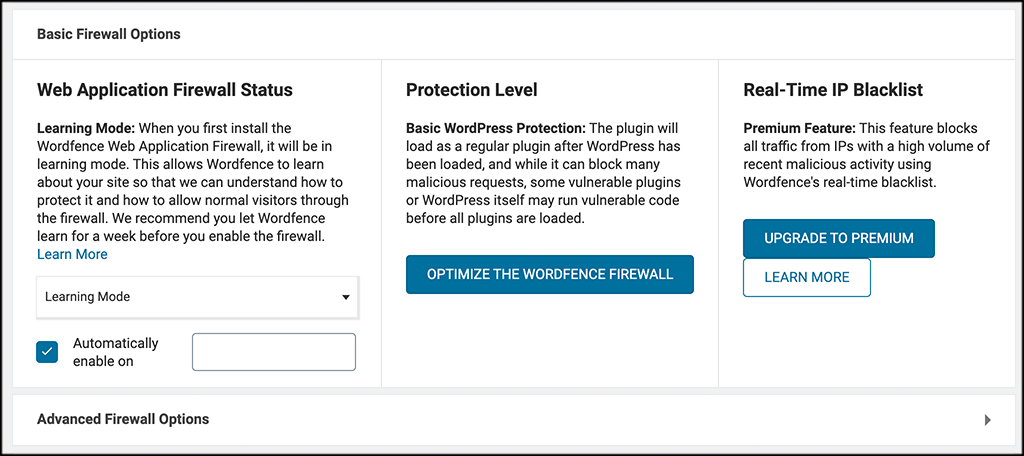
A popup box will appear with some information in it. The system will run a test to determine the best settings to use. You may pick your own, but I would recommend following Wordfence’s recommendation. Especially if you’re a beginner.
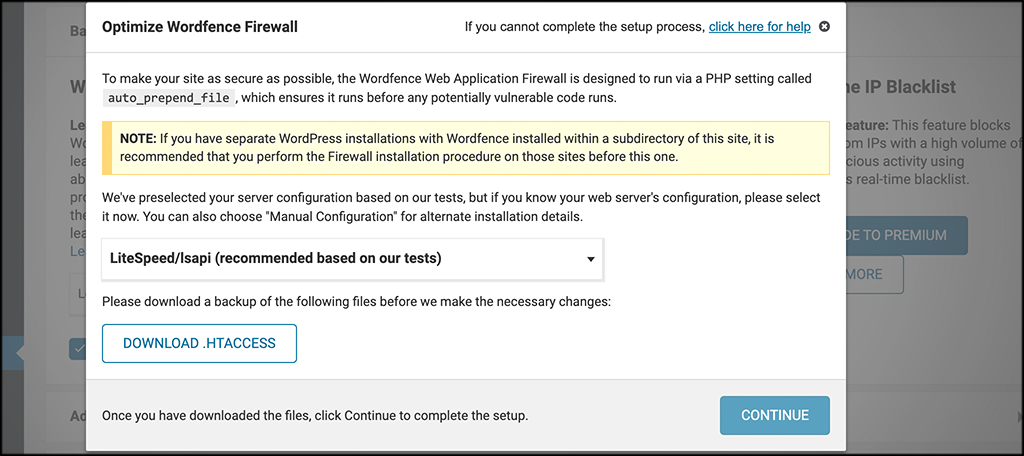
Click on the “Continue” button after you download the .htaccess file. This will complete the process and changes will have taken place.
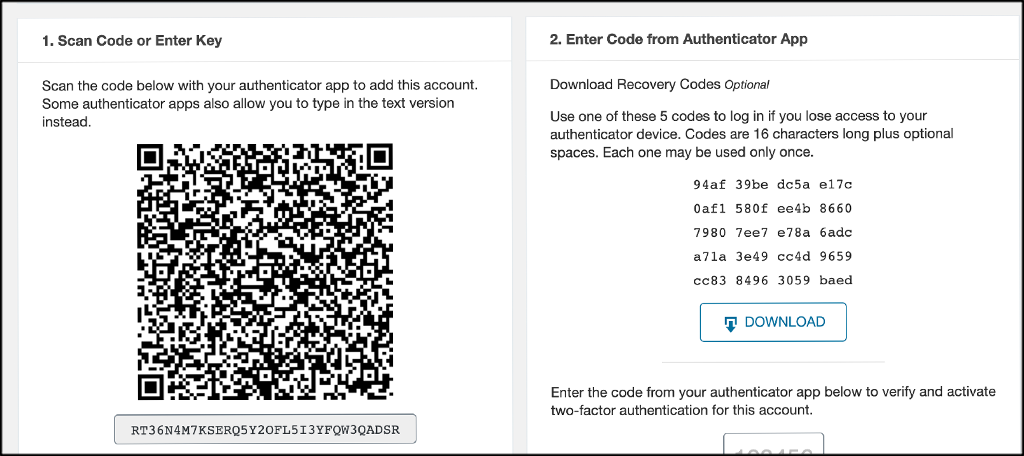
Step 6: Set Up Two-Factor Authentication
Wordfence comes with the ability to set up two-factor authentication for extra login security. Click on the “Login Security” link. Once on the page, you can see that there are a couple of options you can set up and out two-factor authentication in-place if you want.
Step 7: Perform a Scan When Needed
You can now click on the “Scan” option. From here you can perform a scan of your site at any time. Simply click on the “Start New Scan” button.
The free version comes with a default automatic 24-hour scan. Once the scan is complete you will see a full list of problems it has found.
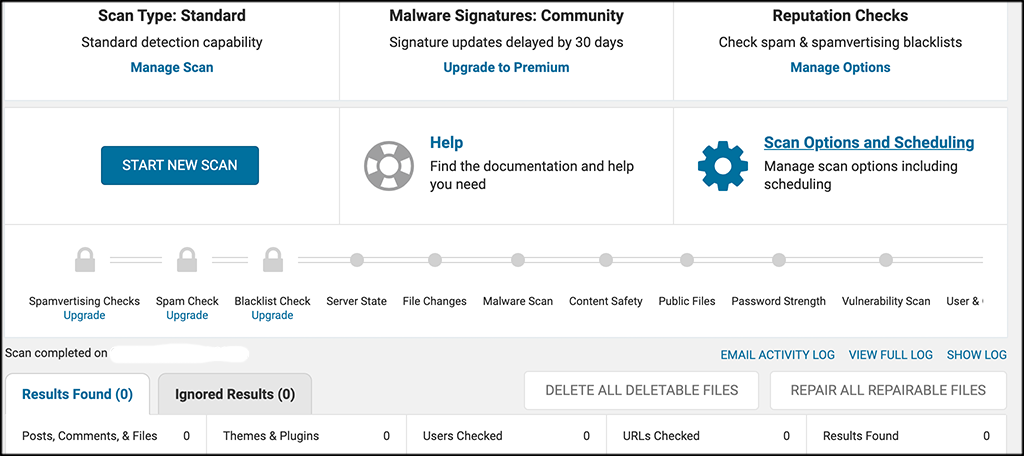
You can also set scan options and scheduling as well. The free version is more limited in this area, but some movement is allowed.
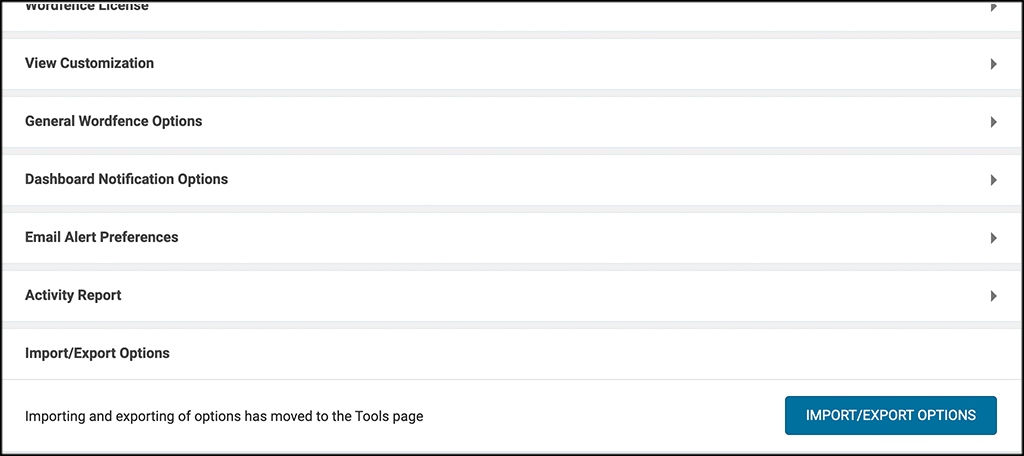
Step 8: View Tools Tab
Last, but not least, is the “Tools” link. The plugin gives you some available mechanisms to use when needed. These include
- Live Traffic
- Whois Lookup
- Import/Export
- Diagnostics
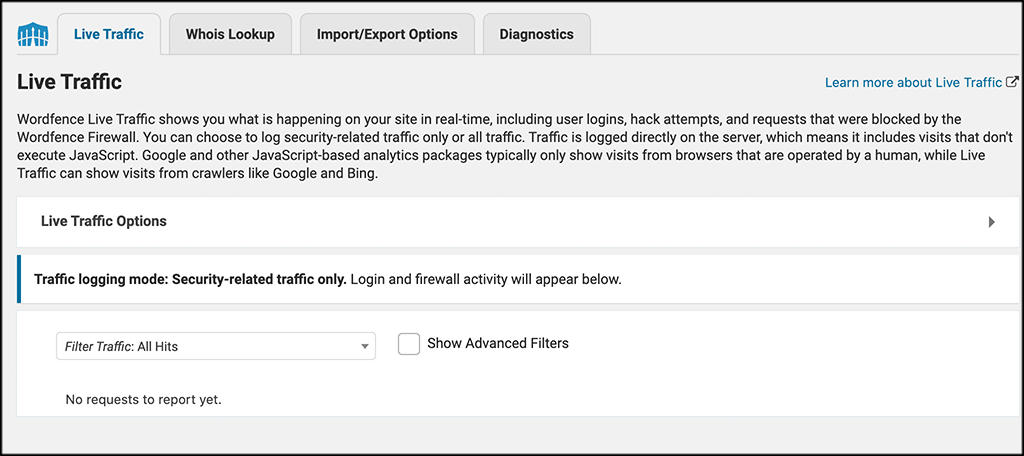
Feel free to go through these and use them whenever you need to.
Note: Click on the “All Options” tab to get a complete list of all the options we went over above listed in one place.
Congratulations, you have successfully installed and set up the Wordfence Security plugin. You can change your settings and scan your website at any time. Remember there are many features that are exclusive to the premium version of Wordfence and you can upgrade at any time, but the free version will be able to guard your website without any issues.
Alternative Security Plugin Options
Website security is very serious and hundreds of security plugins are available to combat these hackers. Here are some alternative security plugins that I can recommend trying.
BulletProof Security

BulletProof Security is another security plugin that can keep your website safe. It has many of the same features as Wordfence like a Firewall and .htaccess support but also has many additional features like a built-in backup. This makes it extremely easy to recover when something goes wrong.
All In One WP Security & Firewall
All In One WP Security & Firewall is a very popular plugin with over 900,000 active installs. It has all the necessary tools to guard your website from malicious intent. Its optimization ensures that it will not slow down your website while providing protection from incoming threats.
SiteGuard WP Plugin
SiteGuard WP Plugin is another popular plugin with over 300,000 active installs. The best part about this plugin is it does not have a Pro version. This means you’re getting the full package when you install this plugin on your website. Unfortunately, this one does not come with a Firewall or other features found in most security plugins, but it can certainly protect your website from everyday threats.
Final Thoughts
Security is one of the biggest concerns that any website developer will face in today’s world. There is a surplus of hackers trying to gain valuable data from your website or just individuals who like to take websites down for fun. These people can cause downtime for your website and downtime will result in a loss of profit for your business.
Regardless of who is targeting your website, you must be prepared and have a security system in place to counter them. You should also create a backup of your website to recover from any damages caused by hackers. As long as you take security seriously and proactively try to protect your website you should be able to avoid any serious security situations.
How many IP addresses are blocked by Wordfence daily? How many security issues were uncovered by a Wordfence Security scan?
I am completely disenchanted with Wordfence. I was exposed to brute force attack that my host stopped. Wordfence showed nothing. I contacted Wordfence and asked whether I had set up as required. I told them I had. Since then , nearly a week NO response.
1. Whathe? doesn’t stop OR show attack
2. Support service doesnt deal with it
Hello Andrew,
Sorry to hear that you’ve had issues with Wordfence. I’m not sure if you’re aware, but GreenGeeks has launched a service called WordPress Protect that is enabled on our hosting platform.
This info is somewhat out of date beginning with the plug-in’s name is different . . .
Hello Galen, I’m not sure what plugin name is different, as I’ve checked all four on the page. But, these steps are out of date and I’ve slated it for a rewrite in the near future. Thank you for pointing it out. 🙂