Just about every single website uses images because they are great at getting the visitor’s attention. However, they can also slow down your website considerably, especially when the image files are large. Using the lazy load technique can help speed up your website.
This technique will only load an image on a page when a visitor will see it. As a result, the overall load speed of the page is much faster. This is especially important for websites that have photo galleries in place.
Today, I will demonstrate how to do this with the Lazy Load plugin.
What Can Lazy Load Do For Your Website?
Lazy load is a powerful technique for developers to use that can impact more than you think.
First, let’s start with the obvious, images. In reality, the technique was developed specifically for them, and it works wonders. Not only does improving your website’s load time improve the user experience, but it also improves your website’s SEO.
After all, speed is a confirmed factor that Google and other search engines use for rankings.
While images are still extremely popular, video content has become the most desirable content on the internet. And you can now even lazy load videos. In fact, this plugin will specifically replace YouTube iframes with the preview thumbnail.
Not every visitor is going to click on a video, so there’s no reason to have it slow down your page.
Note: This should not impact videos that are set up to automatically play when a page is loaded.
How to Add Lazy Load to WordPress
Step 1: Install Lazy Load
The Lazy Load plugin by WP Rocket is quite simple to set up and it has over 100,000 active installs. This plugin allows you to use lazy load on both images and video. You can also choose to disable lazy loading on specific content. This is great for stuff you want visitors to see.
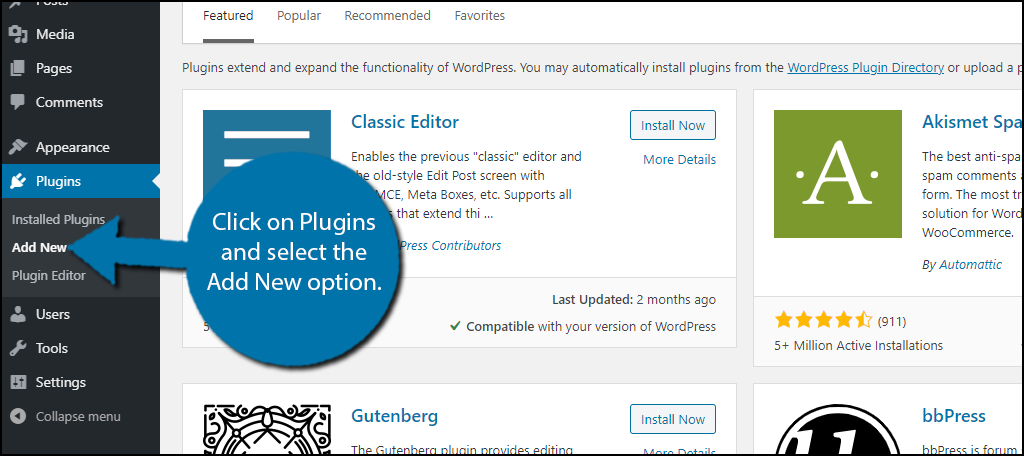
Let’s start by clicking on Plugins and selecting the Add New option on the left-hand admin panel.
Search for Lazy Load in the available search box. This will pull up additional plugins that you may find helpful.

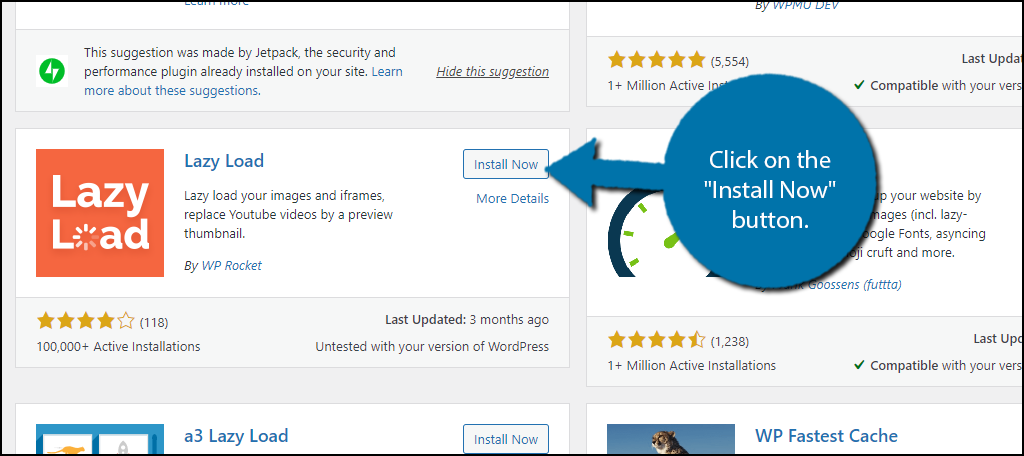
Scroll down until you find the Lazy Load plugin and click on the “Install Now” button and activate the plugin for use. It’s the one created by WP Rocket.
Note: It’s worth mentioning that if you currently use Jetpack, you will see an option to enable the lazy load module within it. It’s another great option to consider, especially if you already have Jetpack installed.
Step 2: Enable Lazy Load
Now I said, this plugin was simple to use and I wasn’t lying. In reality, it consists of three checkboxes that you can use to turn the feature on and off on different kinds of content.
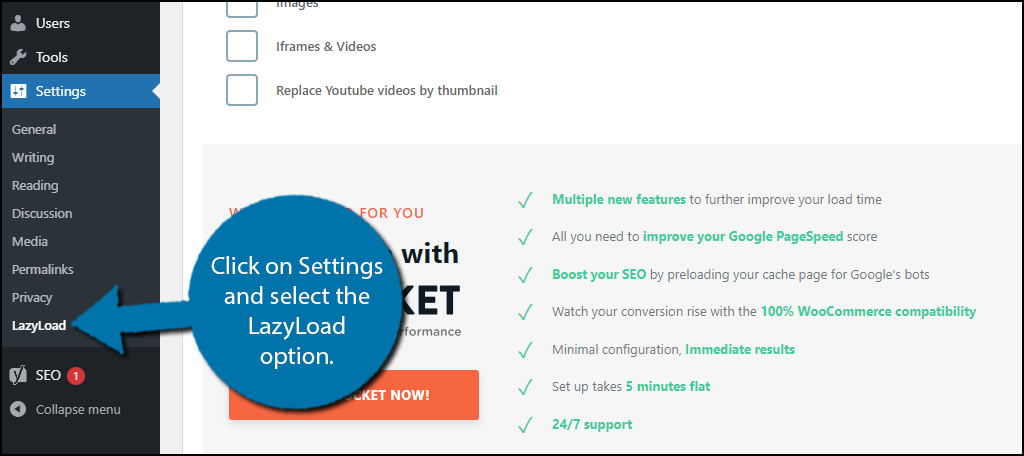
On the left-hand admin panel, click on Settings and select the LazyLoad option.
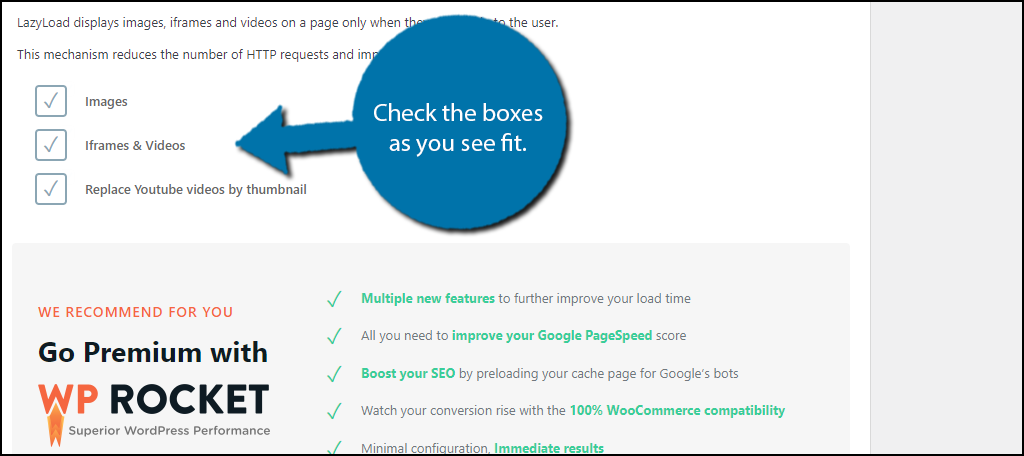
There are three checkboxes to interact with that enable lazy load on images, iframes & videos, and the ability to replace YouTube video with a thumbnail image.
If you check the box for images or iframes, this will reduce the number of HTTP requests a page will make when it is loaded. As a result, it loads much faster.
The lazy load thumbnail replacement option does exactly what it sounds like. This can have a tremendous impact on pages with video content. This is especially important for mobile users. Smartphones have come a long way but still pale in comparison to a desktop.
Thus, loading multiple videos on a page can add seconds for mobile users, especially on older hardware. Just keep in mind this option is not great if the video is the main feature of the page.
Check the boxes as you see fit.
You will also see an ad for the premium version of this plugin, WP Rocket. This premium plugin focuses on maximizing your website’s speed and goes far beyond just adding lazy load to images and videos. It is a great choice for any developer looking to speed up their website.
Click on the “Save Changes” button.
You can then start seeing how much faster your pages are loading. Make sure to test it on both image and video content to see the results.
Step 3: Disable Lazy Load
The options available in the previous step were global options, meaning that they affected all of the content on your website. In actuality, you might only want to exclude a few pages from implementing this feature.
And in some cases, you may just want to exclude individual images. However, the plugin doesn’t have this as a feature, at least natively. Instead, the plugin page does provide the code necessary to achieve these results.
Note: Since you will have to edit the code of your website, I highly recommend making a backup of your website. This will ensure that if something goes wrong, you can restore your website and avoid any downtime. That said, nothing is very hard.
To turn off lazy load on specific pages, add the following code to your functions file:[ht_message mstyle=”info” title=”” show_icon=”” id=”” class=”” style=”” ]
add_action( ‘wp’, ‘deactivate_rocket_lazyload_on_single’ );
function deactivate_rocket_lazyload_on_single() {
if ( is_single() ) {
add_filter( ‘do_rocket_lazyload’, ‘__return_false’ );
}
}
[/ht_message]
If you are interested in disabling the plugin on certain images, you can add the following property to you img or iframe tag:[ht_message mstyle=”info” title=”” show_icon=”” id=”” class=”” style=”” ]data-no-lazy=”1″[/ht_message]
The only other way to disable this feature is to uncheck the box. Hopefully, in the future, more options for disabling are added to help beginners.
Congratulations on setting up the Lazy Load plugin in WordPress.
Optimize Your Images and Videos
Utilizing lazy load is a great way to improve your website performance, but it is not a replacement for optimizing your images. In fact, even if you do use it, optimizing your images will still improve the page performance and user experience.
After all, those images need to load in at some point.
Not only will this affect your website performance, but it can also save server space. The typical image should only be a few kb in total. Only very large images should ever exceed this amount. For websites with thousands of images, this is essential.
In some cases, website owners may be paying hundreds of dollars for extra server space because they’re not optimizing images.
These tips also apply to videos, and potentially even more so. Videos are huge files, especially if you choose to actually host the video on your own website. This is never recommended, instead, always upload it to YouTube and embed it on your website for the best load times.
Remember, private videos do exist on YouTube and are great options for membership websites.
Make Your Website Fast
There’s no doubt about it, fast websites benefit both the user experience and your rankings. There’s no reason to ever settle for anything less than a fast and streamlined website. However, images and video content can slow down posts and pages considerably, but this can be mitigated.
That said, they are far from the only things that can impact website speed. For instance, did you know that plugins slow down your website? This is why many developers try to avoid adding new plugins whenever possible.
Thus, this tutorial may only be the first step in achieving the fastest results.
Did you choose to disable the Lazy Load plugin on any pages? How much faster are your pages loading?
lazy load not work for me with WP Rocket….
Hello there, you might want to make sure you don’t have any other plugins trying to run lazy load at the same time. I know that Jetpack and Autoptimize don’t play nice together on my website, so I had to disable the lazy load from Jetpack. Check to make sure you don’t have conflicts. Other than that, you might have to contact WP Rocket’s developers. From what I hear, they’re pretty quick to respond.