Online education is a booming industry. You can get a slice of that pie by offering courses through a learning management system on your WordPress website. Today, let’s take a look at MasterStudy and how it can help.
Whether you want to teach staff or offer online classes to visitors, this free learning management system might be what you need.
What Is MasterStudy LMS?
MasterStudy is a learning management system, or LMS, that lets you easily add courses to your WordPress website. Although the Pro version does open a lot more possibilities, the free version can easily get you started.
With the ability to set up courses, quizzes, and other educational content, you can build a robust method for teaching just about anything from your website.
This free LMS can be helpful for freelance professionals and business owners alike.
How to Install MasterStudy LMS in WordPress
Installing the MasterStudy plugin is actually quite easy. In this tutorial, I’ll walk you through setting up your first course.
Trusted by more than 10,000 other website developers, it has a strong following thanks to its easy-to-use layout. In just a few moments, you’ll be able to offer your own online courses.
Step 1: Install and Activate MasterStudy
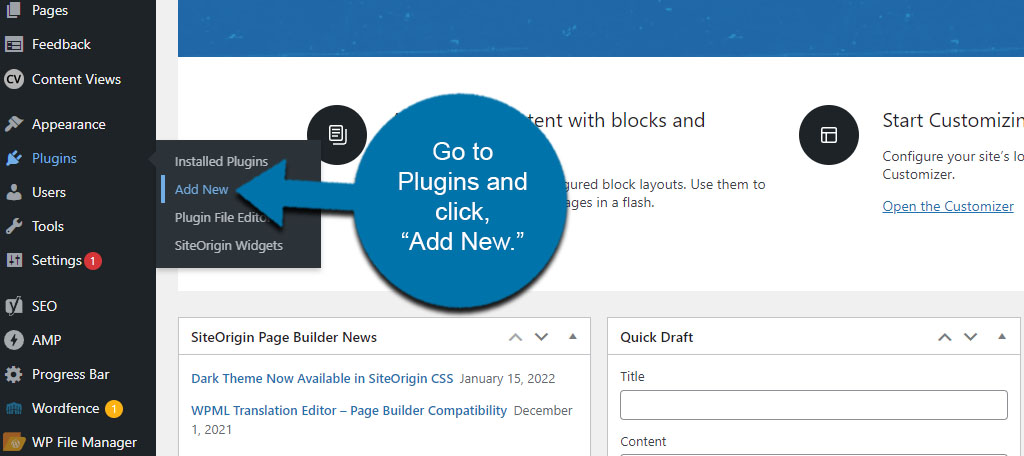
First, we’ll need to install the MasterStudy LMS plugin.
Go to the Plugins area of WordPress and click, “Add New.”
Enter for “MasterStuday” in the Search field provided.
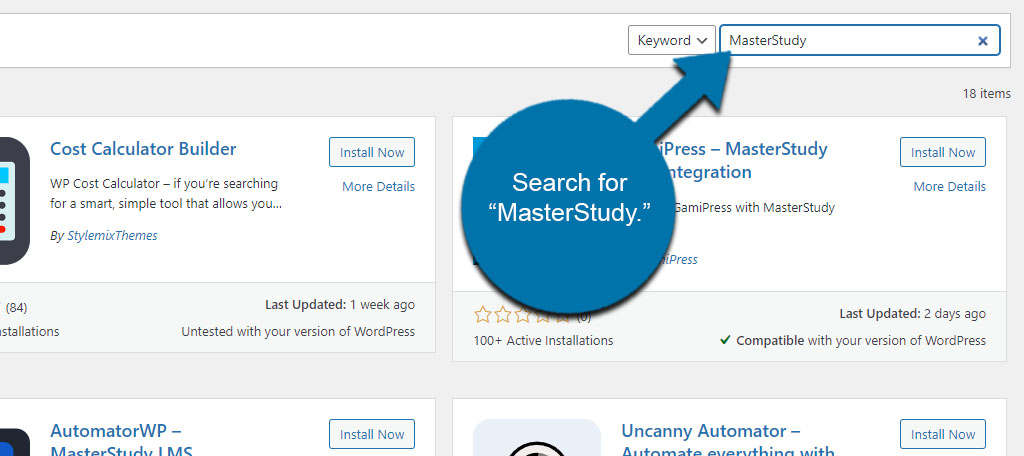
Install and activate the MasterStudy LMS plugin.

Upon activation, you’ll be taken to an opt-in page for notifications from Freemius.com. This is completely optional as you can either “Allow & Continue” or click the “Skip” button.
For this tutorial, I’m just skipping the opt-in service.
Step 2: Adjust Your MasterStudy Settings
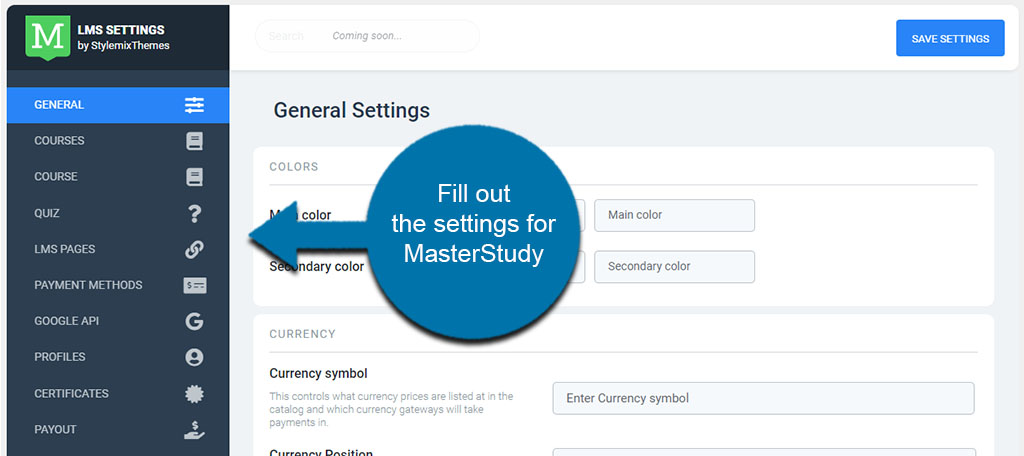
After the opt-in page, you should be taken to the LMS Settings page of the plugin. From here, you can adjust all of the settings that control everything from the colors to your GDPR Privacy Policy page.
You may also see a warning that you don’t have pages assigned in MasterStudy. These are part of the settings below, and using the LMS Pages feature will remove this warning.
Let me explain…
LMS Settings Page
- General
In this page, you’ll modify things like color, currency, and guest checkout. Though, you have other options available in the Pro version. - Courses Settings
Here, you can adjust the courses page of where you show them and how it behaves. - Course Settings
The Course Settings page lets you control how each individual course is displayed on your website, such as difficulty level and lesson page style. - Quiz Settings
You only have two options on this page; the Quiz Styles and Media Type. - LMS Pages
On the LMS Pages section, you can assign pages of your website for specific needs. If you do not have any already made, simply click the “Generate Pages” button. - Payment Methods Settings
Here, you can check all the boxes that apply for the types of payments you’ll accept for your courses. - Google API Settings
In this section, you can set up reCaptcha through your Google account to reduce spam. - Profiles
In the profiles area, you can set options for things like email confirmations, adding students to courses, archive pages, and more. - Certificates Settings
Unfortunately, you do not have access to automatic certificates unless you upgrade to the Pro version. - Payout Settings
This is another section you’ll need to upgrade to access. This runs a cron for automatic payouts. - GDPR Settings
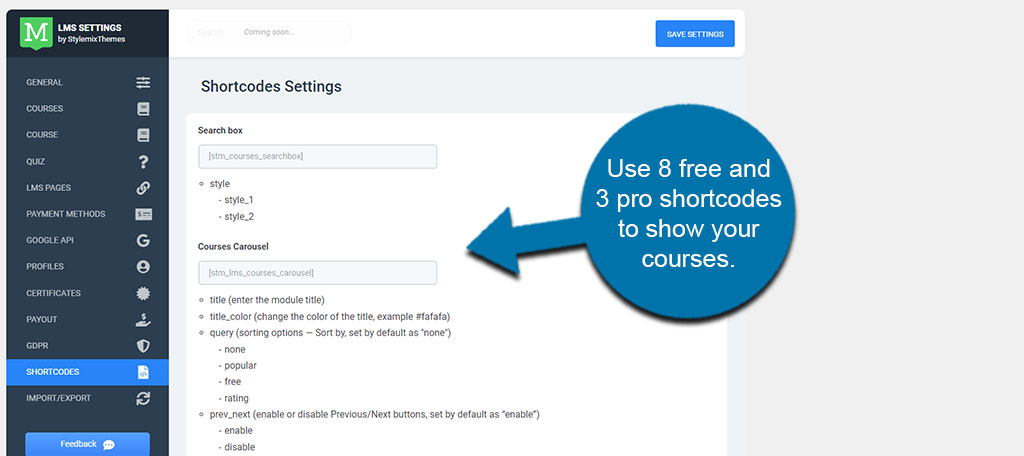
In the GDPR Settings section, you can assign your Privacy Policy Page as well as the label visitors click to accept the terms. - Shortcodes Settings
In this section, you can copy one of many shortcodes available to use for MasterStudy LMS on your website complete with examples. - Import/Export
You can import and export settings for MasterStudy should you decide to transfer your site or migrate to a new domain.
Once you’re done, just click the “Save Settings” button.
Step 3: Set Up Your Course in MasterStudy
With the main settings out of the way, it’s time to set up the course. Now, a lot of the next couple of sections are going to depend on the type of course you’re setting up and how you want to teach.
However, I’ll go through the settings as best I can to help you figure out the best course of action for your needs (no pun intended).
Click the “Courses” option on the left under MS LMS in WordPress.

This page will show you all of the courses you’ve created. Since this is our first course, the list should be empty.
Click the “Add New” button above the course list.
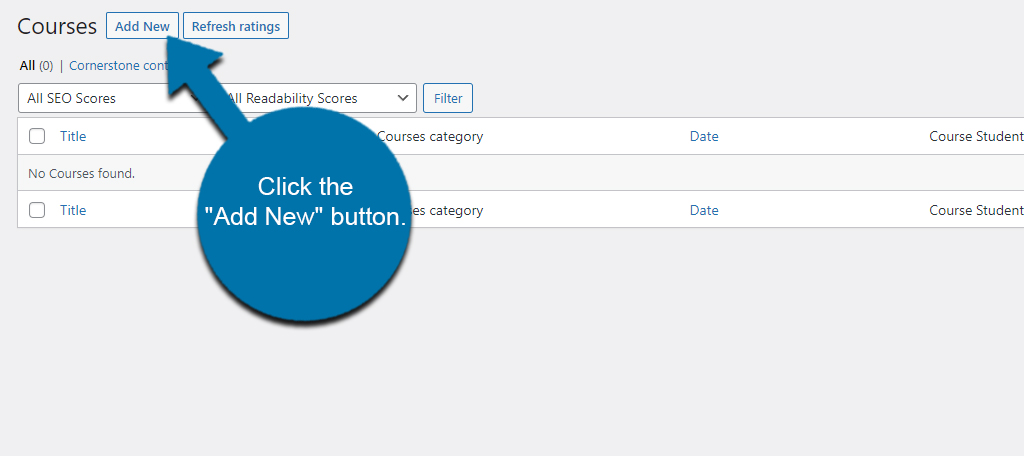
From here, you’ll enter all of the important information about the course you’re offering.
Add New Course
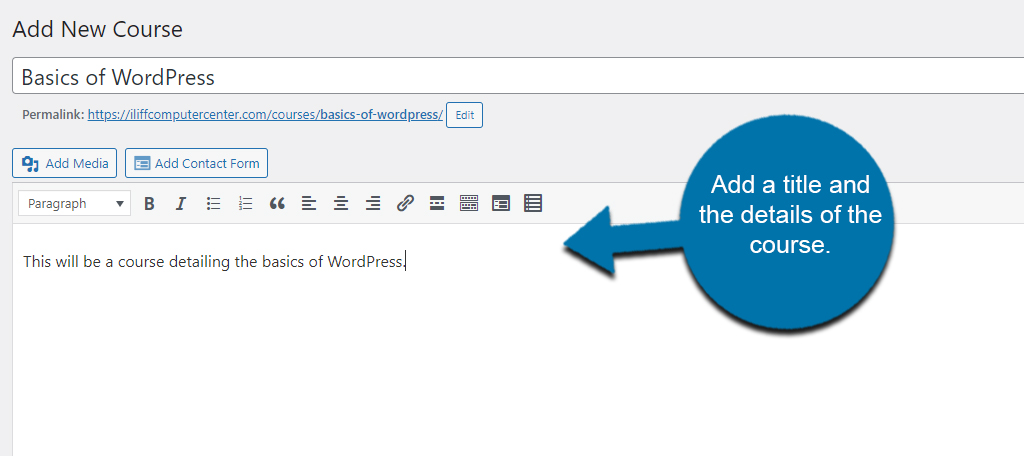
In this section, you’ll give your course a title and fill in pertinent details. It works similar to how the Classic editor of WordPress operates in that you have several editing and writing functions in the areas provided.
Add Course Curriculum
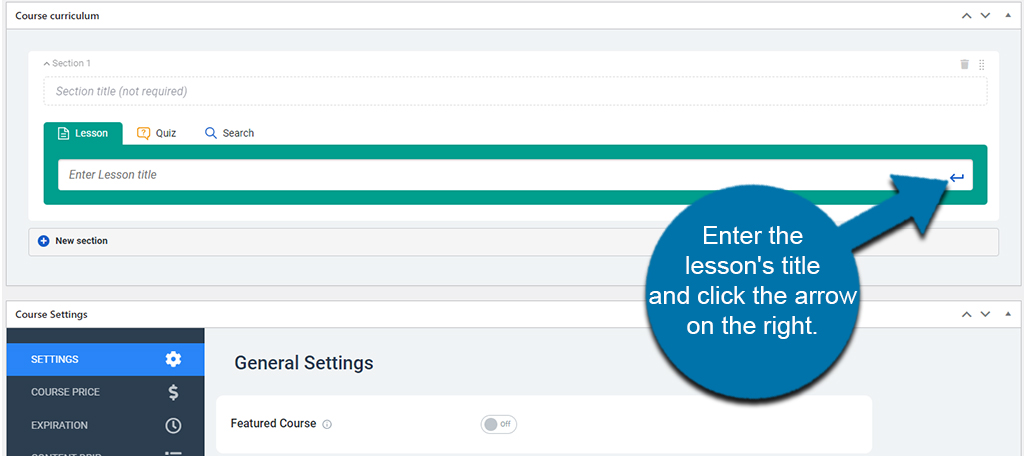
Under the course details, you’ll find the “Course curriculum” section. Here, you’ll add the curriculum to your course, which includes the lessons and quizzes.
To add a new lesson, enter the lesson’s title and click the arrow on the right.
Once the title is created, you’ll need to add content to the lesson. This includes videos and materials you may want to share with your students for this particular lesson.
To edit the lesson’s details, hover over the lesson and click, “Edit.”
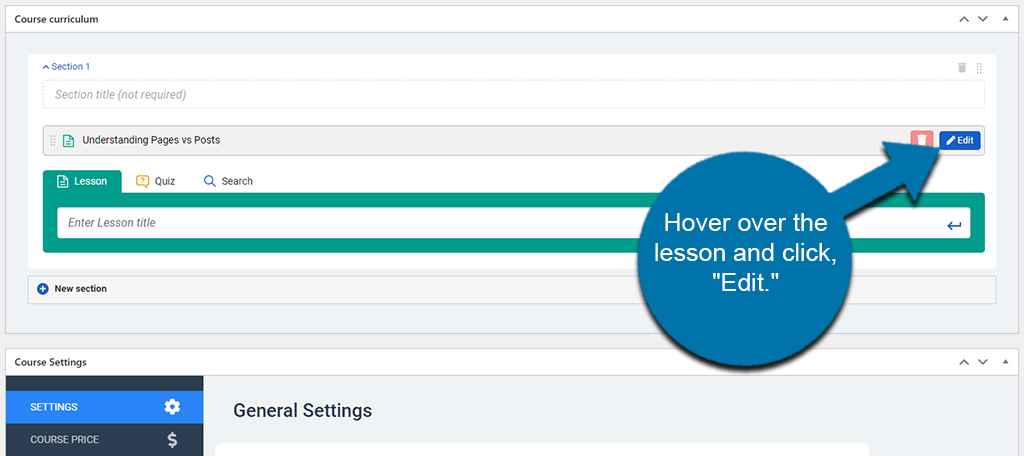
MasterStudy will then open a new editor window in your browser to make those edits.
This lesson includes the details of what students will learn, the type of lesson (text, video, or slideshow), the estimated duration, enabling the preview, front-end description students will see, lesson video URL, and uploading any lesson materials students will need.
This will depend greatly on the type of lessons and courses you plan on delivering. But once you’re done entering that information, click the “Update” button on the right.

Once you’ve updated the lesson, you can close that particular web browser window.
Add Your Quizzes to MasterStudy
One of the things you’ll want to add to your course is a quiz or two. Then again, this really depends on the type of courses you’re creating.
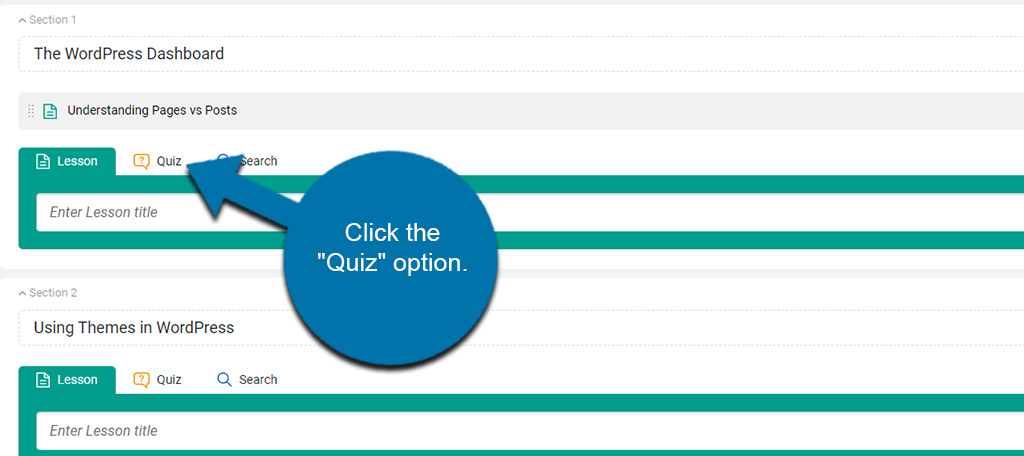
In the event you want to offer quizzes, click the “Quiz” option.
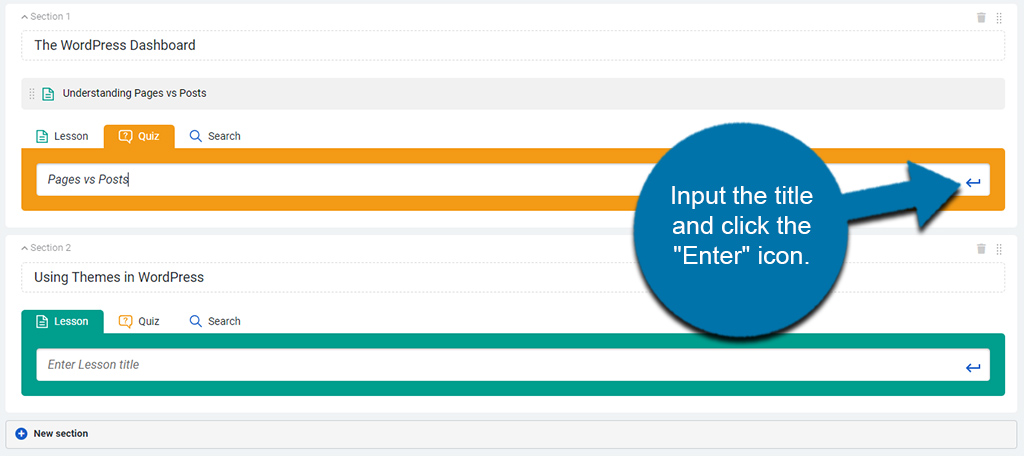
Input the title of your Quiz and click the “Enter” icon.
Like the courses, hover over the quiz and click the “Edit” button.
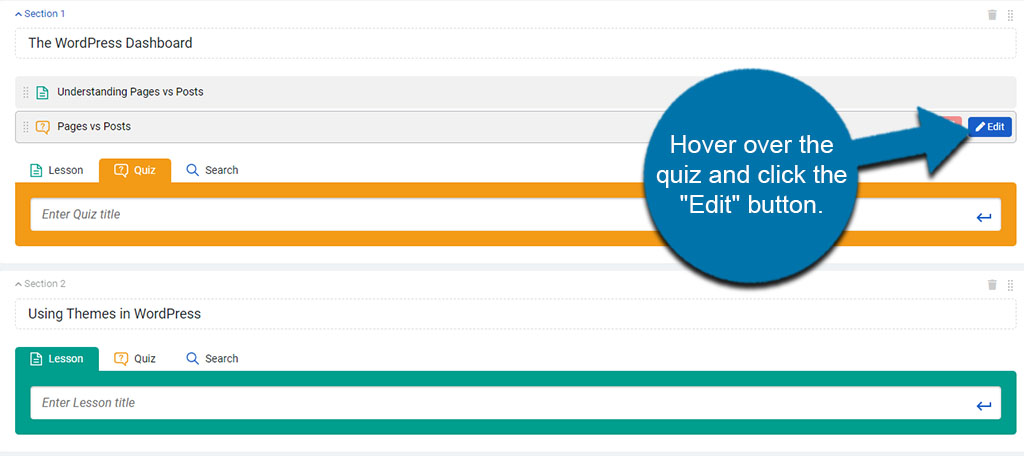
A new tab will open for editing the Quiz.
From here, you can edit all of the details regarding the quiz including:
- A description of the quiz for the student.
- The questions on the quiz itself. You can choose between: single choice, multiple choice, true or false, item match, image match, keywords, and fill the gap.
- Quiz Settings lets you manage how the quiz is displayed including duration, showing correct answers, passing grade percentages, points deducted if it had to be retaken, and randomizing questions.
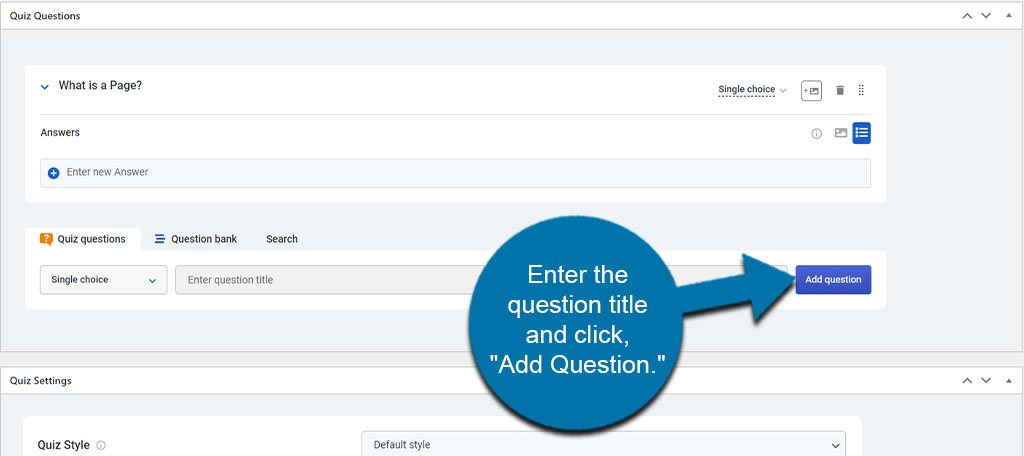
To add questions to the quiz, enter the question title and click, “Add Question.”
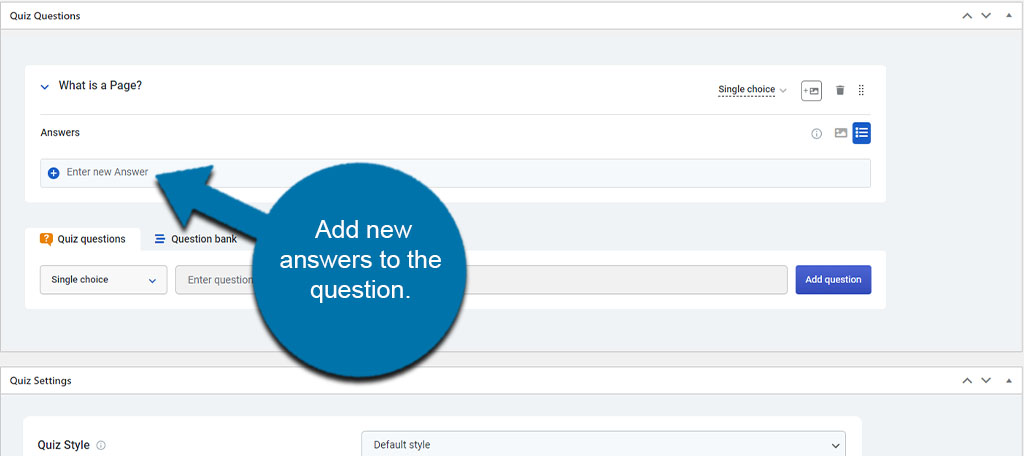
From here, you can then add new answers to the question.
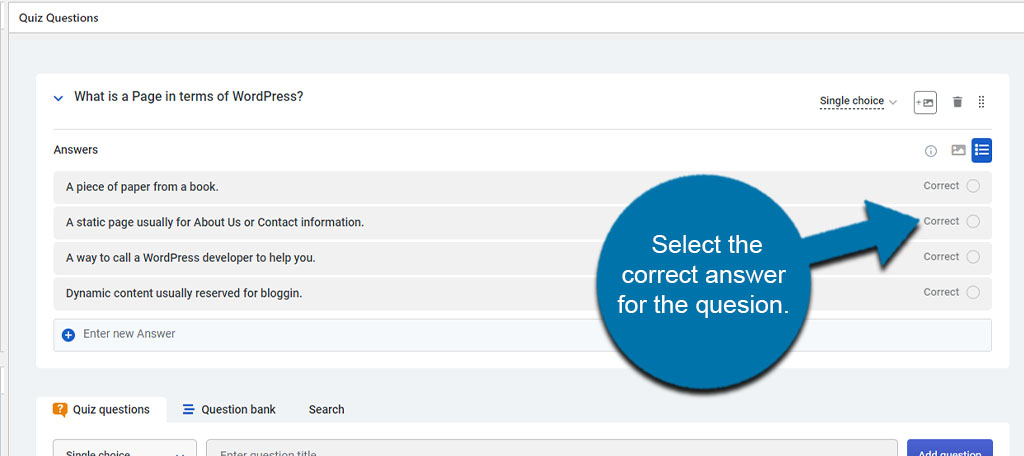
After entering your answers, select the one that is correct for this question of the quiz.
You can add as many questions as you like, add images when appropriate, move the questions around using drag-and-drop, or utilize a Question bank of your stored questions for multiple uses.
There’s quite a bit you can do in the Quiz portion of MasterStudy. Just make sure you’re questions are appropriate for the difficulty level.
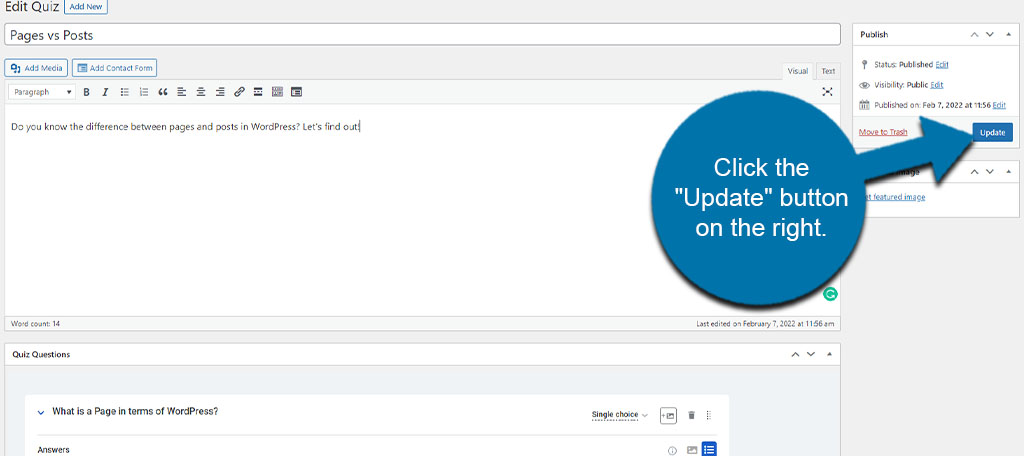
Once you’ve filled out all of the information for this particular quiz, click the “Update” button on the right.
You can come back to the quizzes at any time to add, remove, or change the questions as you see fit. Once you’ve updated the quiz, you can close this tab and go back to your course.
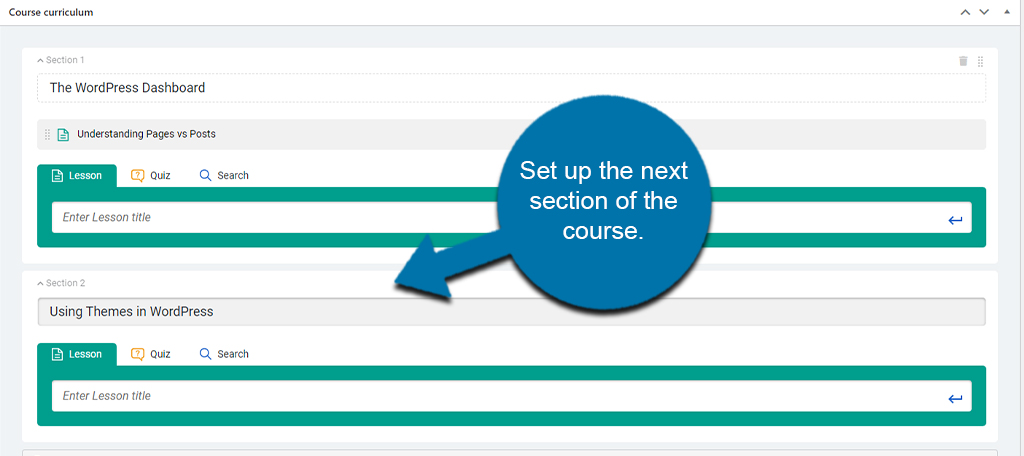
Adding Sections
Now, you can put as many lessons in the course as you want. Or, you can separate the materials according to sections. These are completely optional, but they might be helpful and more streamlined for larger courses that have many lessons involved.
Simply give your first section a title and then click the “New section” option at the bottom.

This next section will work exactly like the first. Add your lessons, quizzes, and whatnots for the class.
Course Settings
Under the curriculum section, you’ll find the pertinent settings for this particular course. This includes details such as the level, current student count, duration, video durations, and status.
These are all settings you’ll have to decide for yourself as each course is different.
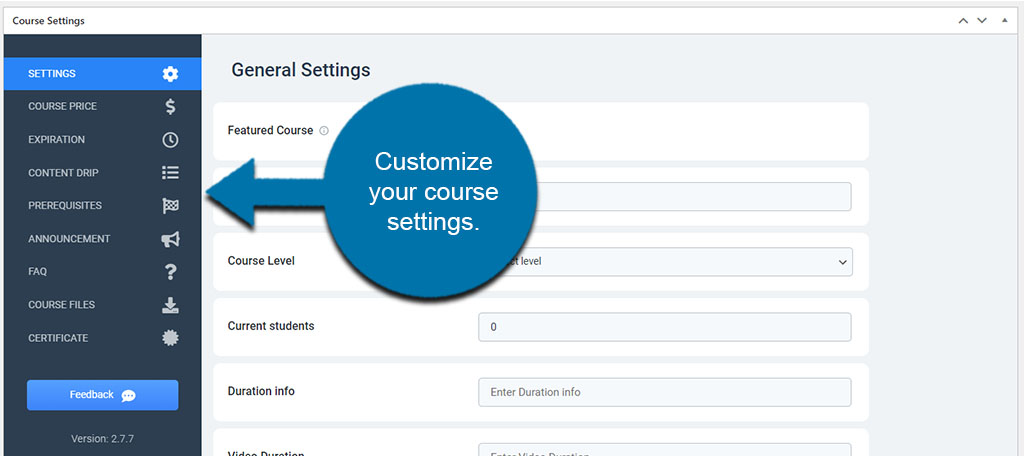
Make sure you set all of the settings that are in the left sidebar, though. This entails:
- Course Price: How much the course is as sales pricing if applicable
- Expiration: Setting a time limit on the course
- Announcement: Where you can post special announcements for the course
- FAQ: The FAQ section lets you answer common questions about the course and what students can expect
- Course Files: What files you plan on utilizing in the course if any?
The other elements in the Course Settings for MasterStudy are only available for Pro version users. If you plan on making this a strong staple on your website, it might be worth the upgrade.
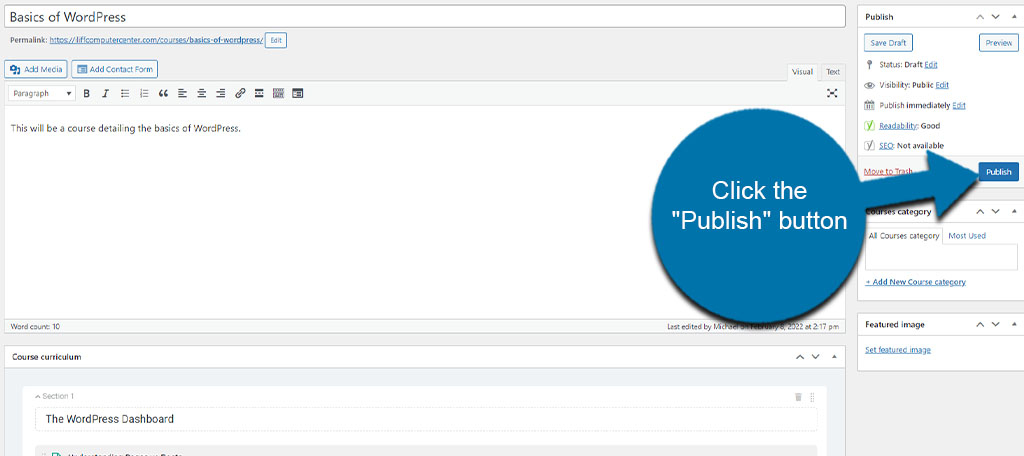
Once you’re completely done setting up your course, click the “Publish” button for it to go live on your website.
Step 4: Set Up the Course Page
MasterStudy has a few different ways you can show courses on your website. You can either create a page specifically for the plugin to use, or you can copy and paste the different shortcodes available.
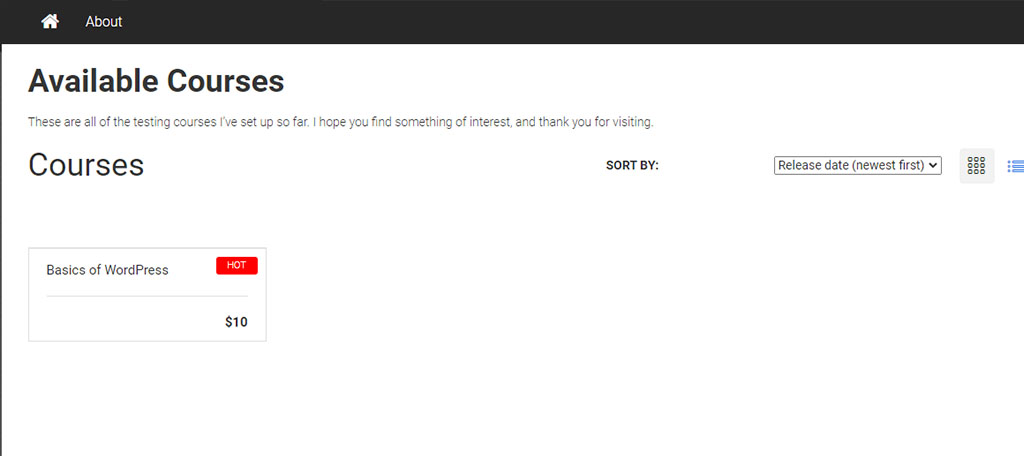
For example, I created a page in WordPress called, “Available Courses” and set the page in the “Courses” area of the main LMS Settings.
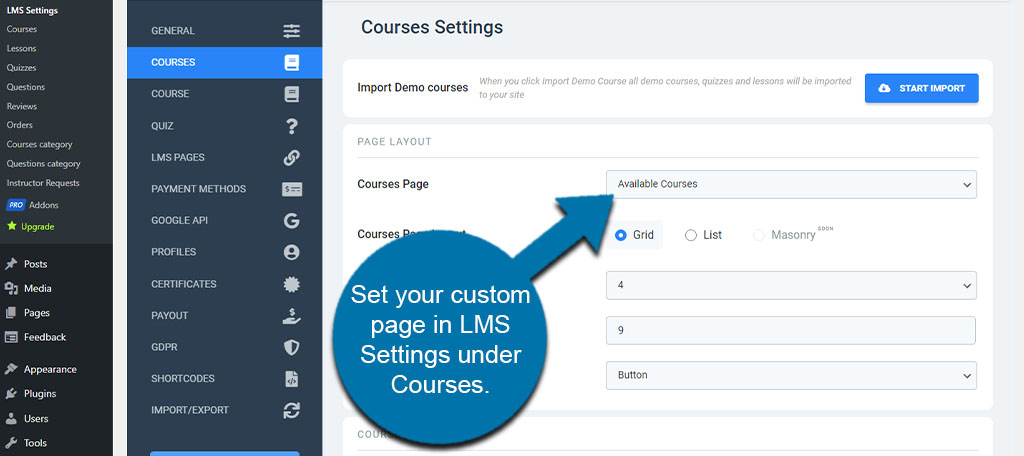
This page can be edited and customized just like any other. Any content you add to the page will appear above the courses automatically.
The second method is using the available shortcodes located in the “Shortcodes” area of the LMS Settings page.
You can copy and paste these to put them anywhere you could put a shortcode. And because MasterStudy offers a lot in terms of showing the courses, you can customize any post or page to fit your needs.
Ideas for Using MasterStudy On Your Website
In reality, you’re only limited by your imagination when it comes to offering educational materials. There are plenty of ways you can get the most out of a free LMS in WordPress.
For example, you could:
Teach Others How to Do What You Do
Do you have a great deal of knowledge you can offer the general public? It’s common for freelancers and other professionals to take to platforms like YouTube to monetize what they know.
Why not do the same thing with courses on your website?
This will cut out the middle-man and put more money into your pocket. That is as long as you can offer a great course people will want and can generate a good deal of traffic to your site.
Provide Educational Materials for Products or Services
You don’t necessarily have to charge for online learning, especially if you’re looking for more engagement from your customers and clients. Offering an online resource to teach people how to use your products and/or services can help strengthen relationships.
And when you teach people the proper way to utilize what your business offers, you’ll have fewer tech calls and may curtail some negative feedback from uneducated customers.
Offer Training for In-house Staff
Another great method of using MasterStudy LMS is by creating a platform to teach your in-house staff. Now, this can either be done online or by installing WordPress locally to create a private website.
In fact, about 70% of employees are more likely to leave a business if it does not invest in development and training. Something like offering free courses to staff can reduce employee turnover.
Thus, it can help reduce how much you spend every year training new staff.
How Much Money Can You Make with Online Courses?
Unfortunately, there are too many variables at play to say that you’ll make a specific amount of money selling courses from your website. No one can guarantee that you’ll bring in “X” amount of dollars.
Just a few things that will affect how much you make with MasterStudy include:
- The amount of traffic you can generate to your site and courses.
- How much you decide to charge and what you’re offering for that price.
- The overall interest to learn what you plan on teaching.
- How your courses stack up against the competition.
- The amount of marketing you plan to invest for your online course.
- Your extent of knowledge in the topic and how well you convey that knowledge.
Don’t expect to install a free LMS plugin for WordPress and start raking in the dough. Setting up a good and profitable course takes a great deal of planning and research.
However, the potential to make a lot of money is there. Especially if you can sell it to your current audience or fans.
In fact, I know several entrepreneurs who are successful at offering courses to help others learn how to become freelancers and business owners. And most do so directly from their websites.
It all depends on how much effort you plan on putting into setting up courses through a free learning management system.
Test and Customize Your Courses
Before setting your course live, be sure to test it. The last thing you want to do is put out something that students cannot use or has poor information and layout.
Take the time to fine-tune your course and make sure that it’s for appropriate audiences. People who are satisfied with the value you provide are more likely to suggest the course to others.
And this could lead to more income.
When testing your course in MasterStudy, it’s probably best to create a temporary profile. Testing it while logged into WordPress will prevent you from adding the course to the cart or seeing elements as new users would.
This is because you’re logged in, probably as the administrator.
It might take you a bit longer to get the course out to the public, but scrutinizing every element could lead to its success or failure. I would suggest planning it out with a pad of paper or even using mind mapping platforms.
Expand What You Offer Through Education
Virtually every professional and business could benefit from offering learning tools. Something like the MasterStudy free learning management system will help.
From teaching your buyers how to use a product to giving staff what they need to know to succeed, proper education can do wonders.
What kind of things are you planning to teach on your website? Is there an LMS plugin that you prefer over MasterStudy?