When it comes to eCommerce options, you have a lot of choices, but PrestaShop remains one of the best options. PrestaShop is free to use, versatile, includes many features to help you with SEO, and can be installed with the GreenGeeks App Installer.
You can use the GreenGeeks App Installer to install PrestaShop and over a dozen other applications on your web server in minutes. This makes it one of the fastest ways to install PrestaShop.
This tutorial will demonstrate how to install PrestaShop with the GreenGeeks App Installer.
What Is PrestaShop?
PrestaShop is an open-source eCommerce platform that can be self-hosted. It remains a popular option due to its accessibility and versatility. It provides powerful eCommerce tools that help you sell products, manage inventory, and connect with payment gateways.
PrestaShop also provides a slew of features to help your site grow. This includes over SEO tools, multilingual support, and over 4,000 modules to choose from. With it, you can build any eCommerce store and advertise it effectively.
As such, it is a great eCommerce platform to use, and this tutorial will show you how to get started today.
How to Install PrestaShop with the GreenGeeks App Installer
The GreenGeeks App Installer is available for free to any GreenGeeks customer. With it, you can install over a dozen applications on your account. This tutorial will demonstrate how to install PrestaShop using the GreenGeeks App Installer.
Step 1: Access the GreenGeeks App Installer
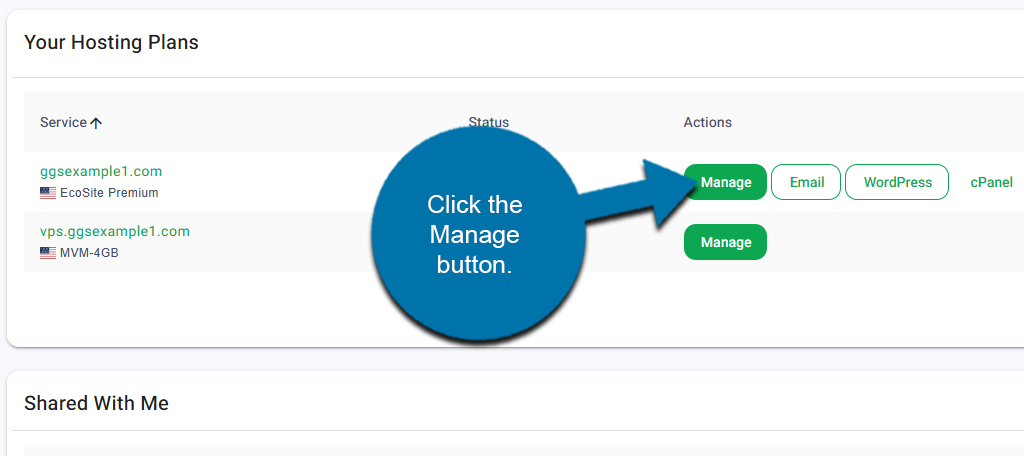
Start by logging into your GreenGeeks account. Locate the domain that you wish to install PrestaShop on and click the Manage button next to it.
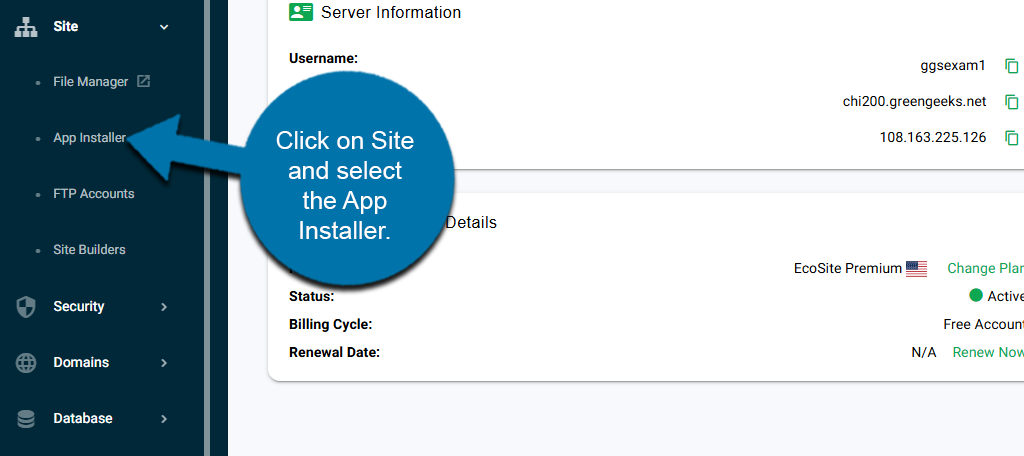
On the left-hand panel, click on Site and select the App Installer.
This will bring you to the GreenGeeks App Installer, which means we are ready to install PrestaShop.
Step 2: Install PrestaShop
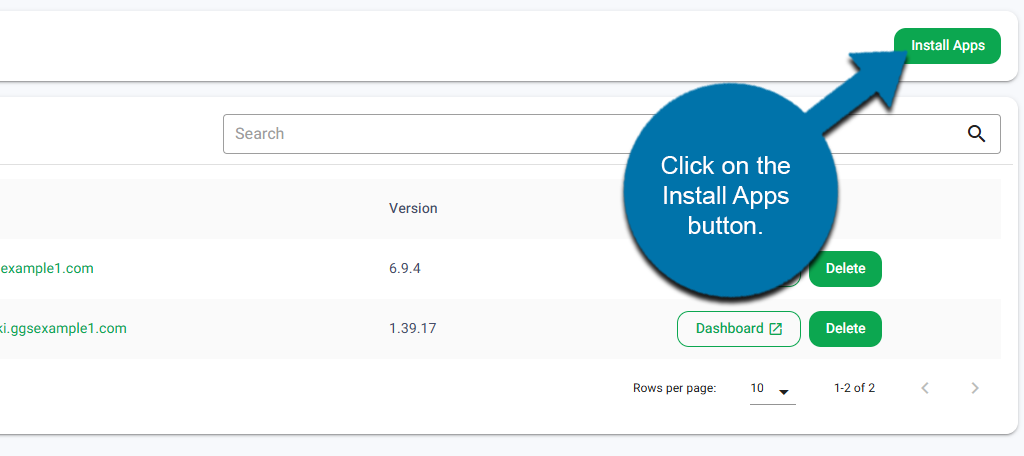
Click on the Install Apps button.
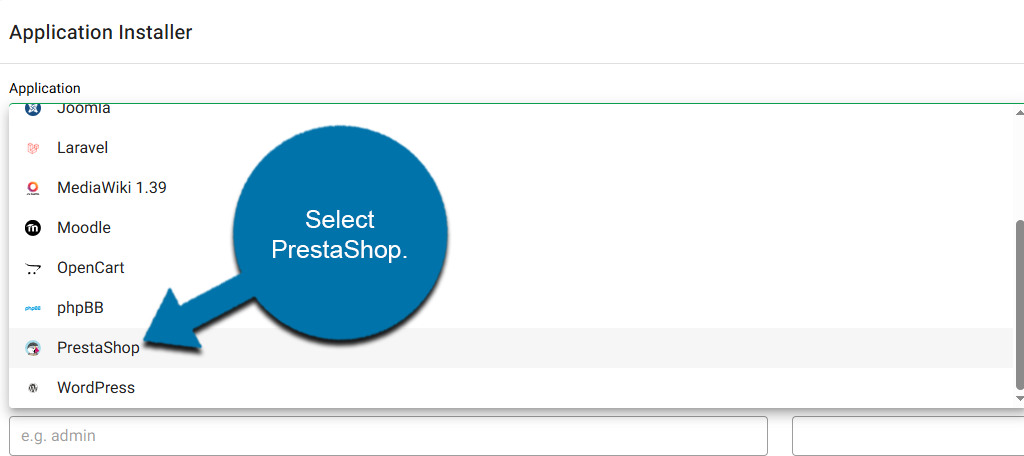
In the Application drop-down, select PrestaShop.
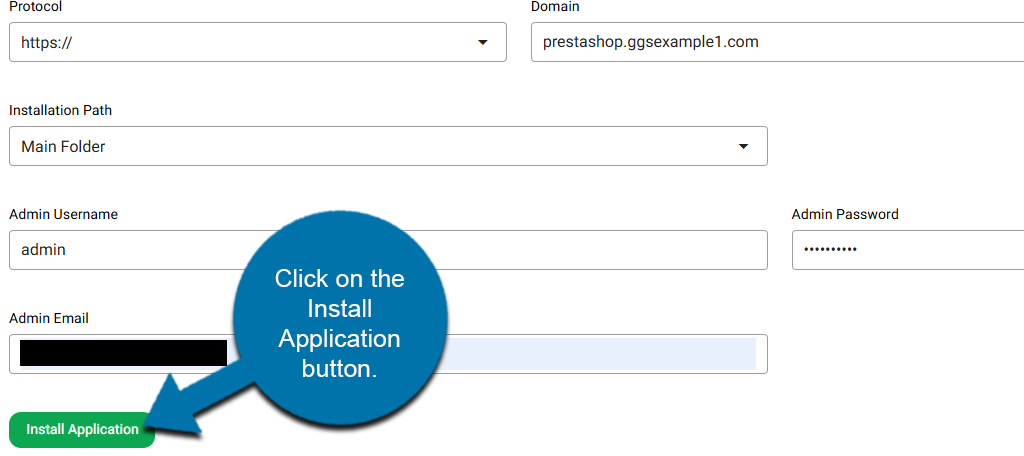
Below this, you will need to fill out the remaining fields. This includes selecting the protocol, domain, and installation path. As well as creating an admin username, password, and email.
Click on the Install Application button to finish.
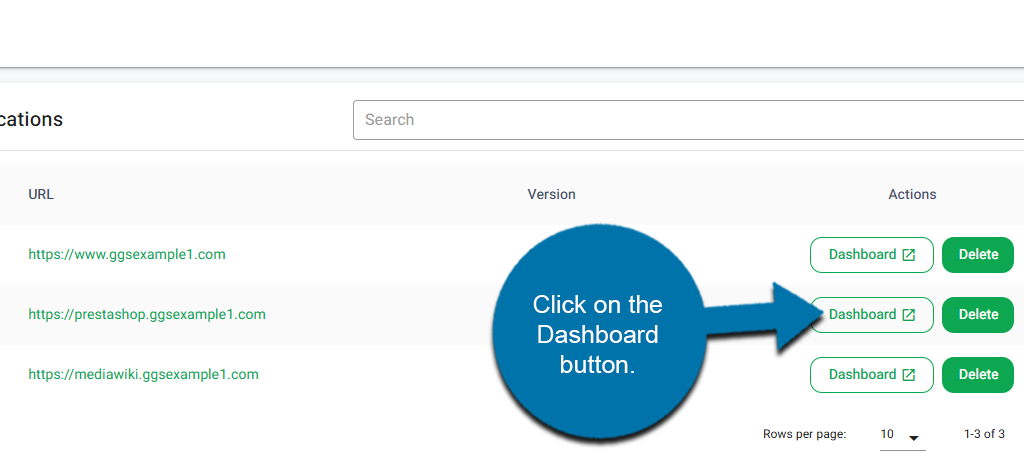
This will begin the installation process. In a few moments, it will be completed and will be added to the list of installed applications below. To access PrestaShop, click on the Dashboard button next to it.
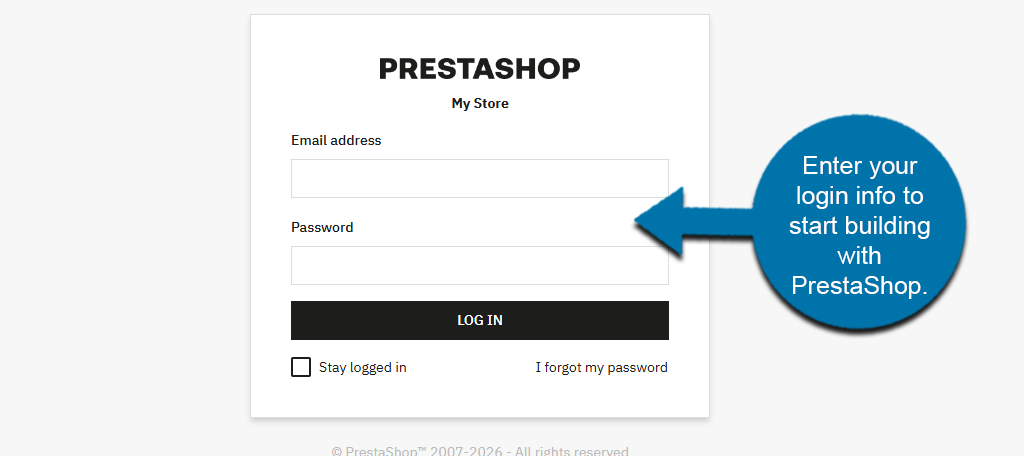
This will bring you to the PrestaShop login area. Simply enter your login information, and you can begin creating your online store.
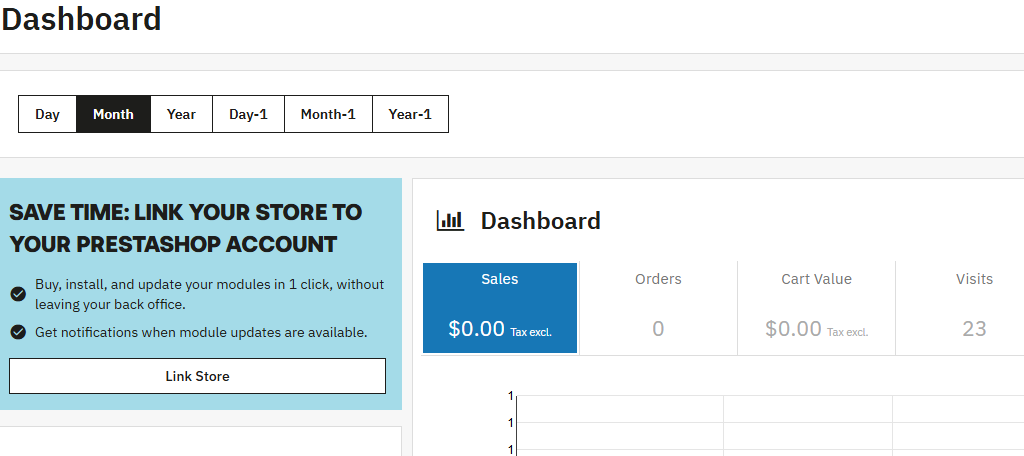
Once you log in to PrestaShop, you will see the PrestaShop dashboard.
And that’s it. PrestaShop is now installed and ready for use. If you need more help getting started with PrestaShop, be sure to check out our other PrestaShop tutorials.
Start Building with PrestaShop Today
PrestaShop is an excellent starting point for eCommerce platforms. It is easy to use, offers a lot of versatility, and helps you manage your SEO. And all of this will come at no expense to you.
You’ll want to begin by adding products to your store and connecting with a payment gateway. Other things to consider are setting up user reviews, multilingual support, and clear shipping options.
Building an online store takes time, but the rewards far outweigh the time commitment.