Most WordPress users know and understand that internal linking is good for SEO. WordPress and Google have basically told us this over time. A good internal link helps the reader relate to something that is being talked about in a specific article. However, internal linking creates the problem of a self ping in WordPress.
Granted, this is not an issue for everyone. However, many people think the pingback and trackbacks are an annoying thing to deal with in WordPress. You don’t need your website sending you notifications every time there is a self ping.
Today, I am going to show you some ways to stop a self ping in WordPress. Before that, let’s take a look at pingbacks and trackbacks.
What are Pingbacks and Trackbacks?
Simply put, pingbacks and trackbacks are a type of technology that notifies other websites when content has been published that users may find interesting. In theory, this sounds like a great way to track things and get noticed. There are actually downsides to this though, so in this article, I am going to show you how to disable and stop a self ping.
Trackbacks
Trackbacks are actually very easy to explain. A trackback is a notification that WordPress sends to an external site when you link to it in your own content. This lets the site owner know that you are referencing their content.
The site owner then has a choice of whether or not they want to approve the trackback or ping, you have sent. The link you provide will remain in-tact either way, but if the site owner approved the trackback, then an excerpt from your post and a link to your site will display in their comments area.
Pingbacks
A pingback actually has a very similar goal as a trackback. They are kind of the same, but kind of different. They were built to be a better version of a trackback that would resolve some of the problems with trackbacks.
The main difference here is that trackbacks are sent manually, while pingbacks happen automatically. Needless to say, oftentimes this is not something you want to happen all of the time.
Not only that, but self pingbacks are even more troublesome and annoying because they are being sent to you almost non-stop. If you are good at internal linking on your website, then you no doubt have a continuing stream of self pingbacks happening.
This is just one of the many problems with trackbacks and pingbacks. Let’s take a look at some options available to you for stopping a self ping in WordPress.
No Self Pings
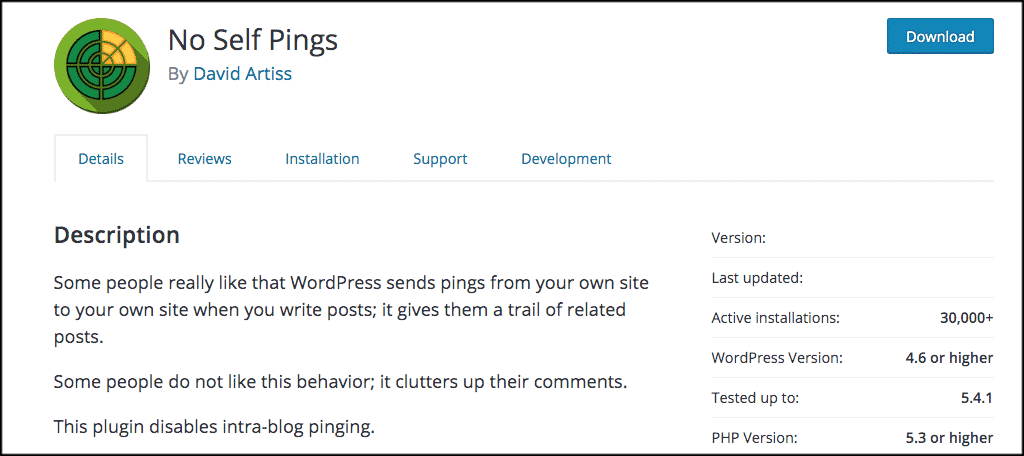
If you want to use a plugin to stop self pings, then the No Self Pings plugin for WordPress is your best option. Not only is this the fastest and easiest way to accomplish this, but it also gives you a couple of other features.
All you do is install and activate the plugin and it is good to go. However, there is also a space provided to add additional URLs that you don’t want self pings coming from.
All in all, the plugin is lightweight, fast, and easy to get running, and performs the exact function you need it to without any hassle whatsoever.
Let’s take a look at how to stop self pings in WordPress.
Stop Self Pings in WordPress
Method 1: Use a Plugin
The first method of stopping self pings in WordPress is to use a plugin. This is also the easiest way, as it keeps you away from any manual code.
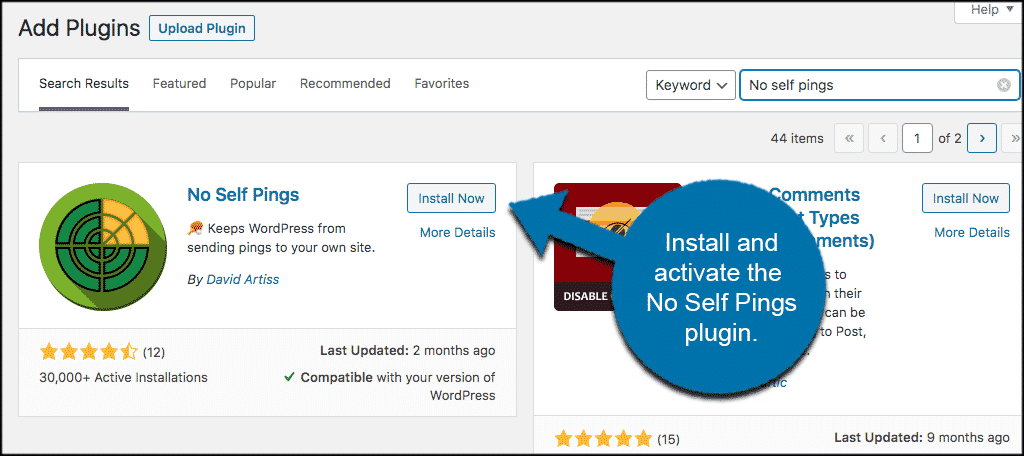
Step 1: Install and Activate Plugin
In order to stop a self ping in WordPress from happening, you first need to install and activate the plugin. You can do this by heading over to the plugins page in your WordPress admin dashboard. Simply search for the plugin name and install it from there.
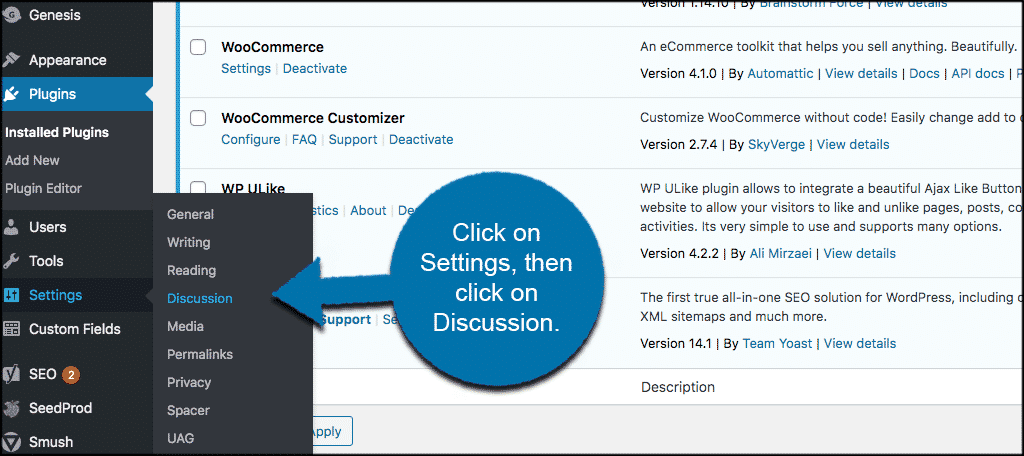
Step 2: Access the Discussion Settings Page
Once the plugin has been installed and activated, you are ready to roll. It starts working automatically. However, you can also get to a setting to add other URLs that you want no self pings coming from.
To access this, click on Settings > Discussion. You will see this on the left side menu area of your dashboard.
Step 3: Add Other URLs
At this point, you should be on the discussion page of your dashboard. You will see a lot of different options that you have configured in the past.
Scroll all the way down to the bottom of this page. Here, you will see a “No Self Pings” area that includes a box for you to add additional URLs if you choose.
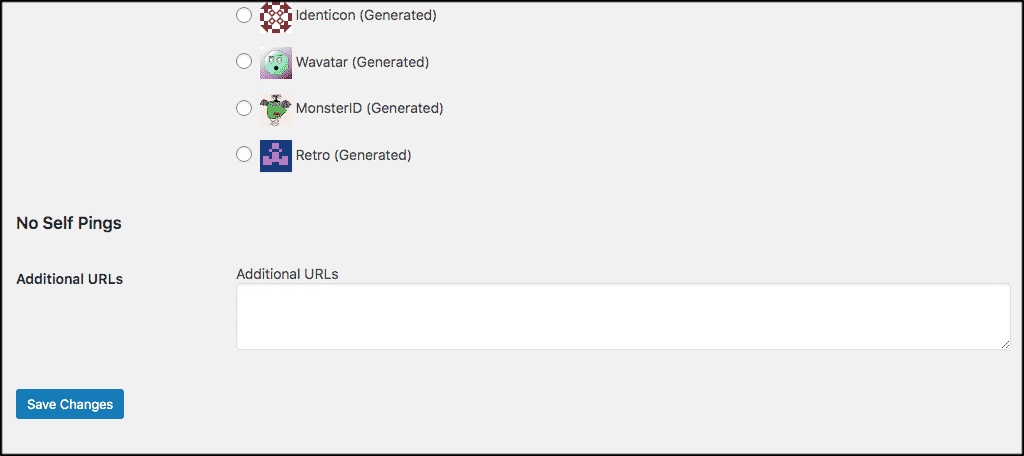
Go ahead and add any you want. If you do add some, make sure to click on the “Save” button to apply those changes and get those URLs added.
Method 2: Manually Insert Code to Stop Self Pings
You can manually insert some code snippets in the functions file of your website. Below, you will find code for both self pingbacks and trackbacks. The process is not difficult. However, if you are not comfortable with code, then give your website developer a call.
Step 1: Access the Functions PHP File
In order to add code to stop a self ping in WordPress or to stop a trackback, you first need to access the functions file on your website.
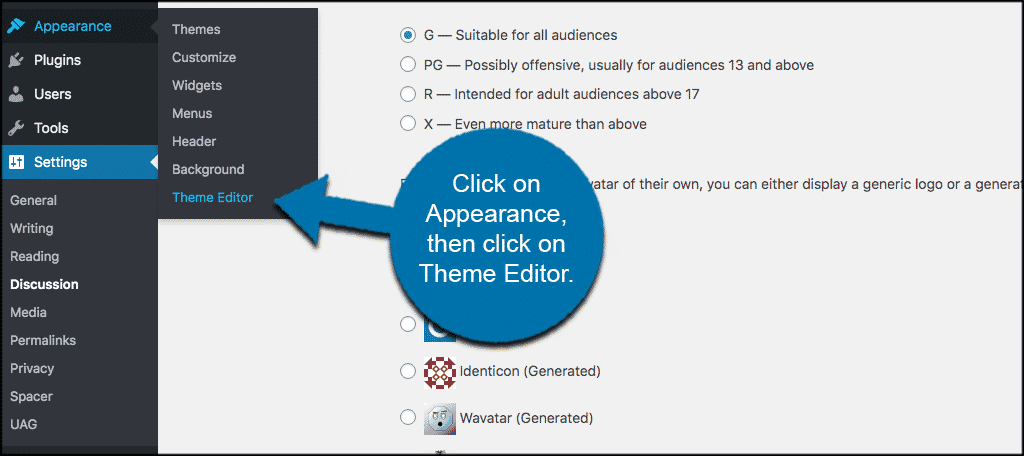
Click on Appearance > Theme Editor, located in the left menu of your WordPress admin area.
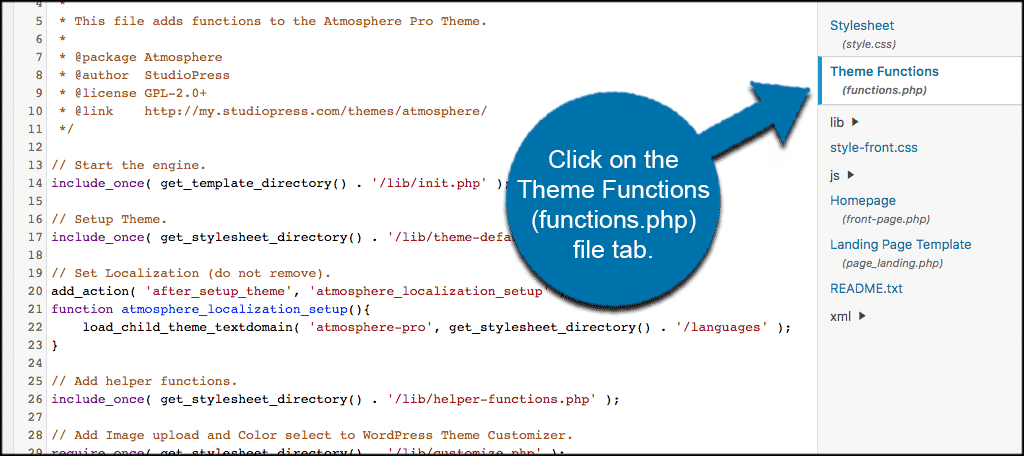
This takes you to the files of your website. Click on the tab titled Theme Functions (functions). This gives you access to the proper file.
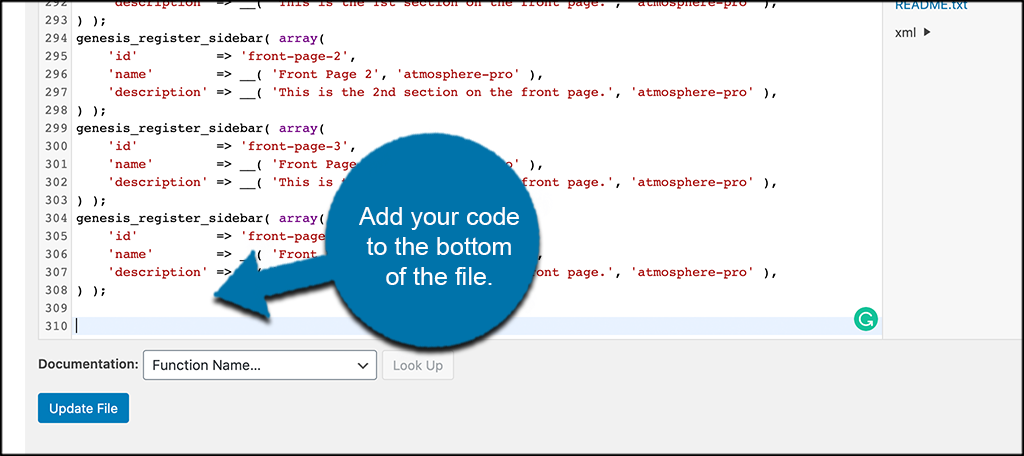
Once in the file, you are going to scroll down to the bottom and add the following relevant code.
Step 2: Add Relevant Code
For Self Pingbacks
function no_self_ping( &$links ) {
$home = get_option( ‘home’ );
foreach ( $links as $l => $link )
if ( 0 === strpos( $link, $home ) ) unset($links[$l]);
} add_action( ‘pre_ping’, ‘no_self_ping’ );
add_action( ‘pre_ping’, ‘no_self_ping’ );
For Trackbacks
function disable_self_trackback( &$links ) {
foreach ( $links as $l => $link )
if ( 0 === strpos( $link, get_option( ‘home’ ) ) )
unset($links[$l]);
}
add_action( ‘pre_ping’, ‘disable_self_trackback’ );
Once either or both of those codes have been added, no self ping in WordPress should happen. Using code and adding it to your functions file is a great way to stop self pings. However, please remember the added code when you update the theme files as noted below.
Note: Remember, the only issue with adding code into a functions file is that when you update or change themes, you will need to add the code again. This isn’t true for every theme update, but double-check your file either way after updates.
This is why it’s good practice to use a child theme. The child will not overwrite any code changes should the parent theme update.
Step 3: Save the File
This should go without saying, but make sure you save the file. I know I’ve had instances where I thought I saved something and didn’t.
A lot can be going on and it may just simply slip your mind.
Final Thoughts
Having to deal with a self ping in WordPress is one thing. Having to do it all the time, well that is quite another. As stated above in this article, there are numerous issues with pingbacks and trackbacks.
In theory, they are supposed to be a good thing. But it turns out that more often than not, they just get in the way and can be confusing.
Using the methods above, you can quickly and easily stop self pings in WordPress. Whether you choose to use the plugin and that functionality or put the code in manually, the choice is up to you.
While WordPress offers a ton of functionality and one of the best CMS platforms available, sometimes you will still run into an issue like this that needs a simple fix. Use either of the two methods above and you will eliminate self pings from WordPress in no time at all.
Have you ever tried stopping self pings before? What method do you prefer, the plugin or the manual code entry?
Thanks for this article. But there is a missing in your instruction. You didn’t describe where to place the code in the functions file. Because there have different classes and functions which can’t be guessed by a newbie
I’ll make sure we get an image added to this to show where the snippet goes. However, the instructions do state that the snippet should go at the end of the file.