Are you looking for an easy way to add a timesheet to WordPress? Timesheets allow you to record the time you start and end a particular task. Generally, they are used for businesses to record work hours but can be used for a variety of tasks.
As I’m sure you noticed, there is no timesheet attendance management system in WordPress, but we can add one with a plugin. Today, I will demonstrate how to use the Dynamic Time plugin to add a timesheet in WordPress.
Why Add A Timesheet in WordPress?
If you plan on paying employees based on the amount of time they put in, you are going to need a system in place. This system needs to track the number of hours they work, handle overtime calculations, and connect to your actual payroll. These are standard features that every business timesheet should have.
A timesheet allows you to do this easily and professionally. However, this is only one use of a timesheet.
Even if you don’t plan on using it to track payments, it is a great tool to track activities. For example, if you run a website by yourself, you will quickly learn that time management is half the battle. Filling out a timesheet can help you track where you are spending the most time.
Of course, you can use a timesheet to track time for just about any type of activity or hobby, so the uses are pretty much endless when it comes to tracking time.
Install Dynamic Time
The Dynamic Time plugin adds a timesheet and timecard to WordPress. It is calendar-based and handles a variety of other features including overtime calculations, multiple time punches per day (punching out for a break), create pay periods, and so much more.
The set up of the plugin is very straightforward, so it shouldn’t take very long.
Note: There is a pro version that adds additional features. Most notable is the ability to export your timesheet data, this may be a necessary feature depending on what you are using the plugin for. So consider upgrading.
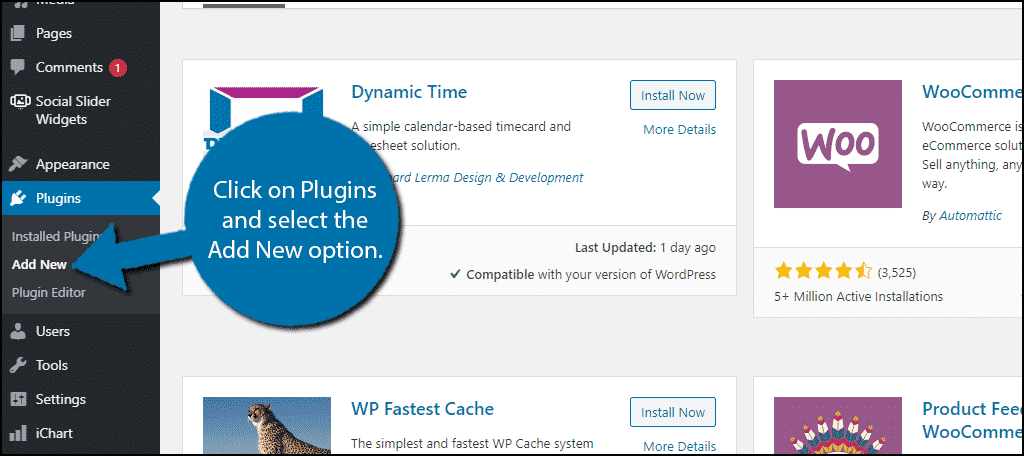
Let’s start by clicking on Plugins and selecting the Add New option on the left-hand admin panel.
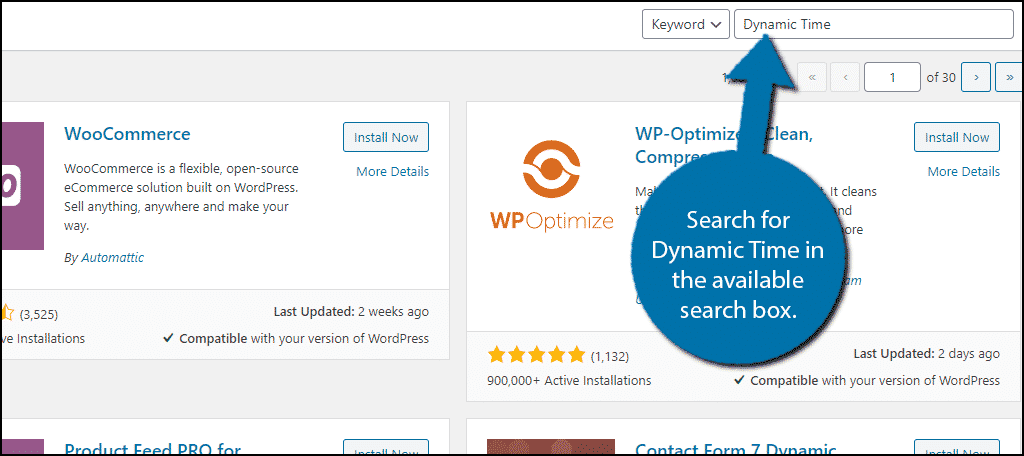
Search for Dynamic Time in the available search box. This will pull up additional plugins that you may find helpful.
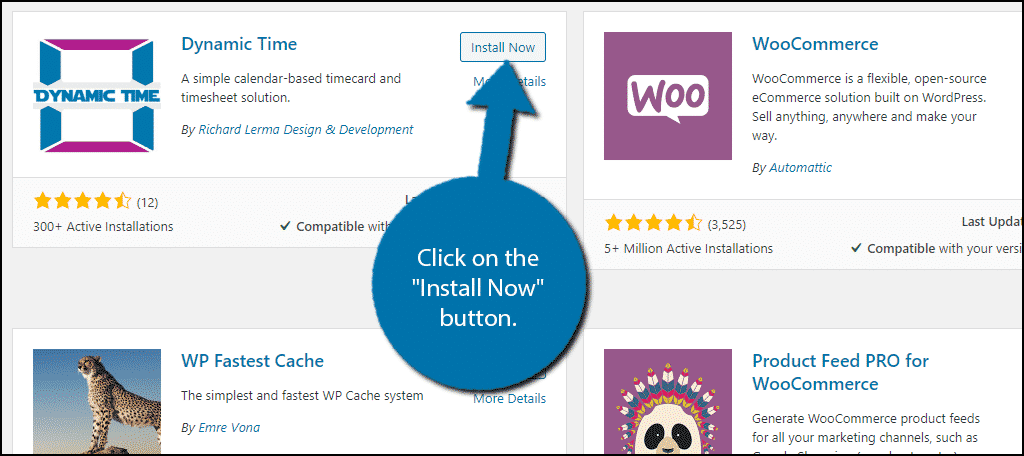
Scroll down until you find the Dynamic Time plugin, click on the “Install Now” button and activate the plugin for use.
Creating A Timesheet
With the plugin installed, you can begin creating a timesheet immediately.
On the left-hand admin panel, click on the Dynamic Time option.
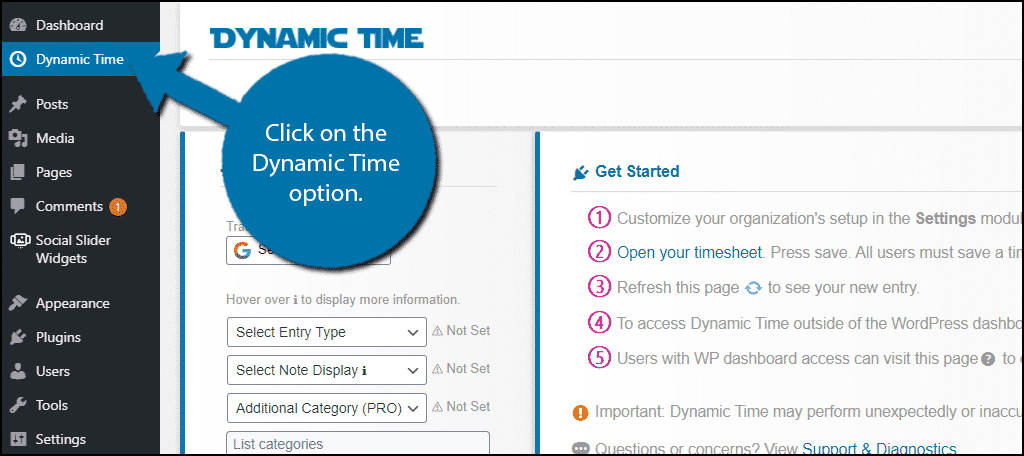
There are two sections on this page: the settings and the instructions. I recommend reading the instructions as it should help you see just how simple the plugin is to use.
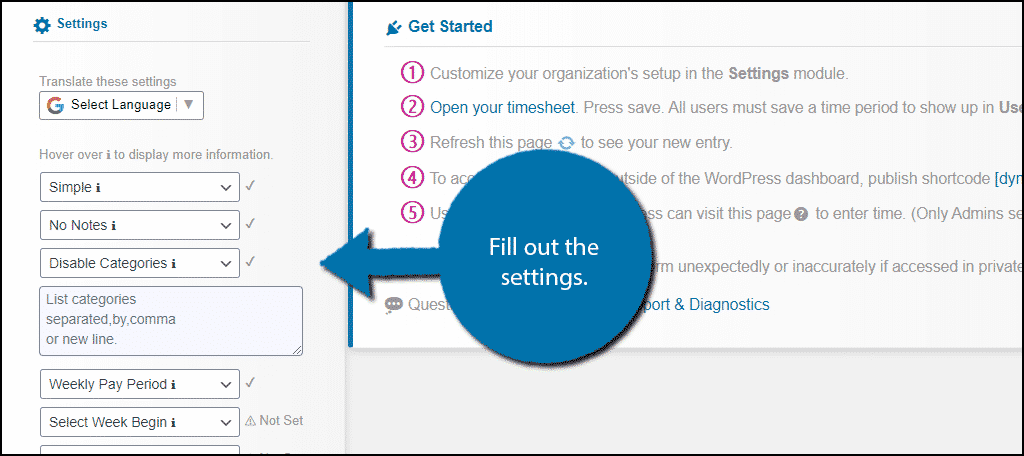
To begin, you are going to need to go through the settings section. These settings include your language type, how you will enter the data, if you will allow notes to display, if categories are available, select pay periods, when the period begins, who receives notifications, uninstall options, and the currency you will be using.
Note: If you are unsure about what a term means or need more information, you can hover your mouse over the “i” to see additional information.
Fill out the settings section fully.
Once the information is completely filled out, the plugin will automatically save the information. Click on the “Open your timesheet” link in the instructions box.

Note: You will only see another person’s time card as an admin, so there’s no fear of employees seeing each other’s hours.
Using the TimeSheet
You will now view a blank timesheet. In my case, I chose a weekly pay period with the week beginning on Monday. Yours may appear slightly different, but it will behave the same.
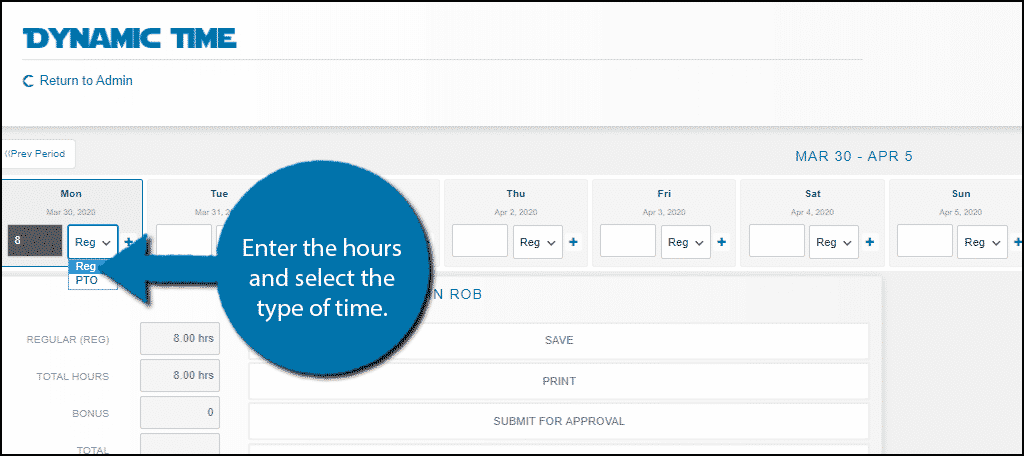
To edit the timesheet, you can add the time you worked and if it is regular or overtime.
You can enter the time you worked in the text box on the left side and you can select the type of time (regular or overtime) by using the dropdown.
You can click on the small “+” button to add another row.
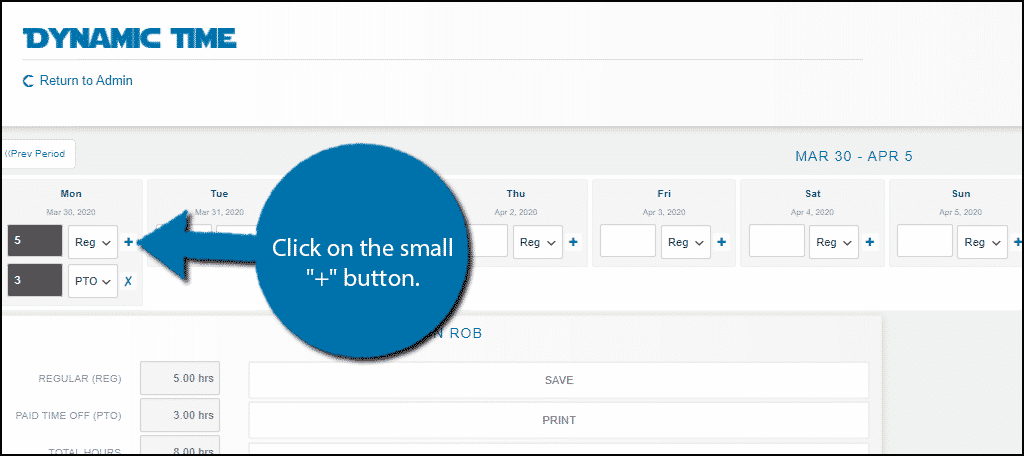
This is necessary to display multiple types of time. For example, let’s say you worked 8 hours, but 3 of those hours were overtime. You would need to put five hours for regular pay and 3 hours for overtime.
Note: All of the additional rows you add will not have the “+” button. Instead, they will have an “x” button that deletes the row. You will always have to use the first row to add additional time slots for a day.
Below you will see the total hours that were entered and you can add a note at the bottom (only if you enabled notes in the settings).
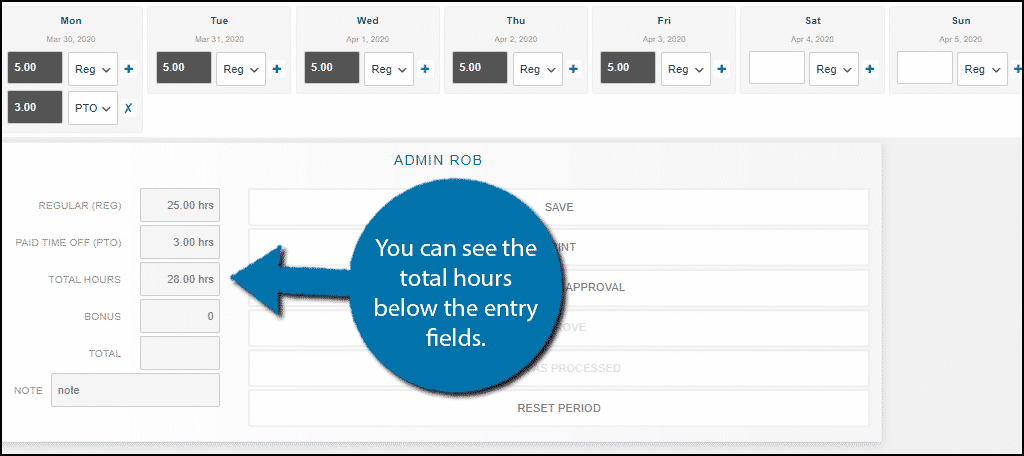
You should then click on the refresh button for your browser to save the changes.
Note: If you want to create a page for employees to handle their time cards, you can. Simply use the [dynamicTime] shortcode to display this information on it.
Approving a Timecard
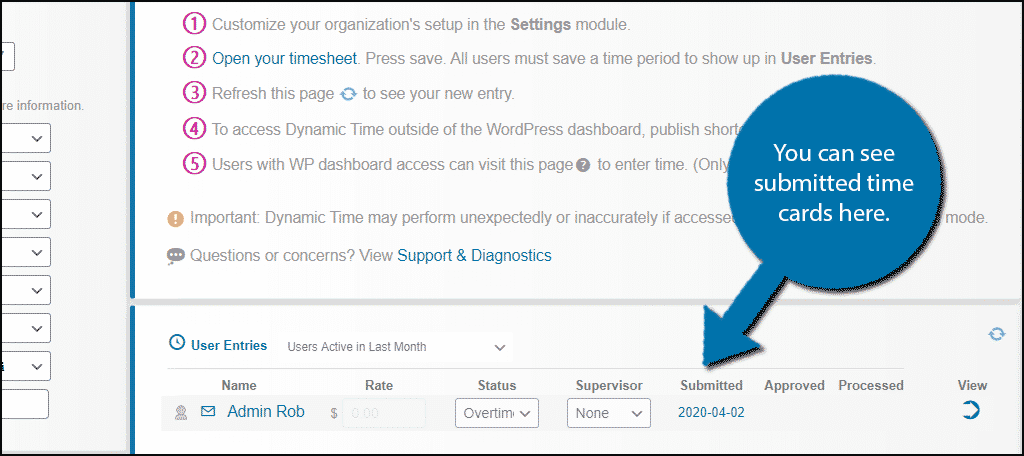
If an employee has clicked on the “Submit for Approval” button on their timecard, and admin will have to review it. This is all done from one screen.
Click on the Dynamic Time option.
You should see all of the time cards that have been filled out (if you are an admin). It will tell you when it was submitted for approval. Simply click on the time card to view it.
To approve it, click on the “Approve” button (only an admin or an assigned supervisor can do this). The plugin does not provide a “Deny” button, so you would have to contact the individual and ask them to correct it if you notice something is wrong.
Remember in the settings, there was a notification option. I do recommend enabling it so that you can keep up with timecard submissions.
Save Your Records
While the free version does not allow you to export this information, you still have the option to print it. I highly recommend printing out timesheets to ensure that you have accurate records in case you ever need it.
In fact, you may want to scan your print out so you can store them digitally as well.
This is also a great way to share information with employees.
Properly Explain The System
While the system is very intuitive to use, it is important to explain everything properly. For example, it would be problematic for someone to accidentally select overtime on their timesheet. Thus, it is highly recommended to take the time to explain the system and even help someone fill out their card the first time.
Mistakes will happen, which is what makes the approval system so important. You should be able to catch these mistakes easily if you know what to look for. Just remember this system does not give you tools to communicate with employees about the mistakes other than a small note.
Thus, it is highly recommended that you have a chat system, email, or phone, to quickly go over what is wrong.
Do you use a different WordPress timesheet plugin? Is there anything you look for when reviewing time cards?