Sliders are a great way to provide information to your customers, while at the same time giving them something fun and interesting to look at on your website. Slider transition can be tricky though if you don’t have the right tool. Today, I am going to show you how to create a smooth transition slider using a plugin.
There are quite a few really good slider plugins that are available for use. That being said, there are some bad ones as well. You want to make sure you have the right one running on your website because there is a lot to consider.
You want to make sure it fits the screen properly for all transitions, looks correct on mobile devices, and operates properly on all browsers.
What Are WordPress Sliders?
WordPress sliders are usually plugins that allow you to create slider animations on your website. Some function as simple tools, while others will give you a ton of features and options to build just about any type of slideshows and animations you can think of.
There is a raging debate on how slideshows and sliders affect SEO, page speed, and ranking of a website with Google. Some believe it does not make a difference, while others believe that slideshows on main pages, especially in the header area, conflict with SEO and hurt rankings in Google.
That issue is for another day and one you can look into and decide for yourself. With that being said, let’s take a look at the plugin we are going to use to create slider animations and see what all it has to offer.
Transition Slider
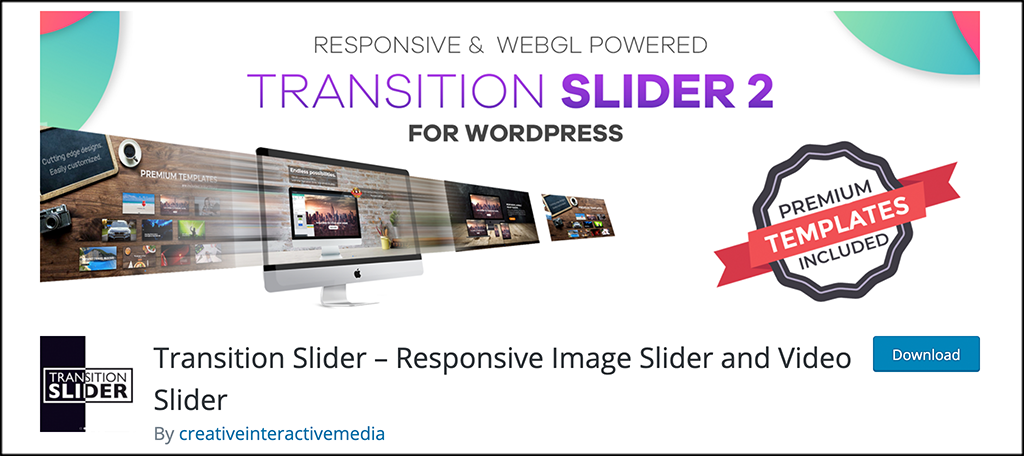
Transition Slider is a high-end image and video slider that will provide you with the ability to add flawless transitions and responsive animated layers to build sliders for any post or page on your website.
There is so much to like about the Transition Transition Slider plugin that it is hard to know where to start. For starters, the slideshow transitions you build will look perfect across all browsers, screen sizes, and devices. You will also be able to build any type of slider you want without ever having to touch any sort of code.
If you can think of a slider type, then this plugin probably allows you to build it. You will be able to build responsive slideshows as well as image, video, gallery, and layer sliders. All sliders you build can have animated layers and effects that include choices like Slide, Fade, Zoom, Warp, Crossfade, Flash, Twirl, Roll, and Stretch.
The slider plugin is filled with a ton of features, options, and pre-built templates. Some of the main features include:
- Transitions
- Easy Integrations
- Animated Layers
- Slider Sizes
- Live Preview
- Mobile and Tablet Settings
- Lightbox
- iFrame
- Slider Thumbnails
- Text Templates
- Google Font
- Navigation
- Pagination
- Great UX
- Fully Customizable
- Draggable Slides
- Lazy Loading
- Parallax Effect
- Infinite Looping
And that is just the start. There are simply too many features and tools to list here. Needless to say, if you are looking to create professional sliders with amazing transitions that look perfect everywhere, then the Slider Transition plugin is a must-see.
Let’s get it set up and create a slider together.
Note: There is a pro version of this plugin available. It offers even more templates and other tools. If you feel this is something your site needs, then go ahead and take a look at it. The tutorial below is based on the free version of the plugin.
How to Create a Transition Slider for Your Website
Step 1: Install and Activate the Plugin
In order to start creating slideshows and transitioning pictures on your site, you first need to install and activate the plugin. You can do this by going to the Plugins page in the WordPress admin dashboard.
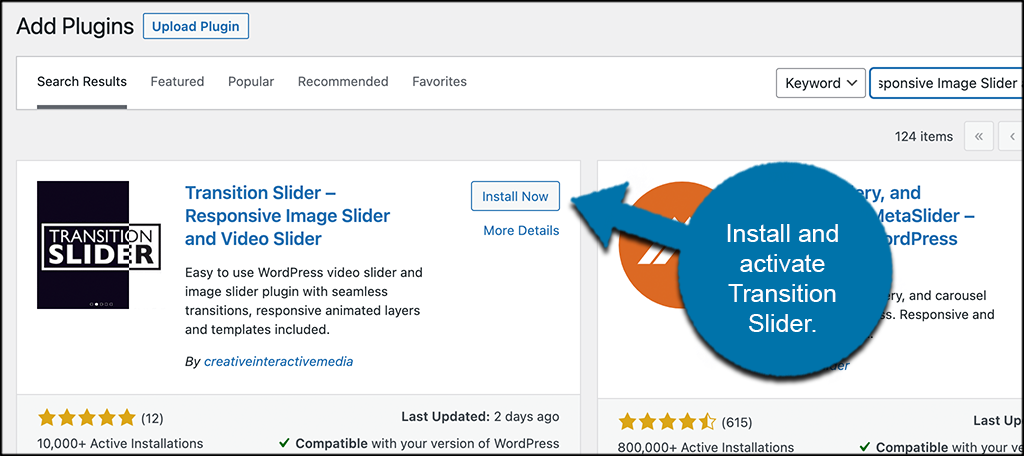
Simply use the available search field and search the plugin by name. Once you see it pop up, go ahead and install and activate it right from there.
Step 2: Click on Add New Slider
The Transition Slider plugin does not have a settings page. All of the configurations and options are done on a per-slider basis. This means you build each one how you see fit.
So, after the plugin is installed and activated, click on Transition Slider > Add New Slider, located on the left side menu area of the dashboard.
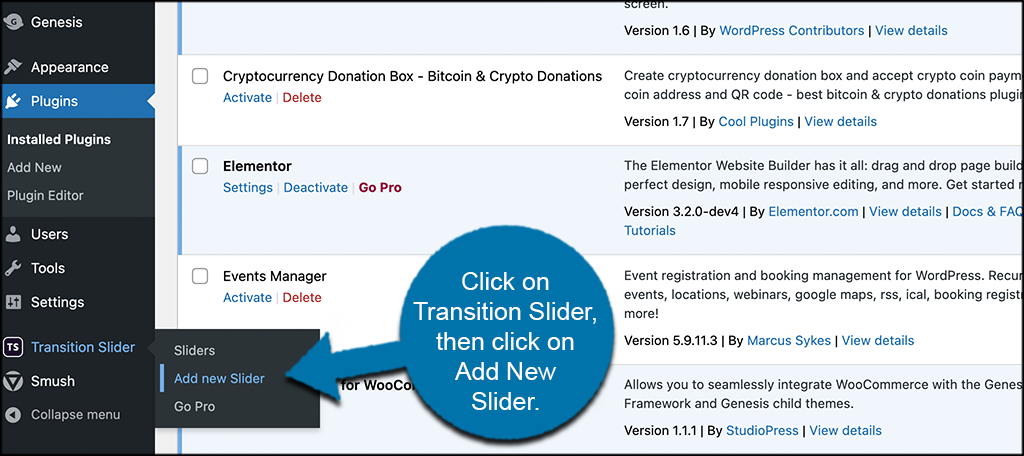
You can see this is now an available option because you have activated the plugin.
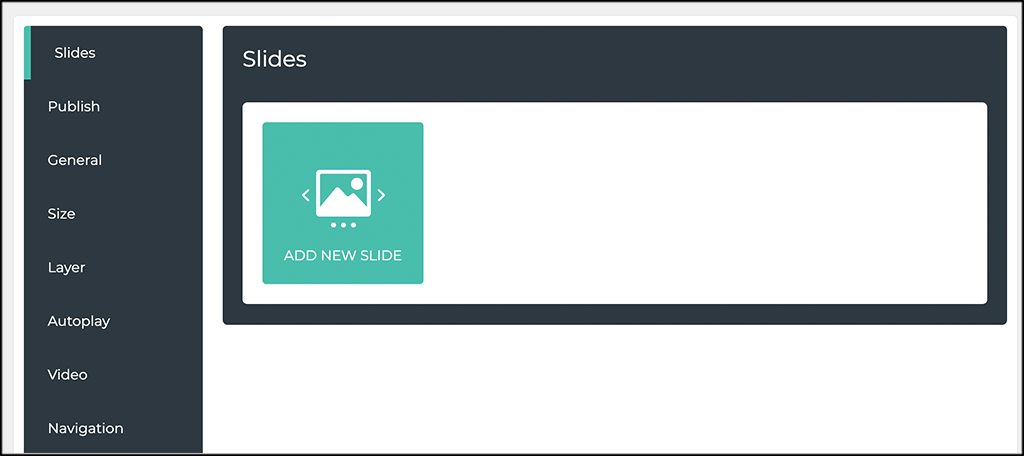
Step 3: Configure and Build Your Slider
At this point, you will be on the main page. You will see a list of different options to fill out and configure. These include things like:
- Slides
- Layers
- General Settings
- Size
- Video
- Navigation
- Pagination
- Thumbnails.
Let’s go through a few of these together so you can see what you are dealing with.
Note: We are not going in the order of the tabs, we will be jumping around a little because the concept of filling out the info is the same.
Slides
Go ahead and add the media you want for your slider in this area.
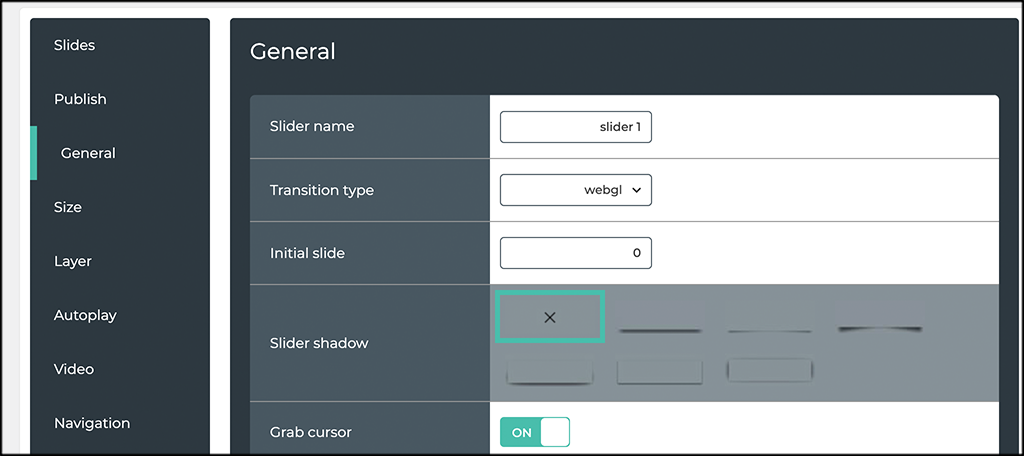
General
Here is where you can enter all the general configurations for the slider. This will include things like the name, transition type, and initial slide. Simply configure this how you see fit.
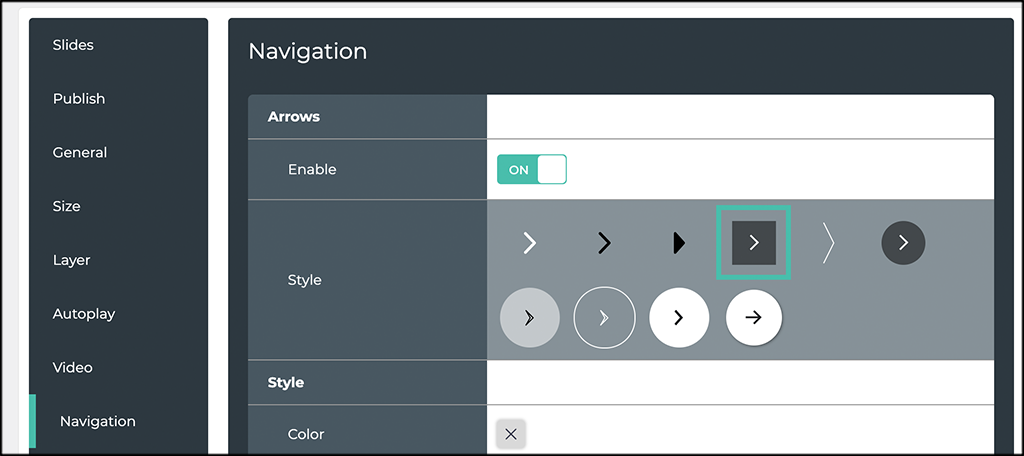
Navigation
Create all your navigation settings in the tab. This will include colors, background, borders, and styles.
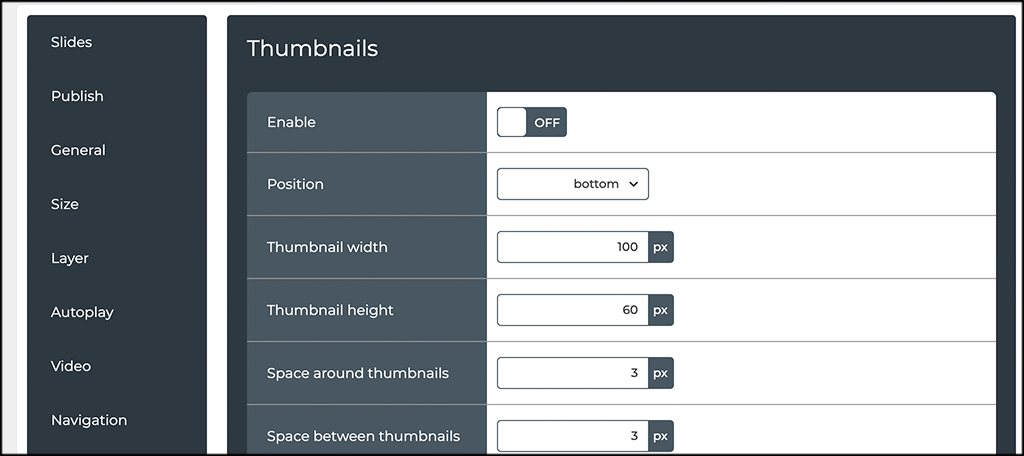
Thumbnails
You can enable thumbnails in this tab and then configure them how you see fit for your website.
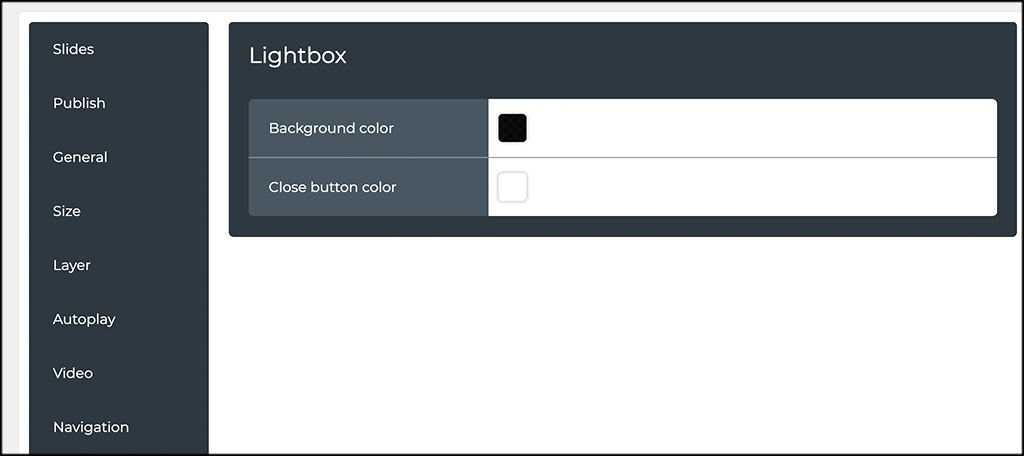
Lightbox
If you want to configure lightbox and create that for your slider, then this is the tab to do that in.
There are some other tabs to go through of course. Go through them all and configure them how you want. If you want autoplay enabled, visit that tab. If you would like to add videos, then go to the video tab.
Note: Your settings will automatically save while you are building the slider.
Step 4: Publish the Slider
When you are done building the transition slider how you want it, then go ahead and head to the “Publish” tab that is available in the same area you are in.
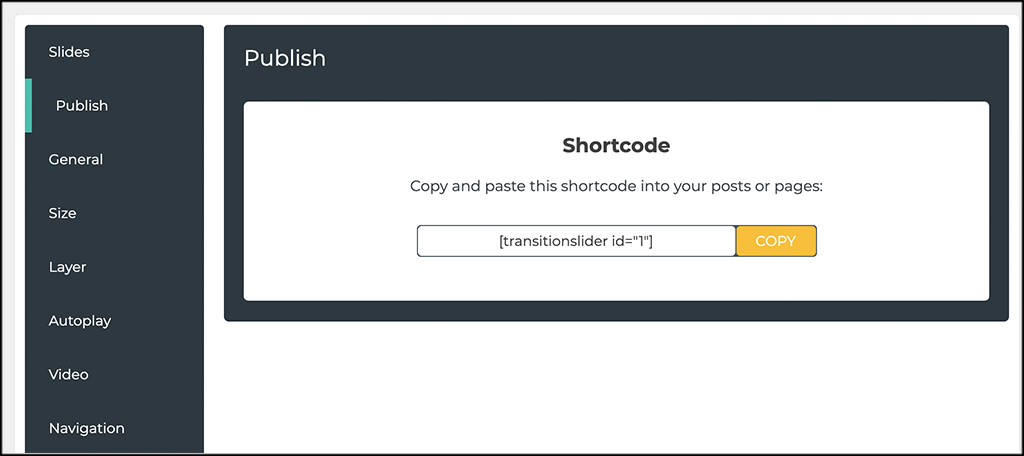
You don’t actually publish the slider. You copy the shortcode that is given, and you can take that and paste it into any post, page, or widget area that you want.
That’s it! Once you paste that code where you want it, you can go view the live slider on your site and then make any adjustments you want from there.
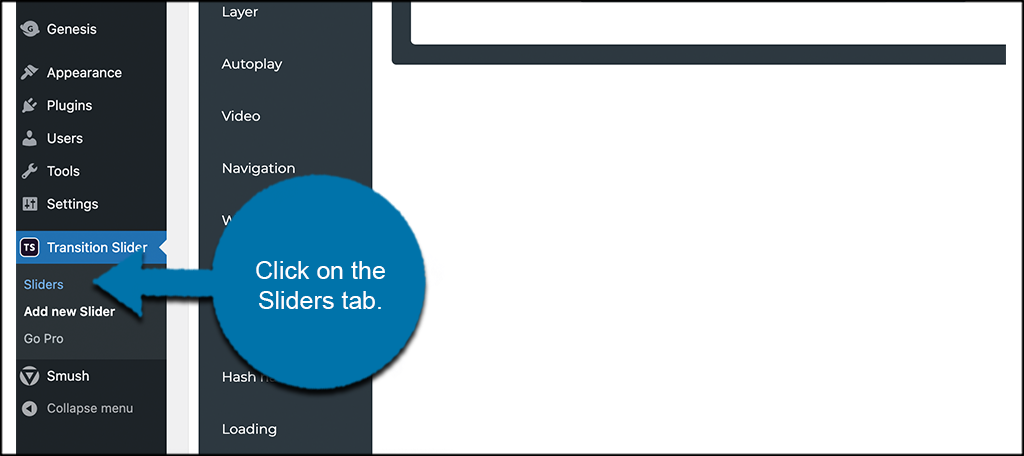
Pre-Built Slider Templates
The free version of the Transition Slider plugin comes with quite a library of pre-built slider templates that you can use. To access these, click on the “Sliders” tab link that is located on the left side menu area of the dashboard.
From there, click on the yellow “Slider Templates” box that you see.
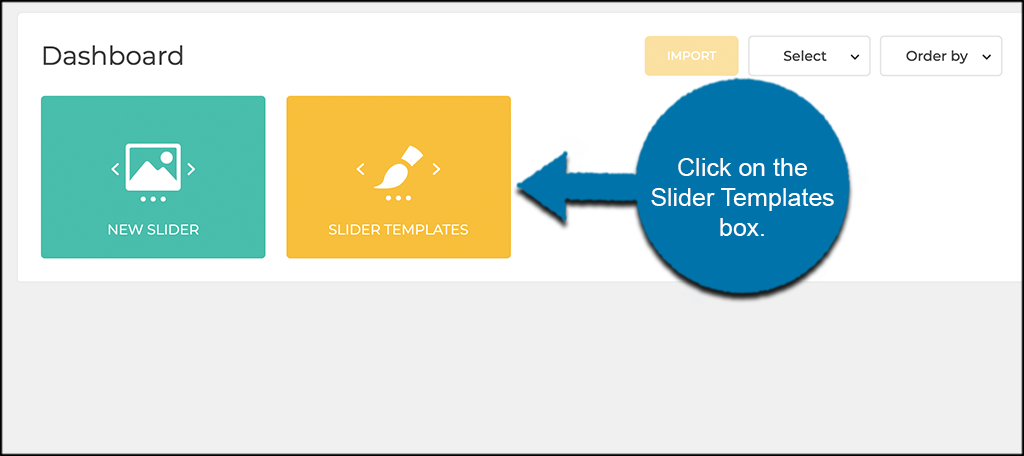
You will see a page pop up that is full of pre-built sliders to choose from. Feel free to import any of them that catch your eye to use on your website.

Final Thoughts
Building sliders is easier than ever if you have a plugin like Transition Slider. You can now build as many as you want and place them throughout your site.
I hope this tutorial was able to show you how easy it really is to build and design WordPress sliders.
Have you ever used this plugin? What is another slider plugin that you prefer?