About a decade ago, Google introduced a new image format for the web, WebP. If you’ve been looking for an easy way to make a move to WebP, we’ve got a plugin for you. It’s called the WebP Converter for Media. It can take care of your switch to WebP with a few clicks.
What Is WebP?
WebP is a web image format similar to GIF, JPG, and PNG. They are all image formats that are optimized for use on the Internet. Images in the WebP format can take up as little as half the storage size of comparable JPG images. Currently, WebP images are typically used in tandem with JPGs, since WebP is not yet supported by all browsers.
How to Convert a WordPress Blog to Use WebP Images
The WebP Converter for Media plugin will do three things:
- Convert existing JPG, PNG, and GIF images to WebP (while keeping the original images).
- Convert new JPG, PNG, and GIF image uploads to WebP.
- Configure your site to serve WebP images to visitors whose browsers support them.
It’s the ideal set-it-and-forget-it WordPress WebP converter.
Let’s go through the installation and configuration step by step.
1. Installing the WebP Converter for Media Plugin
Log in to your WordPress admin panel.
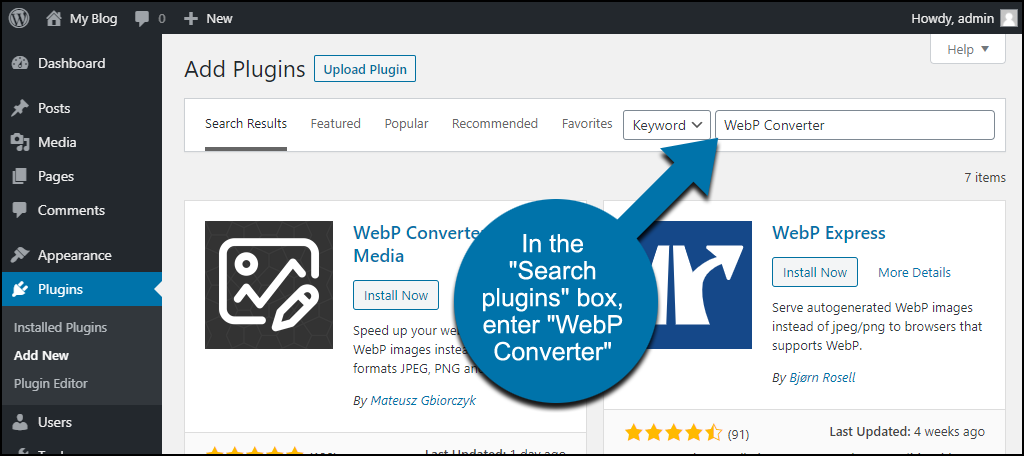
In the left column navigation, mouse over the “Plugins” link and click the “Add New” link.

In the “Search plugins…” box, enter, “WebP Converter.”
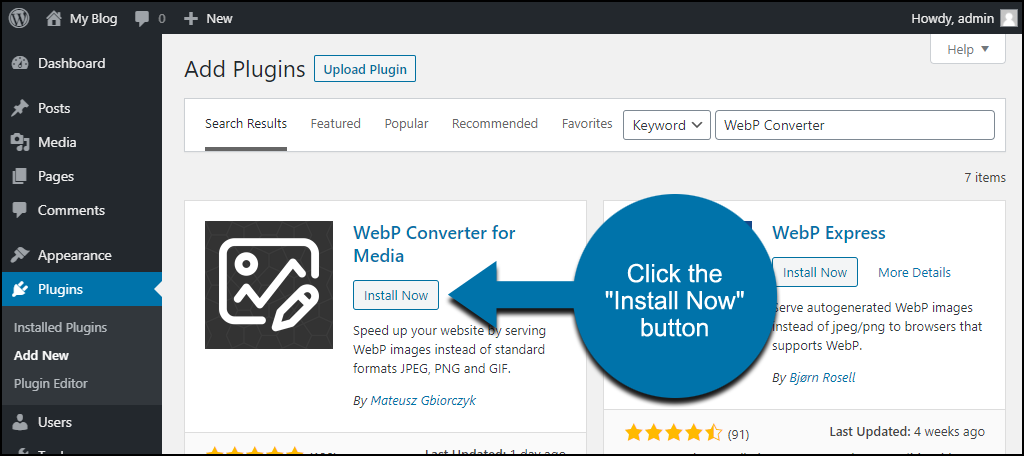
When you find the plugin, click the “Install Now” button.
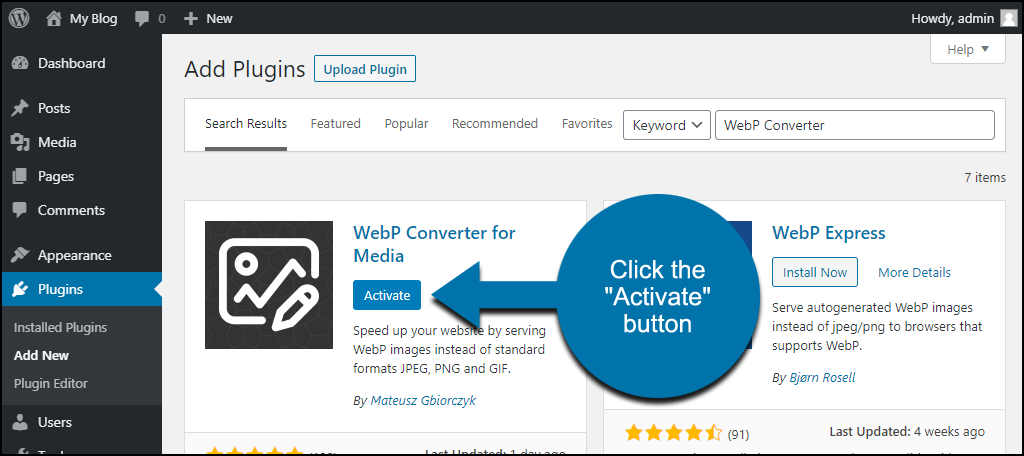
Now the plugin is installed, but it has to be activated before you can use it.
Click the “Activate” button.
That completes installation and activation. Now let’s move on to getting the plugin up and running on your website.
2. Configuring the WebP Converter for Media Plugin
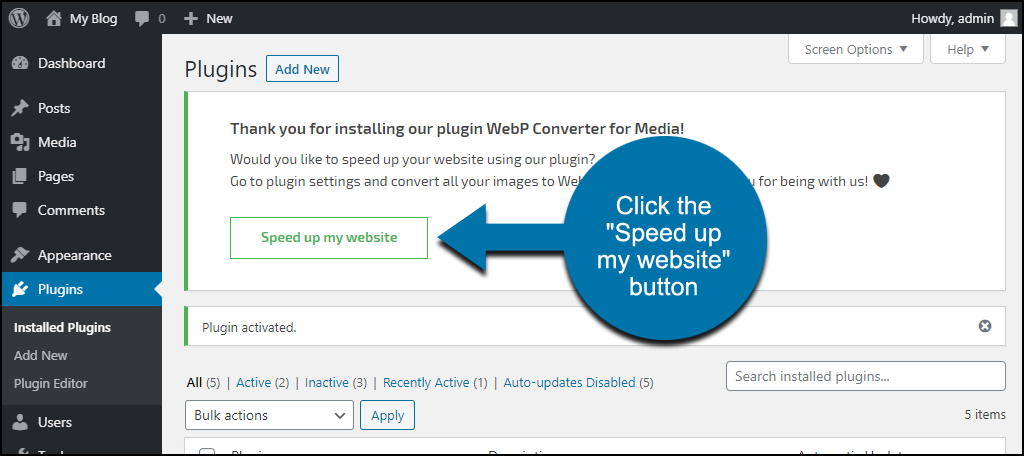
After activating the plugin, you’ll see a “Speed up my website” button on the plugins page. Click it to get to the configuration page.
If you don’t see the button or have navigated away from it, not to worry. In the left column navigation, mouse over the “Settings” link and click the “WebP Converter” link.
A Note on a Potential Issue for Some Websites
If your web hosting uses server caching for redirects, the plugin won’t work properly. The plugin can detect caching and will display this error if you’re affected:
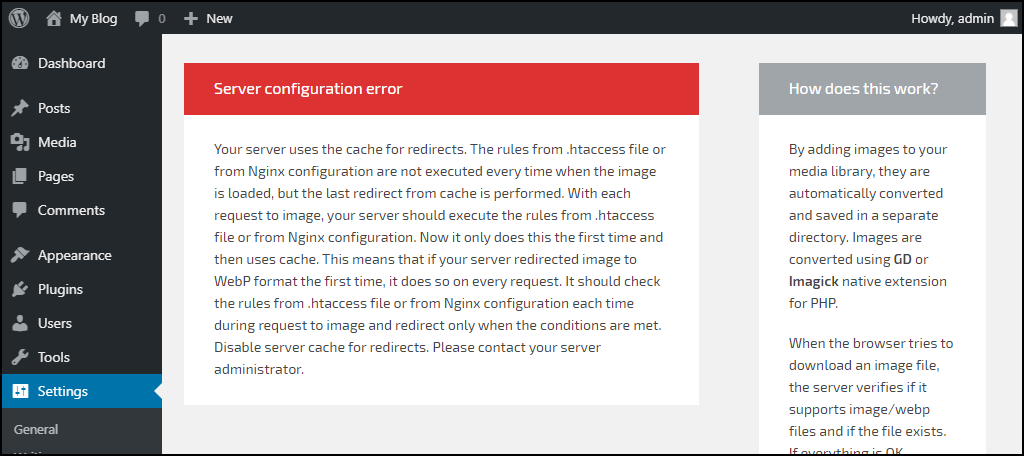
If you see the error, ask your web host to disable server caching of redirects on your account. If that isn’t possible (or your host is unwilling to make the change), you can’t use the plugin.
Don’t ignore the error and go forward with the plugin configuration. Running the plugin in that server environment will cause image display problems.
Okay, back to our configuration.
On the WebP Converter page, the first thing you’ll see is a List of supported files extensions. Those are the file types the plugin will work with.
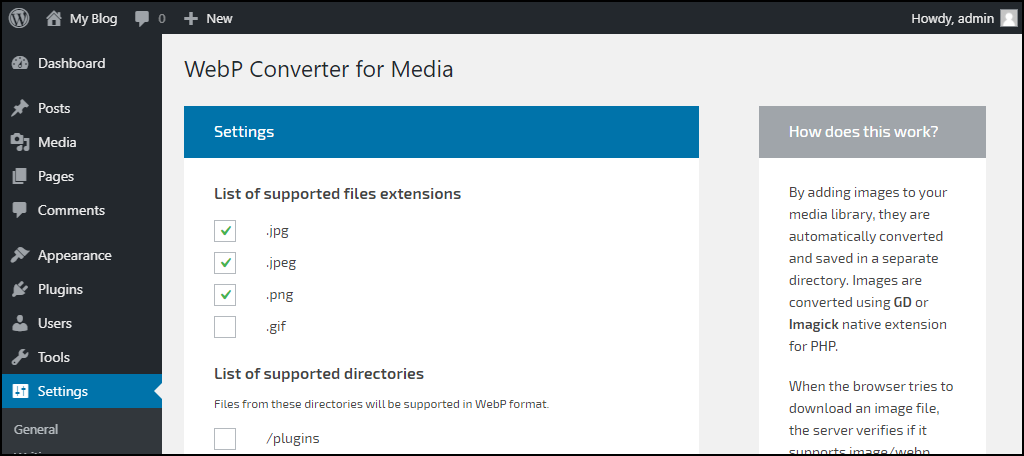
GIF is not selected by default. If you use GIF images on your site, you may want to check that option. Animated GIFs converted to WebP should still be animated since the format supports it.
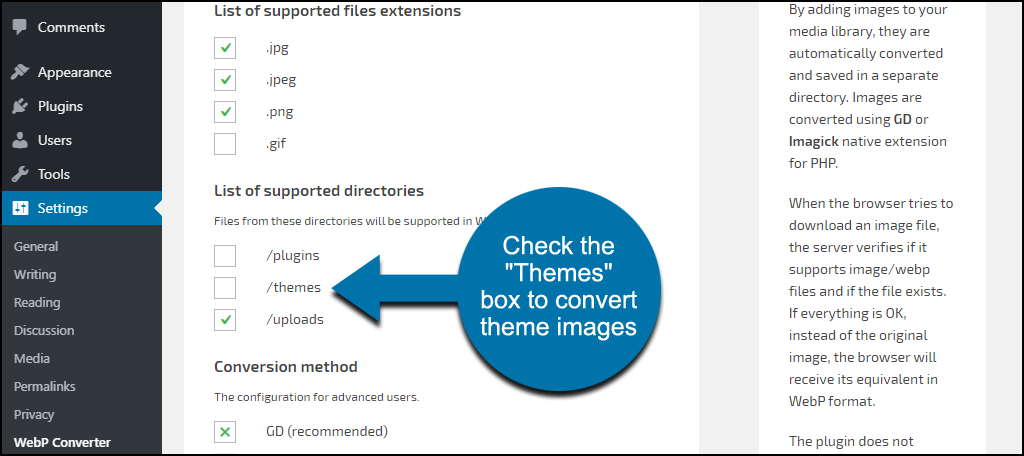
Next is the List of supported directories section. By default, only your uploads (usually in the Media Library) are selected.
If you want to convert your theme images to WebP, check the “/themes” box.
The Conversion method option can be left on the default “GD” setting. If you use or prefer Imagick, you can select that option (if your server supports it).
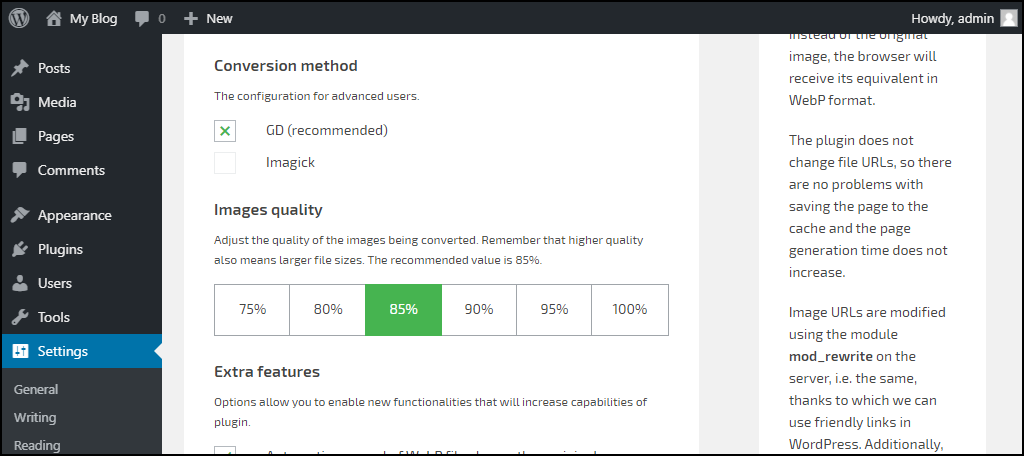
The Images quality section is where you choose the amount of compression the plugin uses to convert JPG to WebP.
The larger the percentage here, the larger the image files will be. The default (and recommended) quality is 85%, so we’ll leave that where it is.
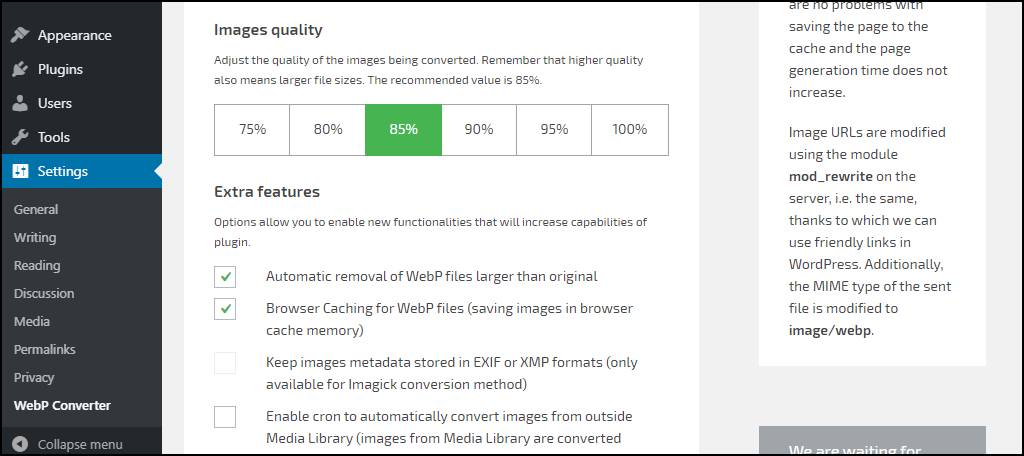
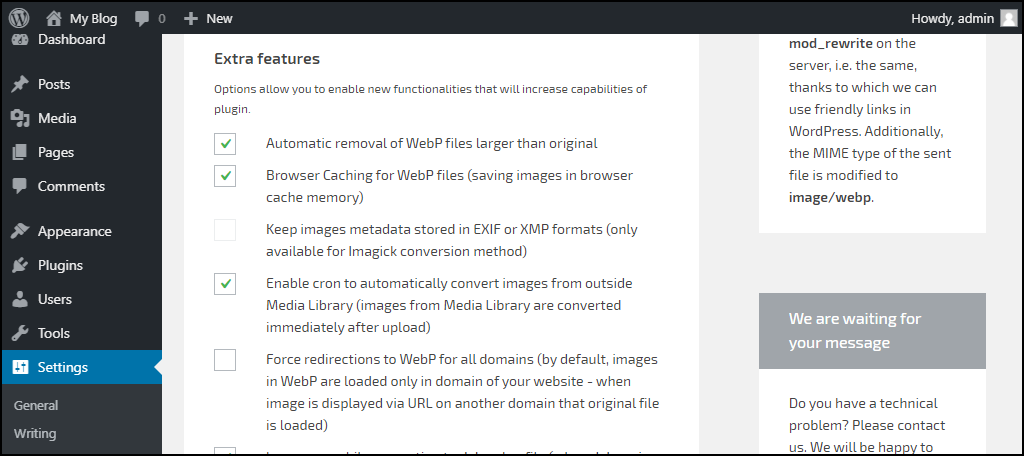
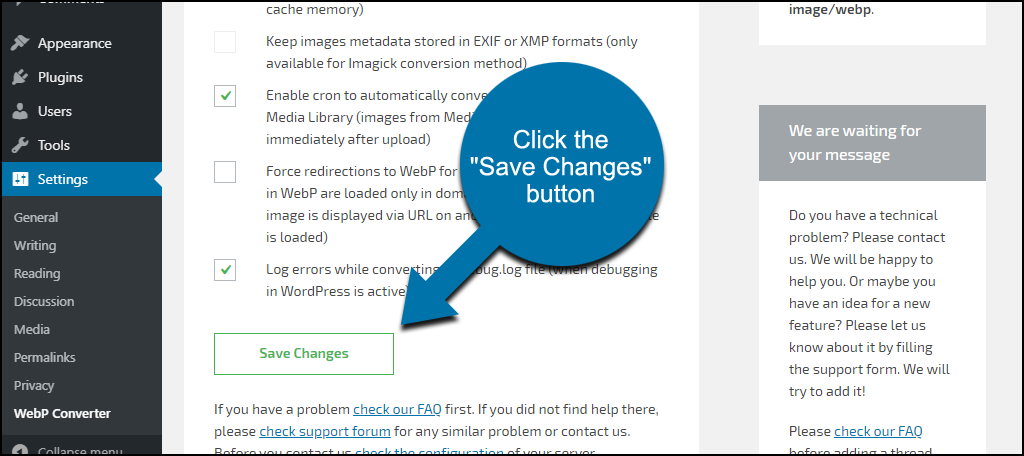
The Extra features section contains some advanced configuration settings. If you’re unsure about any of the options, just leave the default values.
If you’ve made any changes, click the “Save Changes” button.
3. How to Convert Existing Images
Any new images you upload after installing the plugin will automatically be converted to WebP.
But what about your existing images?
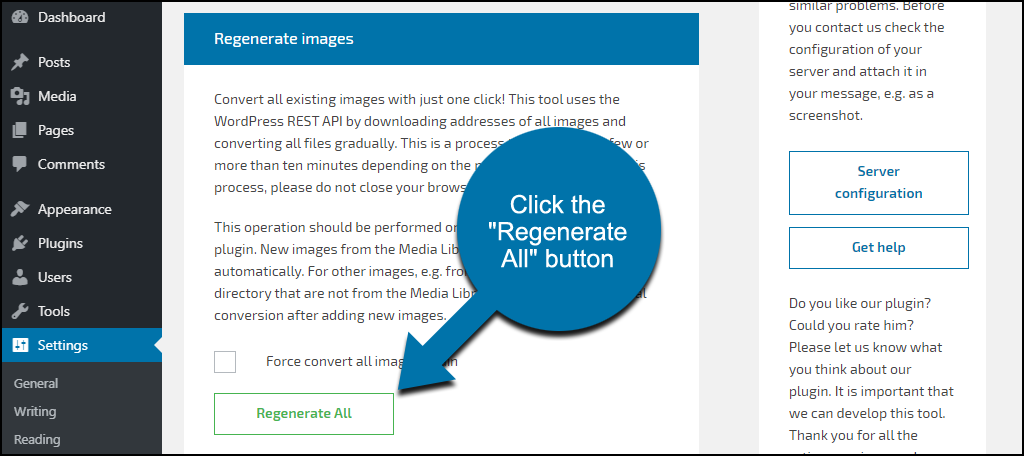
You should still be on the WebP Converter page, so scroll down to the “Regenerate images” section.
Leave the “Force convert all images again” box unchecked and click the “Regenerate All” button.
When the WebP convert is complete, you’ll see a success message.
But you may also see errors.
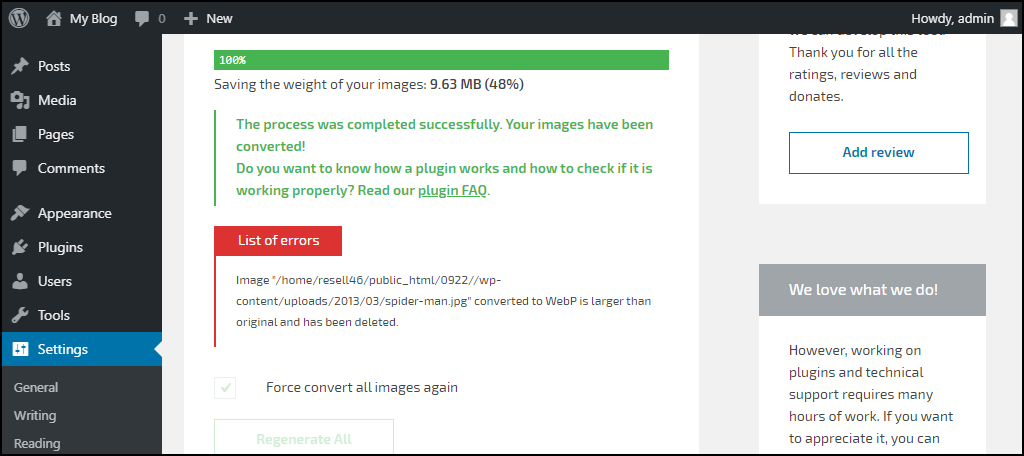
The error is saying that the plugin converted an image, but the WebP image was larger than the original. So the plugin deleted the WebP file.
So that’s not really an error, strictly speaking. And it’s not a problem, since the original images are still served to the visitor’s browser when it’s appropriate.
The higher you set the “Images quality” percentage, the more you’ll see those errors. The lower the “Images quality” percentage, the fewer such errors will happen. But of course, the lower you set the percentage, the lower your image quality will be.
4. The Results of the WebP Image Conversion
After the conversion, the WebP images that were generated are available on your site.
The original:
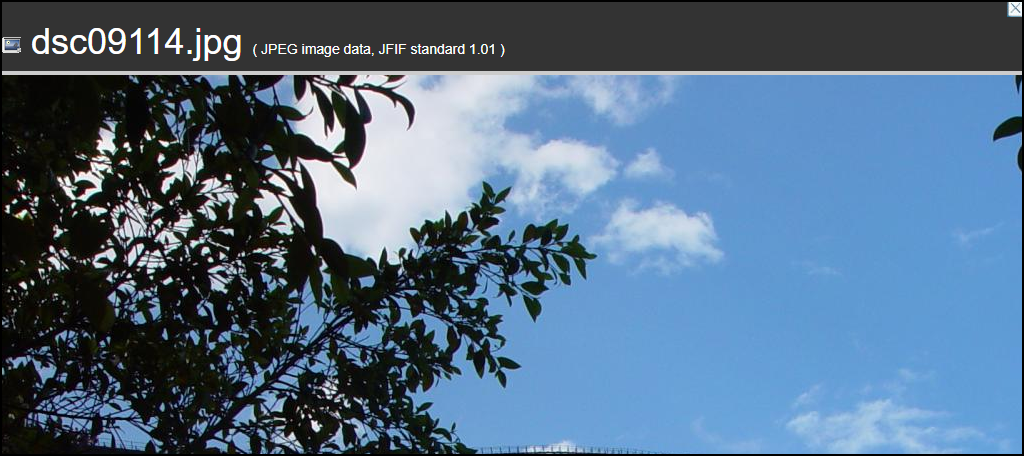
The WebP version:
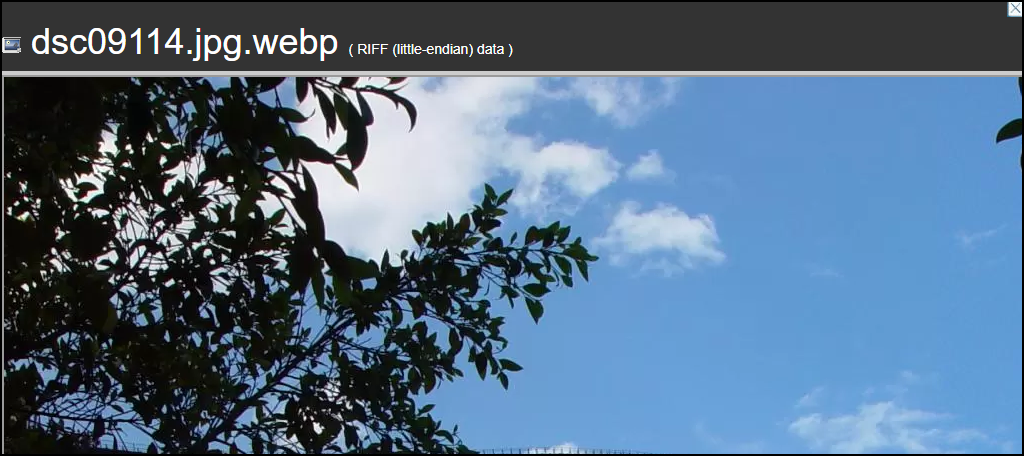
You don’t have to change anything or even know the path to the new WebP image. The plugin takes care of everything for you.
5. What Happens if You Uninstall the WebP Converter Plugin
- When you deactivate the plugin, your site will stop serving WebP images.
- If you delete the plugin, your site will stop serving WebP images. In addition, the /uploads-webpc directory containing the WebP images will be deleted. If you want to keep a copy of the WebP images, make sure to download them before deleting the plugin. Once the /uploads-webpc directory is deleted, there’s no way to get the images back.
The plugin does not appear to create any database tables. So no database cleanup is necessary when the plugin is uninstalled or deleted.
The above issues are what we found in the course of our use and testing. There may be other issues that our testing did not uncover.
Do You Need a WordPress WebP Converter Plugin?
Like any WordPress plugin, there’s no direct answer to who needs it or how beneficial it can be. Every plugin adds “overhead” in the form of server resource use and load time. That overhead is usually minimal. But if your site uses very few images, there may not be a significant benefit to using WebP images. (Not to mention the overhead necessary to know when to serve them.)
On the other hand, most image-heavy sites can undoubtedly benefit from the increased speed smaller image files can bring. For most images, the additional compression used to create a WebP image is not noticeable. Depending, of course, on how much you choose to compress them (the “Images quality” percentage we talked about).
For a site where image quality is important, say a photography site, WebP is not usually going to be desirable. The purpose of WebP is to provide smaller image file sizes, and that comes at the expense of image quality. If you’re particular about the quality of your images, you’re bound to find fault with WebP.
But for most of us, especially those of us with large images on our sites, WebP can help. Google likes to see WebP images (no surprise there since it’s their technology), though they are not a ranking factor. The site response speed is a factor, though, so any time you can cut that time, you’re coming out ahead.
Have you been waiting to make a move to WebP images? What’s been preventing you so far? Do you think you’ll give this plugin a try?
Let me know in the comments. I’d love to hear from you.
Thank you. Good tutorial!