Do you have a great business idea, but can’t secure the funding to get started? If so, you’re not alone. But luckily, banks are not the only option to consider nowadays. Instead, you can try setting up a crowdfunded project with the WP Crowdfunding plugin for WordPress.
If your project can reach and appeal to enough people, you might just get the funding you need, or at least secure enough funding to convince real loaners to join in. And the first step to this is to create your own crowdfunding website.
Today, I will demonstrate how to use the WP Crowdfunding plugin to begin gathering funding.
What is Crowdfunding?
Crowdfunding is a technique many start-up businesses utilize to acquire the funding necessary to start their business or fund specific projects. They achieve this by collecting small amounts of money from a very large group of people, and sometimes, it can take years to reach a goal.
Many of these start-ups will choose to use a third-party platform that already has an established reputation and userbase. This will ensure more people will see the funding request and that they will be likely to trust the project.
However, these platforms are not a charity and take a portion of the money raised to cover transaction fees and make money. Instead, you can build your own crowdfunding website and cut out the middle man.
That said, unless you have a way to spread the word, you may not be able to reach enough people with your idea.
How to Use WP Crowdfunding WordPress
Step 1: Install WP Crowdfunding
WP Crowdfunding is a WooCommerce-based plugin, which means you must also install WooCommerce on your website. With this plugin, you can create a WordPress crowdfunding section or dedicate the entire site to your purpose.
This means accepting payments from funders, setting goals, seeing progress, and just about everything else you will need to manage your fundraiser.
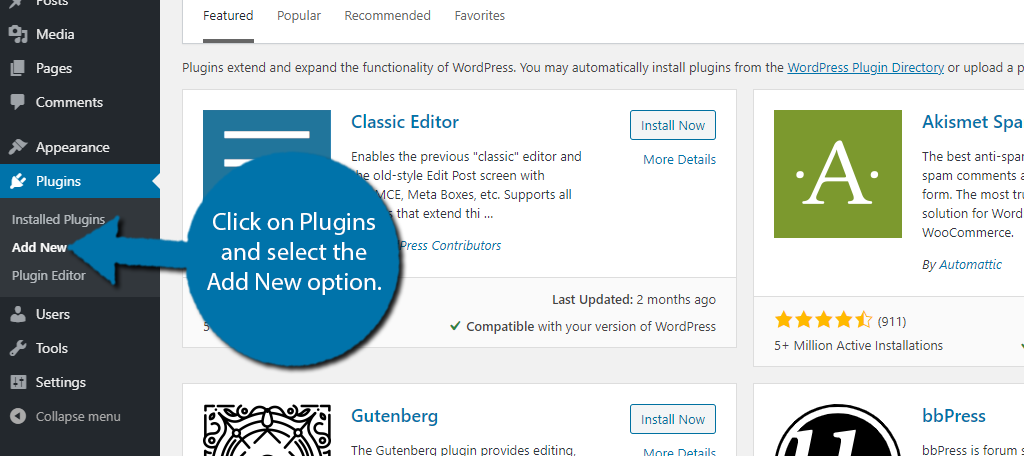
Let’s start by clicking on Plugins and selecting the Add New option on the left-hand admin panel.
Search for WP Crowdfunding in the available search box. This will pull up additional plugins that you may find helpful.
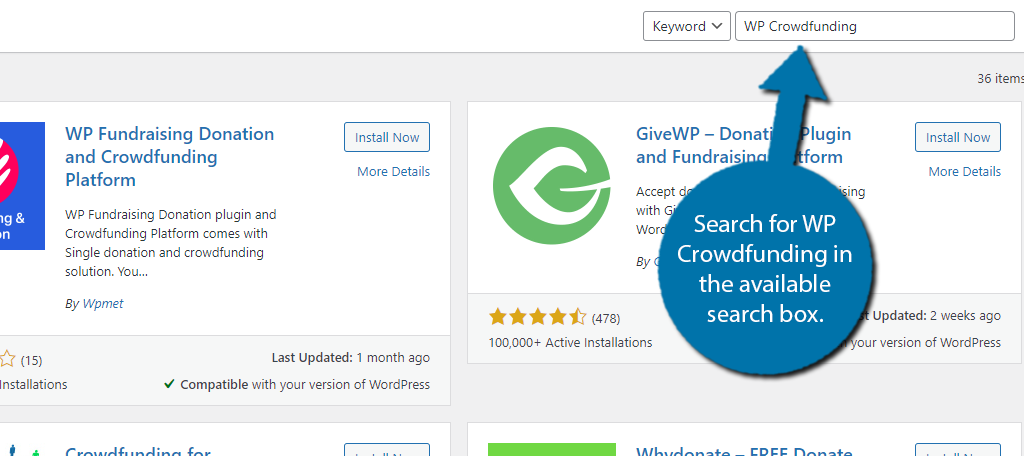
Scroll down until you find the WP Crowdfunding plugin and click on the “Install Now” button and activate the plugin for use.

Note: If you don’t have WooCommerce installed, you will receive an error message informing you to do so. This plugin assumes you have WooCommerce installed and set up as this is required for the plugin.
Step 2: Ensure Your Payment Method is Set Up
While I am assuming that you have WooCommerce set-up, there is one thing you really need to make sure of before proceeding, the payment method.
WooCommerce supports a variety of payment options including PayPal and Stripe. However, depending on how you have these accounts set up, they may not be in a position to, hopefully, accept hundreds or thousands of transactions as donations begin flooding in.
This is also a great time to take a deep look at the transaction fees of each platform.
While you want to ensure you make it easy for customers to donate, it is important to realize that the transaction fees can cost you a lot of that money. You might even want to exclude certain options.
I highly recommend getting into contact with each payment system and seeing what options they might offer a crowdfunding website. After all, crowdfunding is very common online today.
Step 3: Setup Pages
This plugin adds a variety of pages to your website that includes the CF Campaign Form, CF Dashboard, CF Listings Page, CF User Registration, Donation Confirmation, Donation Failed, and Donation History.
Each of these pages consists of just a basic shortcode and really needs to be fleshed out. Spend some time customizing these pages. That said, you could simply add the shortcode to an existing page if it better suits your needs.
In the next step, you will have to decide which pages are used when and where.
Step 4: Configure the Settings
With that out of the way, let’s get right into the settings of this plugin. For the most part, everything is very straightforward, but there is a lot to go through.
Note: There are multiple premium add-ons you can pay for which offer a variety of useful features. One big one would be access to the Stripe Connect payment gateway. That said, this tutorial will not go through the premium add-ons at this time.
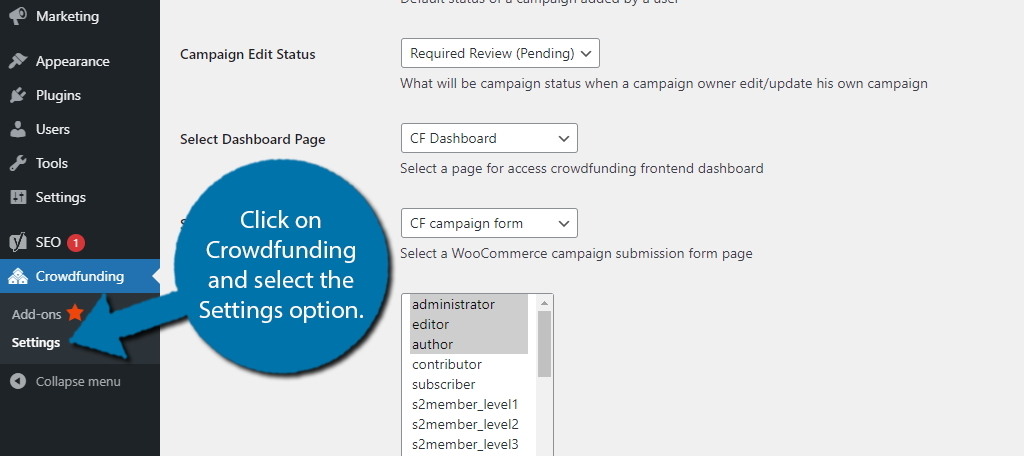
On the left-hand admin panel click on Crowdfunding and select the Settings option.
The plugin is broken up into four main tabs that contain a variety of settings to configure.
I will cover each tab individually.
General Settings
The General Settings tab allows you to choose the funds manager, which is the system that will accept and manage payments. However, you can only select WooCommerce, so there is no choice in the free version.
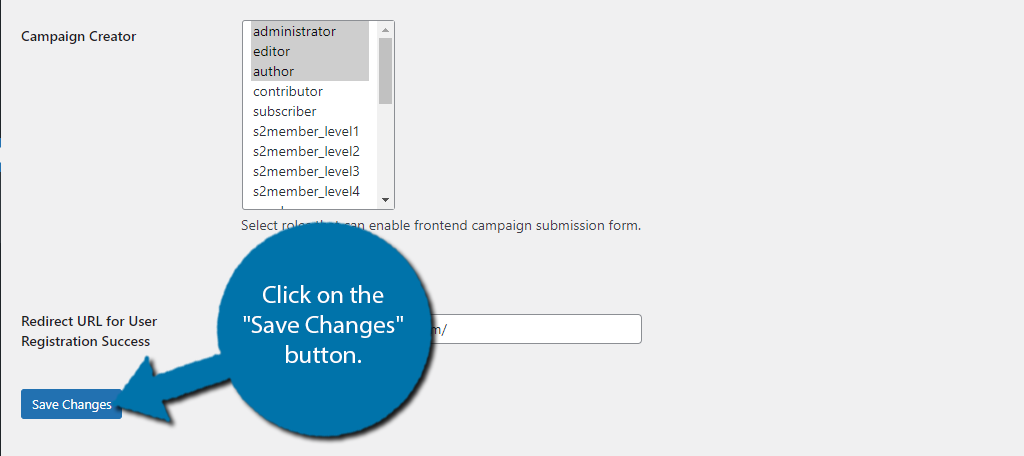
You can then set up the default campaign status, campaign edit status, select a dashboard page, campaign submission form, and which user roles can create a campaign. I recommend only letting the administrator role have this privilege.
Click on the “Save Changes” button when you are done.
WooCommerce Settings
The Woocommerce Settings tab deals more with the way crowdfunding is handled and is broken up into multiple sections.
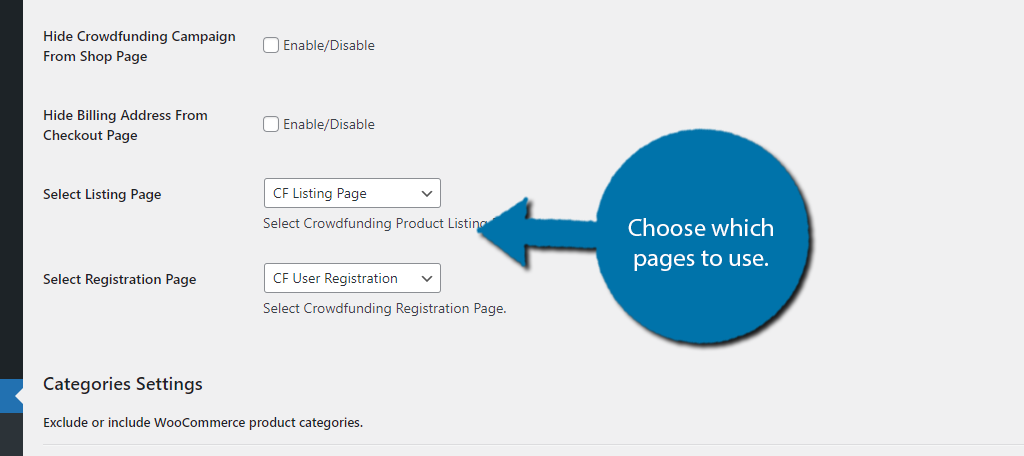
The first section allows you to hide both the crowdfunding page from the shop page and the billing address from the checkout page. You can also select the listing and registration page here.
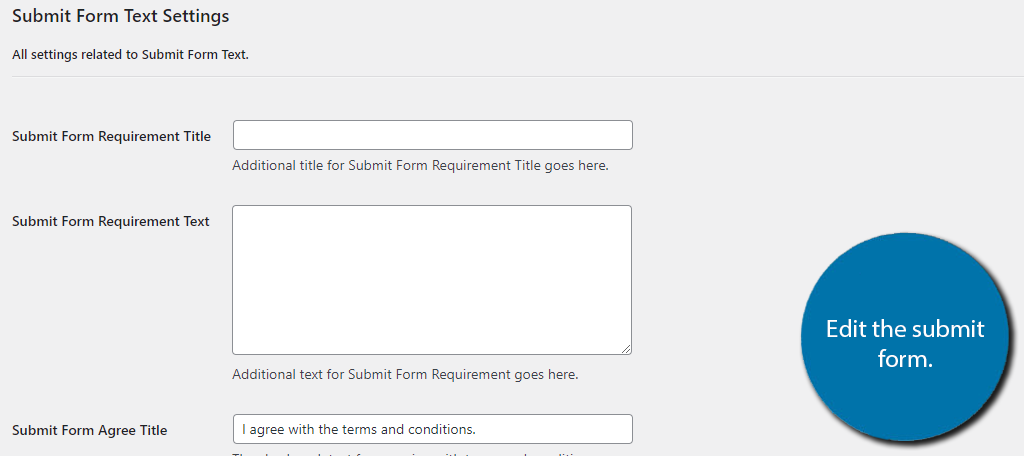
The Categories section allows you to separate crowdfunding categories from shop categories. And below this, you can customize the submit form.
The rest of the settings allow you to customize various page elements like how many items will appear on the listings page. Simply fill them out and click on the “Save Changes” button.
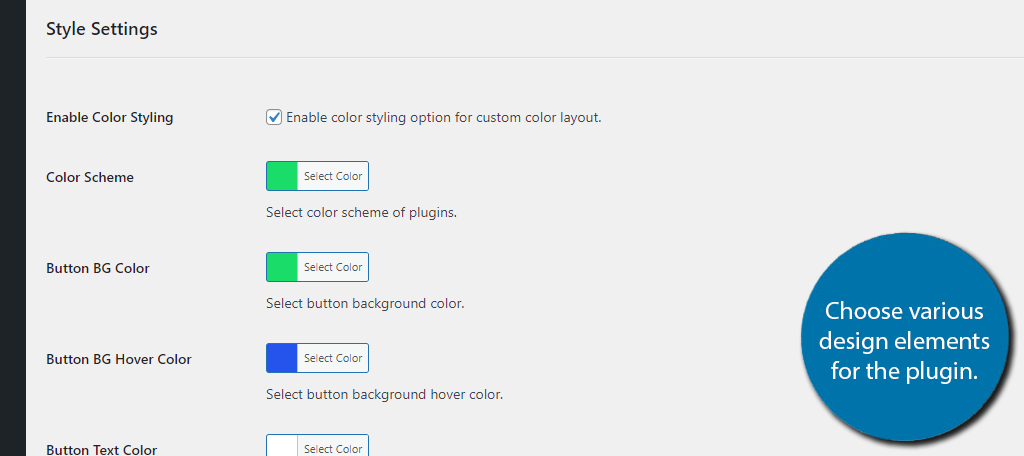
Style
The Style tab is dedicated to the aesthetics of the plugin. You can select the color scheme, button color, hover color of the button, text color, hover text color, and you can even add your own custom CSS to better match your website’s design.
Simply select the options that work best for your website.
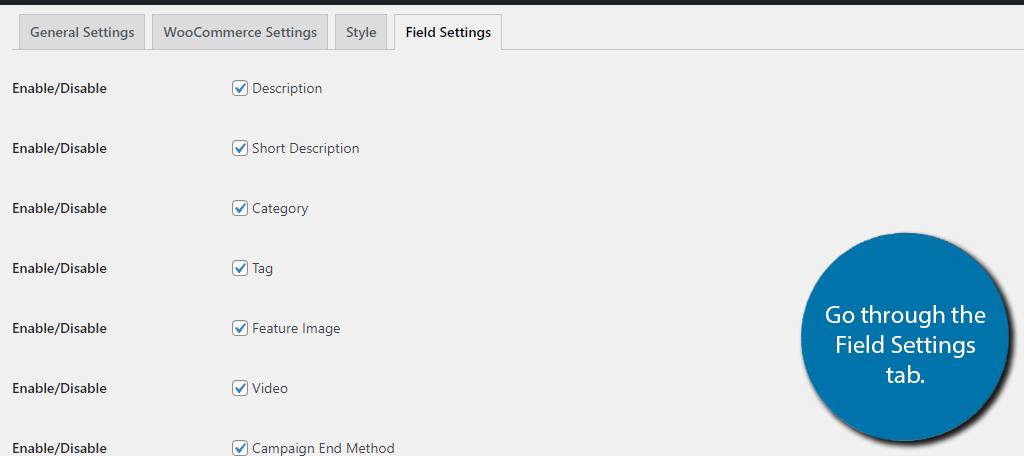
Field Settings
And finally, the Field Settings tab allows you to hide or display various information on your crowdfunding pages. These include things like the start & end date, minimum donation amount, videos, funding goal, and much more.
All of these options are handled with a checkbox, thus you simply need to check the box to enable a feature and uncheck to hide it. By default, everything is checked.
That concludes all of the settings the plugin offers. As long as you customize your pages, your crowdfunding website is ready to go.
Congratulations!
Build A Userbase
Crowdfunding can only succeed if there is a crowd. Starting a website from scratch is an uphill battle and you are going to need to put in a lot of work to build up a sizeable userbase that will attract businesses to use your website.
There are a variety of website marketing tips available, and you are going to need to take advantage of just about every single one of them.
Which WordPress crowdfunding plugin do you use? How easy did you find the setup process to be?