
With thousands of plugins to choose from, WordPress can do pretty much anything from blogs to eCommerce. While it might sound a bit strange, you can also use it to write a novel with the BookPress plugin.
Not only can you write the book from start to finish in WordPress, but you can also display the book, and even sell it with the help of other plugins. As such, WordPress is a great platform to use if you want to write a book.
Today, I will demonstrate how to do this with the BookPress plugin.
This tutorial is for:WordPress 6.4Plugin: BookPress v1.2.4
Why Create a Book in WordPress?
While it is true that you can use anything to write a book, like George R.R Martin, who famously writes on WordStar 4.0 which was released in 1987 and saves his work to a floppy disk in 2023, there are some advantages to doing it on WordPress.
Naturally, having a WordPress website dedicated to your books can be quite handy for digital book distribution, which is how many amateur writers get started. Writing the books, also allows you to build it specifically for your website.
And unlike normal writing where you send the manuscript to a publisher, and they put the book together for you, in this case that’s on you. That means you’ll be responsible for pagination and creating a cover for your book.
Regardless of whether you intend to sell the book or just do it for fun, WordPress is a great platform to do it on.
How to Create and Display a Book in WordPress with BookPress
BookPress is a WordPress plugin that allows you to write a book in WordPress. It is not just for purely writing the book either, it also allows you to create the cover, table of contents, copyright page, and more.
One of the best features is the ability to drag and drop different book elements at any time.
For example, you could rearrange the chapters of your book. It is worth pointing out that the free version of this plugin only allows you to create a single book. If you want to create additional books, you will need to upgrade.
Overall, this plugin is quite easy to use and gives you a lot of control over the book you create.
Note: The plugin page states that it does not work with Gutenberg. Despite this, I tested it with Gutenberg active and had no issue. If you do encounter a problem, consider disabling Gutenberg and use the Classis Editor.
Step 1: Install BookPress
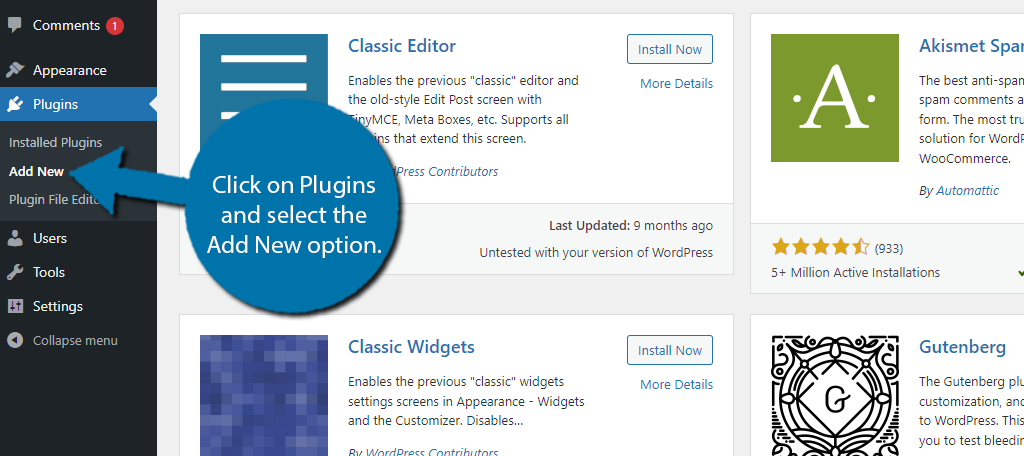
Let’s start by clicking on Plugins and selecting the Add New option on the left-hand admin panel.
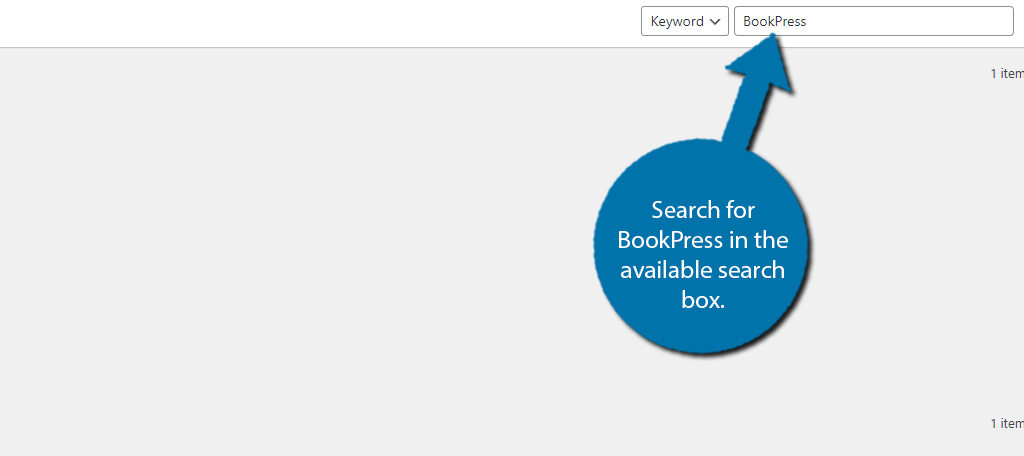
Search for BookPress in the available search box. This will pull up additional plugins that you may find helpful.
Find the BookPress plugin, click on the “Install Now” button, and activate it for use.

Note: Upon activation, you will be asked if you would like to opt-in for security and feature notifications for the plugin. You can either allow or skip it, the choice is yours.
Step 2: Add A New Book
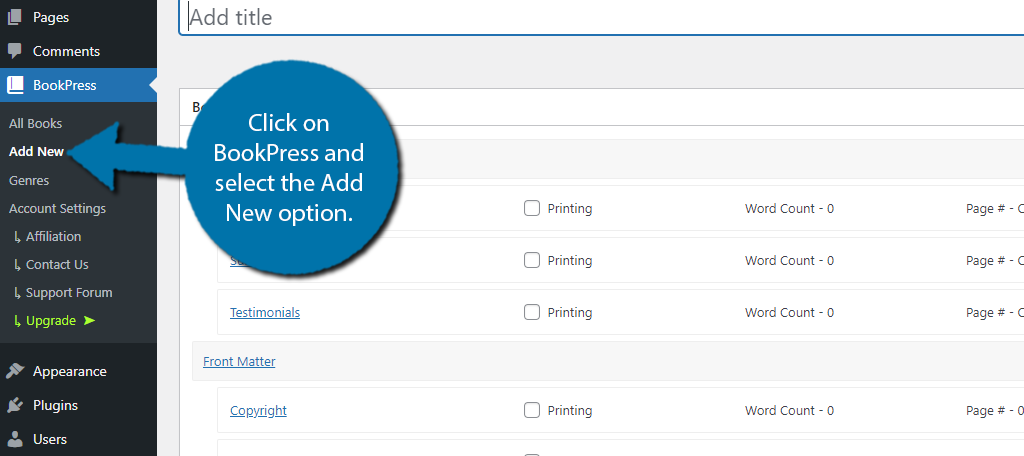
On the left-hand admin panel, click on BookPress and select the Add New option.
At the top of the screen, you will see a red warning asking you to upgrade to the premium version of the plugin. This occurs when you are out of space for new books and since you are only allowed one book on the free version, it is always there.
Unfortunately, it is very annoying and there is no way to dismiss it without upgrading.
Step 3: Add Sections to Your Book
The plugin makes creating a book quite easy and can help you generate sections of your book so they are ready for you to fill in. And rest easy, you can add them at any time, so if you are not sure if you need something now, you can just add it later.
Essentially, this is all designed to help you organize your book before you start writing in WordPress.
At the top, you can add a title. If you don’t quite know what you want to call the book just yet, since you can only have one book at a time, it is actually okay to leave this blank until you are ready to publish it in WordPress.
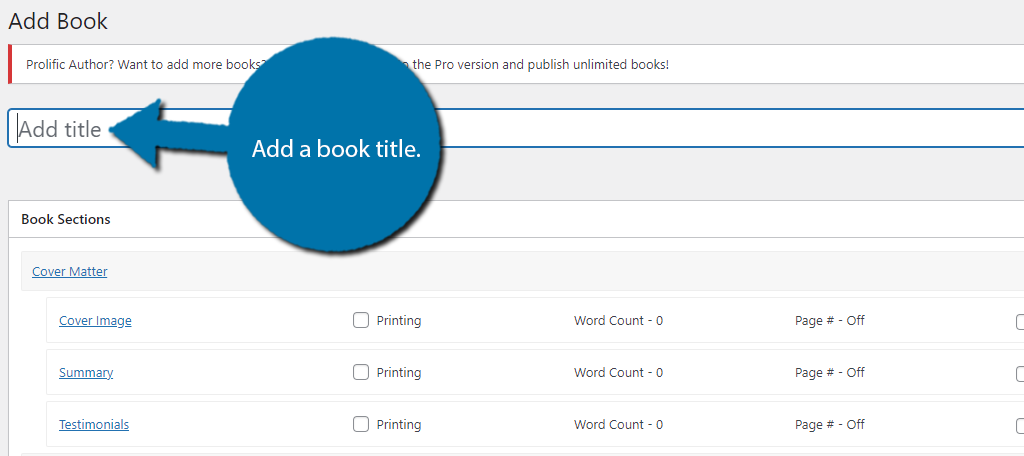
There is a great selection of standardized book sections like the cover image, book summary, copyright page, biography page, table of contents, index, and more. Everything you would expect in a regular book has a pre-made section that you can fill in.
Naturally, you can also create your own sections if needed.
Since the plugin generates all of the template sections for you, you may want to take a minute and go through them. If you don’t want a particular section, just click on the trashcan icon to delete it.
Alternatively, if you want to add a section, just click on the “+” button.
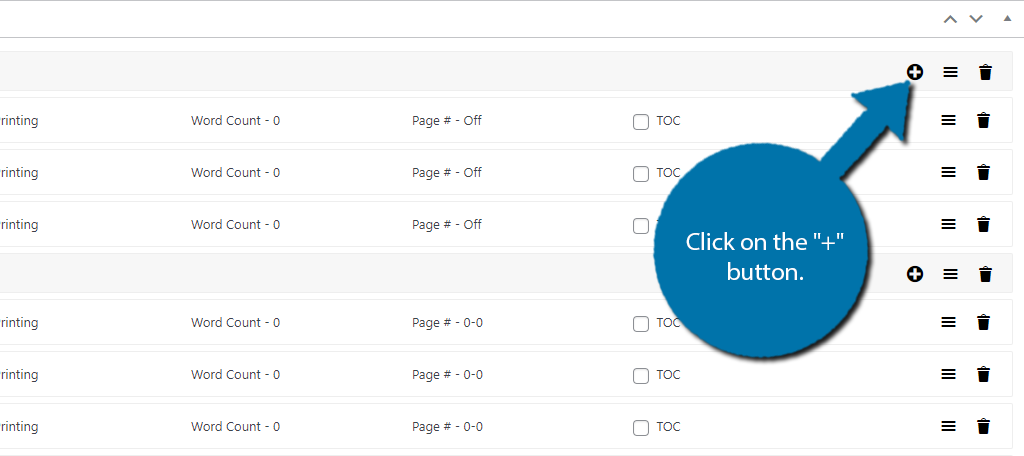
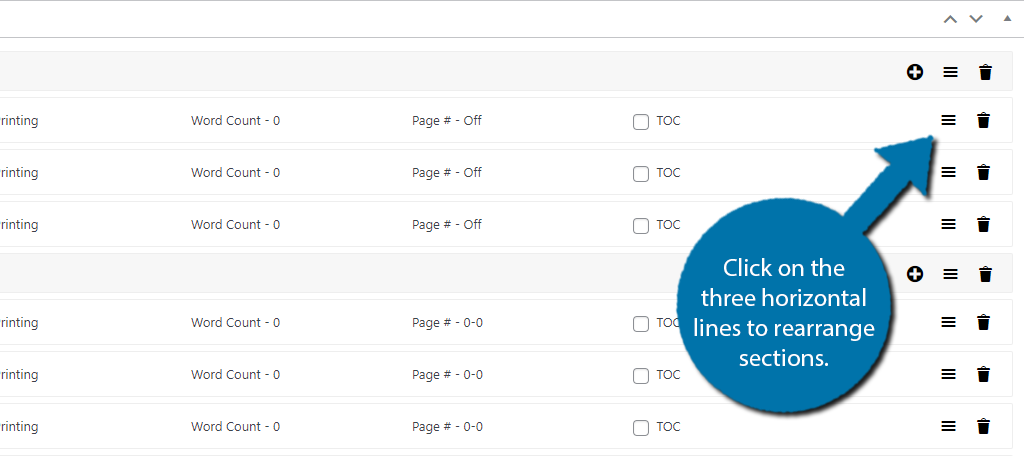
Clicking this will open up a small popup. You can then enter a name for the section and it will be added to the list. You can rearrange the elements by clicking on the three horizontal lines and dragging it to the desired location.
Step 4: Add A Genre
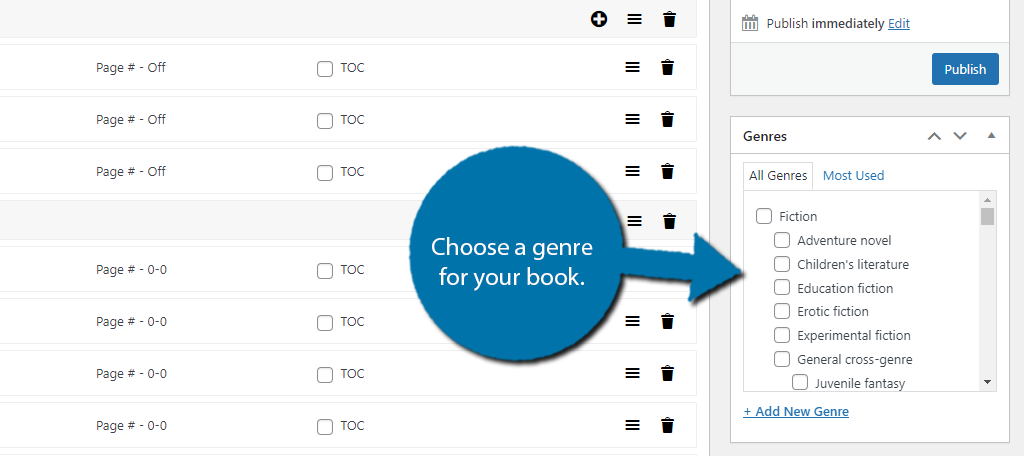
On the right-hand side, you can choose a genre for your book. The plugin does a fantastic job of giving you a lot of options for this by default. And if they meet your needs, you are good to go.
However, if your genre is not actually included, you can just add your own. First, save any changes to the book, Then, click on the Genres option.
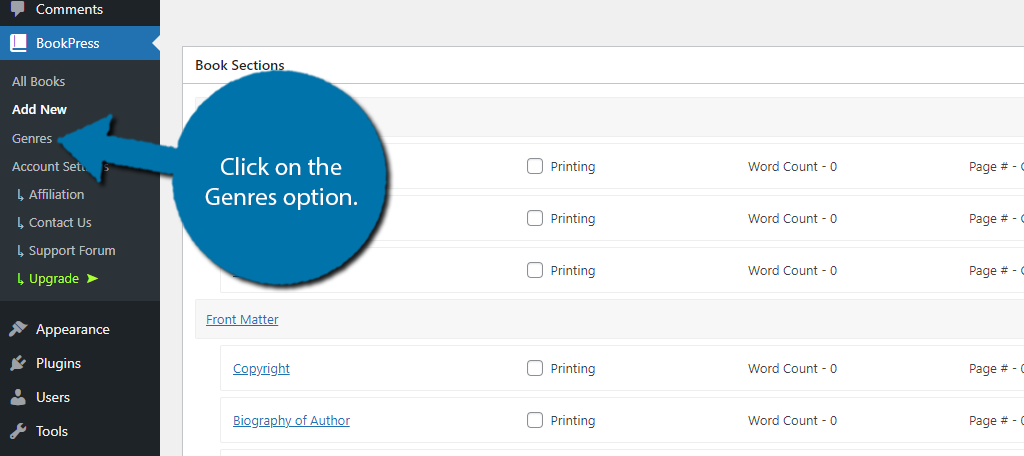
This area is identical to creating categories and tags in WordPress, but it is specific to the plugin. Simply. add any genres you want to use for your books. You can also delete some of the default ones if you wish.
Step 5: Editing the Book in WordPress
You’ve pretty much gotten your book ready to go at this point. All that is left is to get writing. Simply click on the section that you want to edit. You will be brought to the editor. The section name is at the top, which you can edit.
And below this is just a blank canvas that you can write in. If you are not sure how to use Gutenberg, check out our guide.
More importantly, there are some options on the right-hand side. These allow you to include a page number, include it in the table of contents, include it in the total word count, and more.
Simply check the box to enable or disable that setting.
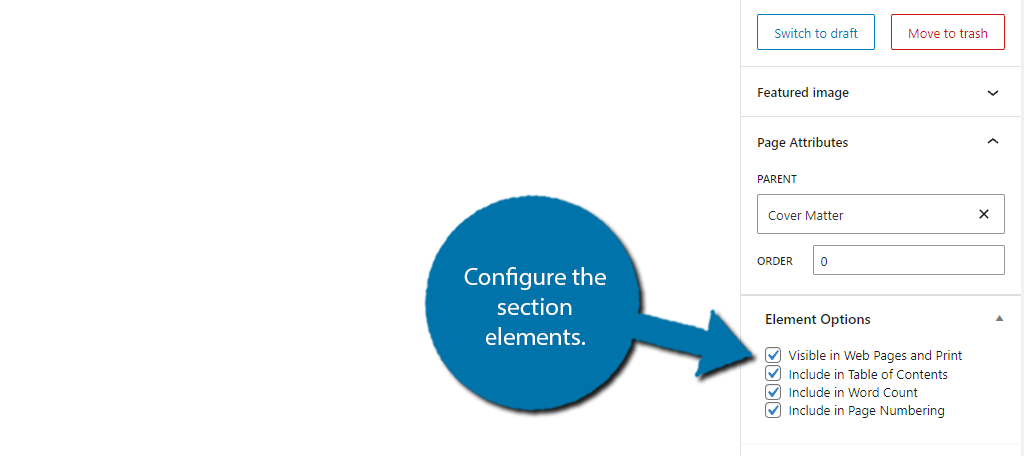
Note: You need to do this for every element you plan on adding to the book.
At this point, you know everything you’ll need to write your book in WordPress with BookPress.
Step 6: Displaying the Book in WordPress
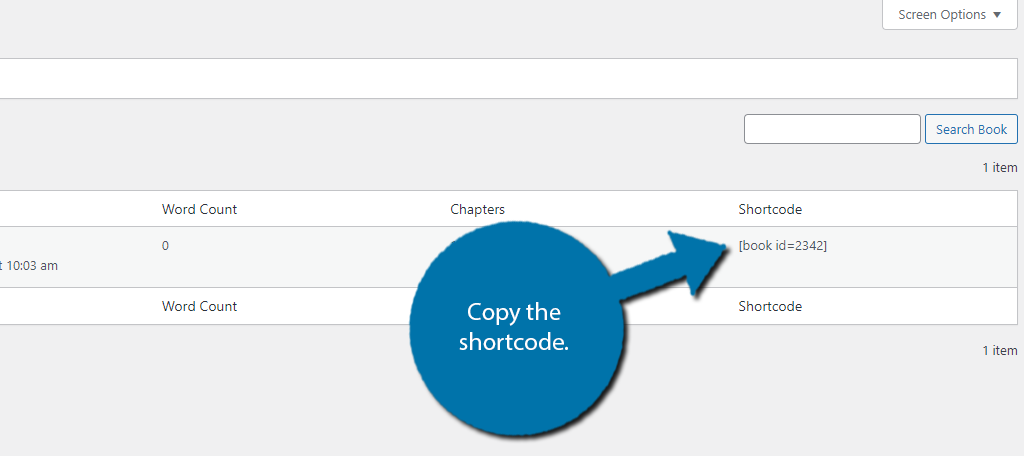
Once you finish writing your book, all that is left is to display it for users to read. The plugin utilizes shortcodes. Essentially, each book has a shortcode, and you just need to add it to the page or post that you want it in.
To find the shortcode, simply click on the All Books option. Here you will find a list of the books in WordPress. In this case, we only have one since it is the free version. You will find the shortcode on the right side.
After that, it is just a matter of placing it. You can enter the shortcode into a shortcode block on a post or page. Save the changes, and you can view the book you published.
Congratulations on learning how to create and display a book in WordPress.
Benefits of Offering A Book
If writing a blog post can make you seem like an expert on a subject, what do you suppose writing a book does for your reputation?
Well, I can assure you that it will increase your reputation to new levels. It makes the average visitor and reader think you are smarter than the competition. In fact, this is the main reason why many “so-called experts” have books published under their name.
It’s a great marketing tool when used correctly, even when the book is free.
However, for businesses, books are not just a tool for building a reputation. You can include them in packages for free to add value to a certain product. In reality, this is a very common practice.
You have probably seen it a lot if you shop online often: Act now and receive access to a free eBook. It just adds value to everything.
Write A Book in WordPress Today
Creating a WordPress website to view your book is a great way of getting started as an author, even if you just do it as a hobby. If your following grows enough, you might even be able to make a living out of it.
For example, selling your books on your site with the help of WooCommerce, or accepting donations from users. You can even create a blog to outline your writing updates ad give more insight into the process you follow.
In any case, I hope you found this tutorial helpful and enjoy using BookPress to write in WordPress.
Did you find BookPress easy to use? Do you think WordPress is a good environment to write a book in?
Hi Robert, Thank you for all the information! Great job. However, when I copied the shortcode to a new page, and then a new post page I get one word. That’s it. I have created five chapters with a word count of 2464 and I still see only one word. I don’t know if you can help but I’m very frustrated. Thank you Gloria
Hello Gloria,
Unfortunately, I’m not sure what would cause that, but I would recommend asking the plugin developer. You can start a support inquiry here: https://wordpress.org/support/plugin/book-press/
I’m just starting out. It may not be a good idea to deactivate Gutenberg now;Is it true that in another year Gutenberg will be the only option?
Gutenberg is the standard now for WordPress. You will still be able to use the classic editor, but for all intents and purposes, WordPress will now move forward with a block-based editor.
Before I try BookPress could you tell me if I can paste and copy my finished book to WP from Word?
Copying some text from other word processors doesn’t always work the best when pasting into WordPress. I haven’t tried it with Word, but I know the formatting doesn’t always copy over from things like LibreOffice or Google Docs.