Gravity Forms is arguably the best WordPress form system available today. While there are definitely some other good ones to choose from, this form builder allows for the most customization and gives you the ability to really open a site up using different types of forms.
It is important to remember that while many WordPress form plugins are free, Gravity Forms is not. You will have to purchase a license from them in order to use the product.
That being said, you can demo Gravity Forms for free for 7-days and see if it is a fit for you.
It is also important to note that while the Gravity Forms WordPress plugin is a premium plugin, there are several great free plugin add-ons that can be used with it. I will show you some of those below.
This demo will give you access to all the functionality the plugin provides and allow you to build several different Gravity Forms examples that you can view and play with.
What is Gravity Forms?

Originally built for contact form creation, Gravity Forms has now morphed into a plugin that allows website owners to create a number of different forms that collect information.
The plugin can be used for contact forms, employment information, calculators, post creation, products, donations, and payments. As of right now, the plugin gives you the ability to build just about any type of form imaginable.
The premium version also comes with a ton of built-in add-on options that you will find in your account. From signature boxes to payment gateways, this plugin has it all.
Furthermore, this is an open-source plugin. All of the code included is unencrypted and easy to modify. There are also dozens and dozens of hooks and filters that allow you to customize without limits.
The form builder is written in PHP and uses many of the WordPress built-in functions and features to power the plugin. The setup also uses the very same MySQL database system as WordPress. The main difference is that it stores all forms and entries in its own tables.
How to Use Gravity Forms
Step 1: Install and Activate the Plugin
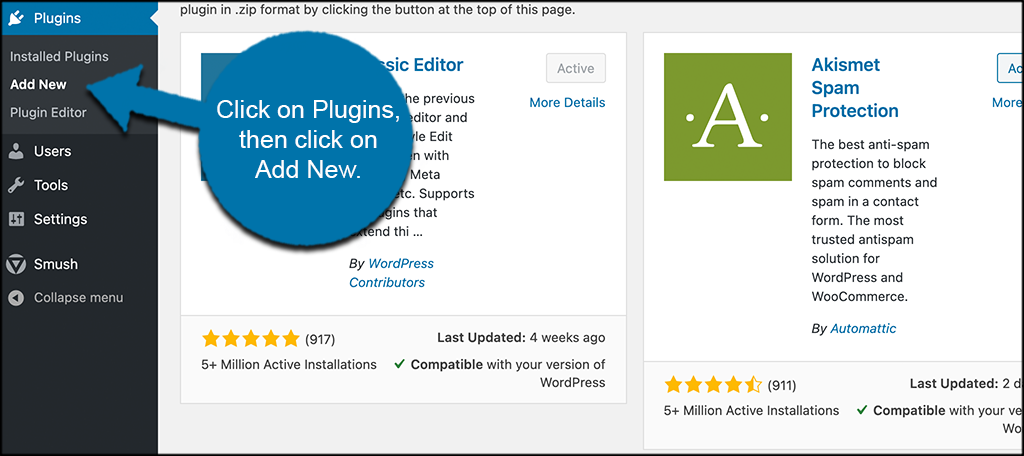
The Gravity Forms for WordPress plugin is installed and activated just like most other plugins. However, it will not be available as part of the Plugins library in the WordPress dashboard.
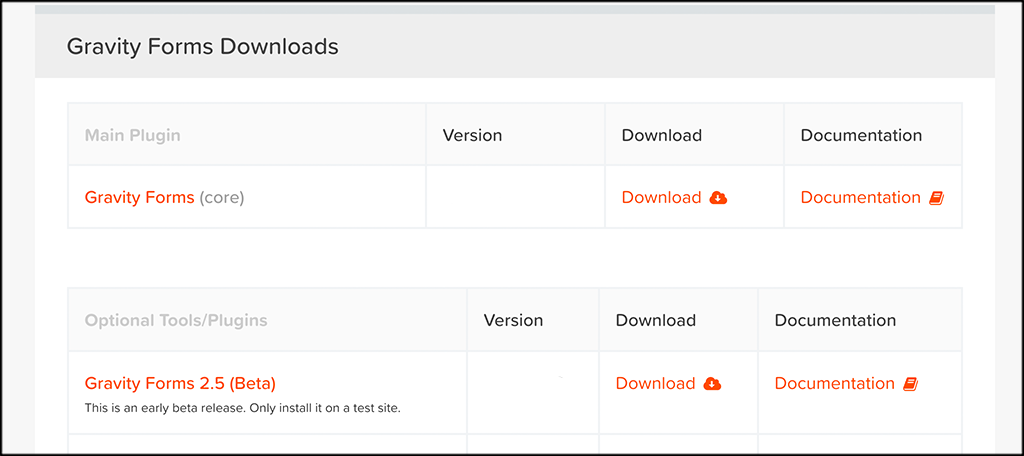
Once you purchase a license, you will have access to everything. You simply go to your “Downloads” page and download the plugin to your machine.
Once the plugin is downloaded to your machine, head over to the website you want to install it on. Inside the dashboard, click on Plugins > Add New, located on the left menu area.
From here, click on the “Upload Plugin” button.
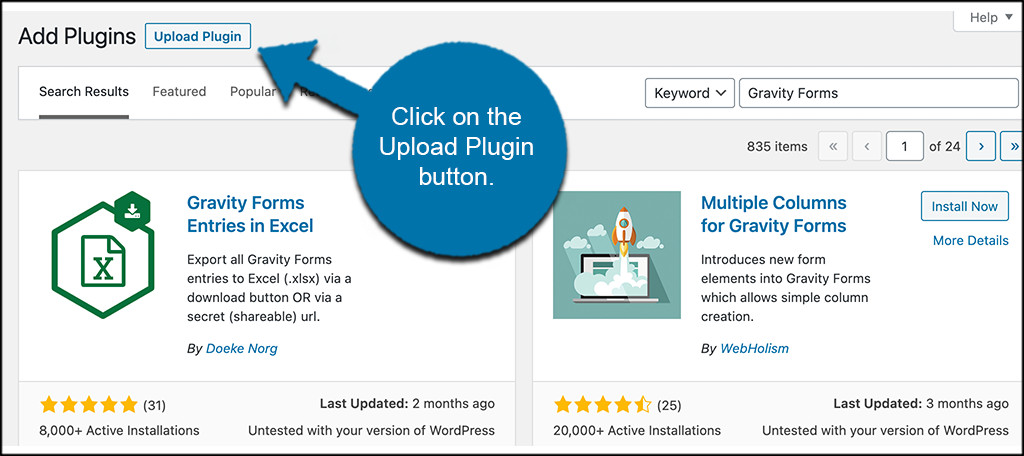
Now, click on the “Choose File” option that is displayed. Select the Gravity Forms plugin from your machine and upload it.
Go ahead and activate it now.
Step 2: Enter License Key and Other Configurations
When you activate the plugin, you will automatically be taken to where you need to enter the info for the license key and select some other configurations.
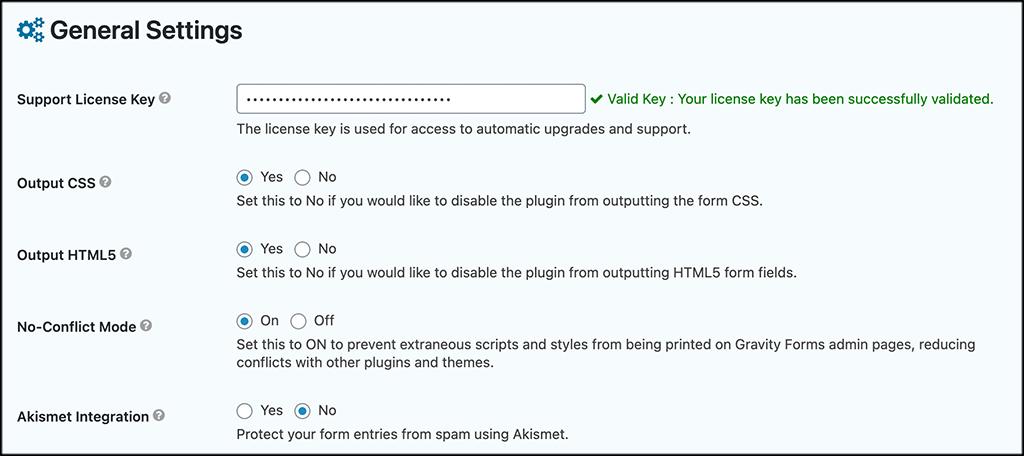
Go ahead and do that now and click on the “Save” button.
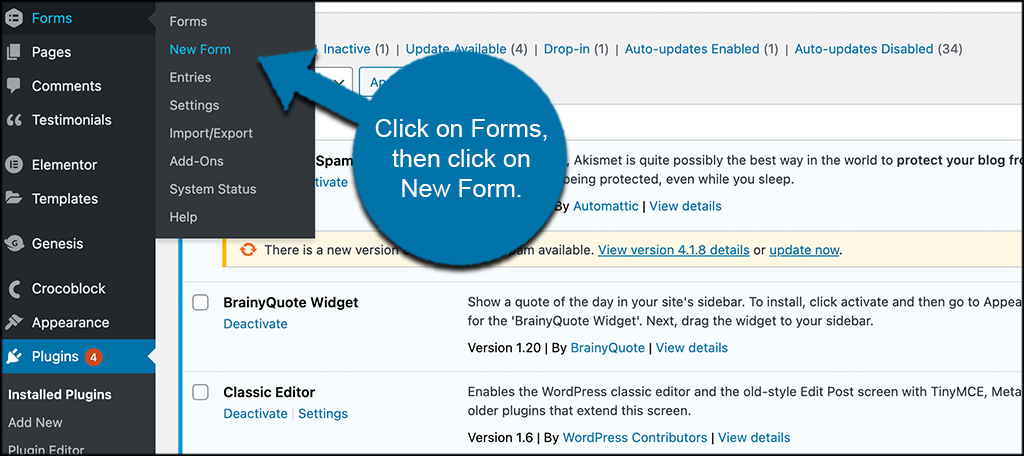
Step 3: Add a New Form
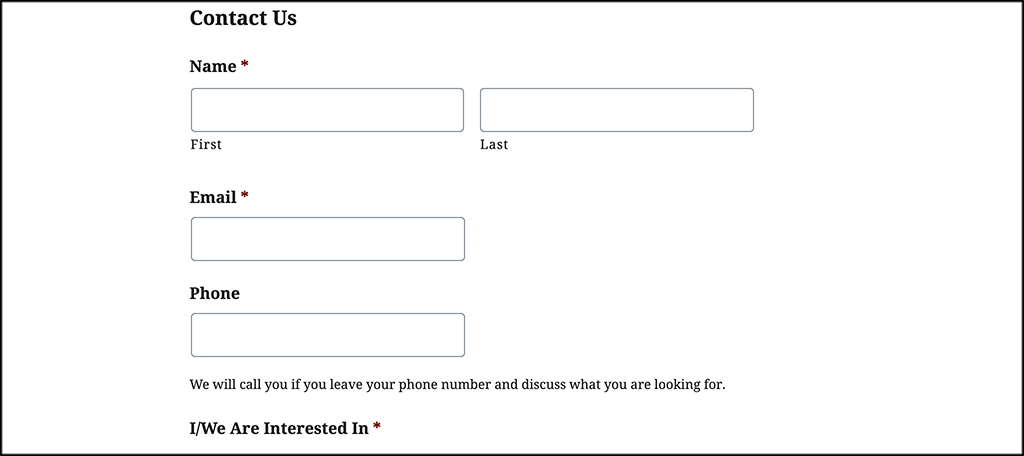
At this point, Gravity Forms is installed and fully running. You can add a new form by clicking on Forms > New Form.
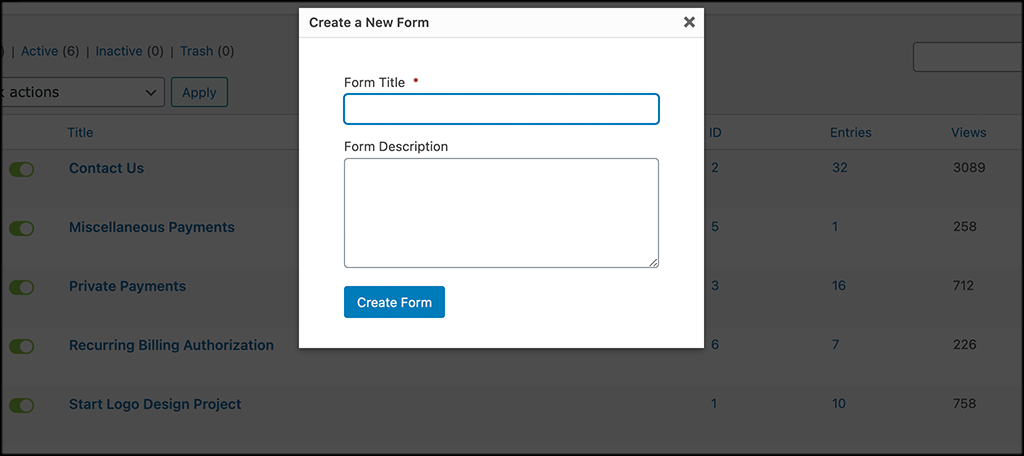
A popup box will appear. Add a form title and form description here and then click on the “Create Form” button.
From here, you can create any type of form you want. The entire interface is drag-and-drop. All the different fields have different servings you can manipulate and design once you drag them over.
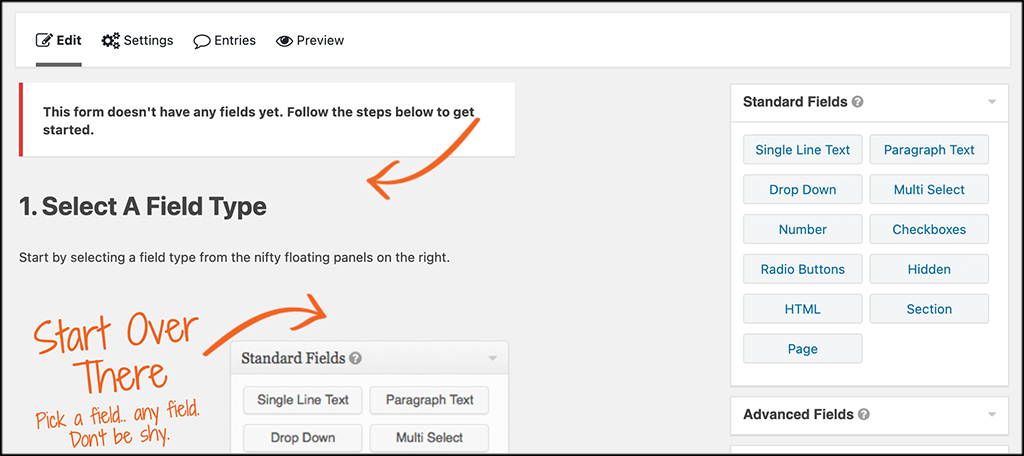
The fields you have available will differ based on whether or not you have installed any add-ons to the form builder or not.
Step 4: Add Form to Page
Now that you have created your first form and added all the fields and settings you want, it is time to place it on a page. Click on the Pages section of your dashboard and add a new page.
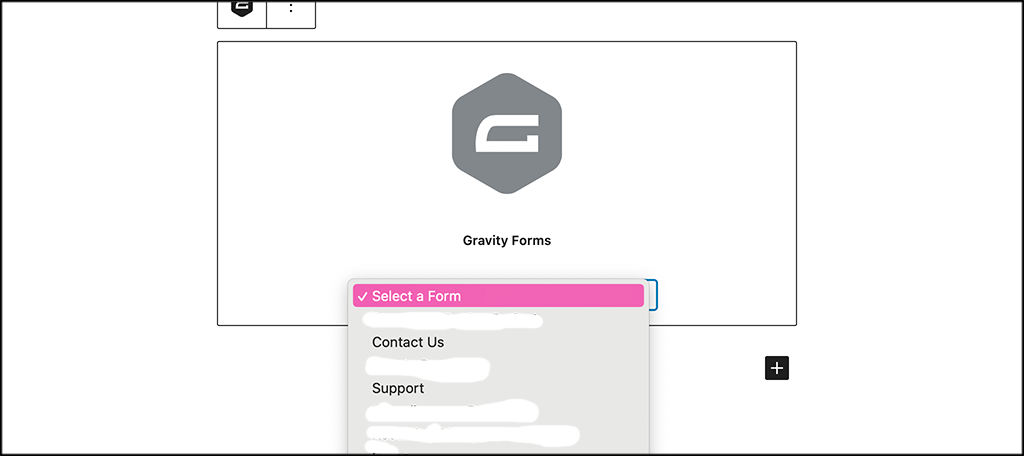
Once the editor is opened, click on the blue + symbol on the top left of the page to open all of the available blocks. Gravity Forms has its own block. You simply select that block and insert it into the page.
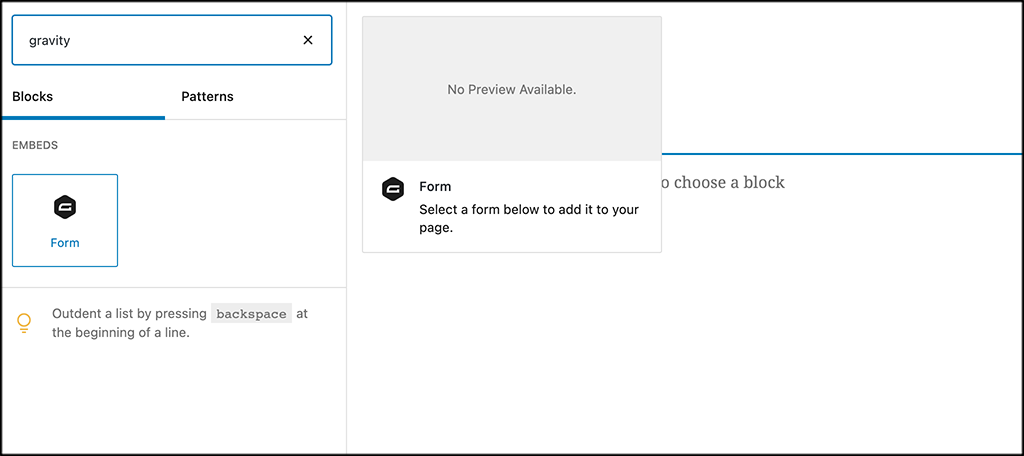
Once the block has been added, select the form you want to add from the dropdown menu.
Step 5: View the Form Live
Your form is published now. View it on the page you published it on and see if you want to make any changes.
That’s it! You have successfully started using Gravity Forms. You can build and design as many forms as you would like.
Free Gravity Forms Plugins
Yes, as stated above, Gravity Forms is a premium plugin only. However, once you purchase it, you have access to a ton of high-end add-ons that help you create anything you want.
There are also a few free add-on plugins that you can get in the plugins library that can help add functionality. If you type the term “Gravity Forms” into the search field on the Plugins page of your dashboard, you will see that dozens of add-ons pop up.
Here are a few of my favorites to consider:
Gravity Forms Entries in Excel

Gravity Forms Entries in Excel allows you to easily export all entries from your forms directly to an Excel spreadsheet. It does this by using a unique and secure URL. There is no need to log in or create a user account for people. Just copy the URL, and give it to whoever needs it.
Multiple Columns for Gravity Forms
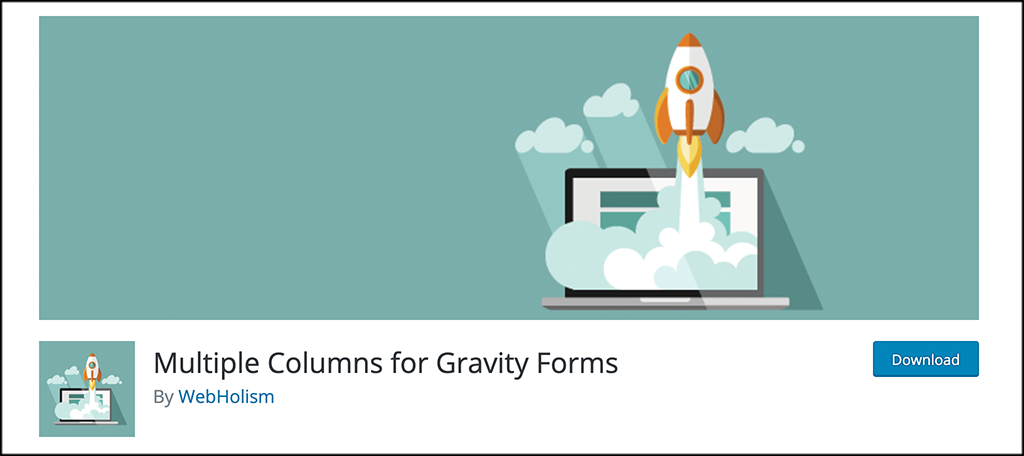
Multiple Columns for Gravity Forms will allow you to split all the Gravity Form elements into columns. Simple as that. The columns are implemented by three new elements (Row Start, Column Break, and Row End) which are introduced into the Gravity Forms administration area in a group labeled as Multiple Columns Fields.
Styles and Layouts for Gravity Forms
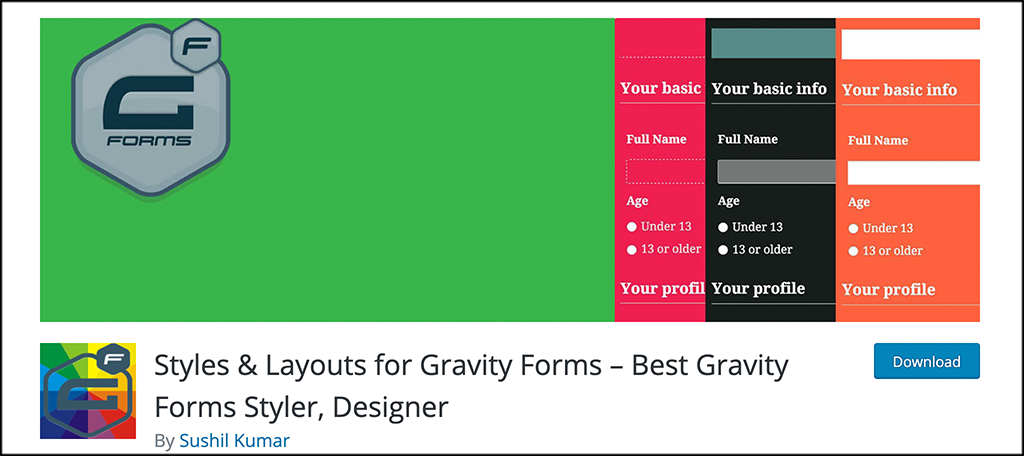
Styles and Layouts for Gravity Forms allows you to use the WordPress customizer to create beautiful styles and designs on your forms. You will be able to see all the design changes you make in real-time, so you will know exactly what the form is going to look like before you publish it.
Gravity Forms Premium Add-Ons
Once you purchase Gravity Forms for WordPress, you will notice that there are a lot of available premium add-ons that come with your account. Gravity Forms has three different license types:
- Basic: $59
- Pro: $159
- Elite: $259
Note: All of these are yearly subscriptions and need to be renewed every year.
The number of available add-ons in your account will vary based on your subscription tier. Depending on our tier, you can expect to see available elements like:
- ActiveCampaign
- AWeber
- Constant Contact
- GetResponse
- Mailchimp
- Agile CRM
- Freshbooks
- DropBox
- PayPal Commerce
- Pipe Video Recording
- Slack
- Stripe
- Trello
- Zoho CRM
- Signature
- Survey
- User Registration
- Webhooks
Again, these are just a few integrations and features of the massive library available when you purchase a license.
You can use these add-ons in conjunction with the form system to really do a lot of different things right from your website.
Final Thoughts
Gravity Forms is arguably the very best WordPress forms plugin available today. Yes, you will have to purchase a license. But if you do, it will allow you to build and design any type of form you can imagine.
I hope this article was able to show you how much Gravity Forms can offer if you choose to take the leap.
What form plugin have you been using? Are you satisfied with it or would you like a change?