If there is one thing every website strives for, it is speed. No one likes a slow website and having one can hurt both the user experience and SEO. One way to speed up any WordPress site is to clear the cache.
Of course, this is assuming your website already has a caching plugin in place, which it definitely should. To put it simply, caching delivers frequently accessed content to users, by storing it in your memory.
The end result is faster page delivery speed, but there are some limitations.
As such, it becomes necessary to clear the cache from time to time. And today, I will demonstrate several methods to do this.
Why Clear the Cache in WordPress?
Every website will need to clear its cache regularly. Doing so is imperative to serving the latest versions of your pages to users, while also ensuring that your website is running as fast as possible.
One of the simplest reasons to clear your cache is when you update a cached page. A cached page is a copy of the original stored in your server’s memory. This makes it a static copy that is delivered to visitors. While it is faster, that means it does not update when changes are made.
For example, let’s say your homepage is cached. If you were promoting a deal on it and that deal expires, you would remove the references to that deal. However, the cached version of it would not reflect the changes you have made.
This can confuse users who are seeing the deal, but then discover it is no longer running. In these cases, you need to clear the cache to ensure that the updates are being reflected in the pages you deliver.
Clearing the cache also helps flush out the server’s RAM, which can help speed things up and sometimes fix errors.
As such, it is a great thing to do regularly to ensure your site is running at peak speed.
Method 1: LiteSpeed Cache
LiteSpeed Cache is the go-to caching solution for WordPress with over 5 million active installs. It gained such popularity by being one of the easiest caching tools you can use. As such, users will have no issue clearing the caching in WordPress.
It also offers users a lot of optimization options for pages, and more importantly images. Images tend to slow down pages, thus compressing them can lead to some hefty gains in terms of speed.
Start by clicking LiteSpeed Cache and selecting the Toolbox option.

The Toolbox contains serval tools that are in the tab. When it comes to clearing the cache, the Purge tab contains all of the tools offered by the plugin for doing so. It is also the tab you start in.
LiteSpeed Cache gives you complete control over what parts of the cache you are clearing as you have several options that allow you to purge different types of data. These tools are handy when you know what needs to be cleared.
For example, if you made a change to your homepage, you could just select the Purge Front Page option to clear it. However, in most cases, you are just better off clearing everything. In this case, click on the “Purge All” button.

Below these options, you can also manually input criteria to purge by using taxonomies like categories & tags. You can also just enter the URL of a page or post to make it even clearer. An even more direct approach is to do it from the post or page itself.
From the top, click on the LiteSpeed Cache icon and select the Purge All option. This will clear the cache for that post or page.

And that’s it. As you can see, LiteSpeed Cache is easy to use and provides you with several ways to clear your cache.
Method 2: W3 Total Cache
W3 Total Cache is another wildly popular caching solution for WordPress. It is a powerful tool with a ton of customization options for users to enjoy. Its standout feature would be the amount of bandwidth this tool saves in comparison to similar tools.
It works in all hosting environments and even puts a big focus on mobile users with AMP support and additional settings. Since mobile traffic makes up a huge chunk of most websites, these are valuable features you should use.
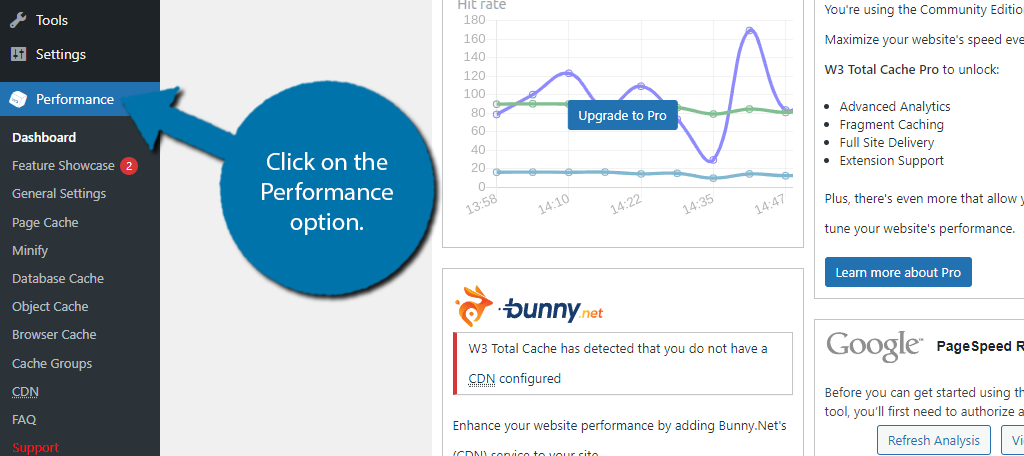
With that said, clearing the cache in W3 Total Cache is easy. Start by clicking on the Performance Option.
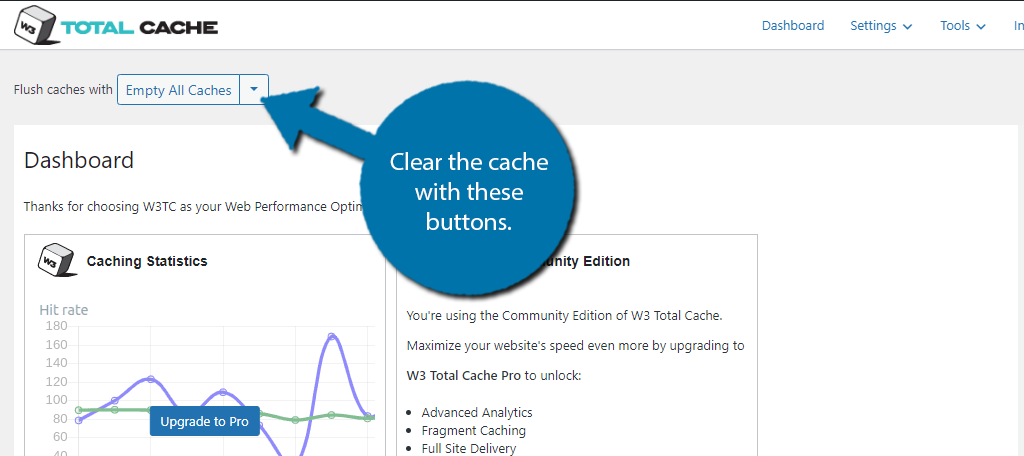
This will bring you to the W3 Total Cache dashboard. You can see all of the stats that this tool provides on this page. At the very top of this page, you will see a button to flush the cache in WordPress.
The default option flushes the entirety of the cache, or alternatively, you can use the drop-down menu to select a specific area you want to flush.
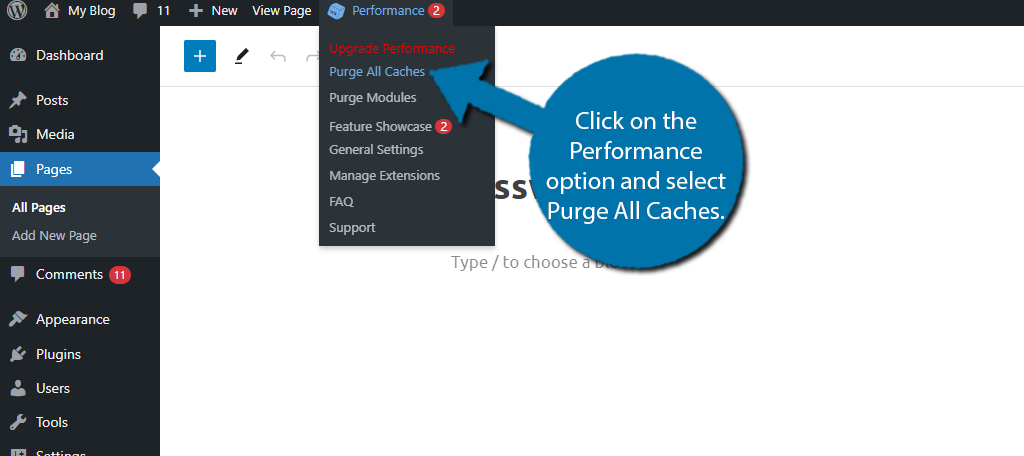
You can also find the option to clear the cache on the top WordPress toolbar by clicking on the Performance option and selecting Purge All Caches.
And that’s all there is to it. As you can see W3 Total Cache provides an easy-to-use interface that makes clearing the cache a breeze.
Method 3: WP Fastest Cache
WP Fastest Cache is one of the earliest caching solutions available in WordPress and it has maintained a huge following with over 1 million active installs. This is all thanks to a simple interface that users of any skill level can use.
It is also worth noting that if you operate in a multisite environment, WP Fastest Cache supports that. Thus, it is a single plugin that can handle multiple sites. It’s very handy for anyone in that situation.
Thankfully, this also means clearing your cache is child’s play. Click on the WP Fastest Cache option.
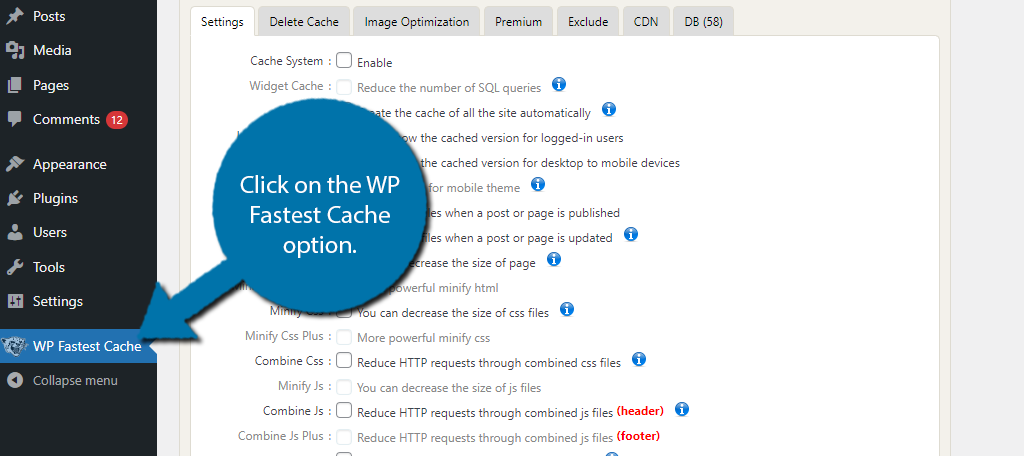
This plugin has a lot of settings you can configure, but for now, just click on the Delete Cache tab.

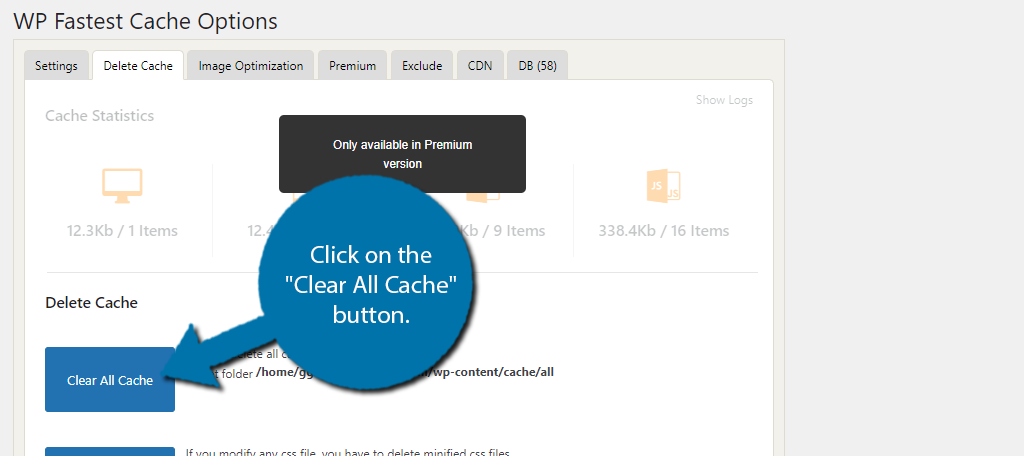
Simply click on the “Clear All Cache” button and it will clear the cache in WordPress. There is also a second button to delete minified CSS files if you need it.
This is the easiest way to clear the cache in WordPress with WP Fastest Cache, but it isn’t the only way the plugin provides. There are some settings you can configure that will clear your cache automatically so you don’t have to worry about it.
You can also force it to clear the cache when certain events take place like publishing or editing a post or page. These can save you a lot of time and they are found on the Settings tab.
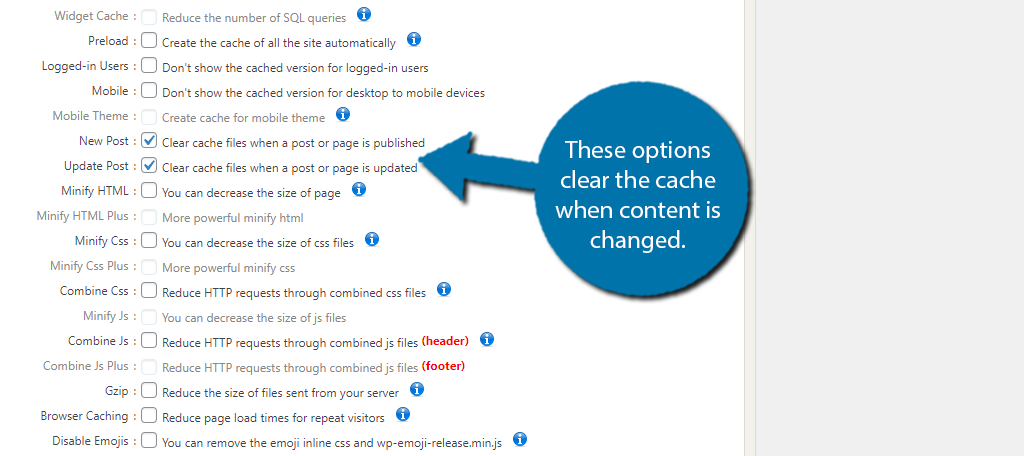
In the Settings section, the very first option is to Enable the Caching system. This should be enabled regardless, but once done, this will tell the plugin to regularly clear the cache.
What you might not have enabled are the options to clear the cache when content is updated or created.
And that’s it. WP Fastest Cache is a great plugin that makes it easy to clear the site cache in seconds. The automatic features make it one of the easier caching plugins to maintain.
Method 4: WP-Optimize
WP-Optimize is yet another caching plugin with over a million active installs. What makes this one unique is that it is not purely focused on caching but instead on optimizing WordPress. As such there are numerous benefits to installing it.
For example, one such option would be the image compression tools. Images often are a major culprit when pages load slowly, and these tools help by reducing the size of the image to reduce loading times.
That said, we are just focusing on the caching component of the plugin, which offers an easy way to clear the cache in WordPress.
To start, click on WP-Optimize and select the Cache option.
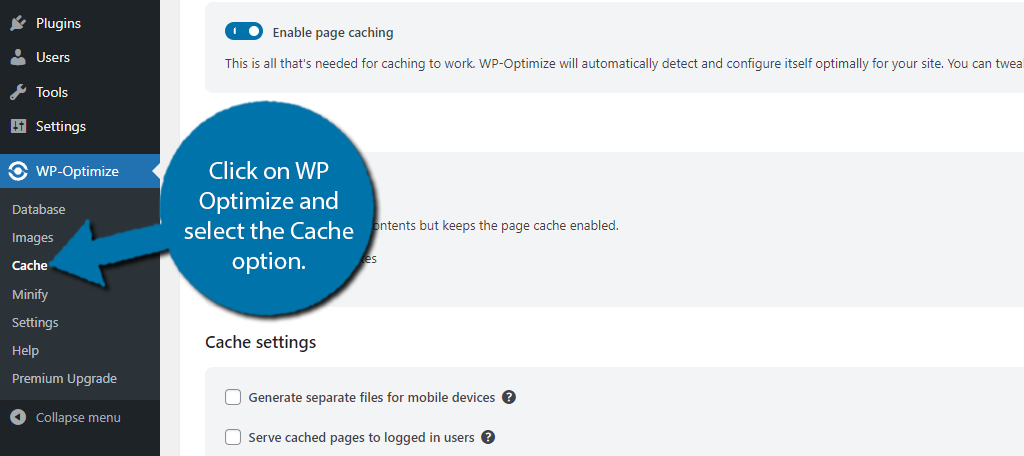
Simply click on the “Purge Cache” button to finish.
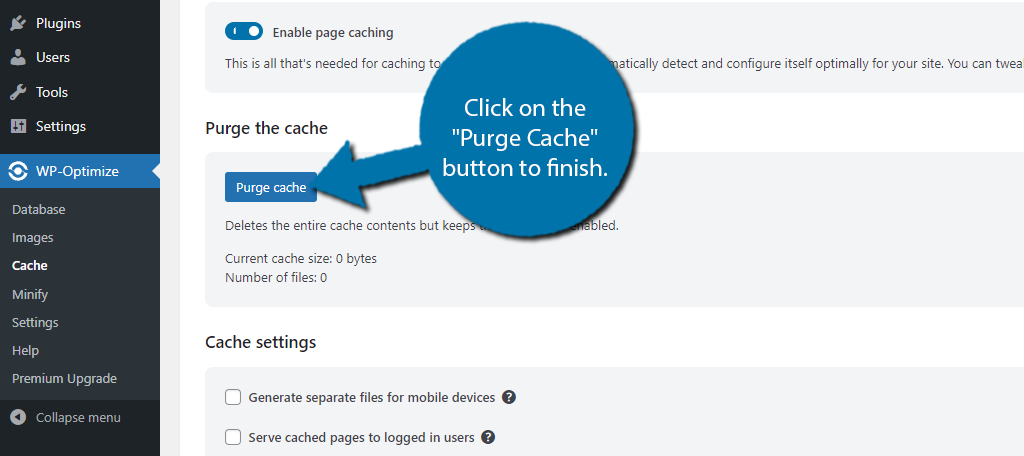
Unlike other options, WP Optimize does not have a way to enable it to clear the cache every time a page or post is updated or published.
And that’s all there is to it. WP Optimize offers a lot more than just caching, but don’t let that trick you. It is still a competent caching solution for WordPress, it just doesn’t have the same customization options as dedicated caching tools.
Method 5: WP Super Cache
Would you look at that, WP Super Cache is yet another popular caching plugin for WordPress with over 1 million active installs. This is a more robust option that offers users a lot of customizations, assuming they want it.
The plugin offers three modes one of them being Expert, which gives more power to the user. However, if you want the plugin to do most of the work, there is a simple mode to help keep it…well simple.
Either way, clearing the cache is pretty easy regardless of what option you choose.
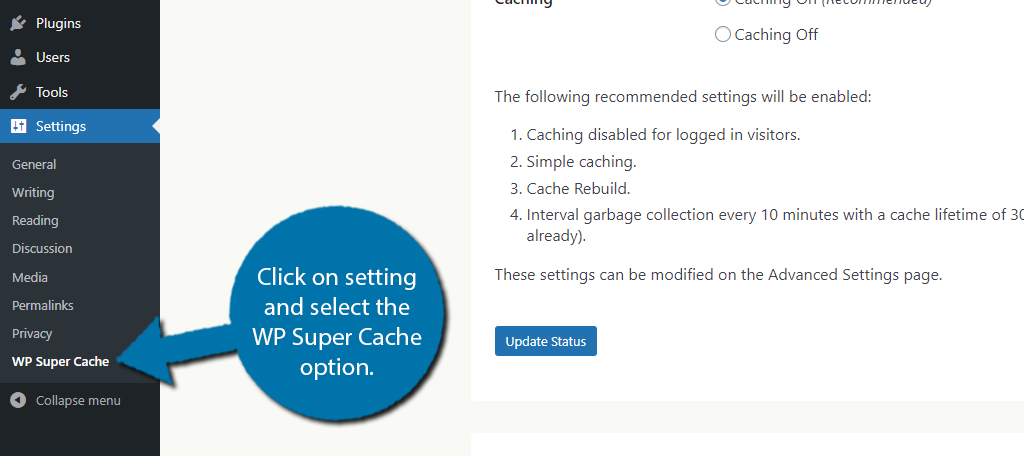
Unlike other plugins, WP Super Cache does not have a dedicated section on the left-hand admin panel. Instead, click on Settings and select the WP Super Cache option.
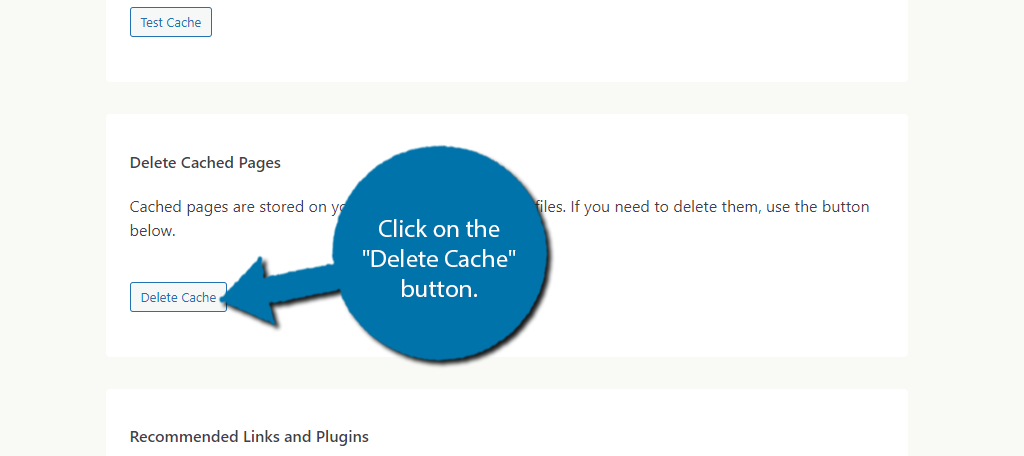
Scroll down just a bit to find the Delete Cached Pages section. Then just click on the “Delete Cache” button.
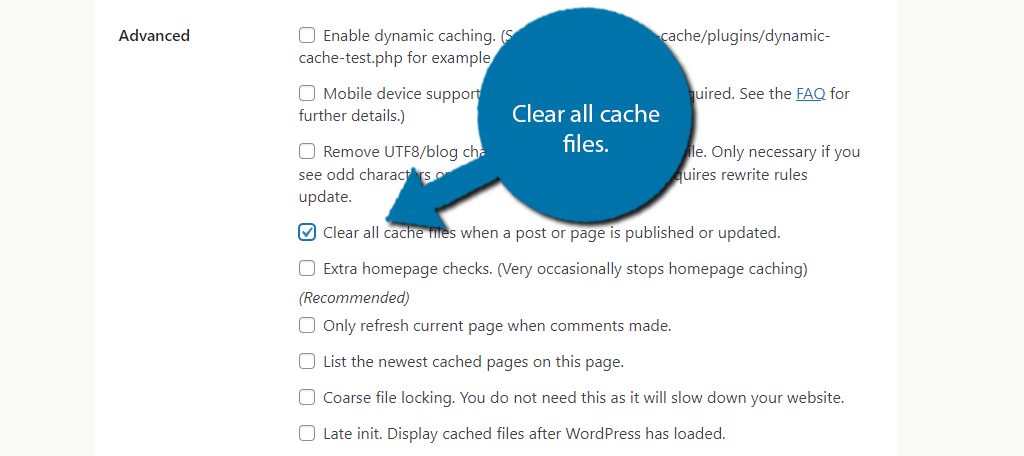
There is an additional way to clear the cache when you update or create a new post or page. This is found by clicking on the Advanced tab and scrolling down to the Advanced section.
Here you will find several options. Check the box for the “Clear all cache files when a post or page is published or updated” to enable this feature. It is a great way to automate the process and reduce your workload.
And that’s it. WP Super Cache is a great plugin that is very easy to use but also has the customization options that experts look for in a caching tool. As such, it is a popular option with a great track record.
Method 6: Speed Optimizer
You would think that by now we would run out of caching plugins with over a million active installs, but nope, Speed Optimizer is another great option that websites can use. Its popularity is a testament to how essential caching tools are in WordPress.
This plugin is a jack of all trades that goes beyond just caching and offers a robust selection of optimizations to boost speed. These include things like image compression, speed analysis with easy-to-understand tips, and much more.
And when it comes to clearing the cache, this plugin is equally as simple as everything else on this list.
Begin by clicking on the Speed Optimizer option and select the Caching option.
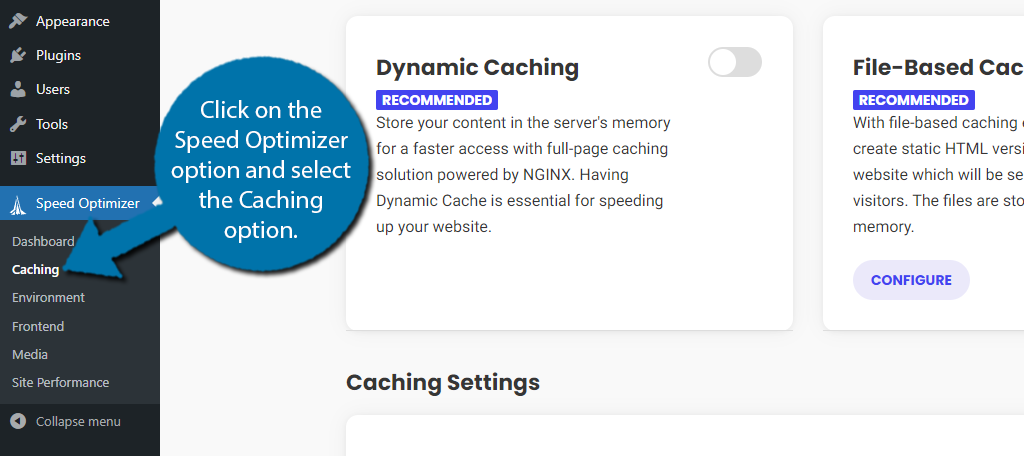
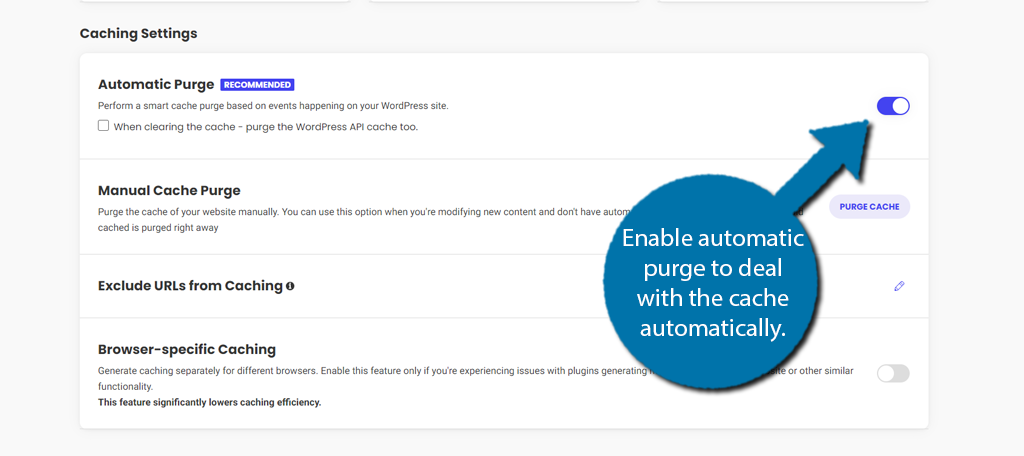
In the Caching Settings section, the very first option is a recommended setting to automatically purge caching data whenever changes are made to your website.
This is pretty vague, but it just means that whenever you edit a post or page or publish a new one, the plugin will purge the cache.
Toggle the switch to enable this.
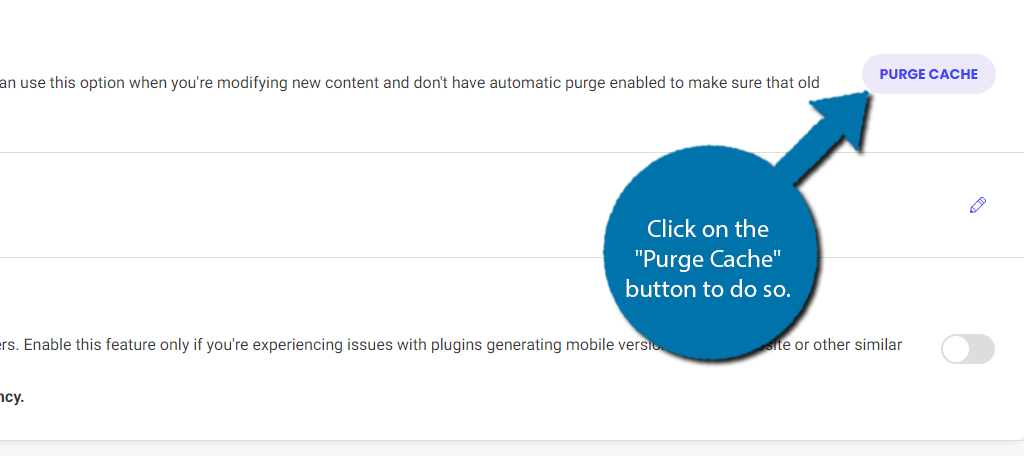
Below this, you will find the more traditional manual option for clearing the cache. This will clear everything and can be utilized at any time. Simply click on the “Purge Cache” button to do so.
And with that, you now know how to clear the cache in WordPress using the Speed Optimizer plugin. It is a great plugin to consider when looking for a caching solution in WordPress.
Method 7: Autoptimize
Autoptimize is the last plugin we will cover and yes, it also has over one million active installs. While it focuses on optimizing WordPress and offers caching, there is one issue, there is no built-in way to clear the cache.
However, as a very popular plugin, there have been several add-on plugins developed for it that can not only add this functionality but even give you additional options like scheduling it to clear the cache at regular intervals.
In this case, I will use the Clear Autoptimize Cache Automatically plugin, but others will work.
Note: Since this is an add-on plugin, you will need Autoptimize installed. If you do not, you will get an error message.
Click on Settings and select the Clear Autopitmize Cache Automatically option.

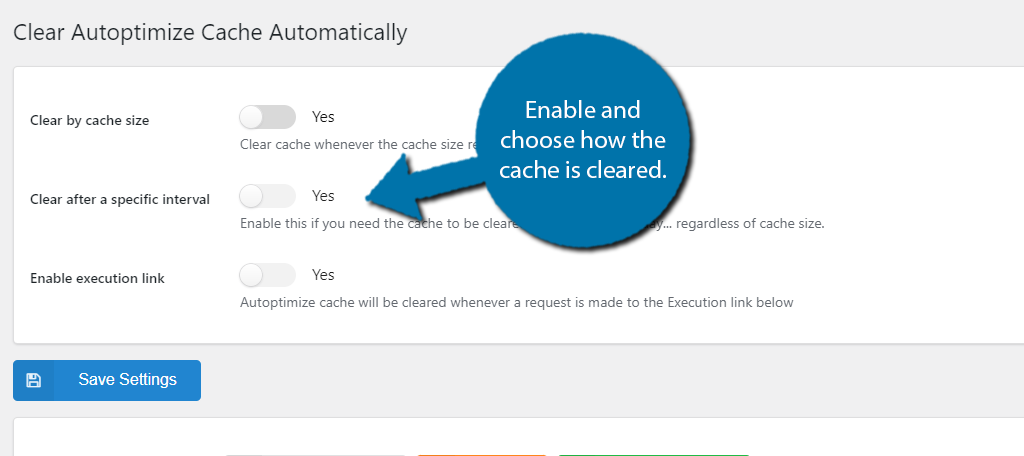
You will have three options. The first is to enable the plugin to automatically clear the cache when it reaches a specific size. The second does the same but at set intervals by day, hour, or minute.
The final option is to clear the cache anytime a specific URL is accessed. The URL is generated by the plugin itself, so there’s no extra work on your end. Simply enable the option that you want to use and enter the desired criteria.
Don’t forget to save any changes you made or they won’t stick. And with that, you now know how to clear the cache in WordPress using the Autoptimize plugin. Hopefully, in the future, the developers can implement features into the plugin without needing an add-on.
What If I Do Not Use a Caching Plugin?
WordPress is a very customizable platform and caching is no exception. As this tutorial demonstrates, there is no shortage of great caching plugins to choose from, but they are not the only options.
It is entirely possible to have a different kind of caching solution depending on your web hosting environment. For example, currently, Redis is making a huge splash when it comes to caching due to the insane performance it offers sites.
If your hosting environment supports Reddis, then you will generally be handling those requests through the cPanel and not your site directly. As such, you will want to refer to that documentation to ensure everything is done right.
In most cases, it just takes a simple command like FLUSHDB for Redis to clear the cache.
And this is just one example. If your host offers their caching solution or has one built-in, refer to their documentation, or contact them for additional details.
FAQ
It should be done routinely once or twice a month. However, anytime you edit or publish new content, you should clear the cache to ensure you deliver the latest version to visitors.
WordPress has a great offering of free caching plugins. Premium versions often add more features and customization, which can be worth it for many websites, but they are not mandatory.
It makes no difference how the cache is cleared, only that it is routinely cleared. That said, automatic clearings may be more consistent as it is very likely someone will forget to do it.
This will typically result in any speed gains from caching being lost. It is also likely that you will deliver older versions of your website to visitors that can contain out-of-date information.
Typically, less than a minute, As the guide demonstrates it usually just consists of pressing a button not much else.
Keep Your WordPress Site Running Fast
Caching is imperative to keeping a WordPress site running fast. Yet to get the most out of it, you need to stay active and regularly clean out your cache. A good rule of thumb is at least once per month.
However, if you did make a change to cached content, consider clearing your cache that day to ensure your website is delivering the latest versions of your content. As you can see, most caching plugins make this an easy process to go through.
I hope you found this tutorial helpful in learning how to clear the cache in WordPress.
Which caching plugin does your site use? How easy is it to clear the cache for your WordPress site?