In this tutorial, I will show you how to set up email encryption in cPanel. When we’re finished, you’ll have both the public and private keys needed to use encrypted email.
If you’re new to email encryption, here’s a great guide with simple explanations of all of the moving parts.
The protocols used in sending and receiving email were written in the very early days of the Internet before security was a concern. While email has become more secure over the years, at its core, it is still an inherently insecure way to transport messages.
If you use a big email provider like Gmail, your messages are sent using TLS, which is point-to-point encryption. The problem is TLS can fail if a server along the route isn’t properly configured or if the recipient’s email server doesn’t support TLS.
It’s also worth mentioning that TLS encryption has been broken, both by the United States government and Chinese hackers. So even if all the mail servers that touch a message use TLS, the message can still be intercepted and read.
If you send personal information or confidential business information via email, and you don’t want any governments or state agencies to read your mail, private key email encryption could be for you.
To use encrypted email, two keys are required. The first key is used on the sending side to encrypt the message. That is the “public key.” The key used on the receiving side, to decrypt the message, is the “private key.”
Let’s create those keys.
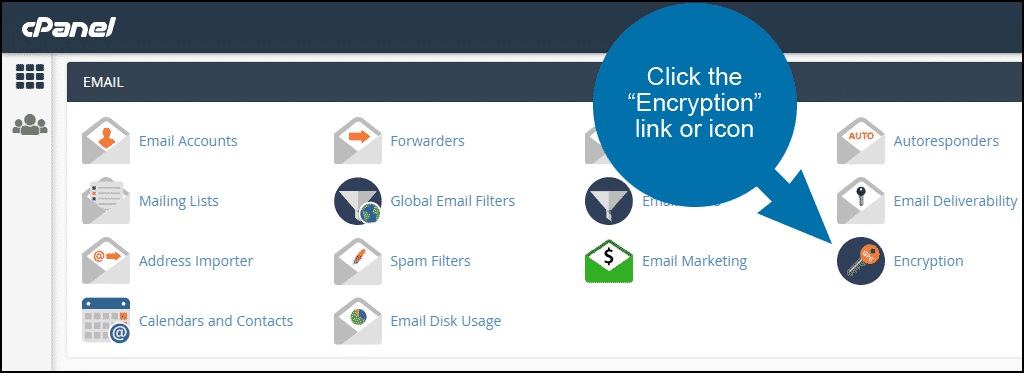
Setting up Email Encryption in cPanel
Log in to cPanel.
In the “Email” section, click the “Encryption” link or icon.
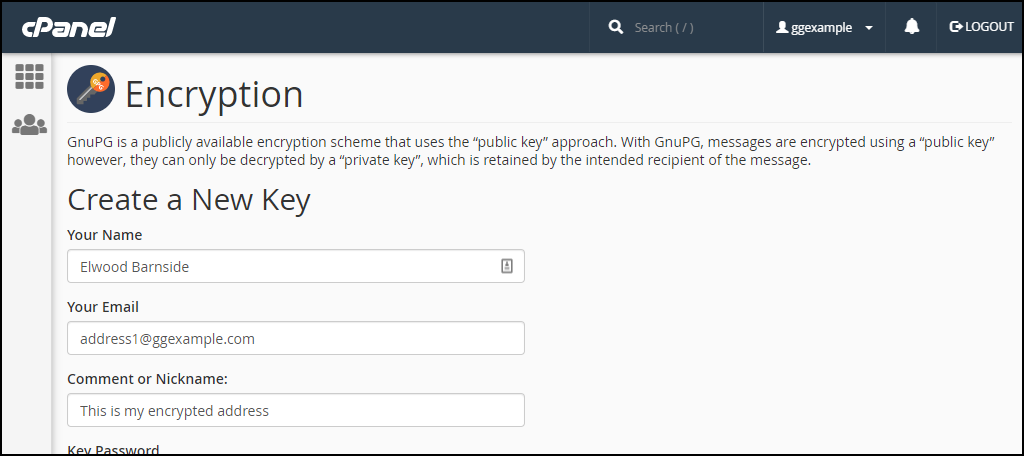
Enter your name in “Your Name” field.
Your email address goes into the “Your Email” field.
“Comment or Nickname” is a note for your own reference.
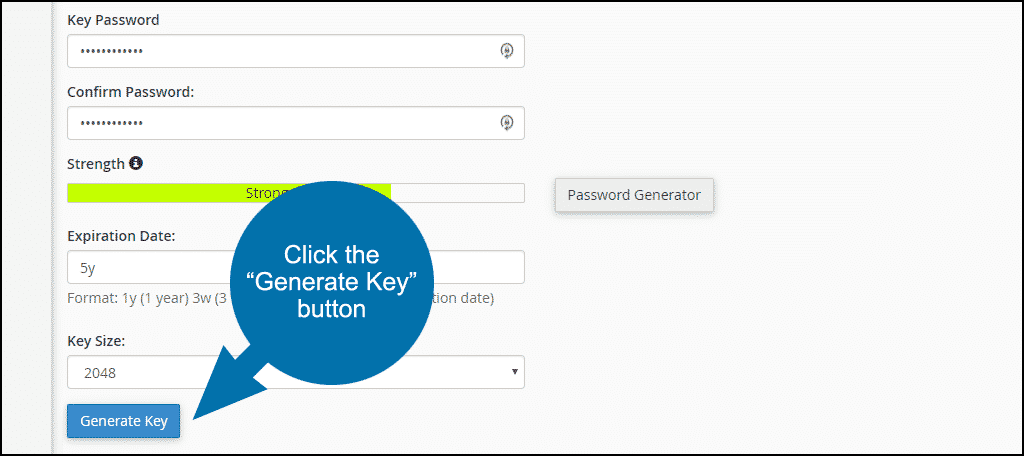
Enter a password in the “Key Password” and “Confirm Password” fields. cPanel will force a secure password here as it does for most applications.
If you can’t come up with a secure password, you can click the “Secure Password” button to have one generated for you.
In the “Expiration Date” field enter a time period during which the keys will be valid. Enter “0” for no expiration, or use “y,” “w,” or “d” for years, weeks or days.
For example, “5y” would signify 5 years.
Choose a “Key Size.” The larger the key size, the more mathematically secure the key. Having said that, a 2048-bit key is realistically all that’s needed. The larger the key size, the more likely you are to have problems with an unsupported system or recipient.
Click the “Generate Key” button. It may take a few moments to generate the key.
You will get the success message, “The Key has been successfully created.”

Reload the page and scroll to the bottom.
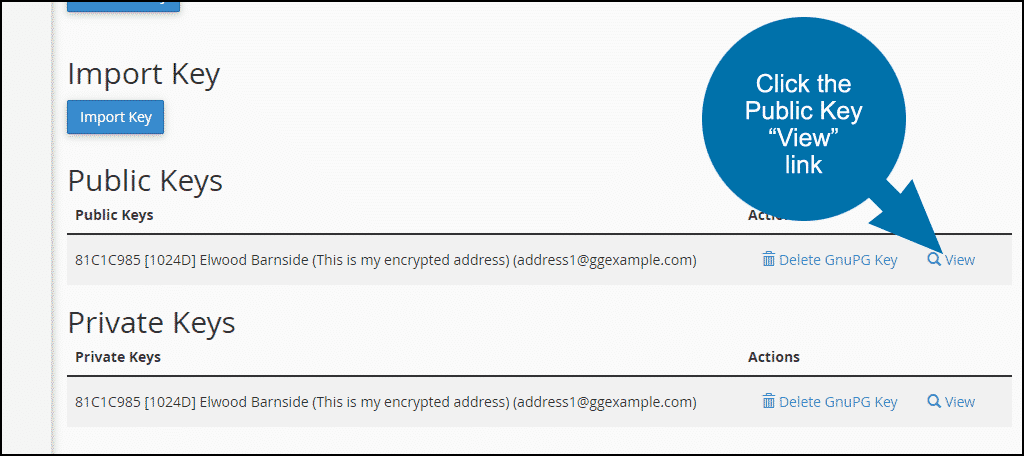
Importing the Public Key
You have successfully created the keys, but the Public Key must be imported before it can be used.
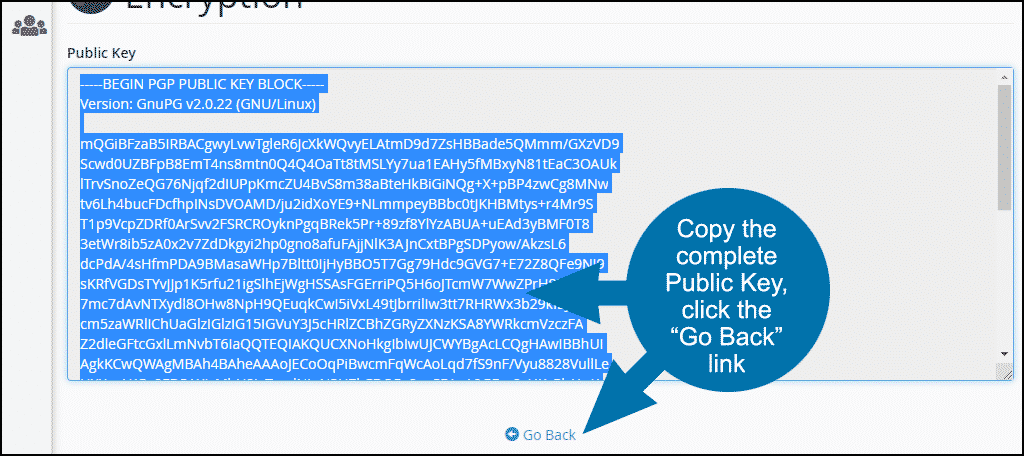
Click the Public Key “View” link.
Copy the Public Key. Make sure you copy the entire block. You should see both of these lines:
—–BEGIN PGP PUBLIC KEY BLOCK—–
[Key made up of random characters]
—–END PGP PUBLIC KEY BLOCK—–
Click the “Go Back” link.
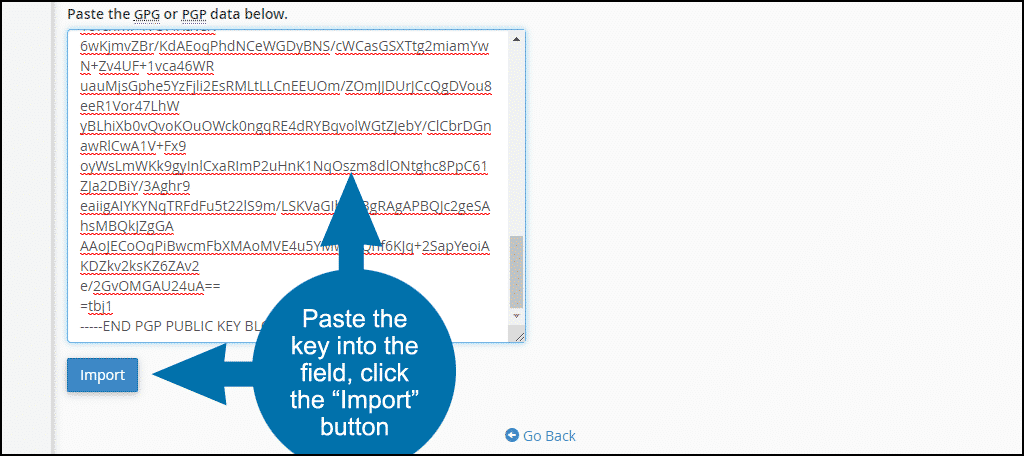
Scroll down and Click the “Import Key” button.

Paste the key into the field, click the “Import” button.
Now your public key is available in an online “keyserver” directory. Anyone who wants to send you encrypted email can look it up and use it.
Configuring Email Encryption
In order to use your new encryption key, you have to configure your email program. Rather than walk you through the set up for one particular program, here are links to configuration instructions for several different email applications:
Mozilla Thunderbird
Microsoft Outlook
Gmail (The program used in this tutorial also works for Hotmail and most other web-based email services.)
Apple Mail
Most of these tutorials will have a section on generating a keypair. Since you’ve already done that, you can skip to the import/install sections.
Your Private Key
When you generated your public key, you also generated a private key. Your private key is what “unlocks” messages that were sent to you using your public key.
Unlike the public key, which is publicly available in the keyserver directory, your private key should remain private. Never share it with anyone.
You can access it at any time in cPanel, but if you want to keep a copy on your local computer or a secure flash drive, here’s how to get it.
Log in to cPanel.
In the “Email” section, click the “Encryption” link or icon.
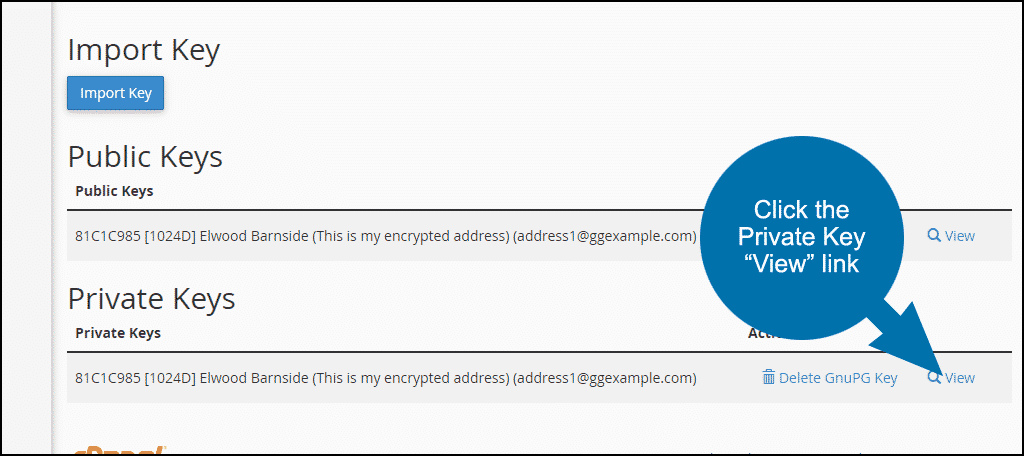
Scroll down to the bottom of the page. Click the Private Key “View” link.
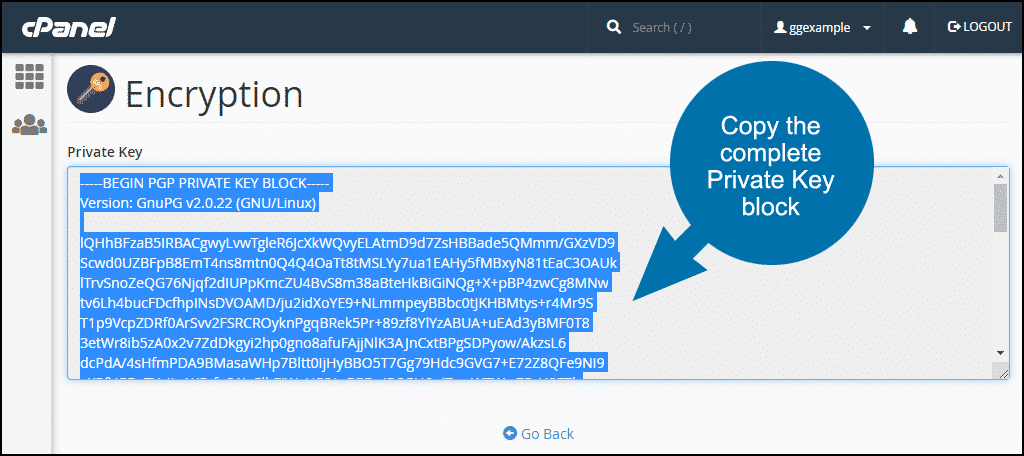
Copy the Private Key block. Make sure you copy the entire block. You should see both of these lines:
—–BEGIN PGP PRIVATE KEY BLOCK—–
[Key made up of random characters]
—–END PGP PRIVATE KEY BLOCK—–
Email Encryption Sure Seems Like a Lot of Trouble
While it takes a bit of effort to set it up, using email encryption doesn’t take any time at all. Depending on your email program, you may not have to do anything when sending mail. At the most, it’s a click or two to send a secure message.
If you’re not concerned with security or privacy, then all of this may seem unnecessary. But everyone—and that includes you—sends sensitive personal or financial information through email at some point. You don’t have to harbor fears of government agents or the criminal element to benefit from email encryption.
Have you ever considered using email encryption? If not, what’s stopping you from giving it a try?