Are you looking for an easy way to add image hover effects in WordPress? If so, the Image Hover Effects for Elementor plugin is exactly what you are looking for. It’s simple to use and offers a variety of Elementor hover effects to choose from.
These can help you add important information to images like location, price, availability, and more. It really does open up a new level of customization in regards to your images.
Today, I will demonstrate how to add image effects with Elementor in WordPress.
What Are Image Hover Effects in WordPress?
An image hover effect is an interactive element that allows you to display additional information about an image in a stylish manner. There is a wide variety of hover effects to choose from, and they don’t slow down your website or clutter your design.
Normally, an animation will cause some form of a slowdown, but that’s not the case with these CSS effects.
Thus, they are perfect for every website’s needs.
There are a variety of uses for them. For example, if your website focuses on photography, you can add an image hover effect to show where the photo was taken, the date, or something else.
Another great use is for product information. You can add an image of a product and use the hover effect to display when it is available for order, its price, or something else.
The only limit is your creativity.
How to Add Elementor Hover Effects
Step 1: Installing Image Hover Effects
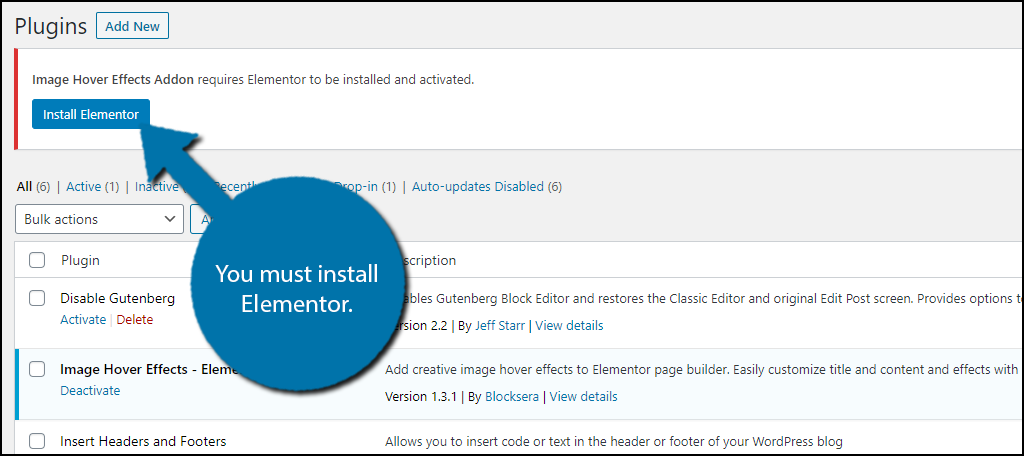
The Image Hover Effects – Elementor Addon plugin is amazing. As the name implies, it is an addon for Elementor Website Builder, which is one of, if not the best website builder for WordPress. Thus, you must have both installed.
The plugin offers 40 different hover effects including fade, zoom, blur, and more. You can add a title, description, set a title tag, add icons, link to other pages (great for products or affiliates), among other things.
It also comes with a new widget you can take advantage of if you want to see the effects in your footer or sidebar areas.
Let’s start by clicking on Plugins and selecting the Add New option on the left-hand admin panel.

Search for Image Hover Effects in the available search box. This will pull up additional plugins that you may find helpful.
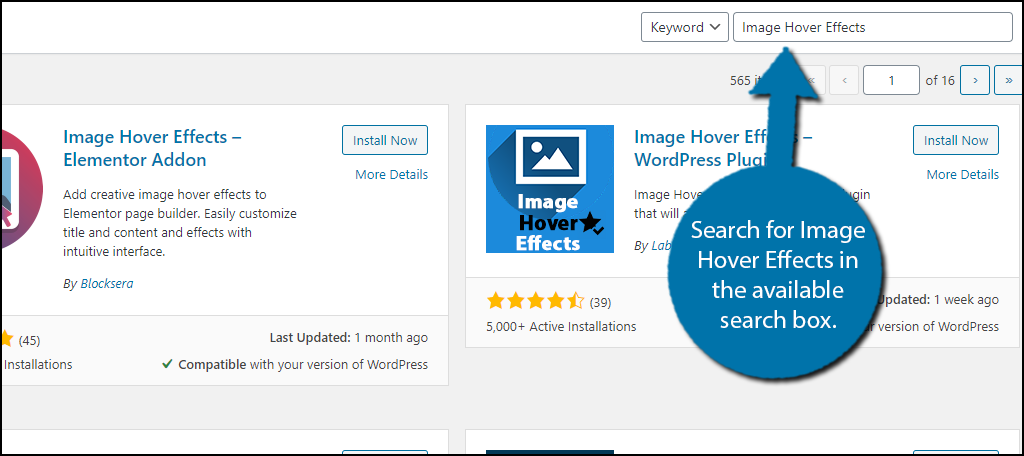
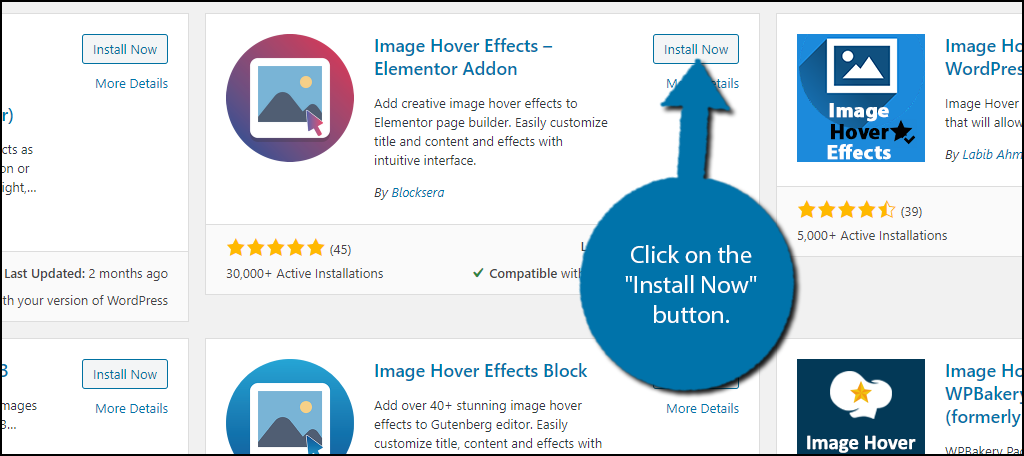
Scroll down until you find the Image Hover Effects – Elementor Addon plugin and click on the “Install Now” button and activate the plugin for use.
If you do not have the Elementor Website Builder plugin installed, you will see a notification at the top of every page telling you to install it. It is required.
Step 2: Add the Image Hover Effects Widget
Luckily, adding hover effects is really easy. To be clear, you cannot simply add a hover effect to an existing image. Instead, you will need to reinsert the image with the appropriate widget within the Elementor editor.
As a result, you may have to do some media library digging to find older images, but it shouldn’t be too bad. This means if you want to add this feature throughout your website, it will take quite a bit of time.
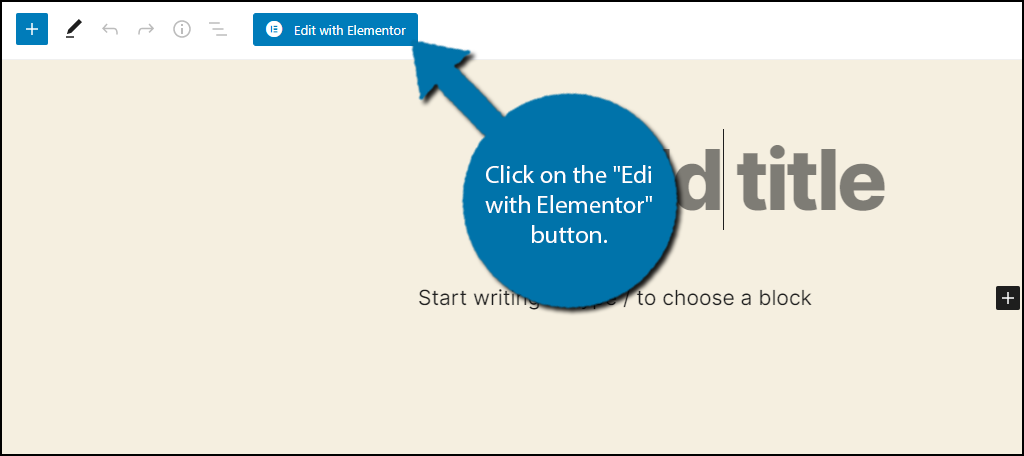
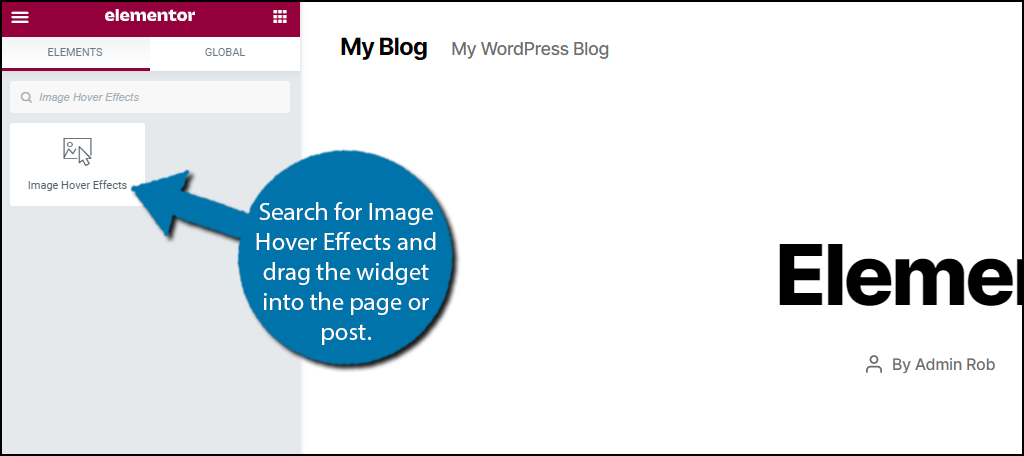
Go to any existing post or page on your website. You can also create a new one for testing. Once on it, click on the “Edit with Elementor” button.
This will open the Elementor editor. On the left-hand side, search for Image Hover Effects and drag the widget into the page or post.
Your now ready to start customizing the widget and all of the settings can be found on the left-hand side.
Step 3: Set up Image Hover Effects
Going through the settings should only take a minute or two, and they’re easy enough for anyone to understand.
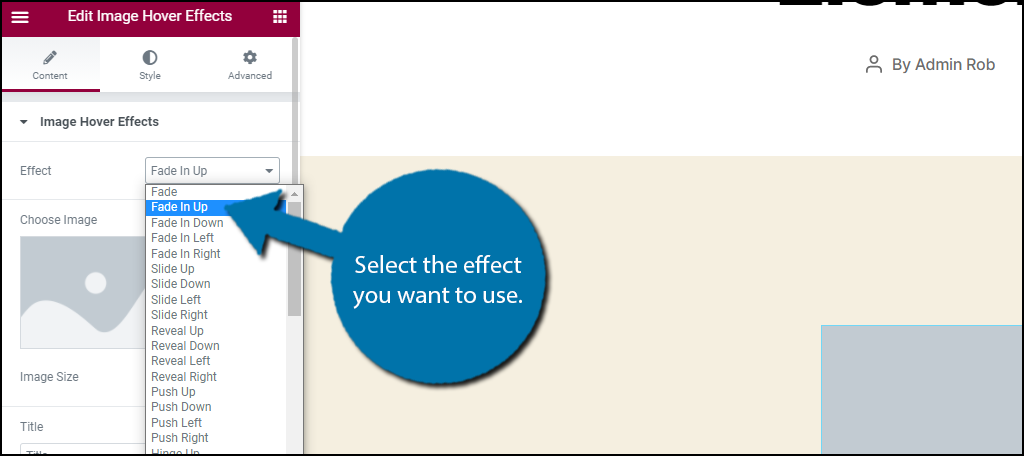
The first option is the effects. As I said before, there are 40 to choose from and they appear in a drop-down box. Select the one you want to use.
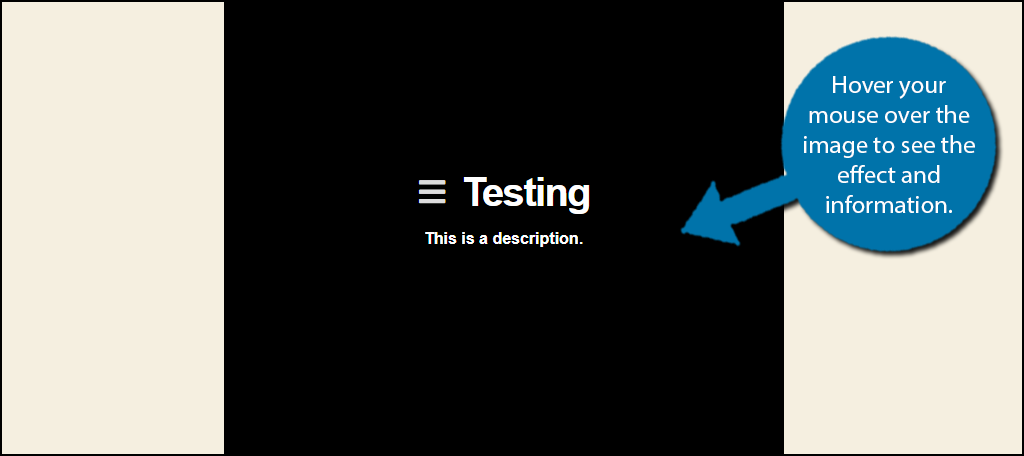
Note: You can see what the effect does by selecting it and hovering over the widget you added to your post or page. I recommend testing them all if you have the time.
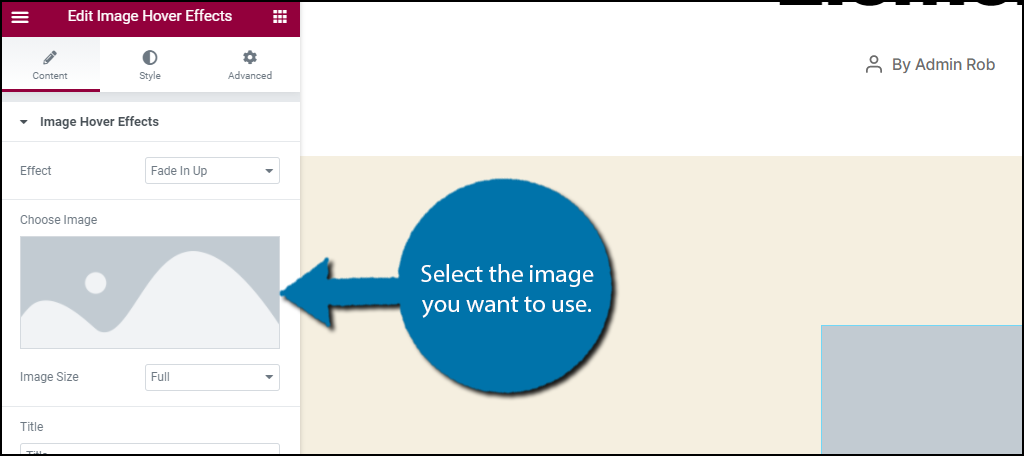
The next option is to add the actual image. Simply click on it and select an image from your media library. Underneath it, you can select the size of the image.
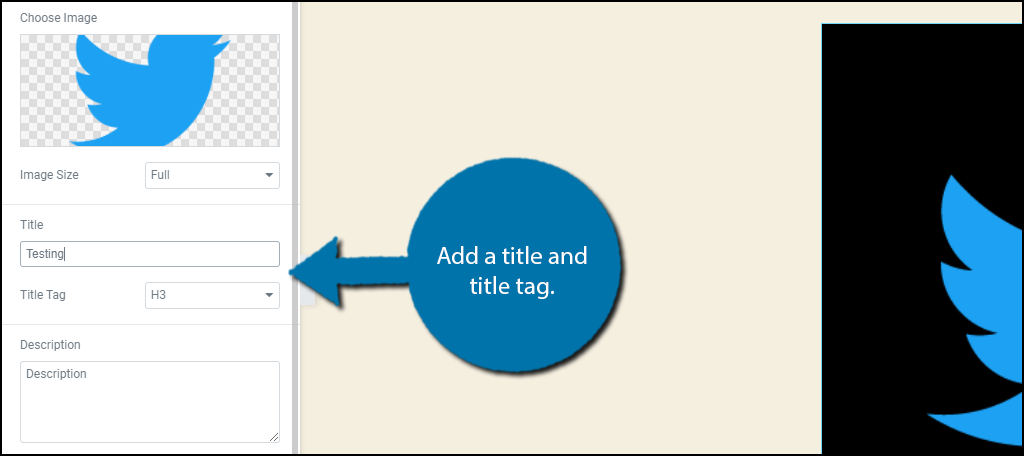
Next, you can add a title and title tag. The title is what will appear in the header text, while the title tag is the type of header it will appear as (H2, H3, H4, etc.).
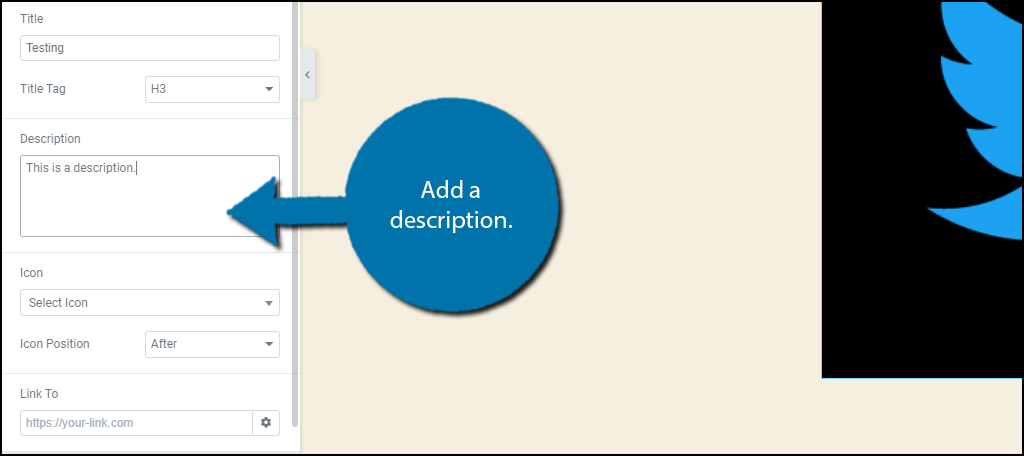
Afterward, you can find a description. This is where you can add a lot of additional information, but I personally recommend keeping it short and to the point. Enter the description information.
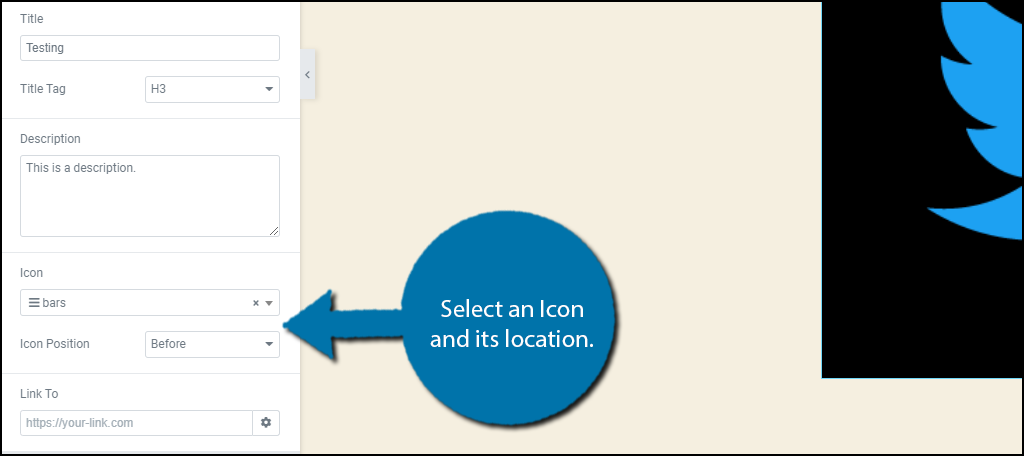
Next is the icon settings. Here you can add an icon to your title. It will only appear before (to the left of the title) or after (to the right of the title).
Note: If you do not see the icon appear when you hover over the image, that is because of a recent Elementor update. To fix this, click on Elementor > Settings > Advanced and Enable Load Font Awesome 4 support.
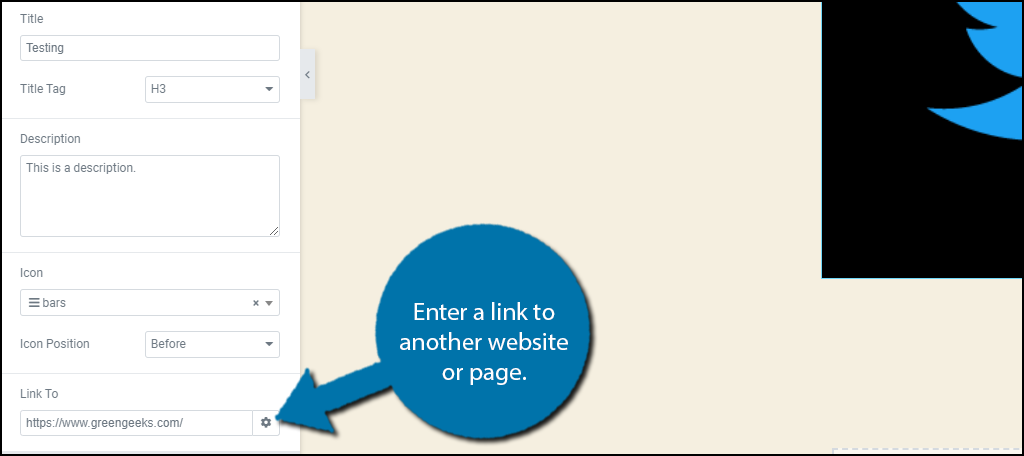
And lastly is the link to option. This is how you can turn your image into a link to another page or website. It’s great for a sales page or affiliate link.
Feel free to leave this blank if you do not want to add a link.
That covers all of the settings, click on the Save or Update button and you can view it on your website.
Congratulations on adding image hover effects with Elementor in WordPress.
Every Image Does Not Need A Hover Effect
Like most effects, you can have too much of a good thing. Hover effects can help in many areas of your website, but it is worth pointing out it can also come off as annoying to some visitors.
For example, it’s quite common for a user to leave their mouse in the middle of a page when they scroll down. They could unintentionally trigger hover over effects as they go down the page. While it is simple enough to move your mouse, it can get annoying.
The same also goes for turning images into links. A visitor may think that clicking on an image may enlarge it or zoom in. Being directed to another page could be very bothersome.
You simply need to find the right balance for your website and remember to listen to user feedback and study how your pages are being interacted with.
Be Consistent with Effect Usage
Once you find that perfect formula for success, you need to be consistent.
It can be very confusing for visitors who don’t know which images will have additional information or not. In fact, some might not even know that you have hover effects on your website.
To fix this, you can try adding some kind of indication before or under your images to tip visitors off. It can really help you make the most out of the feature.
How easy did you find the Image Hover Effects Elementor Addon to use? What do you use hover effects on your website for?