Showing before and after photos is a great way to compare visual effects. If the changes are massive, it could lead to increased sales, leads and reputation as it provides photographic proof of your claims.
The impact could be monumental, which is why a lot people create a WordPress before and after photo gallery. It’s easy, effective and doesn’t take a lot of time to set up.
Whether you’re showing off weight loss, house repairs, lawn care or any other comparison, before and after photos sell information quite well.
In this tutorial, I’ll show you how to create a WordPress before and after photo gallery. All it takes is WordPress and the right plugin.
Using Twenty20 Image Before-After
One of the easiest ways to set this up is by using the Twenty20 Image Before-After plugin. It comes with a customizable shortcode and sidebar widget.
This means you can add the before and after photo almost anywhere in WordPress. It also supports a slider that unveils the image. This gives the before and after photo a sense of interactivity.
It’s probably one of the better free before and after viewer WordPress plugins you can use.
Install and activate the “Twenty20” plugin. This will add a new feature to posts and pages as well as a sidebar widget.
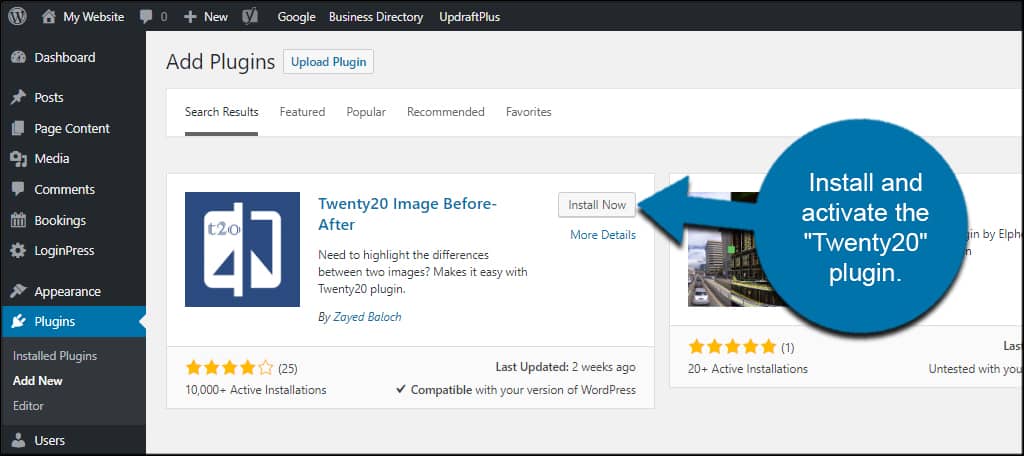
There are a couple of ways to use Twenty20 in WordPress. Let me give you the basics of the shortcode generator and the widget.
Twenty20 as a Post or Page Shortcode
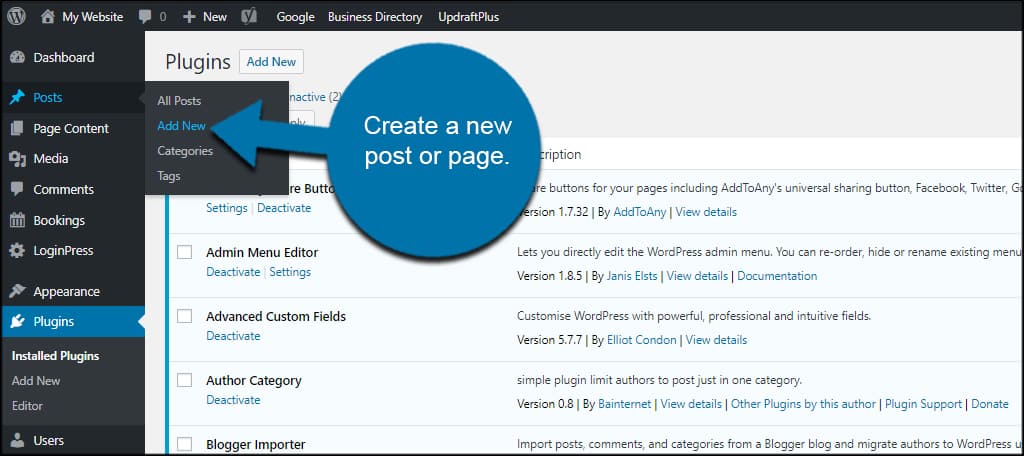
Create a new post or page. For this tutorial, I’m just going to create a new post.
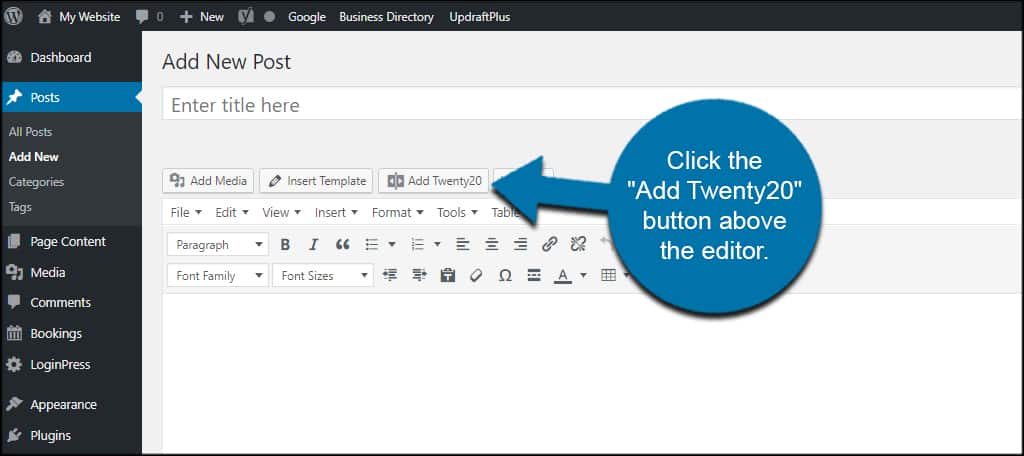
Notice you have two new options above the editor. One for “Add Twenty20” and another for “Help T20.” The “Help T20” button will open a separate window with information regarding how to manually edit the shortcode.
This could be ideal depending on your situation.
But for now, let’s just use the plugin to create a new side-by-side comparison photo.
Click the “Add Twenty20” button above the editor.
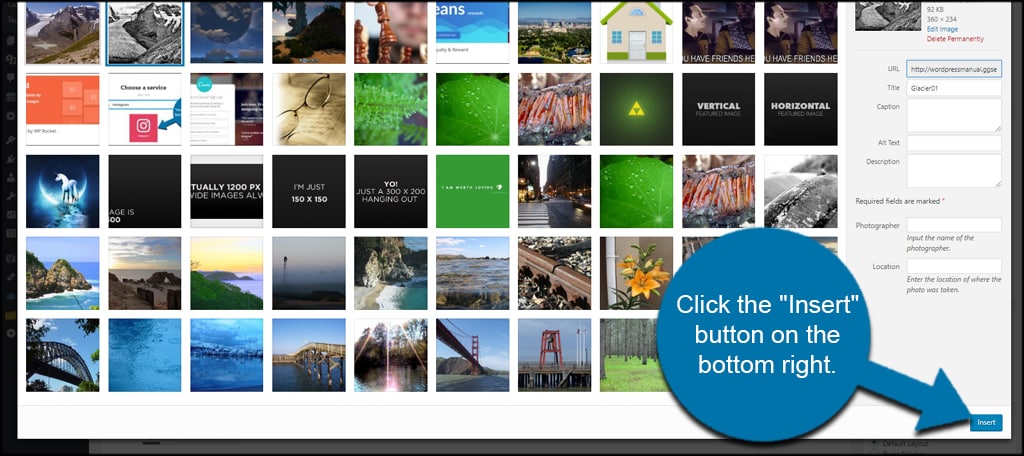
Select two images you want as before and after.
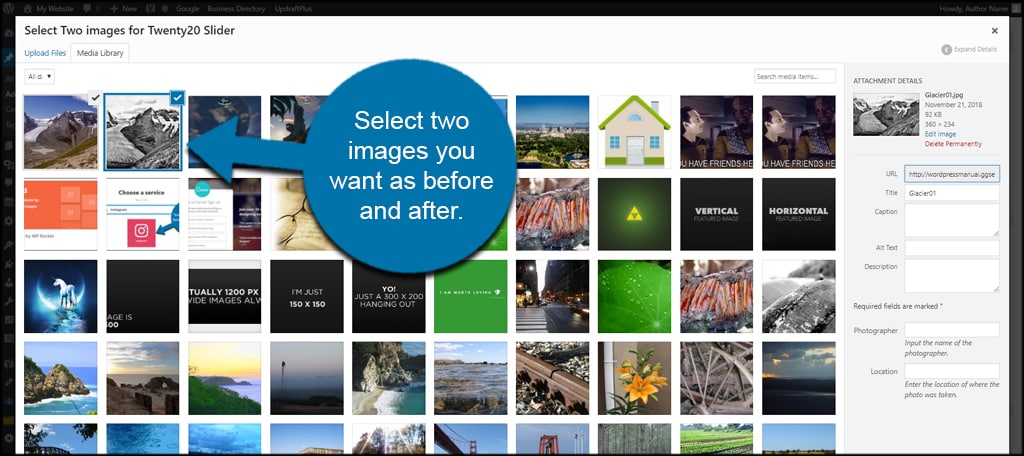
Click the “Insert” button on the bottom right.
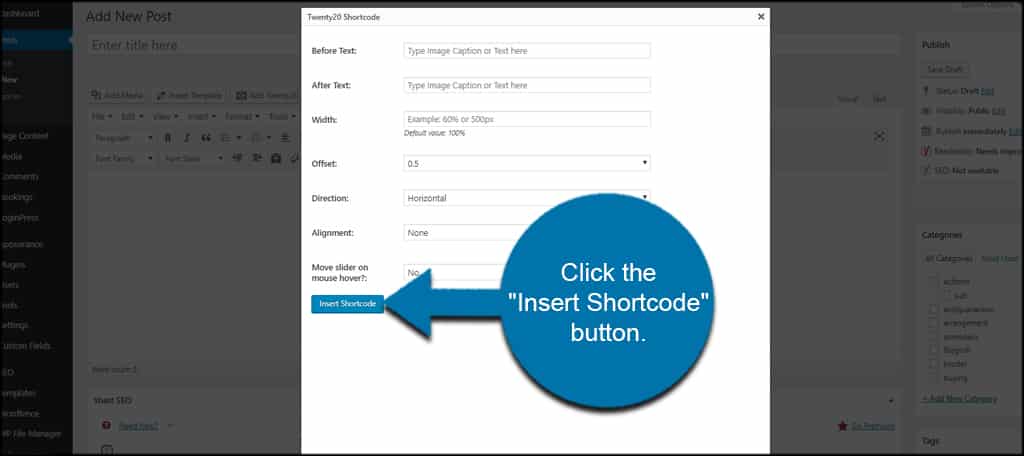
Twenty20 will open a window where you can make adjustments. You can alter the dimensions of the photos, add your own texts, where the offset of the images start and whether the slider moves with a simple mouse-hover motion.
For now, I am going to keep these settings as default. However, you can make any adjustments you like.
Click the “Insert Shortcode” button to add the images to the post once you’re done.
Twenty20 will add the shortcode to the editor field.
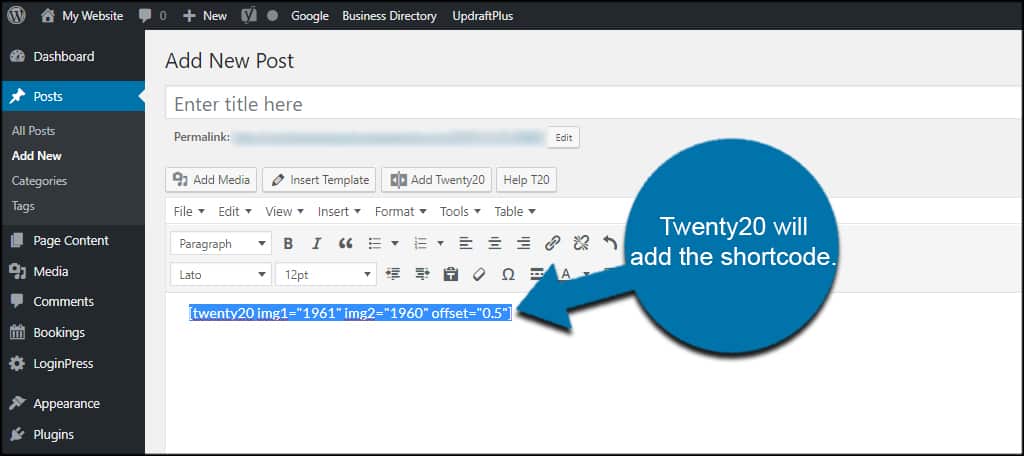
Coincidentally, you can copy and paste this exact shortcode in most areas of WordPress. So if you want to keep this particular comparison photo for other projects, you can save the code in something like Notepad for later.
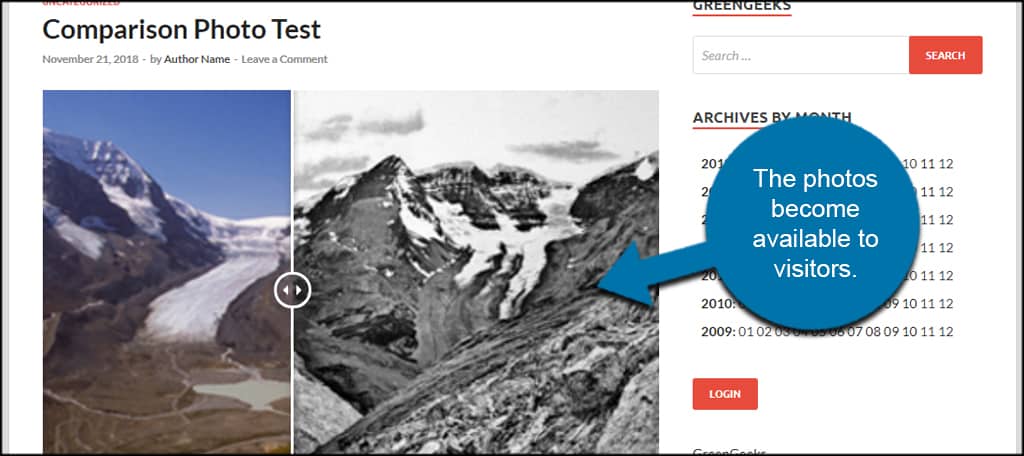
After you publish the post or page, the photos become available to visitors.
Using the Sidebar Widget
What if you want to add a before and after photo in a WordPress sidebar widget? Twenty20 has you covered.
Go to Appearance and click, “Widgets.”
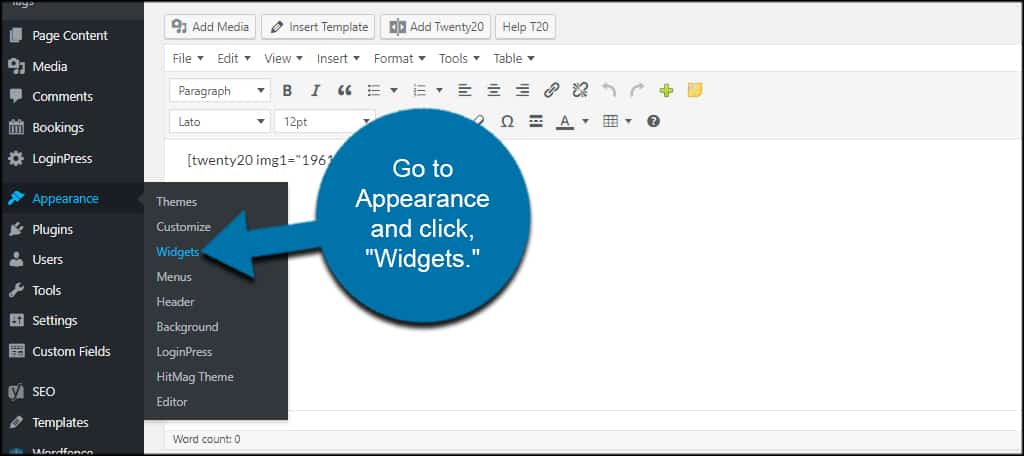
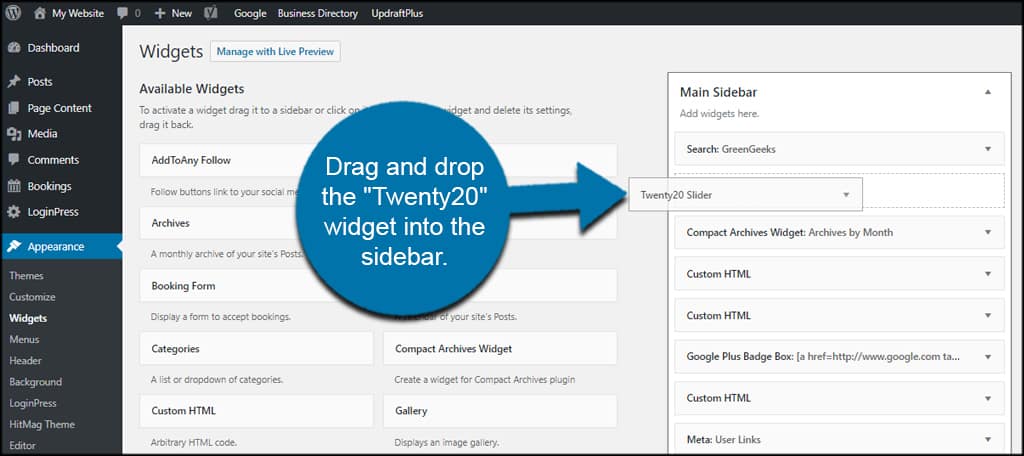
Drag and drop the “Twenty20” widget into the sidebar. You can place this anywhere you see fit in the sidebars available from your WordPress theme.
As you can see, the widget has all of the same functions as the shortcode button for posts and pages. Make your adjustments and click the “Save” button.
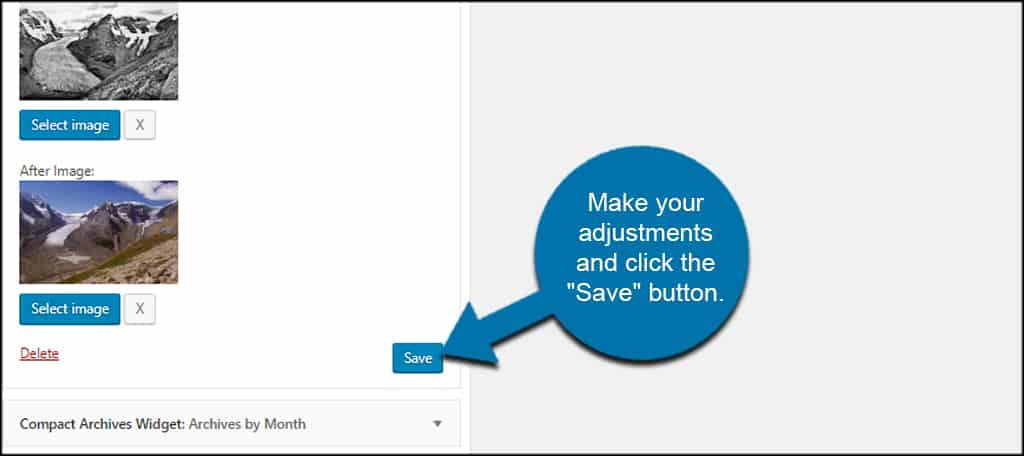
IMPORTANT NOTE: For some reason, various web browsers won’t be able to see the before and after images added to the widget until the “Save” button is clicked. So even though it doesn’t look like you added photos, Twenty20 will include the pictures.
After saving, you’ll have a before and after photo in the sidebar.

Creating a Before and After Gallery
So, what can you do to create a full WordPress before and after photo gallery with Twenty20? After all, what if you want to show a lot of comparison photos?
That’s easy. Simply create a page for your gallery and add multiple images using the Twenty20 button from the editor. You can add as many comparing images as you’d like using the shortcode generator.
Once you create the gallery, you may want to add the page to your menu items. This way, visitors have an easy way to find the gallery. It probably wouldn’t hurt to share it using social media tools as well.
Extended Support
One of the great things about Twenty20 is that it’s compatible with many page builder plugins. You don’t have to fiddle with settings are try some weird workaround code to get Twenty20 to work right.
For instance, you can easily add a before and after image slider in WP with the Elementor page builder as it adds Twenty20 as an element in the design process.
Adding Flair to WordPress
Having a WordPress before and after photo gallery is a great way to add some flair to your site. It can add engagement and interaction while giving you a chance to demonstrate comparisons.
And remember, images are one of your greatest assets when building a website.
What interactive features do you currently use on your website? Do you often make comparisons in your content?
